Piranha4D's Learning and Practice 2022

2022-07-21 Non-destructive Modeling: Dyson Fan

Chris Prenninger: https://www.youtube.com/watch?v=ivnekkGrISg tutorial in 4 parts.

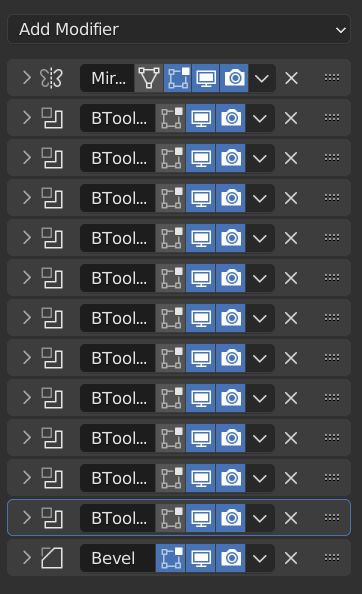
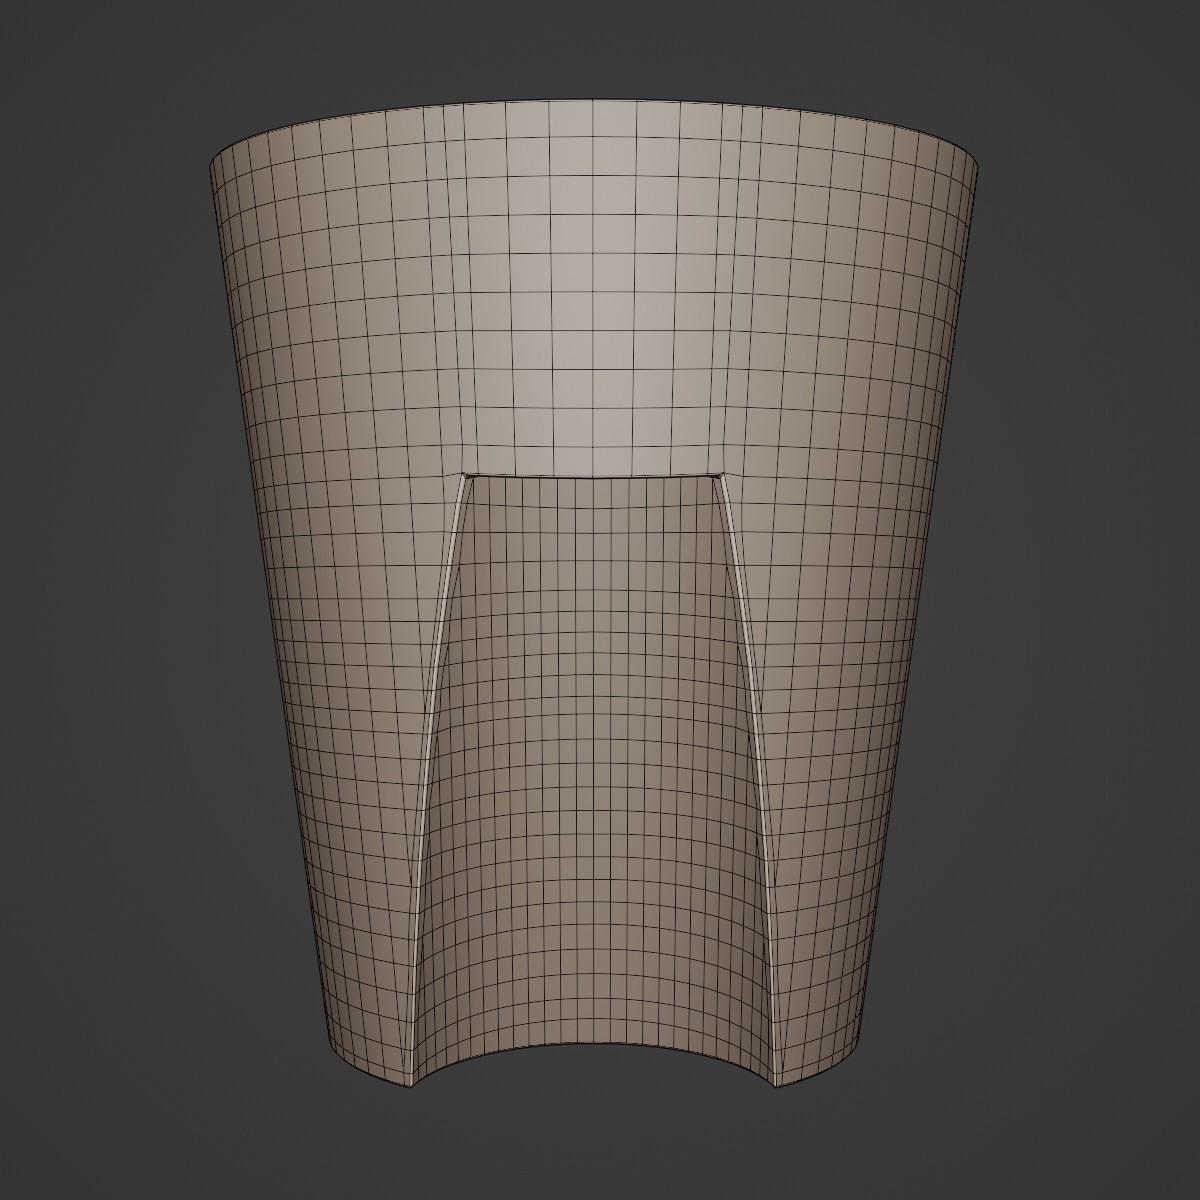
This was quite the shift from the previous tutorials; nearly everything here is done with modifiers, and they’re all kept live throughout. I had to really rethink how I did things. And while the basic process wasn’t new to me – all it takes is a few vertices and a Screw modifier – I hadn’t really put together an entire object with several pieces this way.

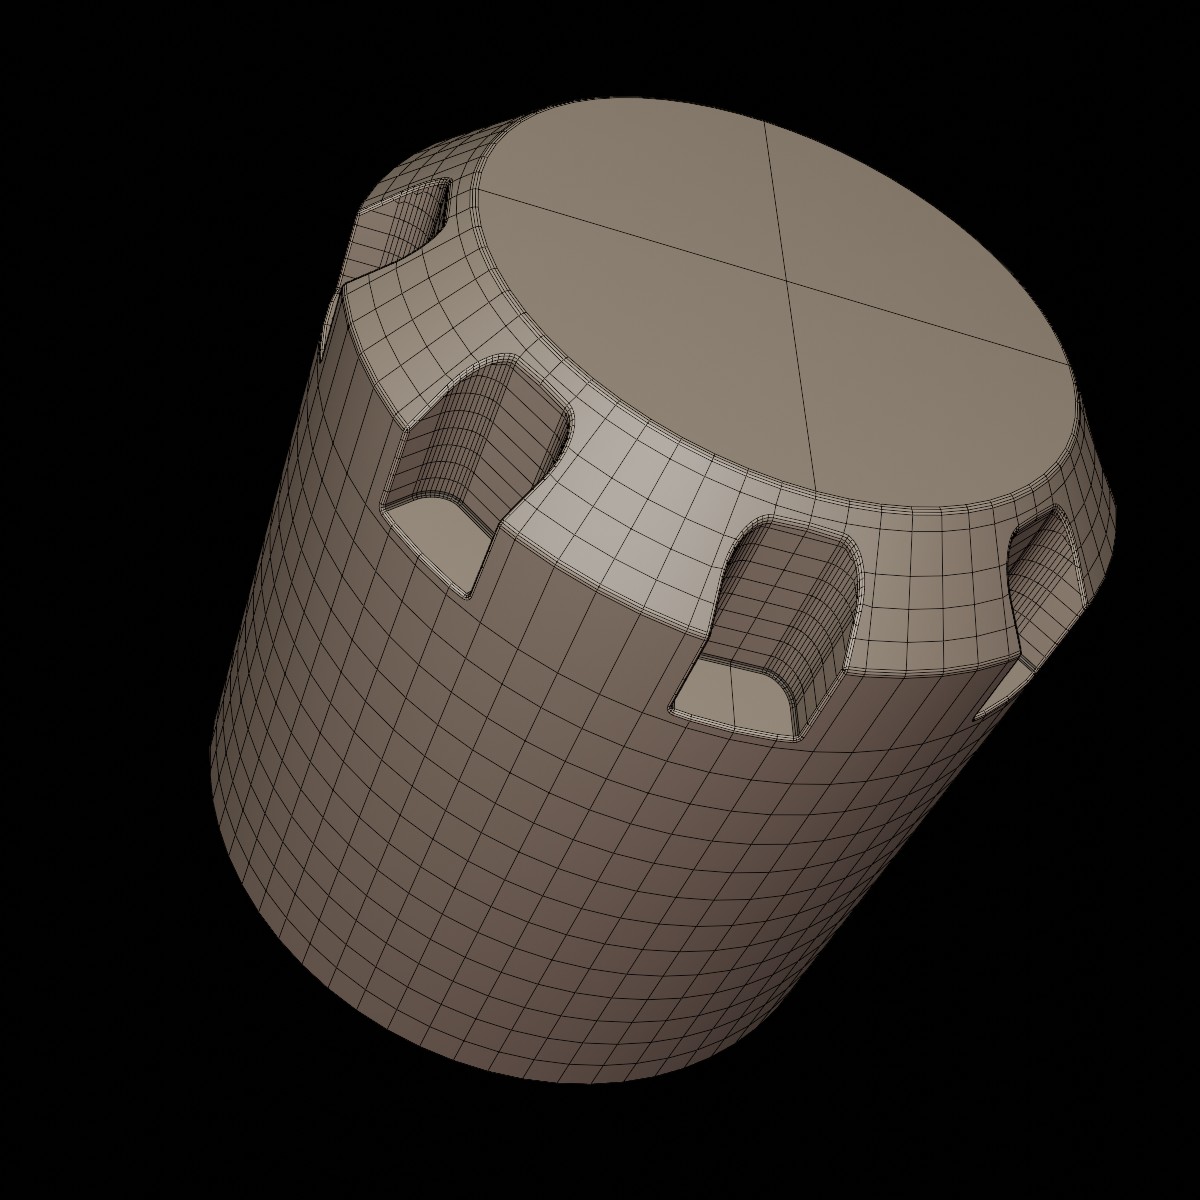
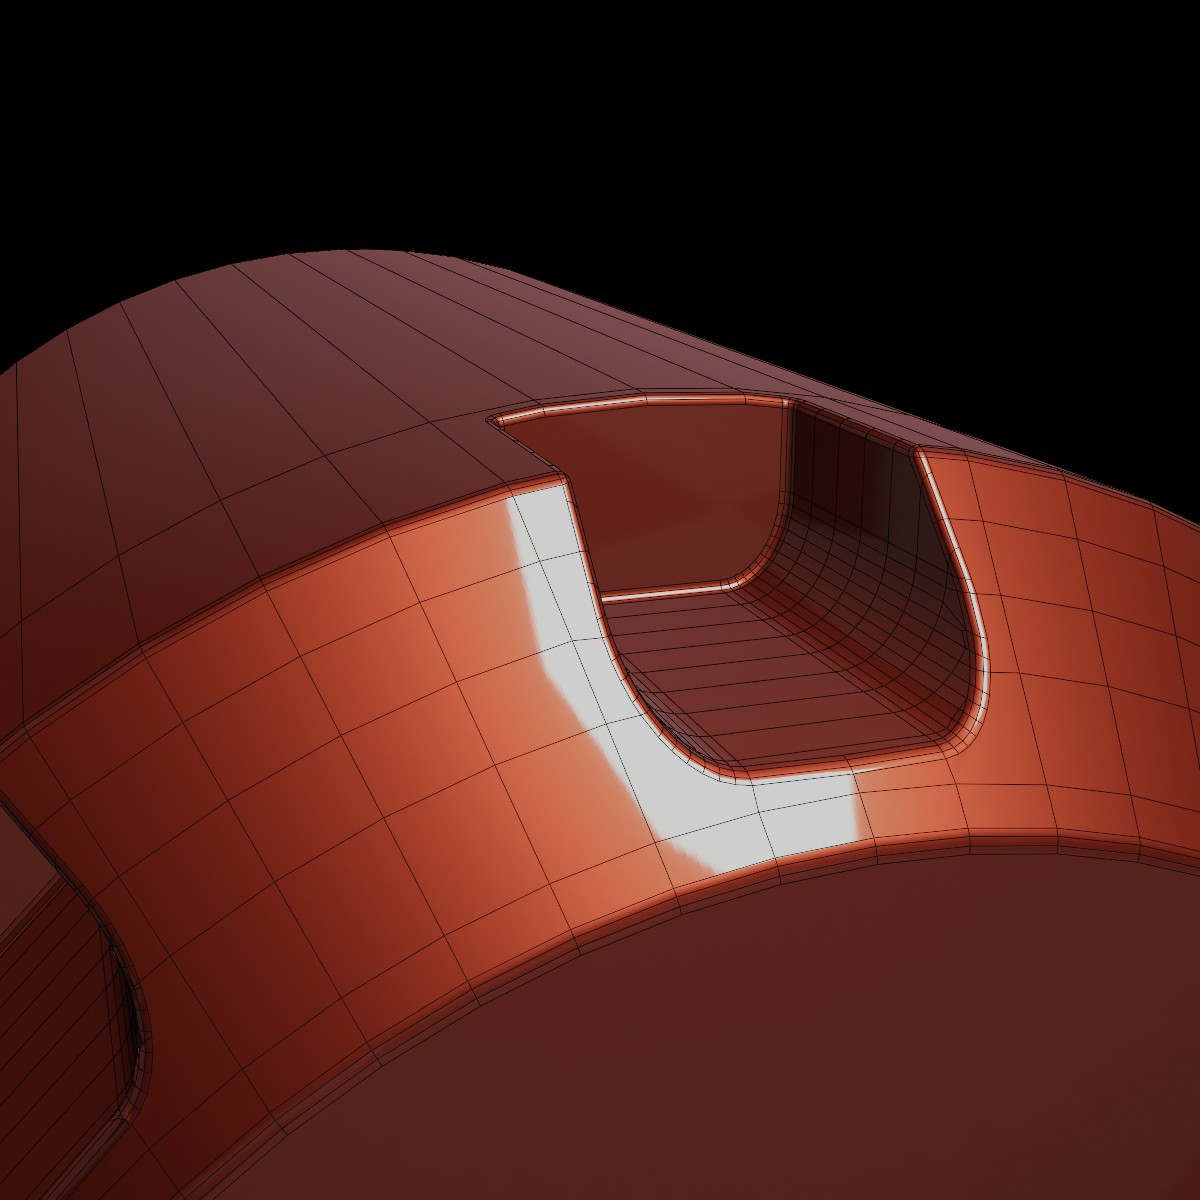
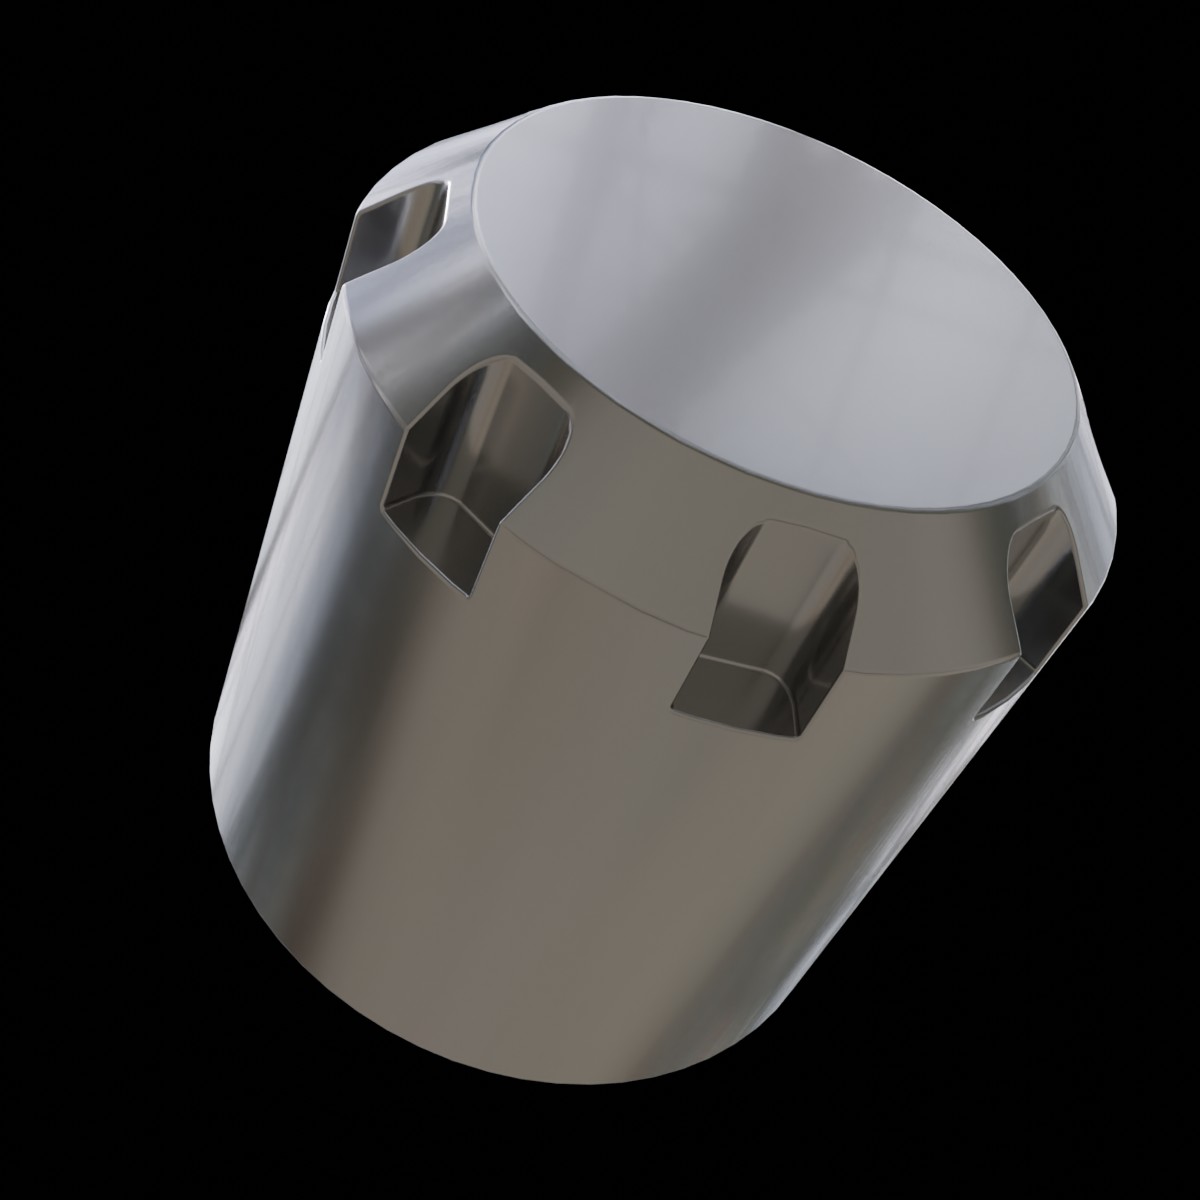
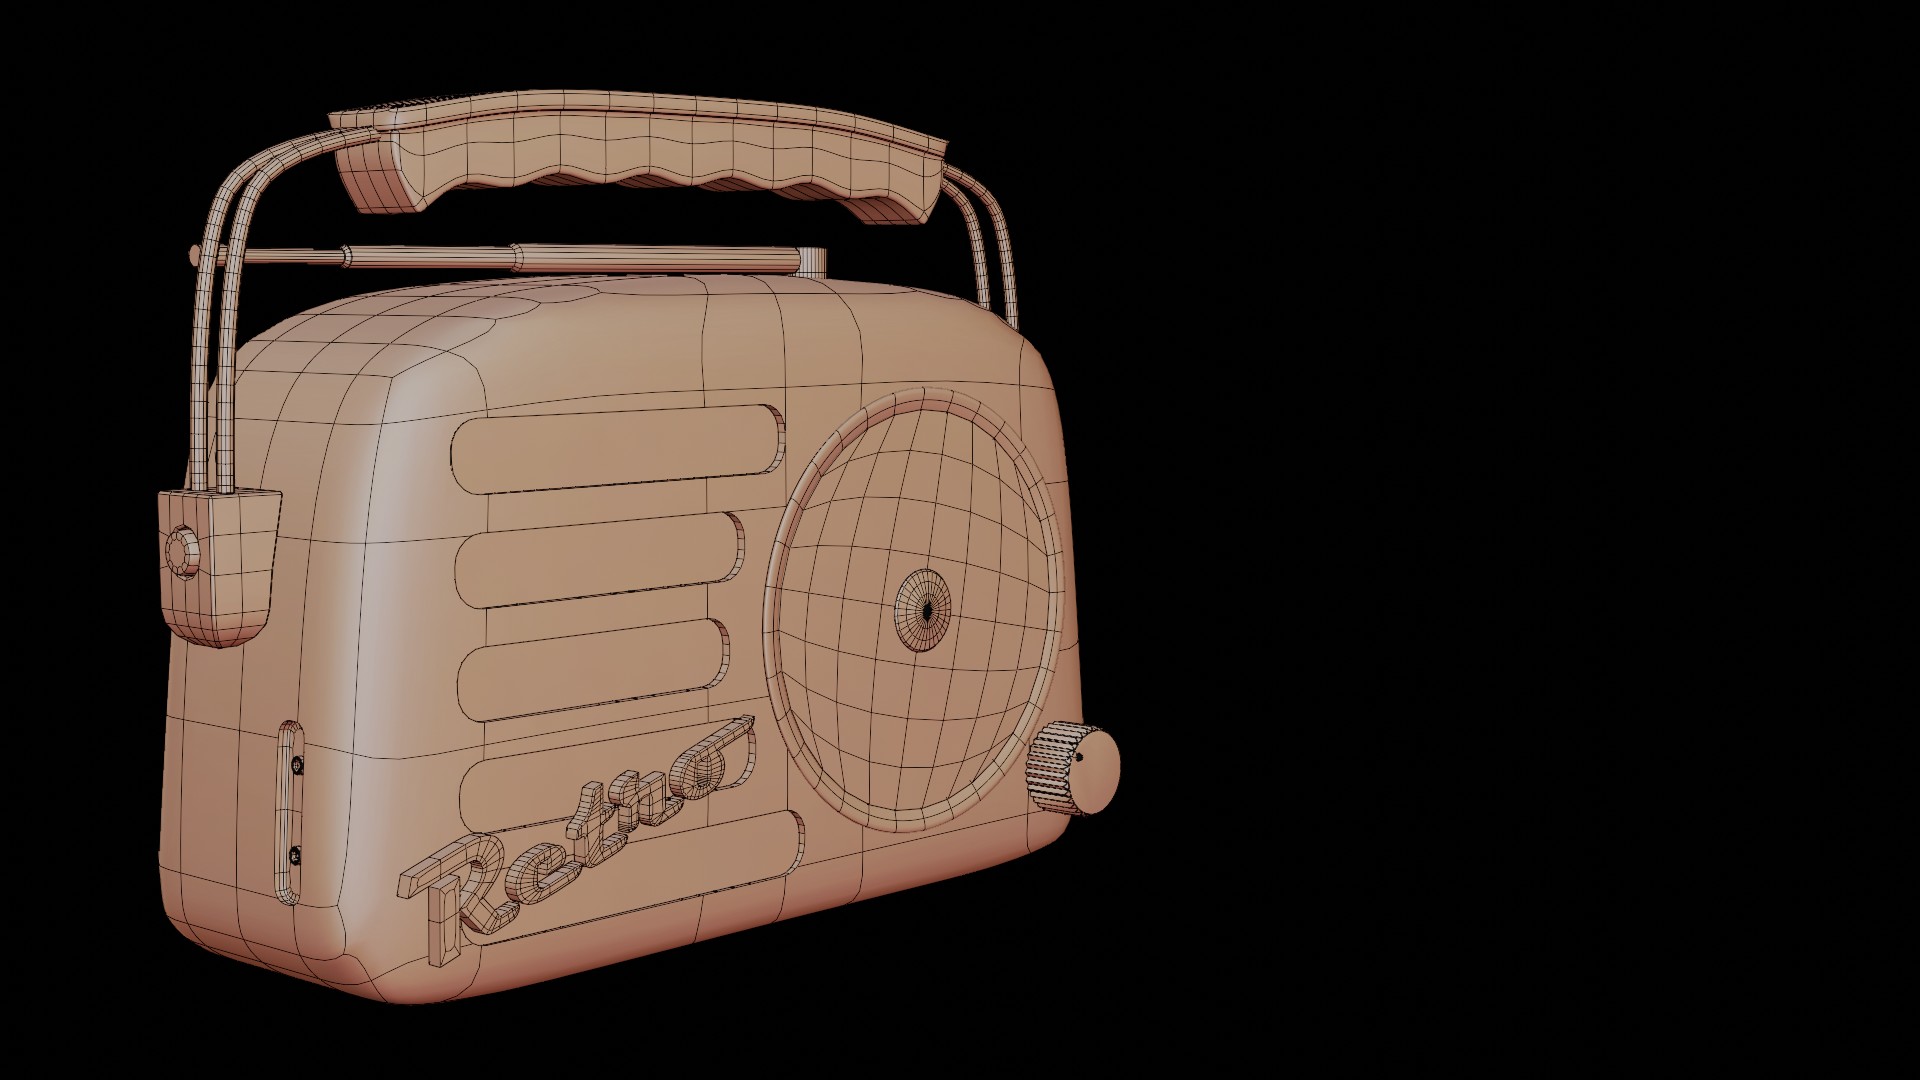
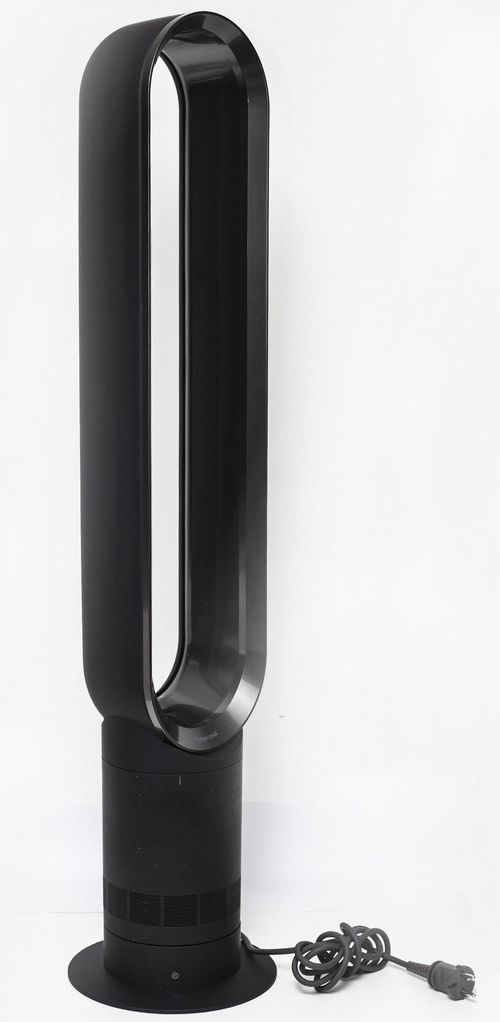
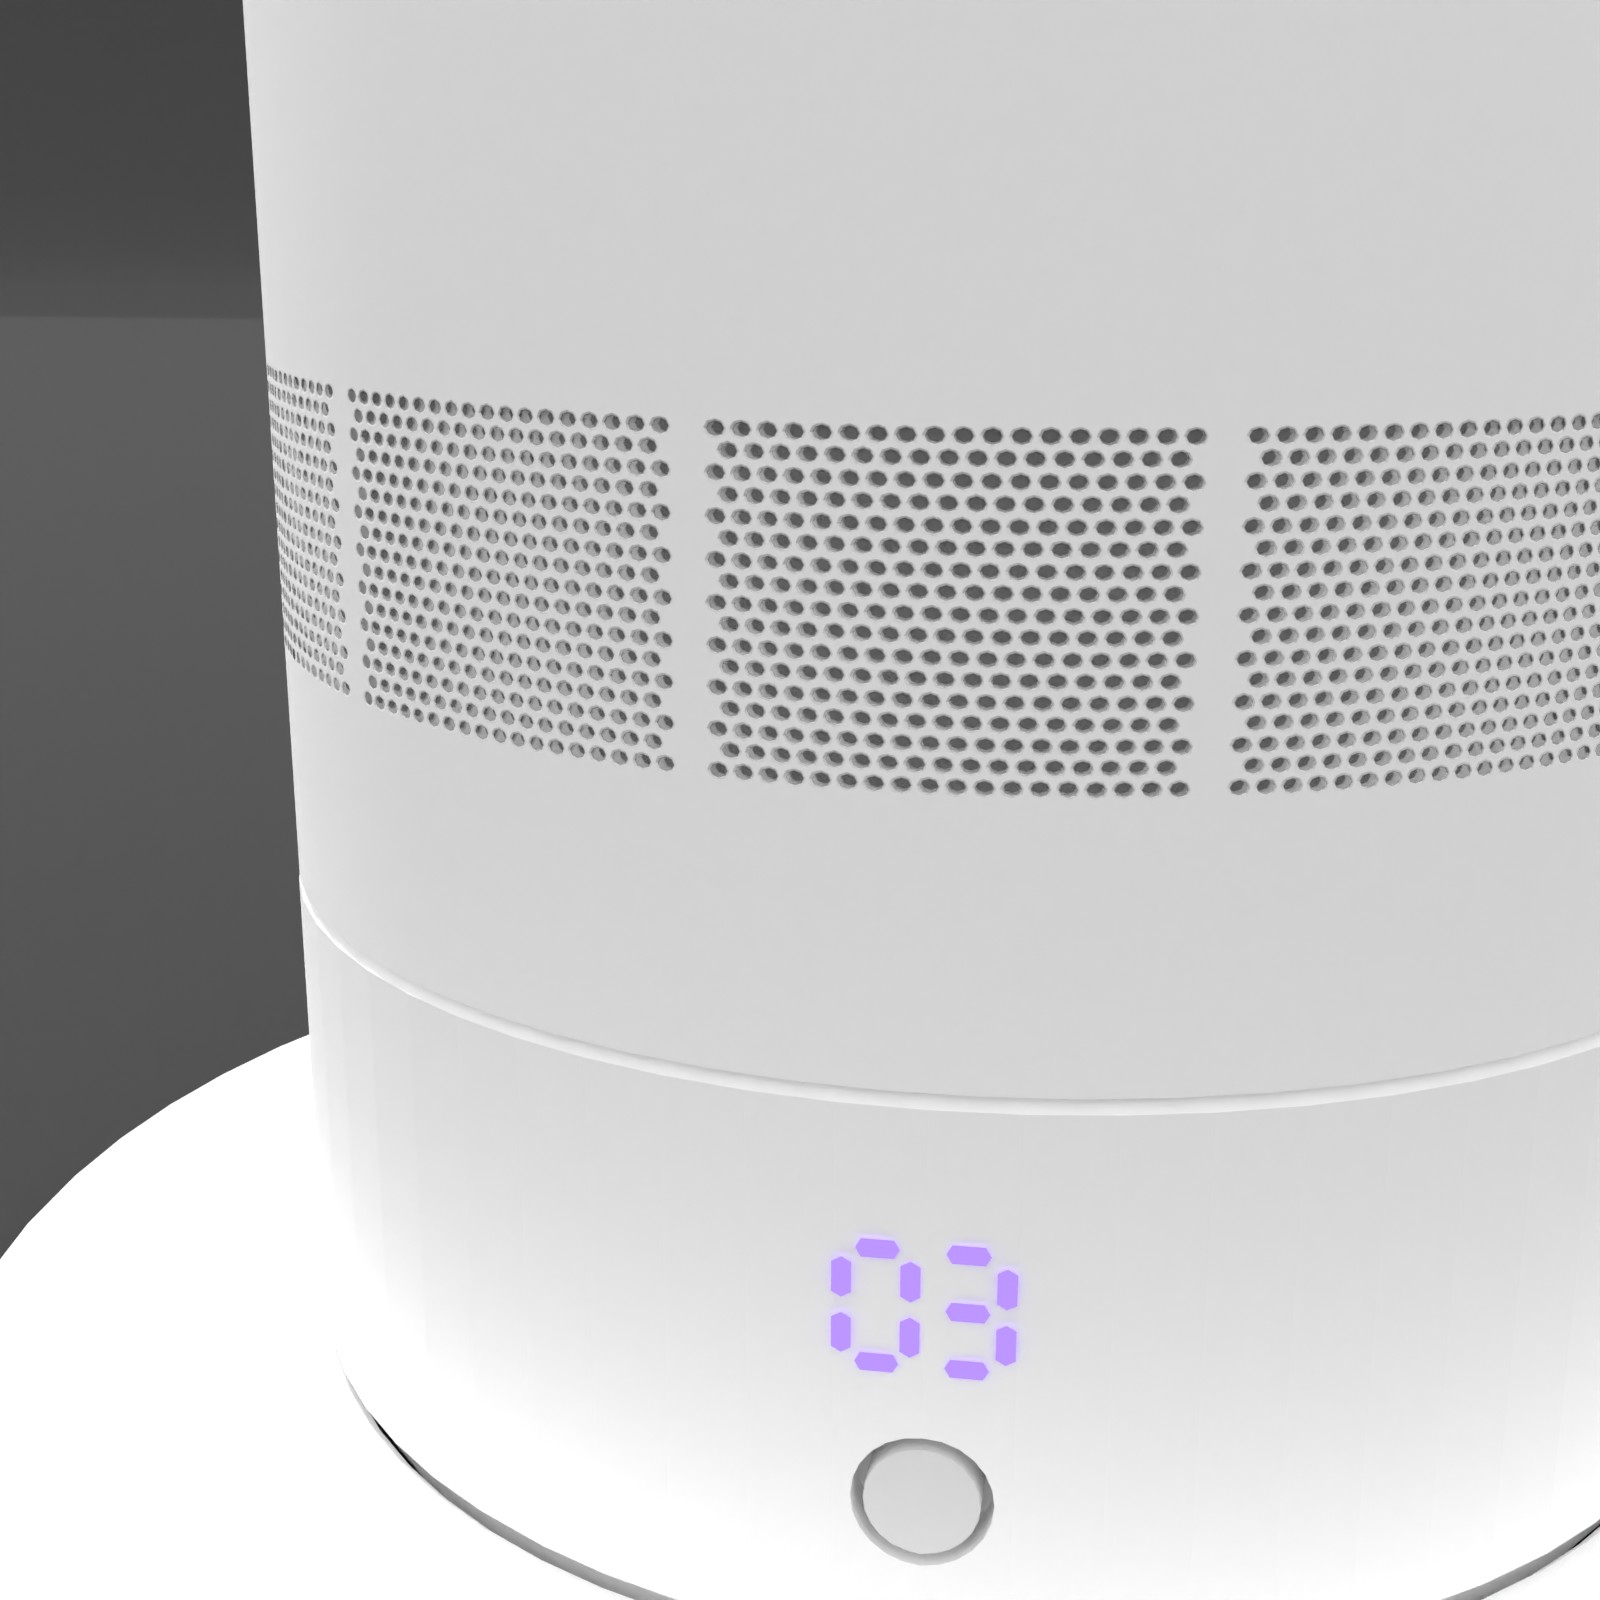
I got on well with Chris – reference images, a real object with actual measurements, meticulous attention to even small detail. This is the kind of modeling suited to product visualization because one can get extreme closeups. For an object that just sits in a corner in a bigger scene this is overkill – but if one has use for both, with the live modifiers one can quickly create a lower poly object (not that this is very high poly anyway, not quite 16k). Seriously, who models the individual LEDs instead of using a texture? We did. :wink:

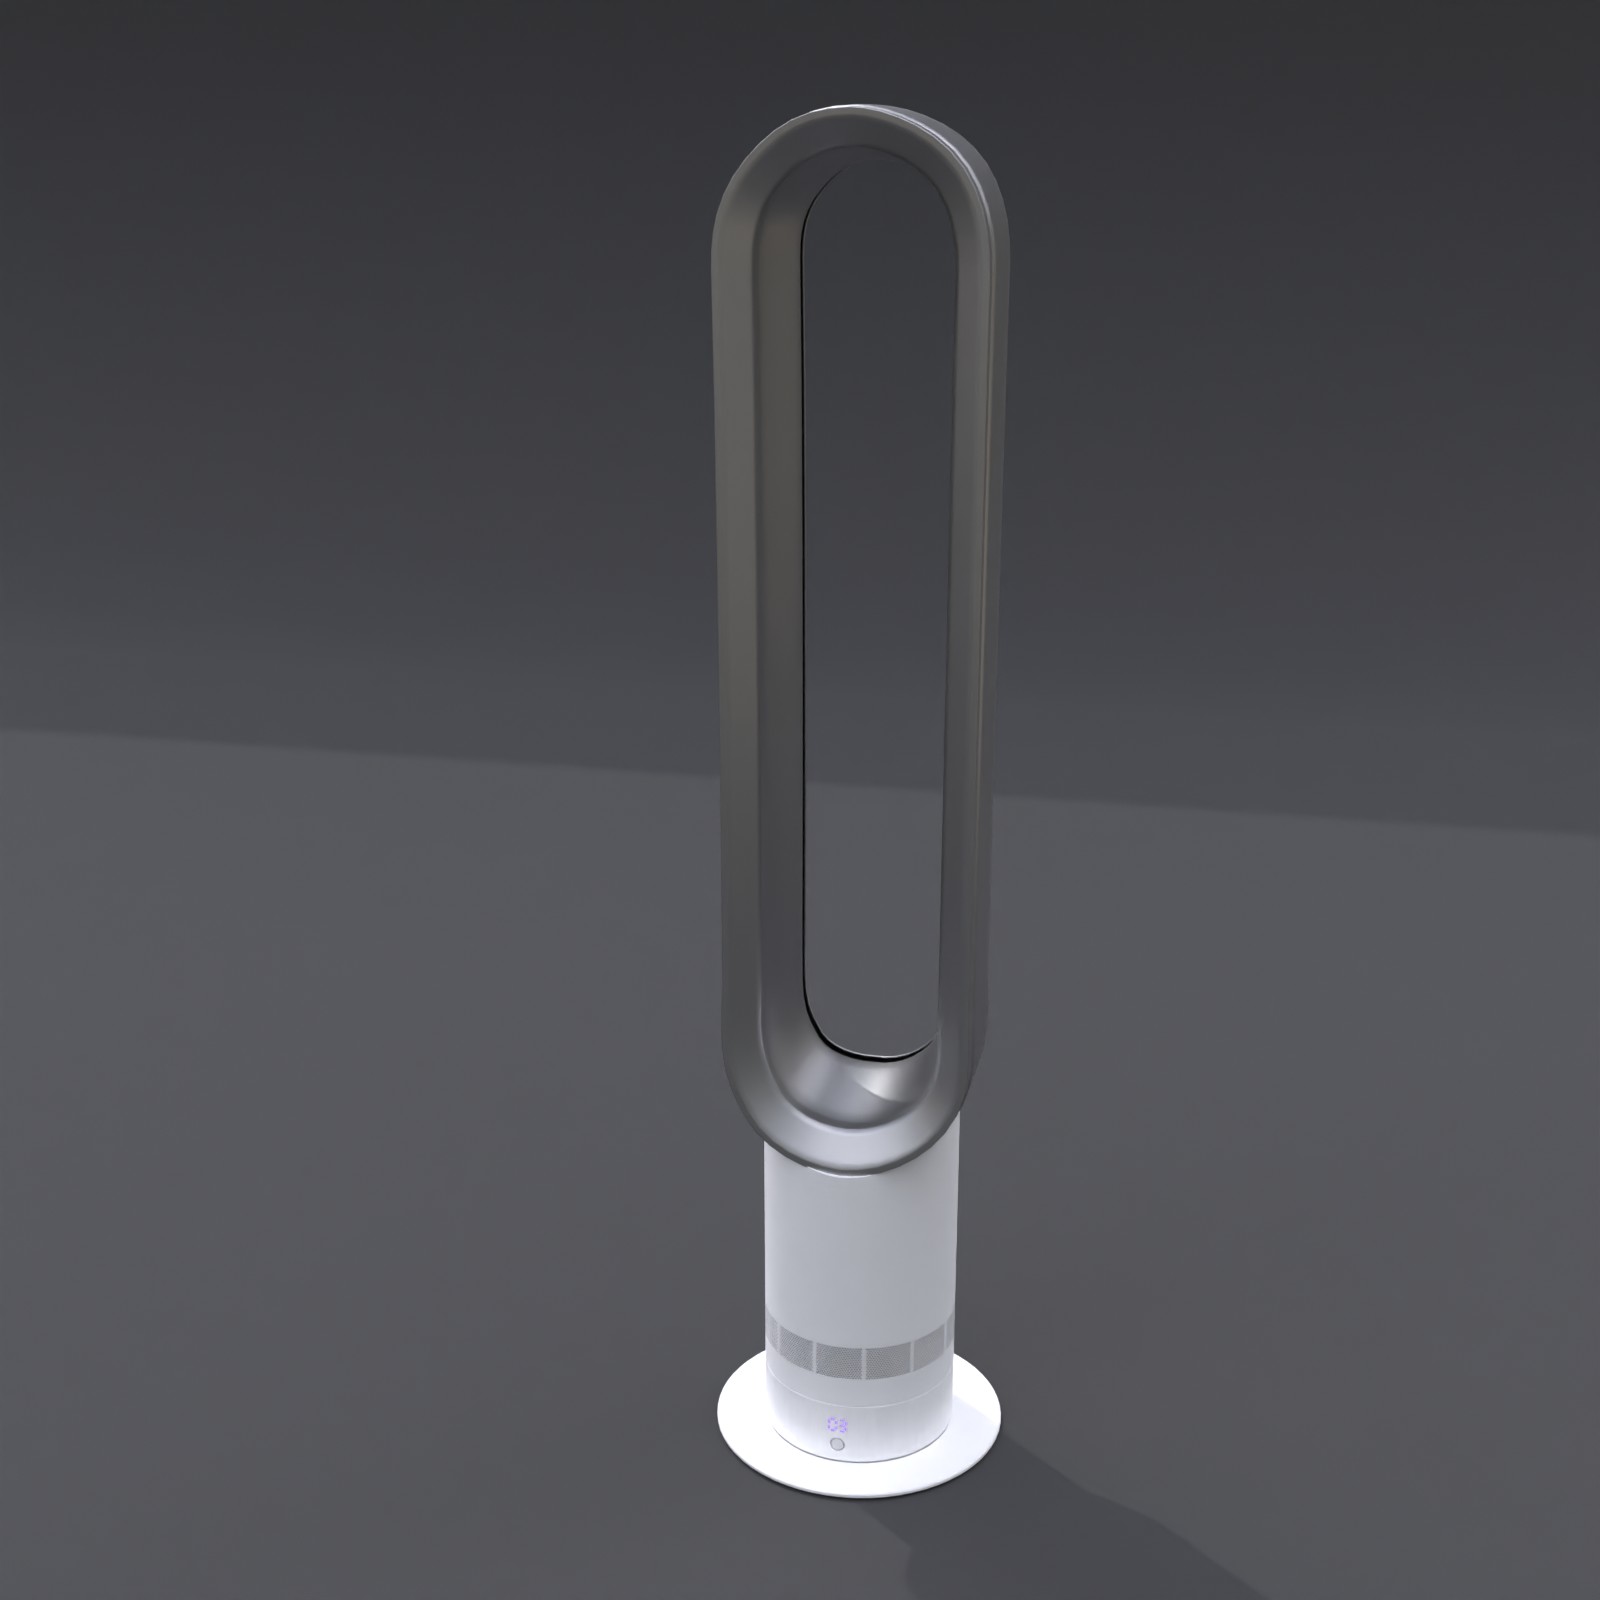
Here’s the real thing:

He made the “wing” of the fan from an extruded profile curve that he then deformed along the main curve, and while I learned something new (the Weld modifier), I made the final version the way I’ve come to like best, with a profile curve as a bevel object for the main curve. Don’t need no welding that way; it all perfectly aligns.

He only stopped at modeling the vent holes – the idea of so many tiny booleans scared him. So we did the sensible thing and used an image texture. And we made it entirely in Blender, which was cool. But unfortunately that broke the “everything can be adjusted with a live modifier” thing we had going – I made a note to look into projections, but then forgot, and today while putting this entry together I wasn’t able to concentrate very well, so this will remain a thing yet to do about this project.

Having everything using several live modifiers is great if one wants maximum changeability, but boy oh boy, was it slowing down my viewport. That’s a lot of calculations on the fly with every little move. I am not going to do this a lot with this old machine.

This project was satisfying. It needs a lot more texturing work to actually be finished, but the modeling was interesting, and I feel good about it.

9 Likes

Wow, this is an Amazon quality product render, if you ever need a side “income”, you could easily make a few dollars a day doing product renders for sellers :wink:

2 Likes

That’s nice of you to say, but you should see today’s list of improvements to be made to this model so it looks more real.

Prenninger went straight onto my subscription list though, because he has a lot of actual product renders and specializes in small, realistic models and realistic materials. I can learn a lot from him.

2 Likes

2022-07-22 Non-destructive Modeling: It Slices, It Dices

CG Juicer: https://youtu.be/S5GtAdfyiKw – not a tutorial, but a speed run. No, I am not a masochist; I did it to see if I could. :wink:

It was slow going at first because I had to stop it a lot at the start, even with slowing playback speed down to .25.

I learned about a new add-on (built-in): Copy Attributes Menu. This add-on extends the Copy Objects hotkey to include several extra copy types. For example, if you have a cube mirrored across x and y, and then a boolean cutting out a piece, you can copy only the mirror to the boolean, create an empty to use as the mirror object, and now the piece is cut out of the mirrored bits as well, without having to apply the boolean:


That is a super nifty trick.

I was surprised I could follow this at all, but doing it on the heels of 3 weeks of hard surface modeling actually paid off. 10 min in I stopped following and just did the rest by myself. What was interesting was watching him move things around by small amounts when a boolean didn’t work well. I’m also well-trained now in moving any boolean up ahead of the bevel in the stack, I don’t think I’ll ever forget that again. It is clearly much easier to do booleans when there’s basically just huge ngons everywhere, and one just puts an extra loopcut in when it’s really needed for support, so the approach I took when the Scifi Wheel was a mess was a good thing to do. This also keeps the poly count down quite a bit. I expect if I wanted to export this to a game engine that I’d better triangulate or remesh it myself first, because who knows how another engine tackles ngons.

I’ve never had more modifiers in a stack:


And they remained all live. Wasn’t as big a problem in the viewport as the Dyson Fan, maybe booleans are less of a load than Screw modifiers.

I do want to learn to do better booleans when the geometry is more difficult.

Music: Bear McCreary, The Serpent Queen. Another new TV series I might find interesting, about Catherine de Medici, the 16th century Queen of France. But whom am I kidding, I have no time to watch TV. McCreary is getting a lot of work; good.

9 Likes

2022-07-23 Hard Surface Modeling: Cleaning After Booleans

As I said, I wanted to learn to do better booleans when the geometry is more difficult.

Josh Gambrell has 4 episodes which he calls “topology studies”, but that might be a bit high-faluting term – it’s about cleaning up after booleans, and it’s generally more about good shading than good topology. Unfortunately this doesn’t work with non-destructive workflows because one doesn’t have access to most of the geometry that’s screwed up unless one applies the modifiers first. And then you’re stuck doing it manually – or buy an add-on like MESHMachine (that one might go on my list to buy if I end up specializing in hard surface modeling).

Topology Study 1
:ack: He uses add-ons. https://youtu.be/-CmqP1KPuns
Without add-ons this is super-duper tedious. I started on it, but the Dice operation from HOPS is just too annoying to replicate in vanilla. I tried to do it differently on my own, and had a decent first version, but then screwed it up. Needs more thinking, more experimenting, and it appears I didn’t have enough functional brain cells online. Some days I feel I go 1 step forward and 3 back.

Topology Study 2
Josh totally nerded out over the bevel on the inset here, and I got a kick out of that. https://youtu.be/QcM8WbxWipM

It’s a pistol grip that he threw together without much care, and I don’t like realistic guns so I’ve decided whenever I find a good tutorial that features a gun I’ll just replace it. In this case with the grip for the nozzle of my water hose. :wink:

This one worked pretty well (for one, he decided to do it in vanilla), but I can still see ways to improve it, like running proximity loops all around the beveled areas to constrain the shading rather than moving so many individual vertices around by hand. MESHmachine apparently has an offset, which might be just what’s needed. Remeshing might also help, but I am absolutely pants with the Remesh modifier. I need to check into that. But this is mostly about getting a feel for when it’s “right” and for that nothing else is as good as doing it a lot.

The shading overall looks good even though the topology around the inset isn’t pretty. Except that pole up there is exactly in the place I wanted it to be in after putting in a constraining edge around the bevel (but the pole at the bottom isn’t). Josh thinks it matters more that the shading is good, and I am inclined to agree, since these models don’t ever get deformed. But I still don’t like ugly topo, and I know I can do better. I run out of steam too fast and then get sloppy.


This matcap strikes fear into my heart. :wink: It shows every little deviation.


Nothing of that mediocre topo shows here at all, everything is shaded just fine. So maybe just 2 steps back. :wink:

My partner left for a 2-week trip to see family today, and I’m planning to do a lot of noisy chores in and around the house. Boat needs winterizing too, so will have less time for happy fun stuff like reading BA.

Music: Mike Oldfield, Tubular Bells, 50th anniversary edition, Royal Philharmonic Orchestra

7 Likes

2022-07-24 Hard Surface Modeling: More Cleaning After Booleans

Continuing with Josh Gambrell’s “Topology Studies”.

Topology Study #3

https://youtu.be/UcY1mkdEaHs He used add-ons again, but in this case I didn’t care because I could basically do everything in vanilla Blender without a problem.

I’m starting to get the feel for this, but I am still too focused on individual vertices, which means the topology overall isn’t particularly even.

Towards the end he pointed at the inside of the upper part and lamented how ugly the shading was there, because the polygons were so stretched. I had noticed that right away but didn’t do what I wanted to do – give the cutter a bunch of horizontal loop cuts before applying the boolean. Should have done that. :wink: Mine was already applied. So I just used the knife to do some cutting.

But none of that topology shows in the render (things could be a little smoother in spots, but that’s not due to me mucking around with the knife):


Overall this isn’t a speedy workflow, even if I do think ahead. The value of those add-ons is pretty obvious to me.

Revisiting Topology Study #1 with which I had issues yesterday. Today this worked, even though it was still tedious. But it came out looking nice – not only the shading, but also the topology. And I was getting into a sense of zen while doing it because everything was pretty regular.


I should have tried out the trick I learned from Jan van den Hemel about overlaying a leaf with a gridded plane to artificially subdivide it; that might provide pretty fast dicing. Oh, instead of a grid, just have loopcuts orthogonal to the cylinder. Yeah, that should work.

The end result is beautifully smooth.

Music: Antonín Dvořák, Symphonies and Dances, Royal Scottish National Orchestra under Neeme Järvi

10 Likes

2022-07-25 Hard Surface Modeling: And Yet More Cleaning after Booleans.

Josh Gambrell: https://youtu.be/6hZxr7UDucs

Topology Study #4

In this one he tried to please everyone so half the people wouldn’t moan that he was using add-ons and the other half wouldn’t moan that they wanted to know how to do it with add-ons. Win.

I did this entirely on my own, and I planned ahead where I’d place the cuts, and where I’d need support.

It worked out swimmingly, very little cleanup was needed (and symmetrizing helped cut that down to 1/4 as well).


Look how clean this is!


This was considerably easier than the previous one. I am really happy with both the workflow and the result.

Music: Franz Liszt, Hungarian Rhapsodies, played by Roberto Szidon.

9 Likes

It always pleases me to see perfect shading on complex geometry. More than it should really. It’s clean, it’s clean! :grin:

4 Likes

2022-07-26 Hard Surface Modeling Non-destructively: V-block

This is a real thing – v-blocks are used in metal working for support and measuring of cylindrical stock.

Josh Gambrell has a tutorial on this one, but he got his inspiration from Frank Oczus Jr on ArtStation: https://www.artstation.com/blogs/frankpolygon/M7w7/sub-d-hard-surface-modeling-v-block-exercise-amp-tutorial

So I went straight there and modeled from the construction drawing, trying to work out on my own how to make it non-destructive. Frank had 3 solutions to this as a subdivision modeling exercise, one an all-quads approach, one a hybrid topo approach, and one a boolean & modifiers approach. I wanted to do all 3, and decided to start with the last one, because that seemed easiest to me. I didn’t look in detail at his mini-tutorials before doing the exercise.


It came out very well, but it was not easy to get this clean. I had learned a lot from the previous exercises in how to move support loops to even out the shading.

In retrospect I could have done a couple more things as modifiers to make the model even more flexible: I could have started with a plane and solidified it. But that’s not that much of a gain – since the front quarter is mirrored across the Y axis as well, I could just move it in the Y to get greater depth.

I could have used a vertex group to do the big bevel in the centre, and that would be much better because then I could adjust the bevel as well. As it is, the bevel is “hardcoded”. But I didn’t know about using vertex groups at the time.

You’ll notice there is no subdivision on this. I decided that wasn’t the point of my exercise; this looked perfect without it.


I made a rudimentary cast iron shader for the inside of the pocket.

And while preparing this entry, I realized that this Frank Oczus Jr is the same person as FrankPolygon @sacboi recommended to me. I hadn’t made the connection before. Cool. This guy is good.

Music: Traditional Celtic Folk (mostly Irish) – Dubliners, De Danann, The Wolfe Tones, Planxty, Lúnasa, Altan, The Chieftains, Solas, The Pogues… As far as I know I have not a smidgen of Celtic ancestry, but the music is in my “blood” anyway (I know genetics has actually nothing to do with this, just riffing off a conversation about ancestry elsewhere).

9 Likes

2022-07-28 Hard Surface Modeling: 123 Block

Also a real thing – 123 blocks are used for inspection and measuring in machining.

Again from Frank Oczus Jr: https://www.artstation.com/blogs/frankpolygon/oebM/boolean-sub-d-hard-surface-modeling-123-blocks-exercise-tutorial

This was the goal:

  • A subdivision cage mesh generated almost exclusively by boolean operations and modifiers.
  • A reasonable attempt at maintaining dimensional accuracy.
  • A cage mesh that subdivides cleanly at 1-2 subdivision levels.

I started with the construction drawing, without looking at the tutorial:

This was much, much harder that it looks. It required a lot of experimentation to come up with a good setup, and then more of the same to get the booleans to work well. Booleans do some awful things to topology if left free rein; I can see why people don’t like them. But they can be corralled very effectively if one can figure out how to do it.

I ended up with this “coral” before starting on the final version of the booleans, which gave me precise snapping points for centering, and forced my specific topology on the cuts:

The boolean cutters, unioned:

Cut and beveled (you can see how precisely the boolean used the “coral”):

Subdivided:

Render:

I am not 100% happy with this; it lacks sharpness, especially for the chamfer of the holes. But I did the exercise without help, and figured out how to prepare the mesh for the subdivision with mostly just booleans and modifiers, with very little manual cleanup. If I did it again – I definitely should revisit this but I have no time right now – I’d probably try some of the things Frank writes about, preparing the booleans more.

Music: Cat Stevens / Yusuf Islam, old and new. I didn’t even know he had returned to western music; that’s how much my finger is on the popular pulse. I like the old stuff better, but maybe that’s just because it’s music of my youth and I have emotional attachments to it and the times it reminds me of. But occasionally I recognize something in the new I especially liked in the old.

7 Likes

Managing to model with cylinders with dimensional accuracy, this. Well taking measurements on any model takes like 4x the time anyways, it’s a long process. Looking good :ok_hand:

3 Likes

I actually like modeling with precision. I was initially quite frustrated that Blender (and most tutorials for Blender) simply didn’t care. It’s sort of weird, I wing most things in my life, but when building things IRL or modeling I get obsessive about precision.

I’ve since gotten more used to improvising (if one likes Grant Abbitt one simply has to let go; he never measures anything), but I am still dragging my feet at times. Even most of the hard surface guys are making things up as they go. I will often model to real life measurements even if the tutorial doesn’t. And anything I model by myself has references and dimensions. ; ) My growing asset library will thank me one day.

So finding Frank Oczus was a nice surprise because he is super-precise about everything, sort of the polar opposite to Grant. I felt really calm about those two exercises where I had construction drawings

5 Likes

Haha, yes. Even more so ever since Blender began to work with metrics, I really can’t do anything else. Yes tutors, how can you do such thing? Since Blender is good at depicting realistic atmosphere and lighting at the right scale, why can’t they have a precision based transform of everything?
Here are tools I use:
PDT
MeasureIt
Although I haven’t used PDT, I hear about it so I keep :100::relieved:
Though when you deal with mm, it seems Blender lacks the numeric accuracy when certain actions are taken (ex: set origin, moving vertices, etc) and you can’t type in numbers to fix it. Albeit minimal, like 0.00026mm, it pisses me off :triumph:

1 Like

2022-07-30 Hard Surface Modeling: Retro Radio

This was meant to be my last day of hard surface modeling for that cycle (I intend to return to each major subject after some time to refresh my memory and learn some new things).

I made a small Fifties style radio. Bunch of relatively random references; I didn’t do any research on this:

I tried to throw everything into it that I had learned – subdivision, booleans, bevels, lattice deformation, a little curve just because, an image texture for the pretense of holes, and some text, all cleaned up.

It was fun.

And that was it for hard surface modeling for the time being. I didn’t do the dial because texturing in general was yet to come.

I’m happy with it.

13 Likes

2022-07-31 Hard Surface Modeling: Søborg Chair revisited

(Delay in posting due to long power outages, we’ve got stormy weather.)

And I thought I was done with hard surface modeling. But then I remembered I had given up on Blender Guru’s chair by means of simply poly modeling it instead of using subdivisions. Now that I had learned a lot more about subdivision, I figured I could probably tackle it that way too.

And I could. Only better. I first followed him exactly anyway, just to see whether I was missing some magic, but I wasn’t – I repeated the seat “my way” and I can make that seat in a fraction of the time now by planning ahead a little. I mean, Andrew is of course much faster than I am by means of overall experience, but I am efficient now.

What was good: He dedicated the entire episode 5 to focusing on mistakes people might have made and how to fix them (he gave the back rest as “homework”). I didn’t make those mistakes thanks to my prior training, but it was still quite useful to see him address such issues, and see how he solved them.

Mine is 27k tris, which is considerably lower than the 350k+ tris for the many chairs people felt moved to upload to various model sites after following this tutorial. My poly version had just under 7k. This version is also slightly more exact; he didn’t care, but I did, of course. Now that I am rendering it I see of course bits and pieces that could use improvements, :wry grin:.

I didn’t unwrap and properly texture it. Later days.

So the way for me to tackle Andrew’s tutorials is pretty clear now: watch it, get frustrated, learn how to do it elsewhere, return to beat it triumphantly into submission just because I can, :snicker:.

Music: Deus Ex: Human Revolution OST, composed by Michael McCann.

9 Likes

Now that I’m done with the morning BA clean-up I can actually respond to this :grin: anytime someone does what Andrew price does, but better, I count that as a net win in the world. Nice job! :trophy: (it’s probably a good thing he doesn’t use BA anymore, I wouldn’t mind sharing my thoughts about his NFTs and rambling with him directly at all, but at the same time, I don’t particularly enjoy hurting people’s feelings when I can avoid it.)

I haven’t heard Deus Ex, but I love all video game OSTs, so I’ll be sure to check it out :smiley:

3 Likes

That soundtrack is great!

and lol, I didn’t know that this can happen:

2 Likes

Yeah, that is one excellent soundtrack. I haven’t even played any of the games other than the original, but this is my favourite soundtrack of the lot. I can feel the atmosphere.

Oh man, Discourse’s earnest but patronizing messages are a hoot! I get this one all the time in Sketchbooks. Whenever I see yet another discussion about AI in art I want to whine about what I want instead: better AI in forum software rather than this poor rules-based facsimile! I want AI that can recognize that yes, I got it, I don’t need these dumb reminders.

My least favourite is the “minimum 10-words” one. I clearly don’t suffer from terseness in general, but sometimes a single word has precisely the punch one needs, and Discourse stomps all over that like I said “first!” for the twentieth time.

5 Likes

If you get a chance I recommend trying it. I even completed Human Revolution (which is very rare for me). Though Mankind Divided didn’t grab my attention as much…

Lol, that will be probably one of the last AIs that we will get :sweat_smile:

Exactly!

2 Likes

2022-08-01 Phone Home

After doing hard surface modeling every day for a month I felt like chucking discipline aside, and took a few days off. Didn’t want to stop doing Blender altogether, but decided just to do random things that appeared in my recommendations on YT. I was lazy and didn’t take many notes either, so the next few entries will be short and sweet and not very interesting or educational, just for the record.

This is older though, something like 5 months ago – I forgot about it because I stored it in the wrong place, but found it when I was cleaning during the break. And then lost it again. What a difference a single letter can make…

It is from a tutorial by Polygon Runway: https://youtu.be/Ezfi9fur1nQ – it has an animation follow-up which I didn’t do, but which is quite cool. The tutorial is fast. I had no major issues, I don’t think. Or did I? The single note says “so fast. is this really the best way to do radial arrays?”

Subdivision, booleans, bevels – pre-practicing hard surface modeling, so thematically it fits here.

I worked a bit more on the lighting than usual, to get it to highlight the edges of the phone.

Music: I started listening to the God of War soundtrack, but that fit with this like a large, gnarly fist fits a teletubby face, so it was ABBA to the rescue. Thank You for the Music!

9 Likes