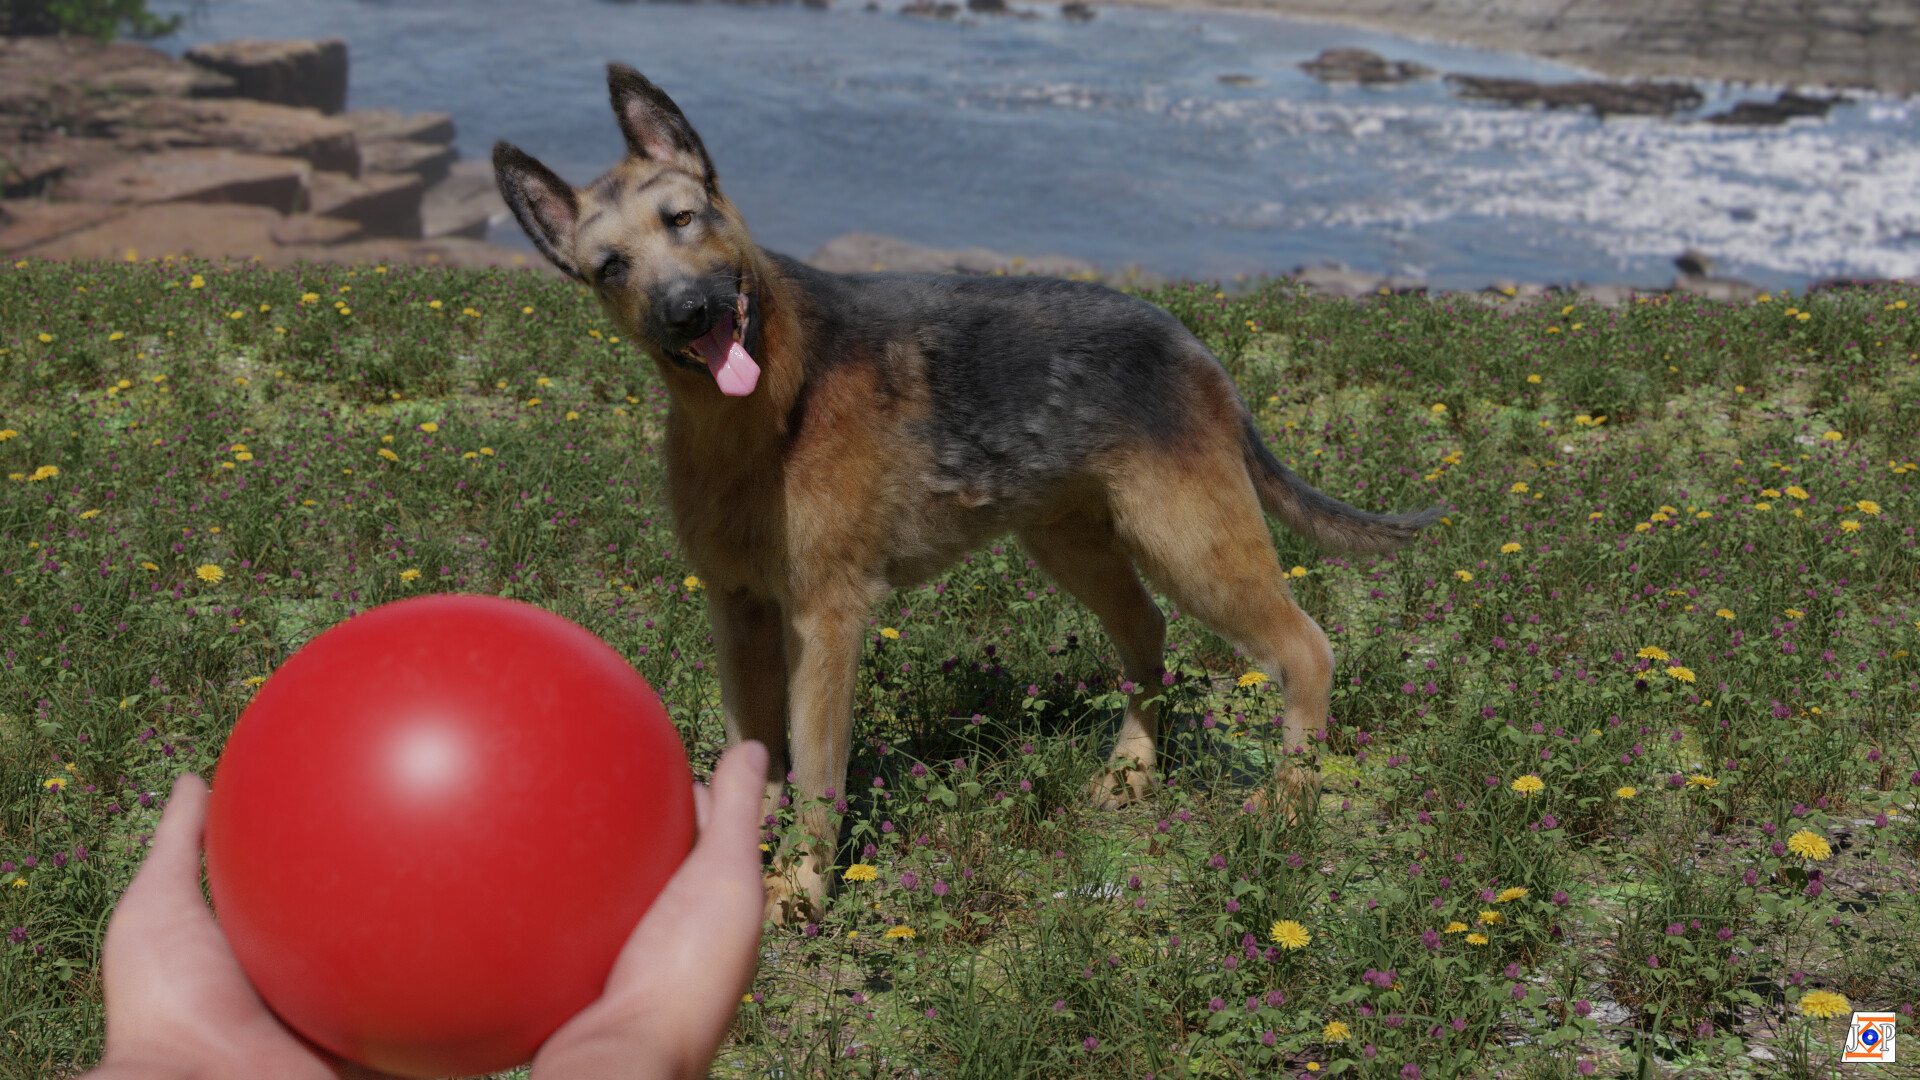
Hi to the community, here is my latest work in Blender.

14 Likes
Is this CGI? If it is that’s really cool! Do you have a wireframe shot?
It’s a render, though it’s a very realistically lit render so at first glance you wouldn’t likely notice. However, there are a few issues I noticed:
Most notably there is no depth of field. The dogs eyes should be the focus spot while the ball and hand are out of focus. The HDRI background (stones & water) is not the right size so it is blurry compared to the foreground render, this would be mostly solved with adding a DOF to the render.
Another issue is that even though te dog looks excellent, I feel like some of the proportions are wrong. The two things that stand out to me are the bottom corners of the ears where they meet the face (they seem to extend out a bit too far) and the bottom section of the hind legs (they look too short in comparison). The fur is very good, but it’s a bit too perfect, the flow is a bit unnatural specifically around the body.
And finally, I’ll say, the ground is not dirty enough, the plants and grass are great, but the ground plane itself is rather flat and not realistic. The dogs feet should have some rough scattered dirt debris around them and the ground where the feed meet should have a tiny bit of displacement. The ground should also have random displacement throughout.
Anyways, I’m not trying to be overly critical here, it’s really well done. I’m just noting a few things to help improve the realism.
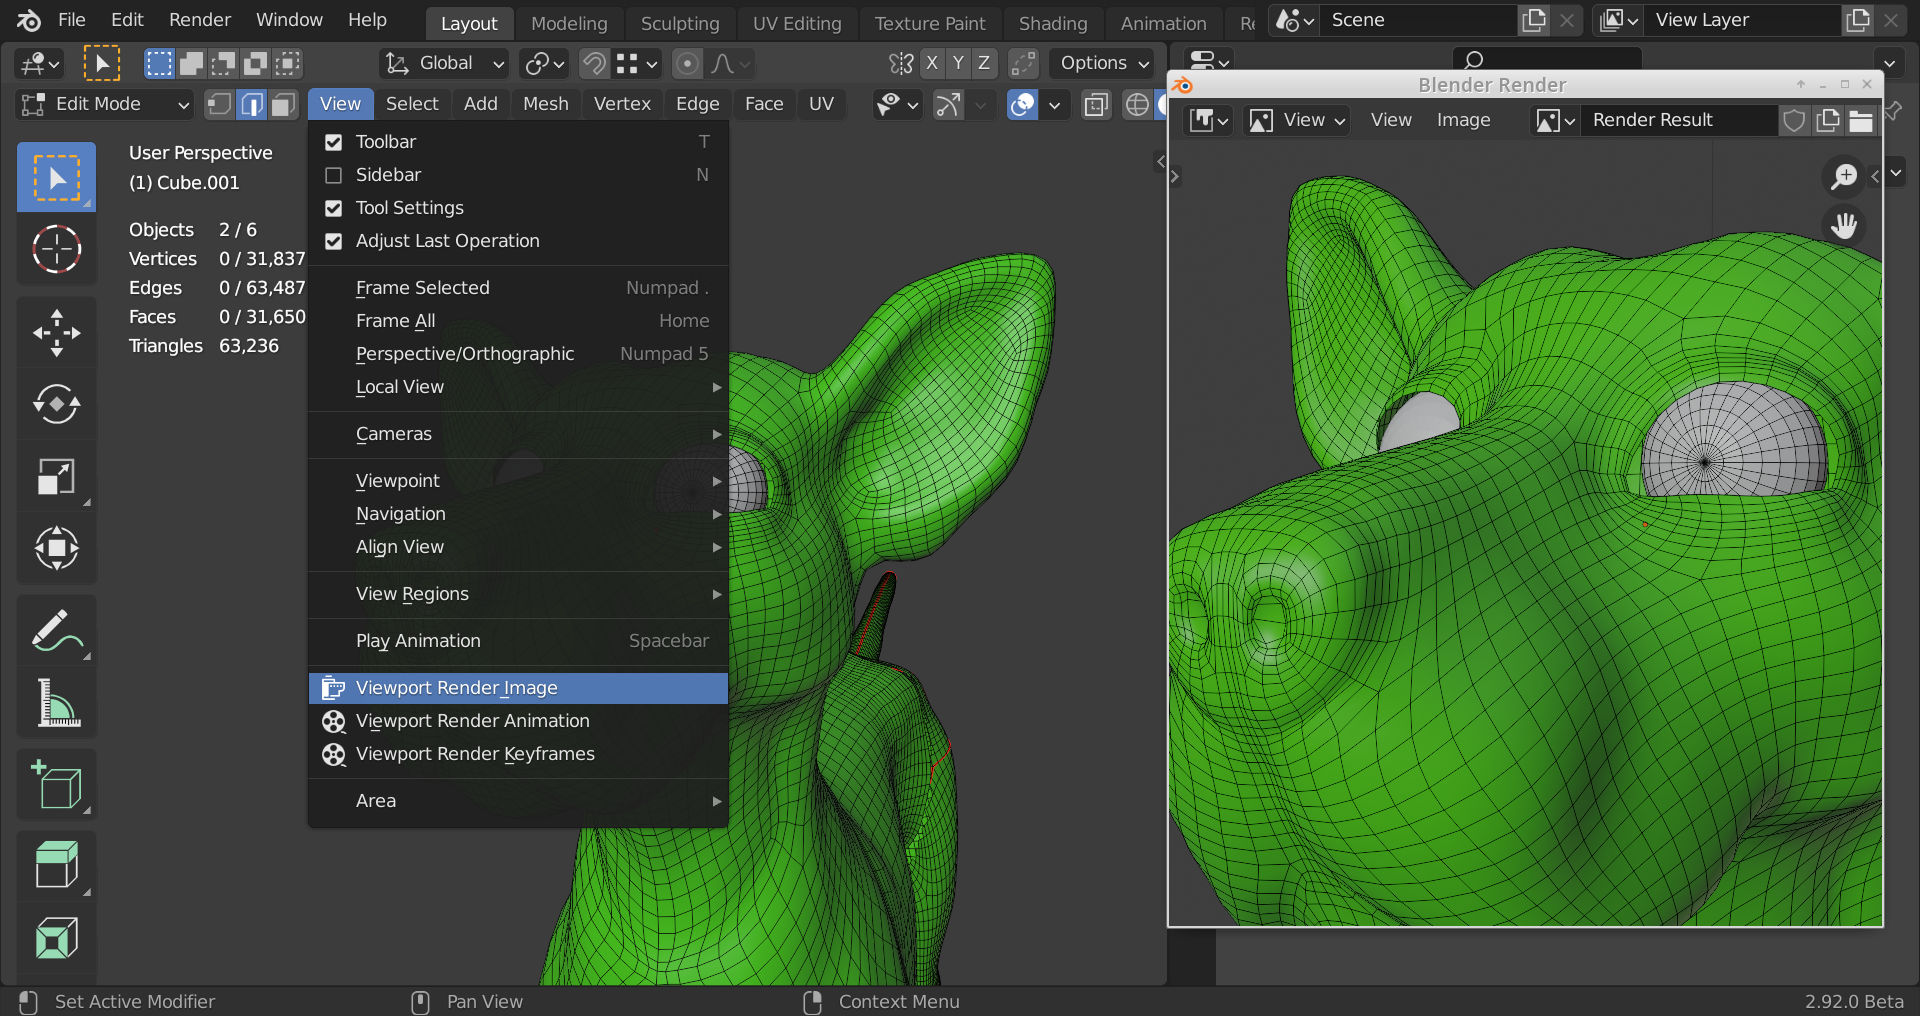
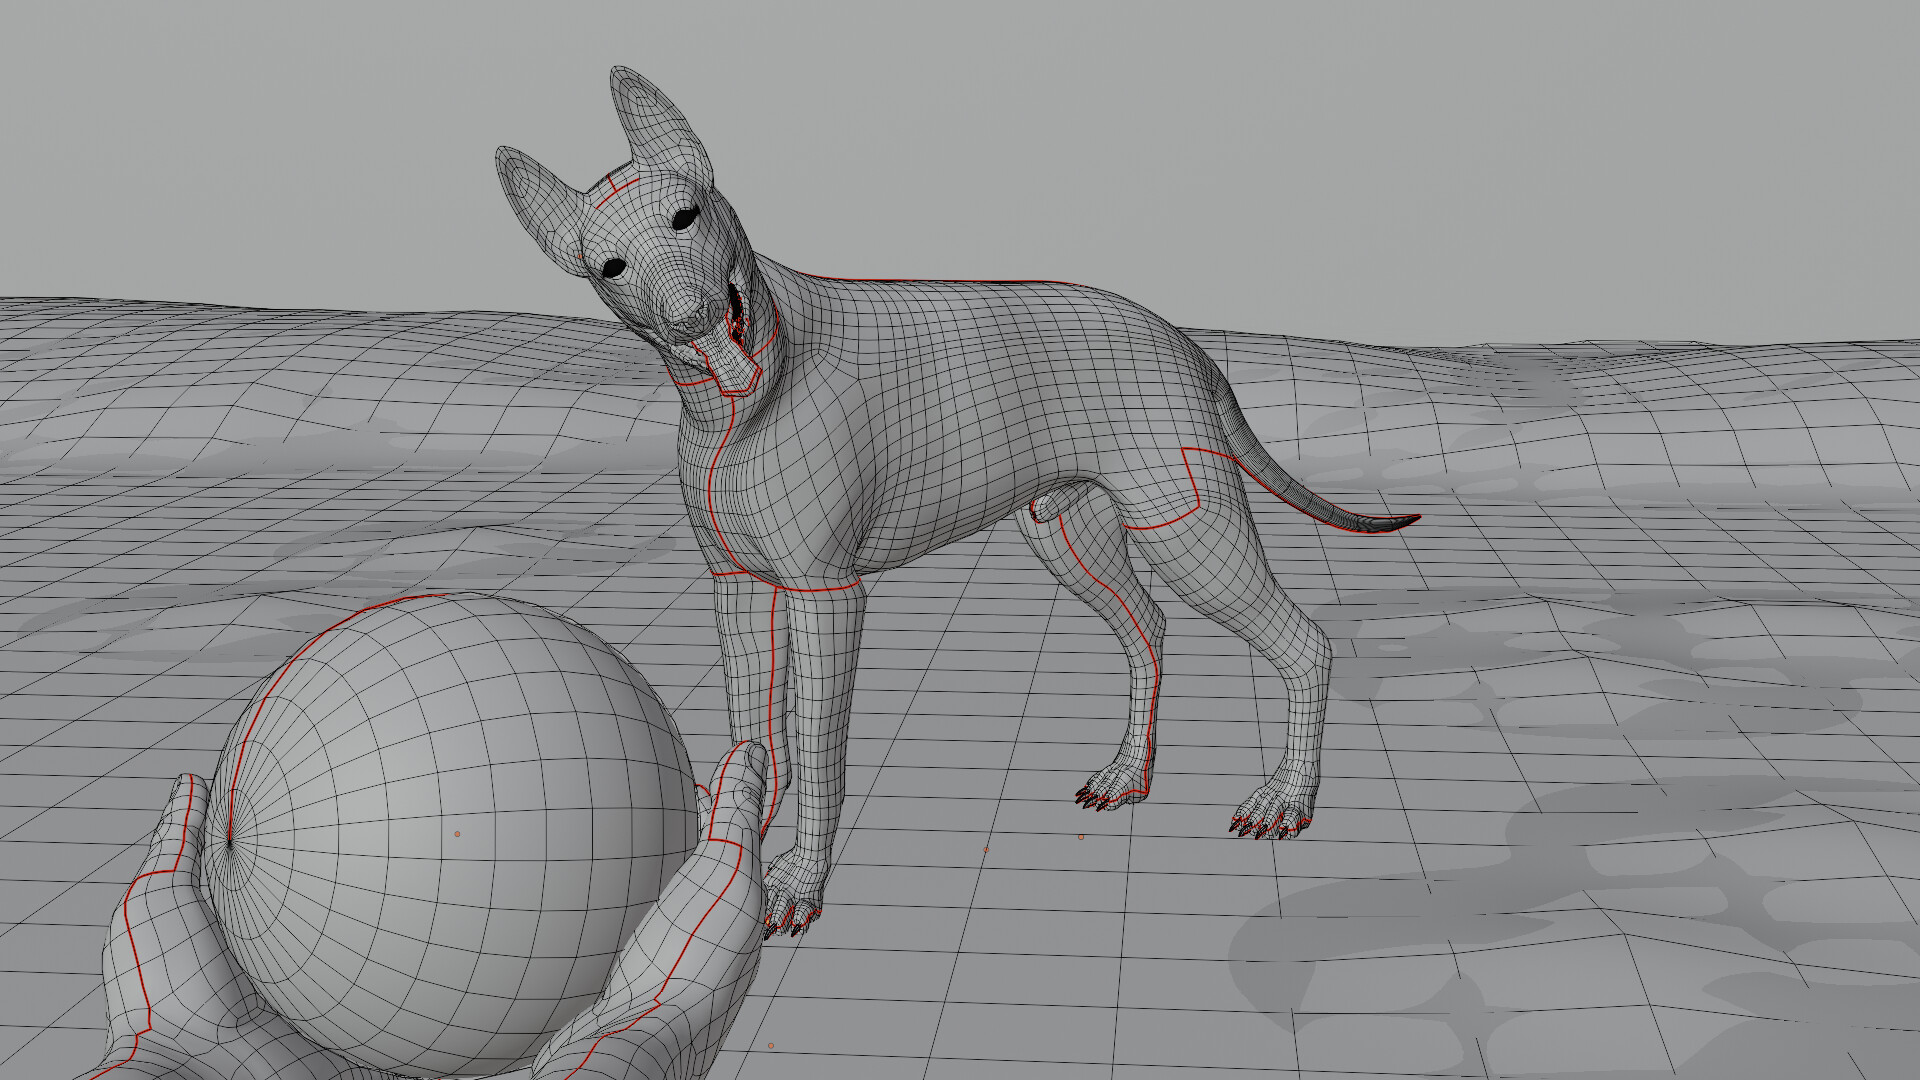
Hi Guillermo Ortiz, thank you for your comment. I don’t have a wireframe but I can put an Object mode view. I hope it will be ok for you ?

1 Like
Hi Robproctor, thank you so much for your feedback I really appreciate the time you’ve taken to explain what could be improved. I tried to fix some issues you pointed. I don’t know if I managed to do so but I tried !!! Here is the result. What do you think ?
Thank you again.
2 Likes
An easy way to do a wireframe is to select all the objects go to edit mode (edge edit) and do a viewport render.
1 Like
Interesting, I didn’t know that was possible, I would normally just screen snip with Win+Shift+S.
Hi JP, I think your changes look very good, the ears are much better. Your Depth of field doesn’t seem quite right still, but it’s better. I’m not sure what scale your at, but if your at proper scale for a render like this I would probably use around a 1.4 value. This is where having knowledge about photography and cameras/lenses comes in handy. If your camera lens is set to 50mm, which I think it is (it’s the default), them 1.4 will give you a nice blur. If your camera lens is set to 14mm (wide angle) a DOF of 1.4 won’t do much. For portraits you would normally use around a 200m lens (very tight) but a DOF of 1.4 will totally blow out the background giving a very strong depth effect.
FYI, Wireframe is a viewport option, press Z on the keyboard and choose wireframe.
With “viewport render image” you can change the resolution in the render settings and it gets rid of the tool box, icons and gizmos. (you do have to manually turn off the overlays you do not want)
The “z” viewport wireframe mode does not look as nice, with the edit mode method you get the studio shading as well (or matcap etc).
There is also a wireframe option in the overlays that does overlay on the studio shading but the wires are not as pleasing to the eye as in edit mode.
Hello again Robproctor83 I remade it with the lens set to 50mm and F-stop to 1.4. Thanks for the technical advice ![]()
And I replaced the previous one in the head of the post !!!
The ball is too perfect. It looks like CGI ball composited on photo. (That’s actually what I thought it was, good job on photo-real!!!
The other thing is the dandelions. They are brightly colored so it is noticeable when they all look similar. You need fewer or split into like three types and scatter those (one with yellow flower, one with ball, one after seeds blown). The tongue material is also a little bright maybe, but just a little (maybe).
The ball you might subdivide 2x and sculpt some bumpies. Add a little color variation or paint dirt in UV.
Have one hand squeeze the ball rather than 2 hands gently supporting.
Hi Boder, thank you for your comment and advice. You’re totally rignt with dandelions, I have to admit that I wanted to do something quick as an environment, but it would be better the way you propose. For the tongue I tried something darker but it didn’t convince me so I have kept it like that. I Tried to add some bumps on the ball before posting and I wasn’t happy with it. I agree there’s something really fake with this ball, I already add some dirt maybe it isn’t obvious but there are some  For the hands I had a real debate with myself : one or two ? I’ve chosen two because I imagined the carrier throwing the ball from bottom to top and some people do it with two hands but maybe one hand would give it more accurate. I really appreciate you took time to analyse it, thank you again !!! I am on an other project now, so I will let this dog quiet
1 Like
This is awesome! The environment looks great as well has the hands and the ball, and the dog looks super realistic.
Thank you very much for your support