Problem: UV Map a world map of Countries

Alright this is just a little problem I’ve been running into, and I’m in kind of rush on this project, the whole idea or topic is, how does one unwrap a sphere into a flat UV map? I’ve been trying to search for some stuff, but I’d figure at the same time it’d be faster to give this a try as a post for feedback. I don’t have the images of this problem yet, but later on they’ll on here, I’m currently working on a mac and there’s no way of taking screenshots on here.

Anyways, I’m trying to UV map a high res image of a World Map showing states and countries with bounding lines, so I’m pretty much trying to find a way to accurately fit this image onto a sphere. So any ideas or suggestions?

You have to live with distortions, it is not possible to project a sphere to a plane so that the angles and the areas are projected in the same relations. The big garbage heap of knowledge has an article about the problem here. (Short: Impossible. Just think of a rectangular map where the north and south pole are lines as long as the equator where they are in reality points without any extension.)

You can use the free spherical mapping corrector plugin for Photoshop here to shape your flat map into one that works with spherical projection. http://www.richardrosenman.com/software/downloads/

It’s about halfway down the page:

Lynda

Well you’re right about that, lol I guess I was just looking for an easy way out, but thank you guys, although lynda, I’ve been trying to get the hang of that filter for photoshop and lol it’s cool as hell, thank you for that link.
Well you’re right of course, I was just looking for an easy way out, that’s what my teacher had told me when I started on this project, he said, “look…you’re always going to to have to stitch it…no matter how much of a pain in the ass it is…you’re gonna have to do it you whiny a**!” well you both were right, thanks, I’ve just gotten almost finished trying to stitch it up and flatten out although it’s been quite a tedious process, for the project, it’s part of my major thesis project, I have to design an educational dvd for a deaf school, which I’m going to involve animated 3d graphics of course, usually in this class we use maya…but unfortantely someone messed with the dat key and screwed the program up thus rendering it useless for anyone to use, but pretty no one else in the class has learned how to mess with blender…show’s you how freeware goes a long good way right?

The filter works nicely with the Blue Marble world images here: http://earthobservatory.nasa.gov/Newsroom/BlueMarble/BlueMarble_monthlies.html

Lynda

Ah thanks, I finally got it fixed up and all worked out. I know probably alot of people know how to do this but I’d just thought I’d post this for future noobs, and see if they can find this solution on the searches. There’s probably a whole lot of other simpler ways to unwrap a UV map of a Sphere into a squared map, but nonetheless I’ll just post this up instead

http://i6.photobucket.com/albums/y220/sineelcuro/Tutorial%20and%20Display%20Art/Disorted_UV_Map.jpg

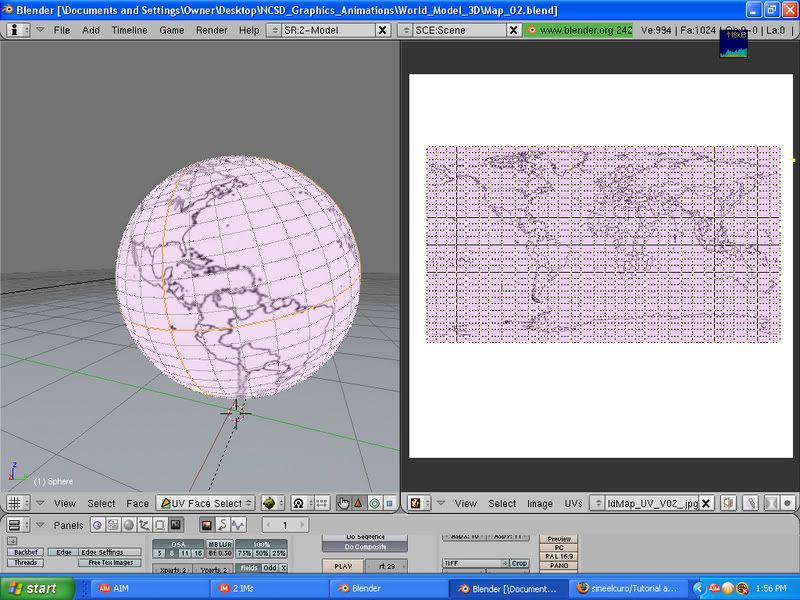
Obviously enough…the first thing that I encountered was unwanted distortion where I wanted to just have a seamless and accurate uvmap that was in proportion.

So therein, this isn’t a quick solution(it might be if you have fast hands and know your shortcuts) but this is only more of a helpful hint at getting more straighter and easier aligned UV Maps

the only thing you need for that is to enable a few options, like “Snap to pixels” and enabling a shadow map underneath your UV’s. As well as splitting your UV into quadrants with Marking Seams(this helps for more organization in my opinion and able to select the faces easier)

this should be more clear

http://i6.photobucket.com/albums/y220/sineelcuro/Tutorial%20and%20Display%20Art/Snap_To_Pixels.jpg

Turn on the option in your UV Window, “Snap to Pixels”

Then turn on shadow map in your UV Active Draw Mode options

http://i6.photobucket.com/albums/y220/sineelcuro/Tutorial%20and%20Display%20Art/Shadow_Map_Option.jpg

After you got all that hubaloo done…this comes the tedious part, it shouldn’t be too hard to get through it easily, just remember your shortcuts and all that sweet stuff, maybe put on some music to keep your insanity from boredom at bay…(in this case I turned on some old black sabbath…nothing like the sound of Iommi riffs to get you through this little…monotonous process…like I said, I know there’s probably simpler ways of doing this)

All you have to do now, is since you have the Snap to Pixels option turned on, you’ll be able to move your UV verts more accurately.

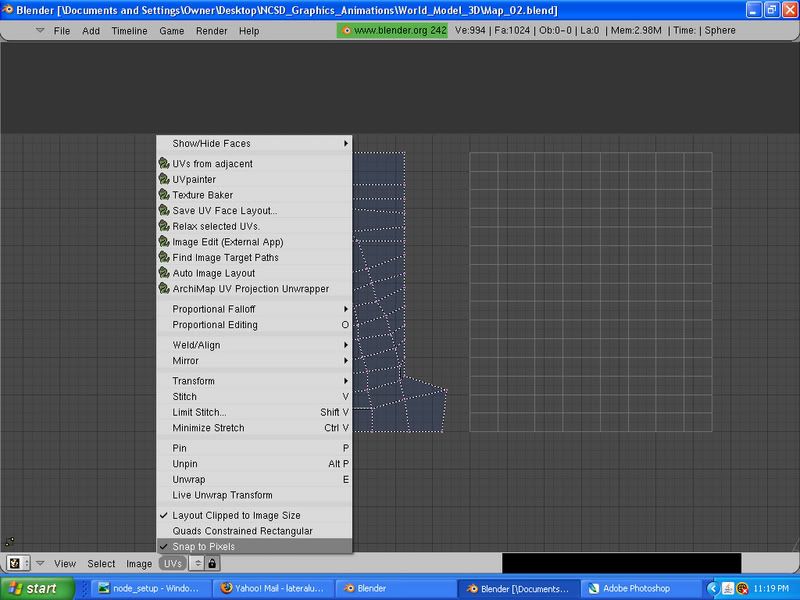
All one needs to remember right now, is that since your sphere is cut up into quadrants, it should be easier to select the unwrapped sections. All one has to do is, while in the 3D window, in the UV Face Select mode, click on one face on one of the sections of the divded sphere
Then press Ctrl+L, this highlights all the linked faces in the marked section, and it’ll only pick up the faces inside the Seams you’ve marked.
Go to your UV Editor Window, you should see the section you’ve selected, press ctrl A, now…pick a defined space on the map, to stretch your verts out evenly into a square…

In this case, I just moved the verts into evenly spaced units

http://i6.photobucket.com/albums/y220/sineelcuro/Tutorial%20and%20Display%20Art/Risizing_UV_Verts.jpg

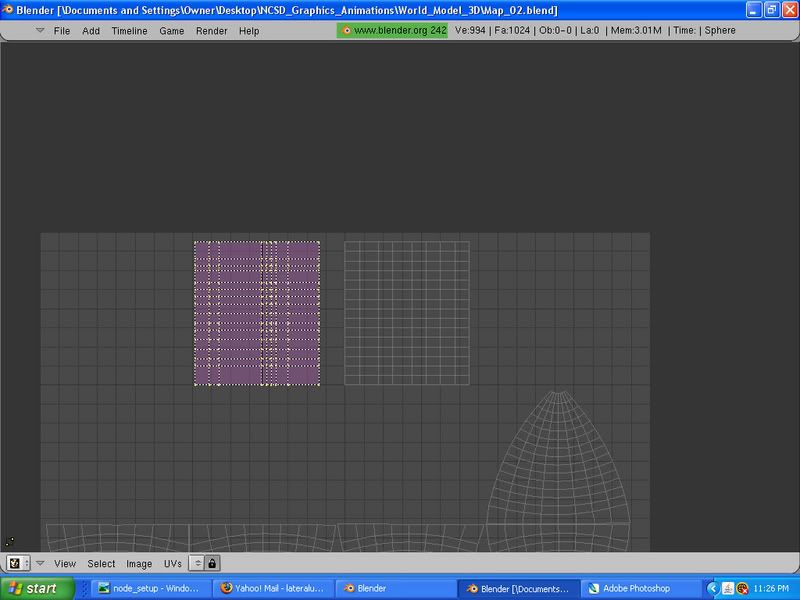
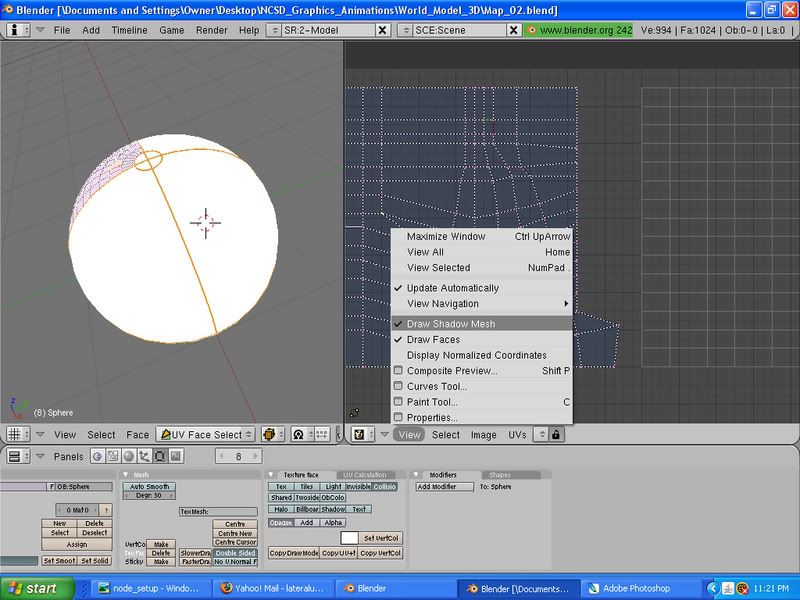
After I have my verts of the selected UV Section changed into a square, I realigned them just a bit…then I go back and select another section, I move the selection over the fixed section, (THis is why you need the shadow map option turned on) and I do it all over again, following the first square UV I unwrapped

http://i6.photobucket.com/albums/y220/sineelcuro/Tutorial%20and%20Display%20Art/Realigning_UV_Verts.jpg

Then all that’s left is to realign the vertexes in accordance with the first section which is shown as a shadow beneath the current UV Section

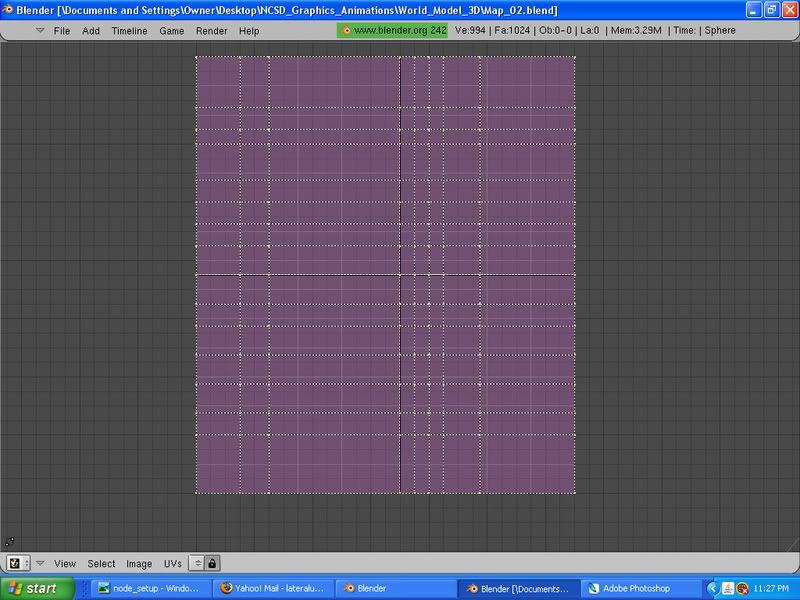
The process is thereafter the same for the rest

Just select the section, move it over the previous one you just unwrapped, and unwrap the current one over the previous one. Pretty much, just …erm…I guess you could call it, Trace Unwrapping? shrugs

Well anyways, I know there’s more easier ways, but I guess this could be just helping for a more better workflow in Unwrapping Spheres

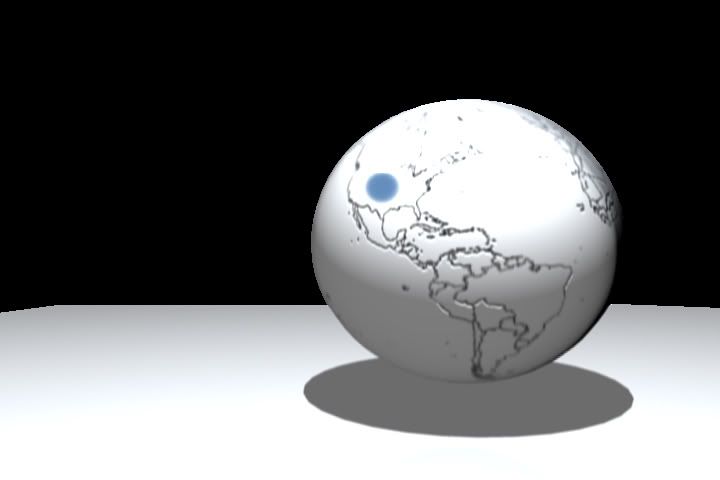
Here’s the finished piece

Thanks Lynda and Inmare for you advice, it pretty much helped me out in ways

http://i6.photobucket.com/albums/y220/sineelcuro/Tutorial%20and%20Display%20Art/Finished_02.jpg

http://i6.photobucket.com/albums/y220/sineelcuro/Tutorial%20and%20Display%20Art/Render_Test_02.jpg