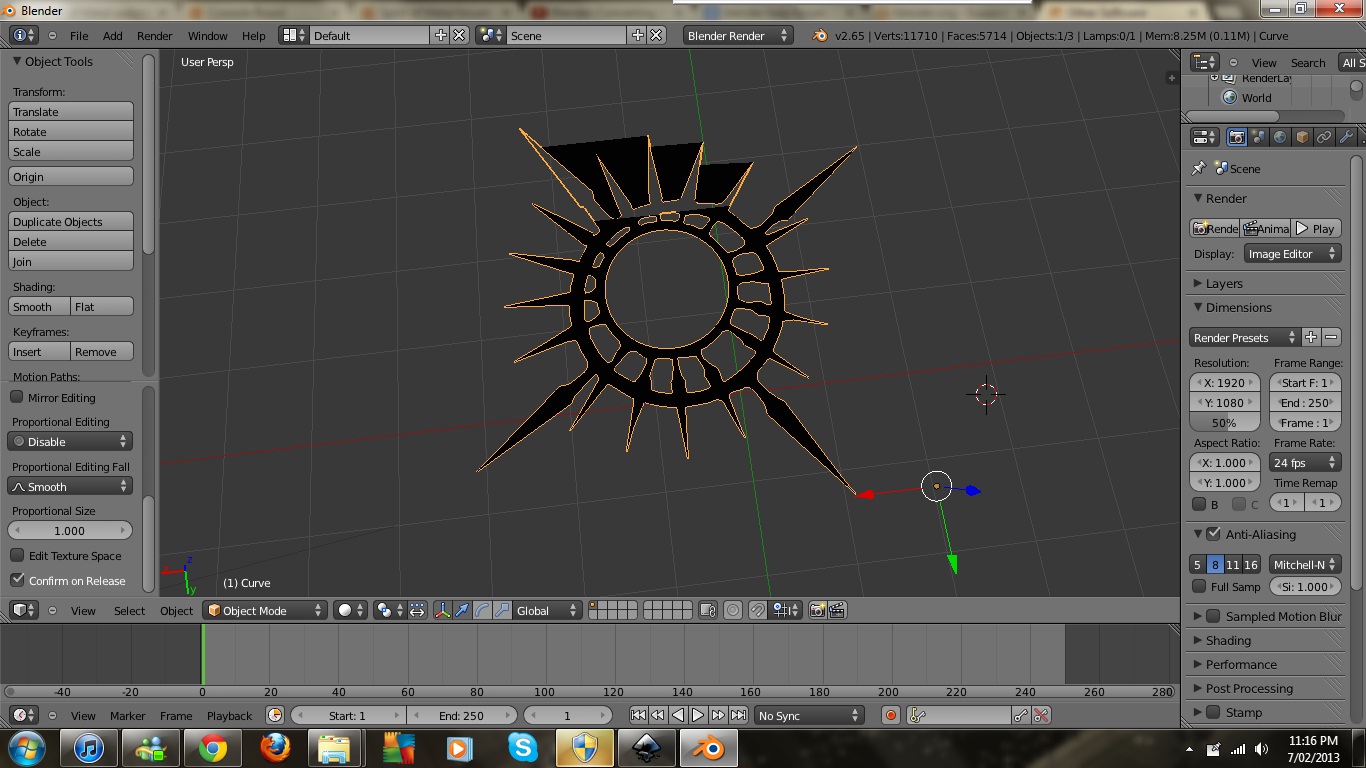
Just recently I’ve started a project of creating an intro animation from an image logo. However, I have encountered a problem when importing my SVG file I create from inkscape into blender. I have posted two attachments to this post.
The above shows how my image looks when imported into blender from inkscape. As you can see, the top portion of the image’s colour is inverted, which I do not want. I want the image in blender to look like the one I had in inkscape. I’ve tried to redo this multipule times with the same result, does anyone know what I’ve done wrong here?
To get to this stage, I first cut out the part of the logo I needed. Then I scaled the image up and made it transparent in Gimp.2
Then using Inkscape, I traced the bitmap of the image and the only default I changed is “remove background”, then I saved it as an SVG.
Check for any overlapping curve points. If yo find them delete them.
You could also try removing them with the Simplify Curves addon that you can enable in user preferences
You have so nice and clean image that it was just a matter of couple of clicks to get this form Inkscape to render.
After you import svg, make sure to turn down Preview resolution for curve to some 5 instead of 12. That still will give quite a lot of geometry, but might just do.
If you want less vertices, better would be to trace image in blender by hand. Any automation leads to some excess geometry and not really predictable results.
Give tiny bit of a bevel to curve, extrude, then Alt-C convert to mesh. Subsurf will work out of the box thanks to that bevel. And it gives nice reflections too.
And yes, delete doubles after converted. http://www.pasteall.org/pic/show.php?id=45100
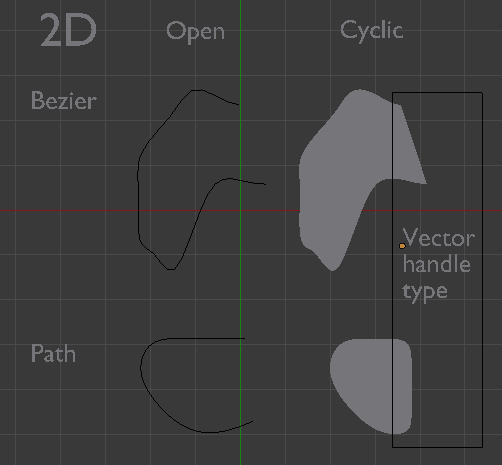
In blender, the paths have to be closed. In SVG they can be open and work just fine, but remember blender is converting SVG to it’s own internal format, which does not work the same as SVG.
Paths and curves (later is what svg import is converted to) in Blender can be open or closed - cyclic.
If curve type is set to 2D, blender automatically forms surface if curve or path is cyclic.
what you are going is having inkscape do is fill in geometry for you this is going to produce a odd effects and as sharp as the point is yes the path is going to get flipped over.
But you are using fill mode turn it off. Use just pen so you can see the path better in blender. Convert to a mesh Alt C.
Thank you for the response guys, I found out that the unwanted black parts could be removed with a simple extrusion.
eppo, your interpretations of the image are magnificent! Which textures did you use and how did your render get so clear? (sorry, I’m very new to the software)
Whenever I try an render the object, it comes out all pixelated and yucky.
There were no textures involved at all, just Cycles renderer material made of Diffuse and Glossy shaders mix. Good amount of Sun and World lights, some 100-200 samples quick render. I’ll see if i still have file left, will pm you later.


 )
)