Hi, I’ve done some digging on this topic and I am starting to think it may not be possible in blender strictly speaking aside from hopping over to python and doing it there.
The gist of it is that I’m trying to in a sense do a form of camouflage akin to ambient occlusion without transparency. I want to take the colors and patterns of surrounding objects in a snapshot, and then use that as a base color for this material’s shader. So the end result would be if the object is say, in the middle of some vegetation, it would take a snapshot of the colors of the vegetation and the edge information from its perspective and do a disruptive mimicry.
That’s sort of a pipe dream at the moment, but the reason I’m asking for support is not only because I’m not finding much information on anyone else doing something like this even in parts for other projects, but because the information I’m finding is suggesting blender isn’t capable of doing this at all.
Is that interpretation correct, and (hopefully) if not, how can I capture color information from around an object for that object’s shader?
I’m pretty novice to blender but willing to muddle at it either way. Using Blender 3.5.1.
Let me know if anything is unclear or if I posted this wrong.
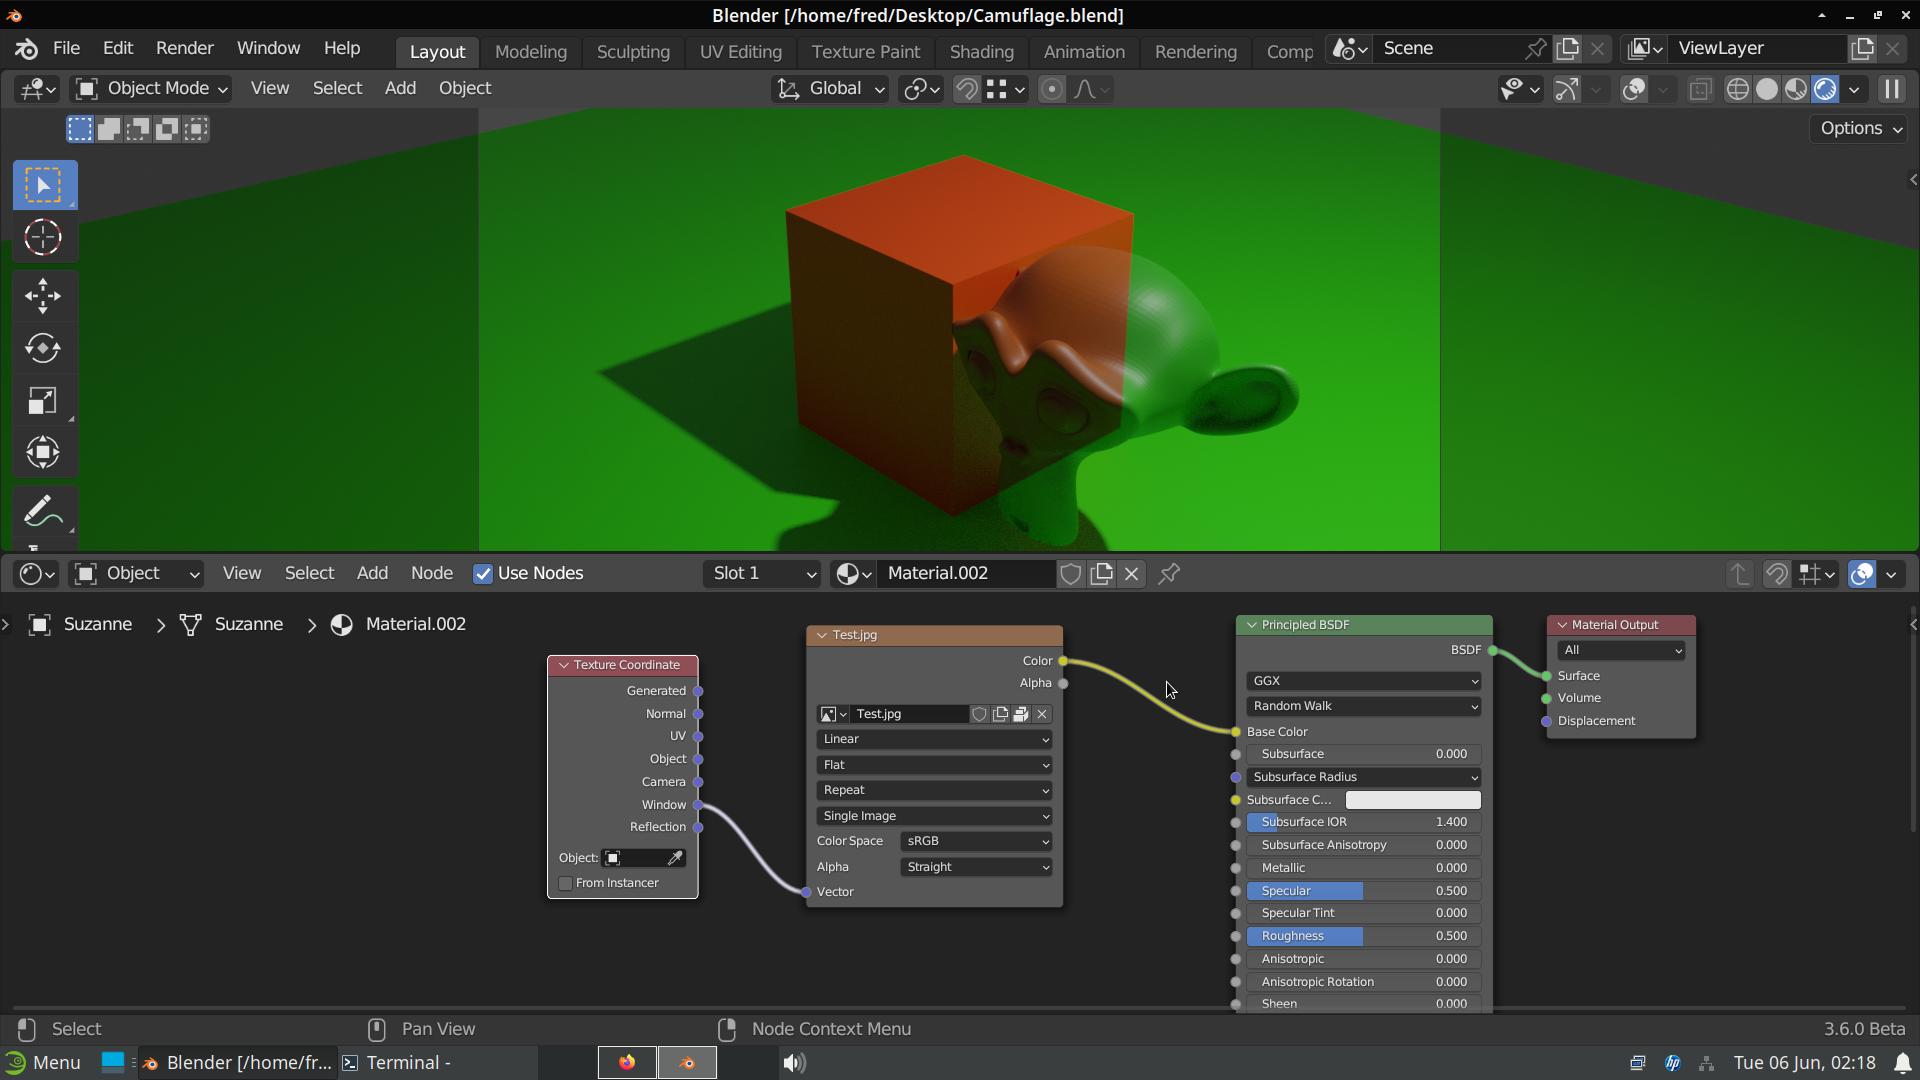
Not sure if I understand correctly, I think it would be difficult in the shader editor because the shader can not take a “snapshot” of the surroundings. Shading is calculated by the render engine at the end of the process so you can not feed the render result (background colours) back into the shader nodes.
Maybe your best bet would be to try re-colouring your object in the compositor using crypto-matte. In the compositor you can access the render result of the surroundings.
I am not sure exactly how to go about it, especially if you want to use the colours that are “underneath your object” but I am sure that the compositor would be your best bet.
Hmm interesting okay. I’ll try playing around with compositor then, I haven’t done anything with it yet. A little disappointing that the shader system cannot do this, but that’s how it goes. May end up having to do something like a one render pass without the object, then pass that back in as an image texture? Not going to work in any sort of animation and it definitely isn’t quite going to work how I wanted, though.
Well another thing to consider could be do a render (or animation render) without the object and save it.
Then use that render (or image sequence) to colour your object in the shader editor using camera coordinates.
(A bit like compositing by brute force, or taking the “snapshot” before you texture your object.)
The trouble here is that to be “true” to the speculative work it would need to be colored from information from the point of view of the object, not just relative to the camera. But I think this will at least work for most cases, and be far better than nothing.
Although maybe a chameleon will pick up the colour from what it is standing on top of. If this is the sort of thing you want to do maybe render the Image/sequence from the top view over (but without) your object and use object cords with a static empty to shade the object.
It is difficult to say without knowing exactly what you want but I am sure this is a possible route to take.
That looks excellent. This is very close to the route I’d want, the end result is going to have additional crypsis and camouflage patterns in order to break up outlines, but this is an incredible proof of concept. I should have some time now to play around with this again, I’ll share if I get anything interesting working!
Thank you, this really does look great. I’ll have to look into maybe a spherical camera? Use that for the reference, mirror the render from that to use as the base texture “from the perspective of” the object? I dont think I’m using the right terminology here but I think it’s something feasible.
Okay this is going to work great, and was not difficult to set up at all. I put a panoramic equirectangular camera inside of suzanne locked to their transforms, and then using that camera’s render as the image texture for suzanne themselves. Mirrored it X and Y using a mapping node.
This is far farther than I thought would be possible at the start of this post, so now the next steps for me personally are to turn this texture into a camouflage texture procedurally in various ways. I’m not sure how I’d do this in an animation, I’m not sure exactly how one would use say, a .gif as an image texture, but I also haven’t done any animation yet anyway and so I’m guessing that’s not something super advanced for later on.
I think for the purposes of this post, this is solved, though I wish there was a way to do this automatically, it’s not a tricky workflow by any means.
To recap:
Spherical camera, render without camouflaged object, use that render as the base image texture for the object to pass into the camouflage generator.
Since this post is technically solved I’m not sure if I should bother updating it once I make more progress on the actual camouflage aspect of it, though if someone figures out a way to do this in real time (realizing this is just a fancy environment map though, im sure that’s been well investigated) it would be great to see any input on that.
You can use a video in the image texture node, just open a video and the node will give you options for start and end frame etc
It is possible to turn the image into a camouflage type thing in different ways. You could start by pixelating the image and then distort the pixelation. This can be done procedually.
I will have a play and see what I get.
Edit:
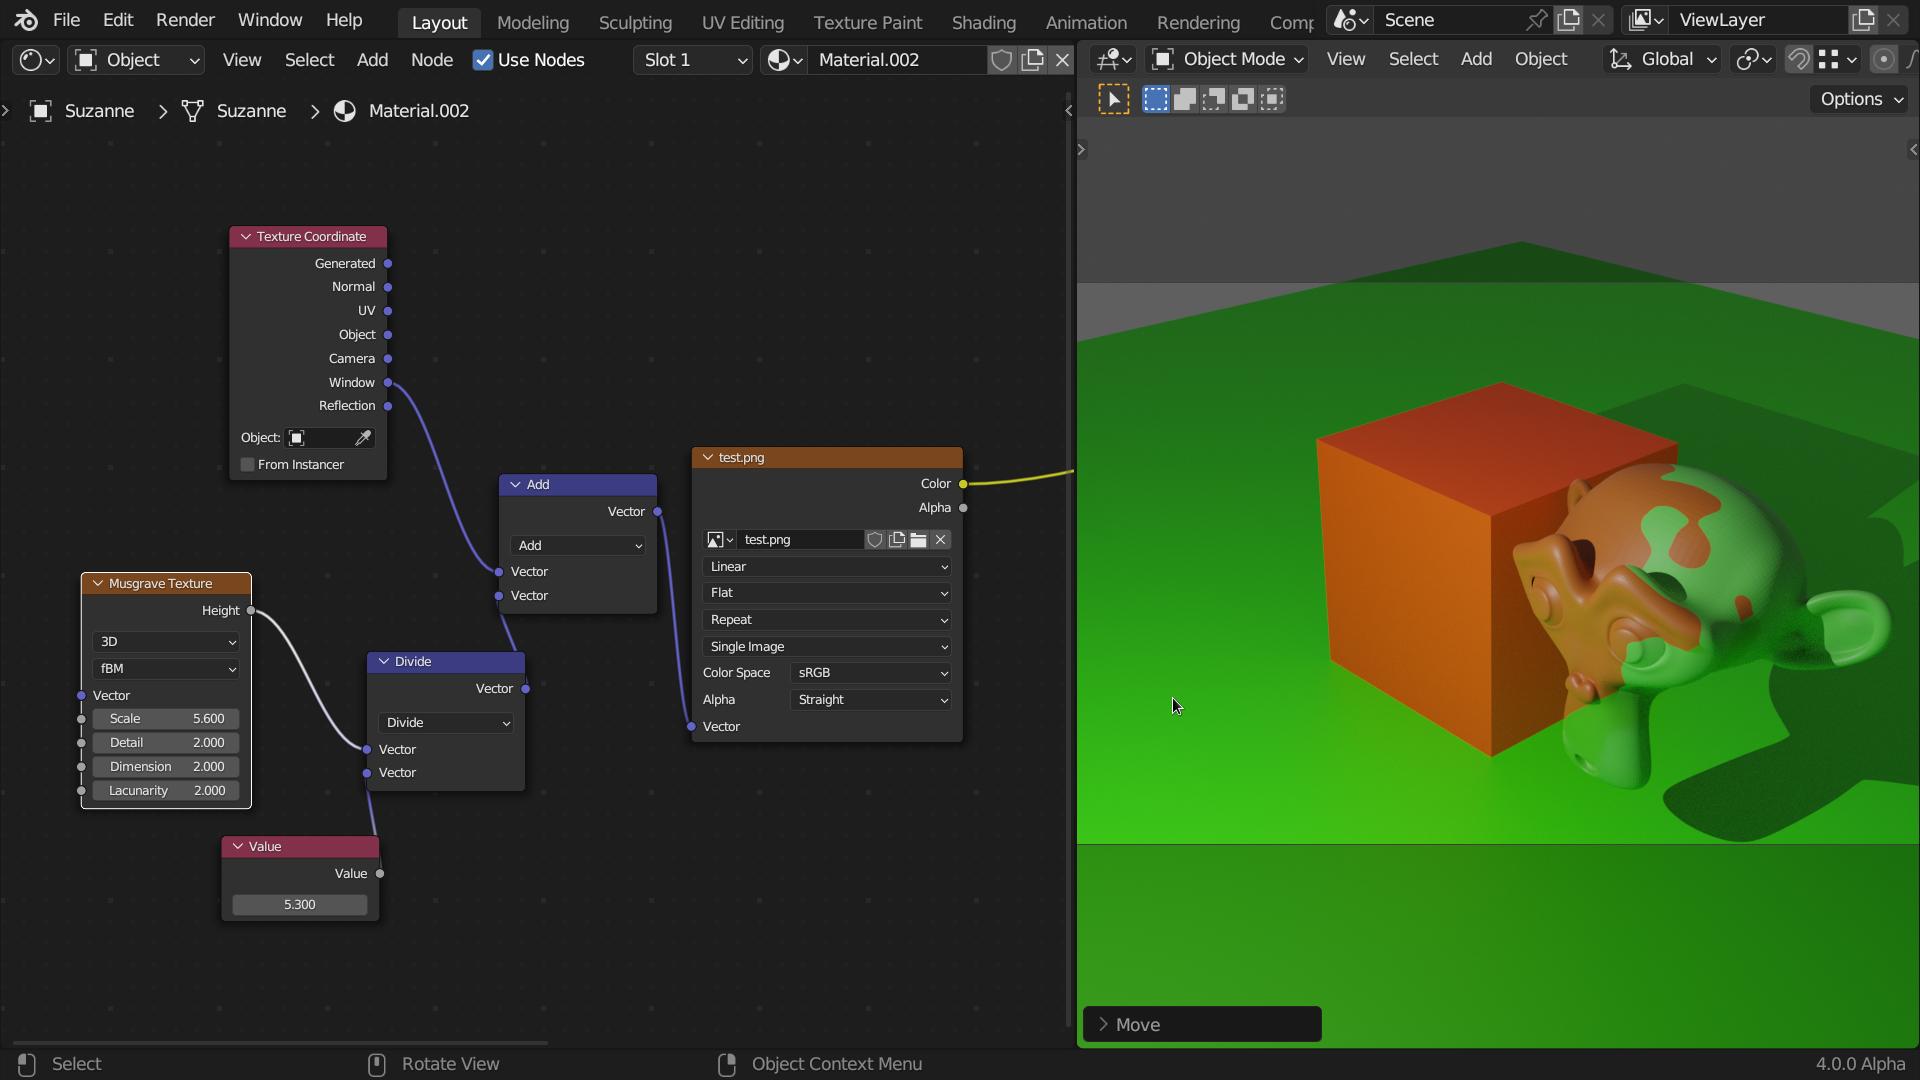
Here is one simple way to do something, by distorting the mapping with a musgrave texture.:
This time when I did the first render I used a solid whitish colour in the world shader as the light. That way there are nearly no shadows in the image that I used in Suzannes shader. Then I changed the world back to a grey and added a point lamp to the scene so that the shadows work better in the general image, (hope that makes sense.)
Interesting process, I have been playing around some with the method but haven’t quite gotten to a state where it actually looks like camouflage from the perspective of the object yet, but I’ve been making some progress. That simple musgrave warp looks great, what’s the thought process behind the division there?
The values from the height output go from 0 to 1, dividing them by a number is just a way of making the distortion a bit more subtle, the higher the number you divide by the less it will distort (and vise-versa).
In this case it does not need to be a vector math node ( a standard math node will give the same result).
This makes sense. Details like this make me wish there was a way to display values in the node tree or on the object as numbers, but that seems to be another thing I think might be impossible outside of sverchok.
I think that is not feasible.
Most of the node outputs (fac, coulor etc) are a mathematical formulas, they are not a fixed values or fixed arrays of values, when the shader is calculated by the gpu/cpu those formulas are used to assign values to each pixel of the display/render image, depending on the geometry, mapping, camera/viewing angle, zoom and the resolution of the render (or view-port).