FROM BLACK FRIDAY TO CYBER MONDAY IT’S 25% OFF ON THE BLENDER MARKET!
Ravage is a system that streamlines the PBR texturing process inside of Blender. It allows for you to either use your own nodes in the node editor, the system provided by the addon, or a combination of the two for a flexible workflow. It uses a layer based system, simplifying rearranging nodes which can easily become a chore.
The current version of the addon covers the 5 main PBR channels, Albedo, Metallic, Roughness, Normal and Bump. However support for all channels shall be coming in future updates.
The addon is currently available on both the Blender Market and Gumroad.
Looks like a really good implementation of the layered workflow
There are a few addons already trying to cover similar functionality, the ones I know are Layer Painter, BPainter and Mask Tools by Wayward Academy. The critical points in all of them for me are the performance of the material node tree under the hood and the easiness of getting different material heights (in the bump/normal map).
Performance wise, I took time to implement the functionality to view specific channels therefore significantly speeding up the calculation. For reference, I have no GPU and created this on a 4th gen i5. Also I’m currently working on a version that is more efficient.
Kindly break this down for me a bit more, what do you mean by saying “getting different material heights”?
About the heights thing, I’ve found sometimes difficult or not too intuitive to get the paint over a raw metal or wood to look higher. The functionality is implemented and accessible in all the mentioned addons, but sometimes is confusing to me or have to dig a bit too much to my likening into the settings. I guess I’m lazy and I would like an immediately accessible slider to make a layered material higher or lower in the bump map xD
You can do that with the addon, you can use a value node for the bump channel and a slider will be made available for you to move the values either up or down.
I bought Layer Painter some time back and I believe it has this functionality as well.
Yes, in layer painter you’ve got to add a bump channel in both layers and then give an appropriate value to each one. It’s a simple enough method but it wasn’t obvious to me at first time using it. With the other addons the solution also wasn’t straightforward. That’s my insight about the matter, I guess I expect a too much dumb and lazy approach xDDD
Checking your video more closely I think I see you have a slider right there to control that bump value, if that works right away it’s a great UI feature to have
I don’t think you’re dumb, maybe the developer just didn’t make the UI as intuitive.
I also didn’t know about the adding a bump channel in multiple layers then giving an appropriate value to each layer, I assumed that you just add the height on the relevant layer.
Yeah, I wanted to keep the UI as intuitive and clean as possible, so a single slider will take the value either up or down.
I guess in Layer Painter if you don’t add a bump channel it takes a default 0.5 value, then if the above layer has a different value it looks higher or lower…
But enough about other addons, I would like to see that “blank layer controlled by nodes” feature you were talking about in the opening post and how that fits in the overall workflow (I think it’s not shown in the video)
Yeah, haha. I don’t recall using a blank layer in the video. It’s basically allowing you to use a node based workflow on the given layer instead of using a Ravage controlled layer, you will be able to move it just like and add masks just like any other layer but the data such as color, roughness, etc is controlled by nodes.
If you want a demo on this I can record something for you showing exactly how it would work.
Here’s how the blank layer works, quite straightforward I believe.
I had to cut the video short due to limits in size, but I believe you know your way around once in there, haha.
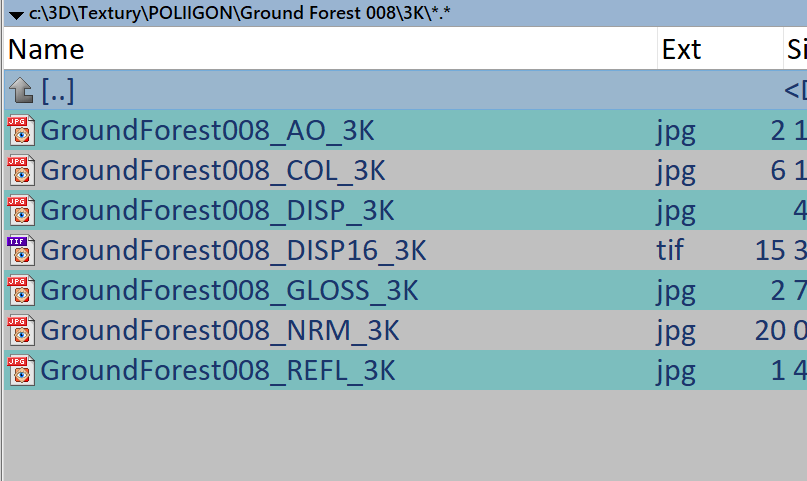
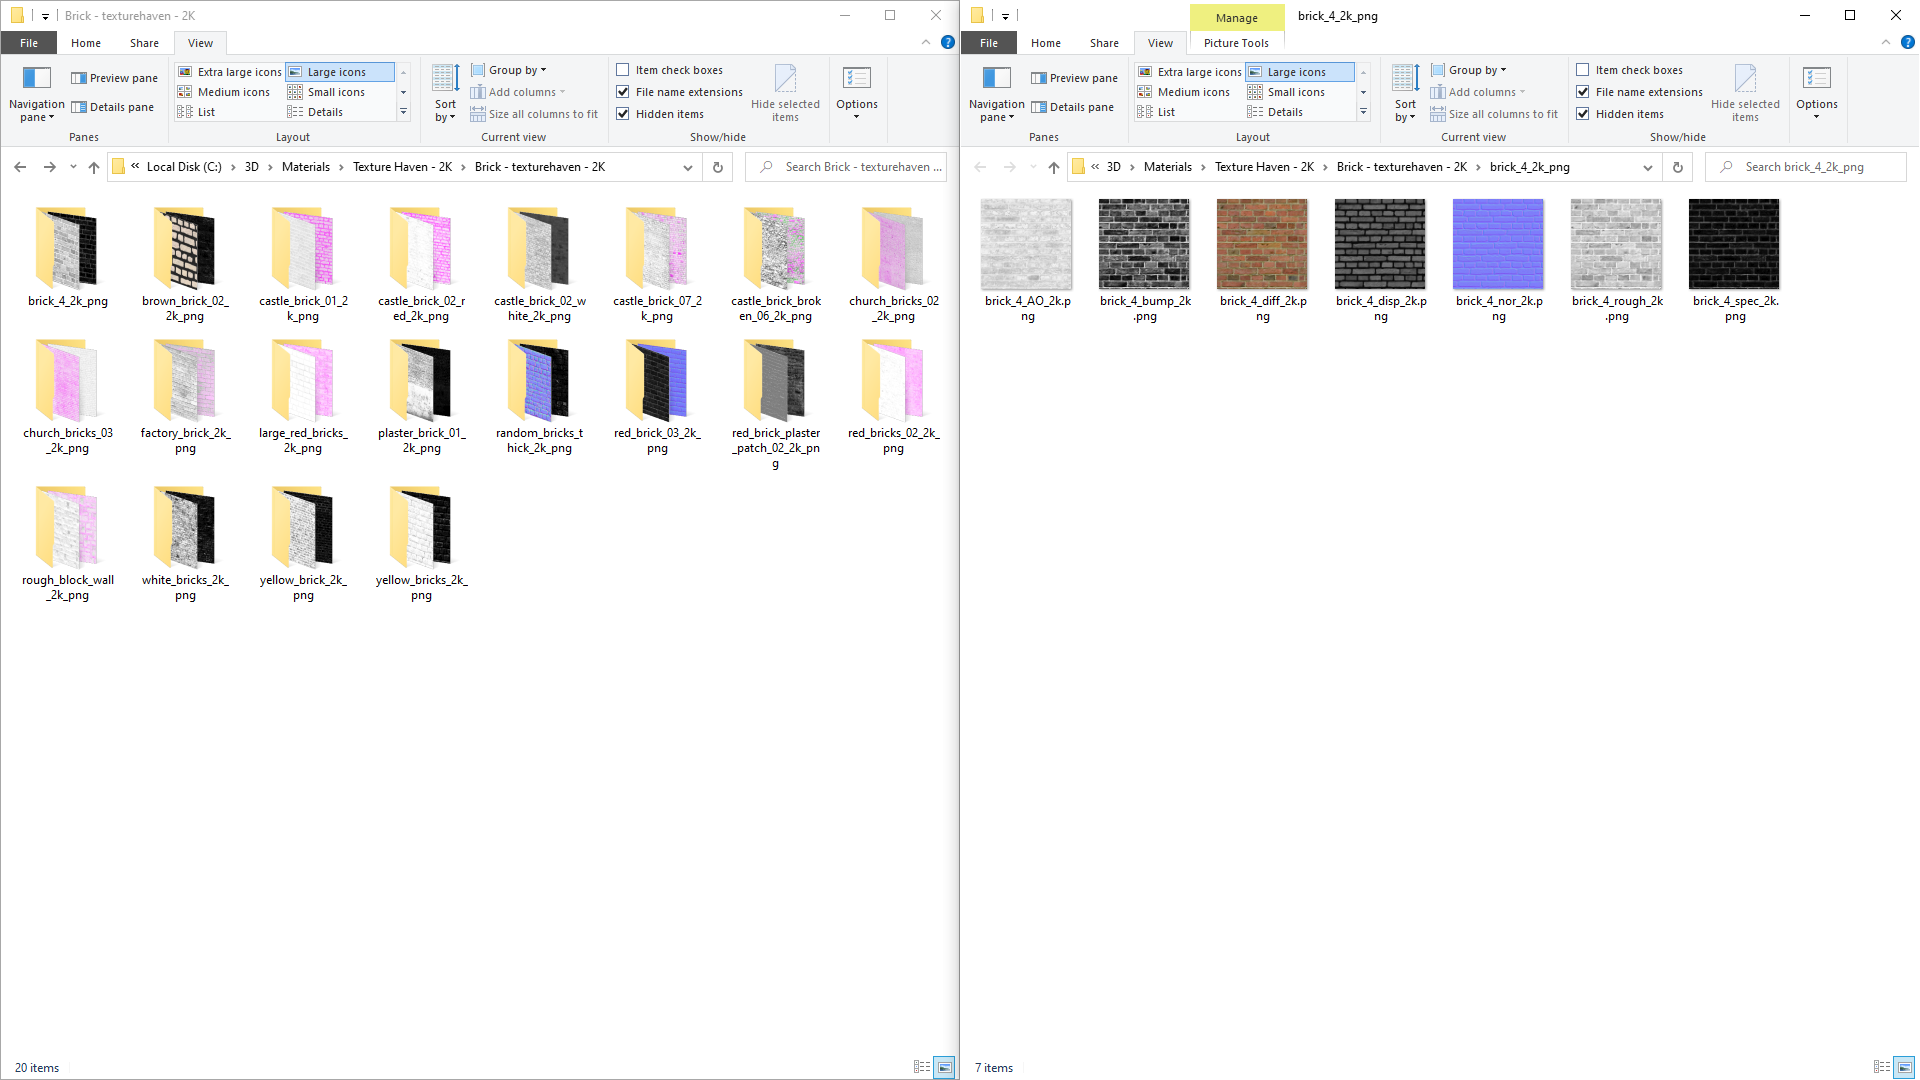
For the libraries, you need to set them as shown, on the left, I have the material library, that will parse and find the folders in the library counting each as a material.
On the right is one of the materials in the same library open.
Also please note that the parsing goes one recursion level, meaning that it will look for libraries in the given folder and not folders within folders.
I believe the problem may be trying to use the second method of library previews, as stated in the documentation, it takes some setting up and has to be specific.
I would recommend that if you have previews, to have the image texture in the file named “PREVIEW” with it’s extension.
Let me record how I set up a library and send it here.
I had to record in 720p for it to allow the upload but I believe it’s still visible.
As you can see, I had no libraries at first. I then opened a material folder and went back by one. The folder one level up is what I selected and added to the library.


 (I think it’s not shown in the video)