Well, I was hoping that the updated video version of my face / projection texturing tutorial would be my 1000th post but I don’t think that will happen. Having some issues capturing at 1024x768 in real time. Timelapses I’ve had no issues with, but I think I need to do some digging for the video tutorial.
Anyone know a good tutorial on making video tutorials? :rolleyes:
So I think for the moment I’ll focus on finishing my various WIP pieces for now to turn them into an updated portfolio. Starting with this dude and his face seeing as I made a start anyway…
So far I’ve done two projections (front and side) and blended them together. Then I got curious seeing as I’ve learn’t new tricks since the last one and started playing with early bump/normal/etc maps, correction the tone/gamma, nodes and whatnot.
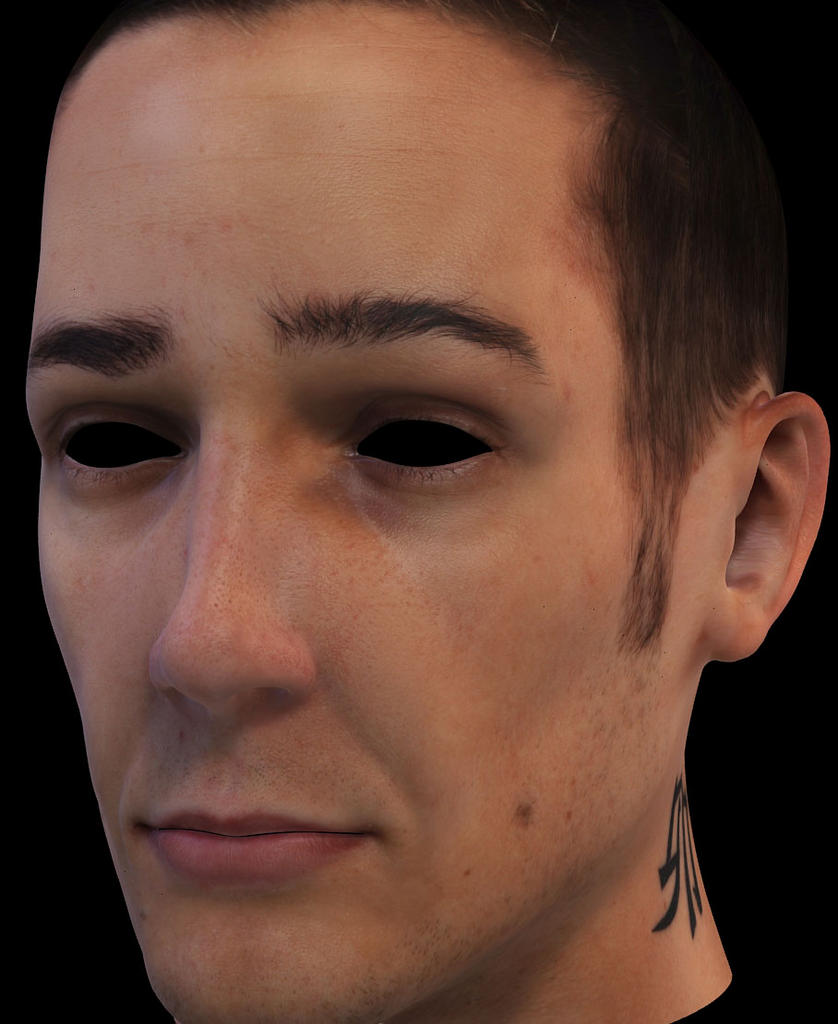
That’s basically the reason for the smear inside the ear and all the other bits to finish, like making him bald and such.
Blender internal, no IBL or anything, 1 sss layer only at this point. Render time was about 1min50sec and the textures are 4096x4096. (4k)
Should finish the texture(s) soon, maybe tonight if I keep on a roll.
‘Part 7’ at the end is about that. The spec baking bit I need to get figured out a little better, but the bump map is pretty simple. To turn it from a bump to a tangent space normal map I use this:
I’m sure there are alternatives around, but it works for me. Incidentally - normal maps give much better results at the edges of a model than bump maps with Blender Internal it seems. Been playing with that for a while, but more or less confirmed it for myself today.
Opted to render a video rather than push on with the texture for a bit, so will upload that (probably vimeo) when it’s done. More texturing tomorrow.
Stuff is fun when it’s working right!
(edit - http://vimeo.com/2737997 for 200 frames of ‘turnaround’ - give it time though, still being processed)
Next post is the big 1000 (I’ve not really participated in a forum before this one), may as well wait to post the finished head with eyes and modelled/particle eyelashes (and eyebrows?)
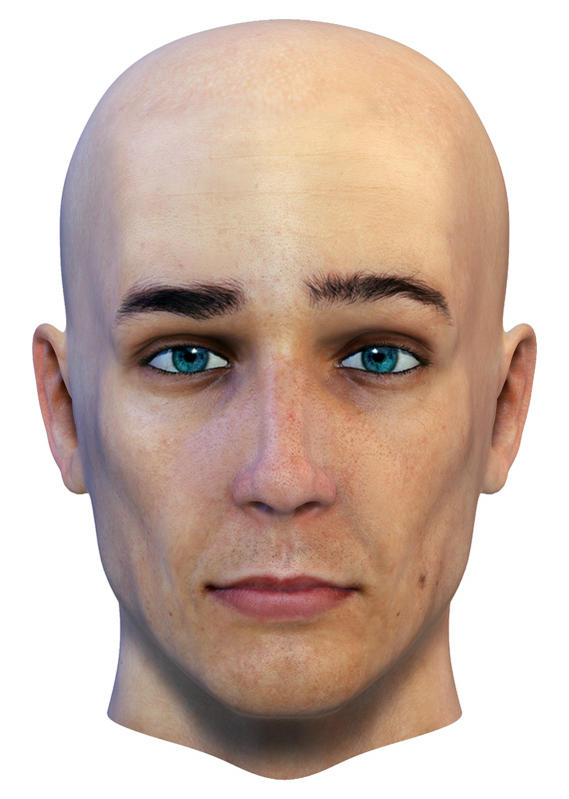
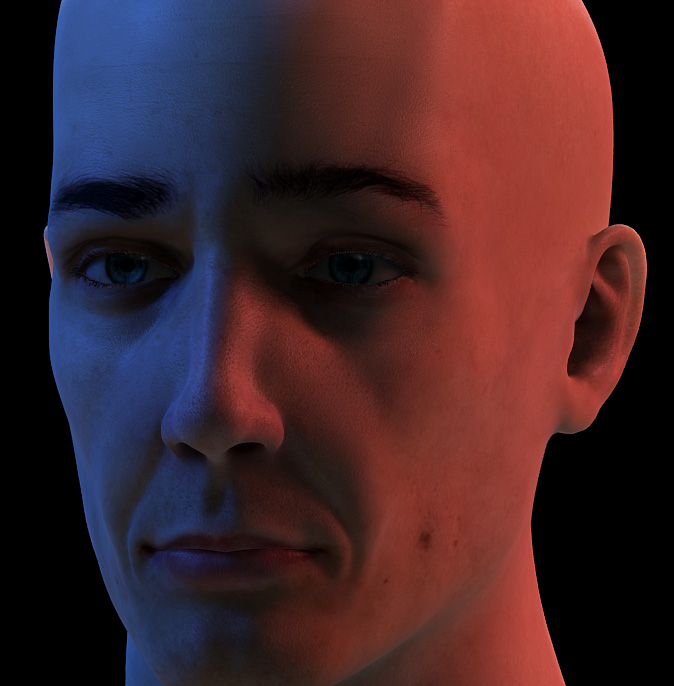
Till then, a full HD render closeup of my progress.
Basically need to fix up the back of the head and then pay close attention to tweaks and such about the place. For example - there is a slightly dark patch above his left eye that contrasts with a slightly light patch going down the side of his face off the top of his eyebrow. That sort of nitpicking.
The ‘smearing’ on the tip of his nose is because the uv map gets a little squishy around there. Other than that, happy with how the 4096px textures hold up to a HD closeup.
Incidentally, the photo sets I usually use come from here:
It’s the same photographer as the head photographer for 3d.sk, but Renderosity.com sells a fair few of the sets separately for $5-$15 ish, rather than paying for a full 3d.sk membership. I’ll do that one day, but not churning through image sets at a rate that needs it yet.
WARNING - There is full photographic nudity in many of the sets, but you are well informed by text before you stumble across any nude images. There are head only reference sets too. Mojmir is the name of the model I am using the reference images from for this project.
There are some areas that are a little smeary still, but they will be covered with particle hair soon(ish) and they aren’t that obvious. The eyes are a further rework of the eyes I’ve been using in characters for about 2 years now, each time I push them a little further. (Thats basically how I ended up with my current avatar btw…)
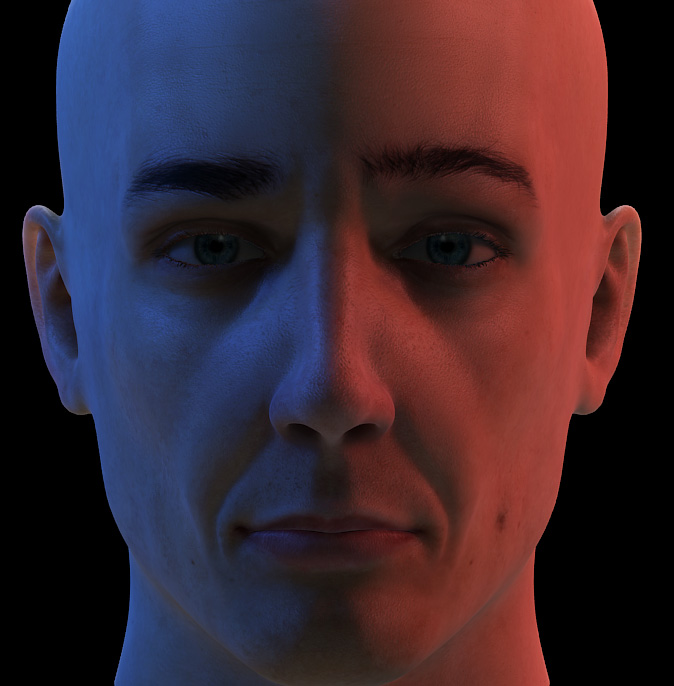
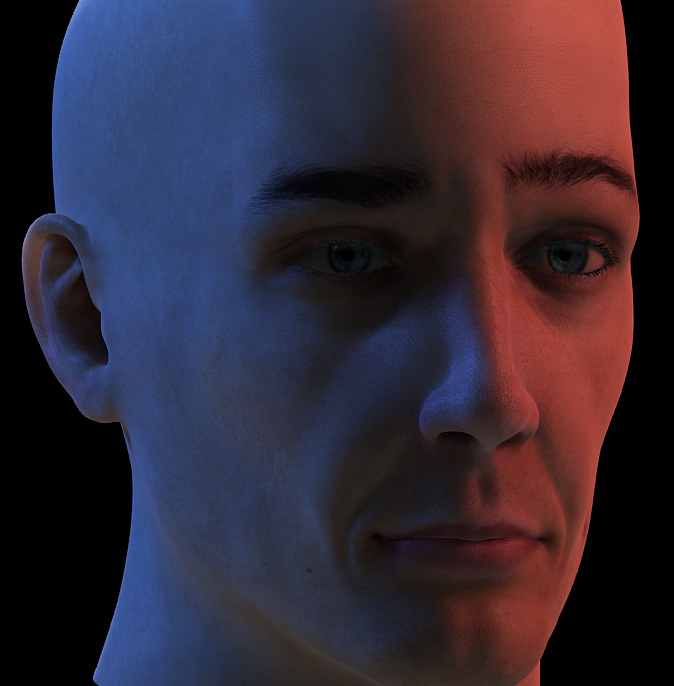
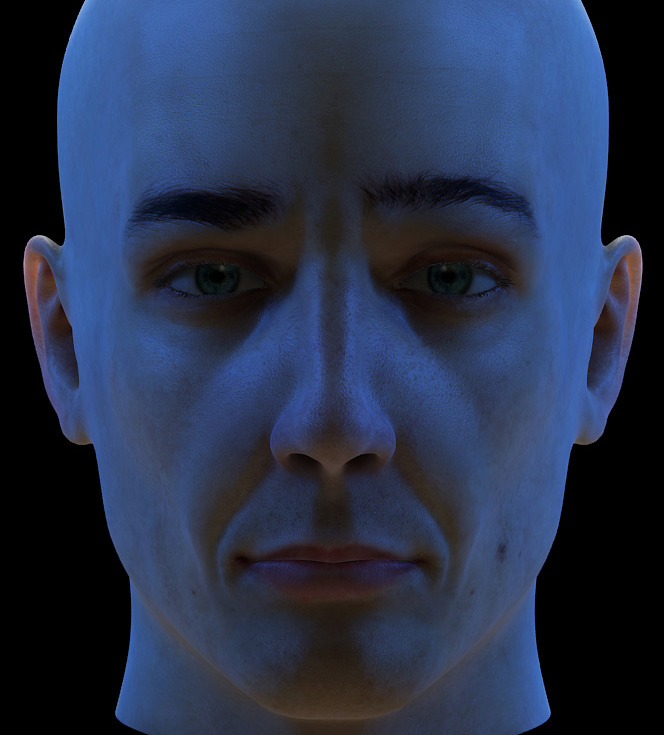
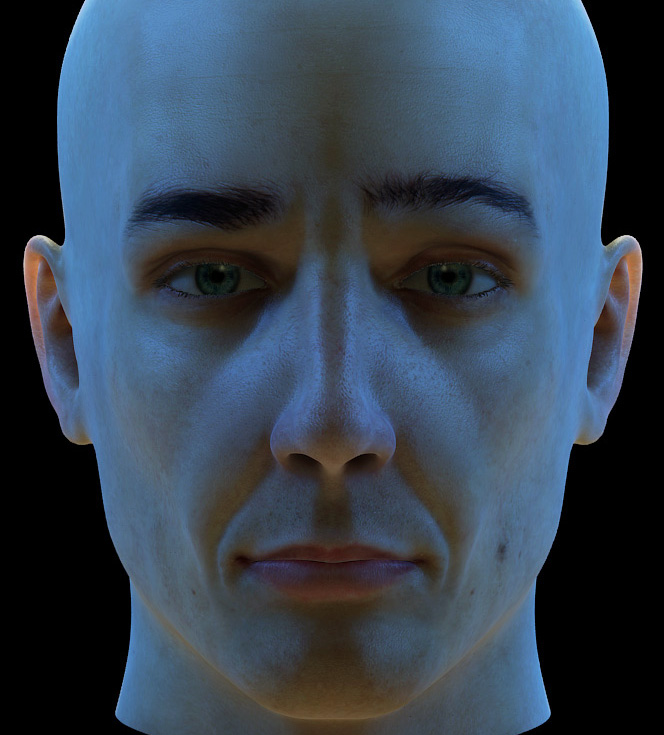
As for the following - 2 versions of three angles - the versions with more red are the original renders from Blender, the other versions I duplicated the image, used ‘auto colour’ in photoshop, which is basically ‘colour - auto - white balance’ in Gimp. I then dropped that auto colour layer to 50% opacity and merged the two. I think I like the second lot better, but from a ‘physically accurate’ point I’m not sure whether that is an improvement or not. Oh well.
(all thumbnails, LARGE IMAGES!)
Enjoy!
Hoping to get the entire character - armour and all - to that level of texturing. So it could be a little while. Although if I sat down and worked on this alone, it was probably one very solid day’s work from a texture/materials point of view.
Rendering at this resolution took about 12-13 minutes.
Probably about to figure this out as I am half way through watching a dvd on colour theory, but the red light seems to ‘flatten’ him out a little and the blue light seems to be heaps more interesting. At a guess it would be because the texture/material has proportionally a lot of red in it so it is just bouncing red back to the viewer.
Wow, nice. A thing though. His forehead is too squared off; you’re missing the lump of the brow, just at the rim of the eye socket, and his forehead should slope back maybe 3-4 degrees.
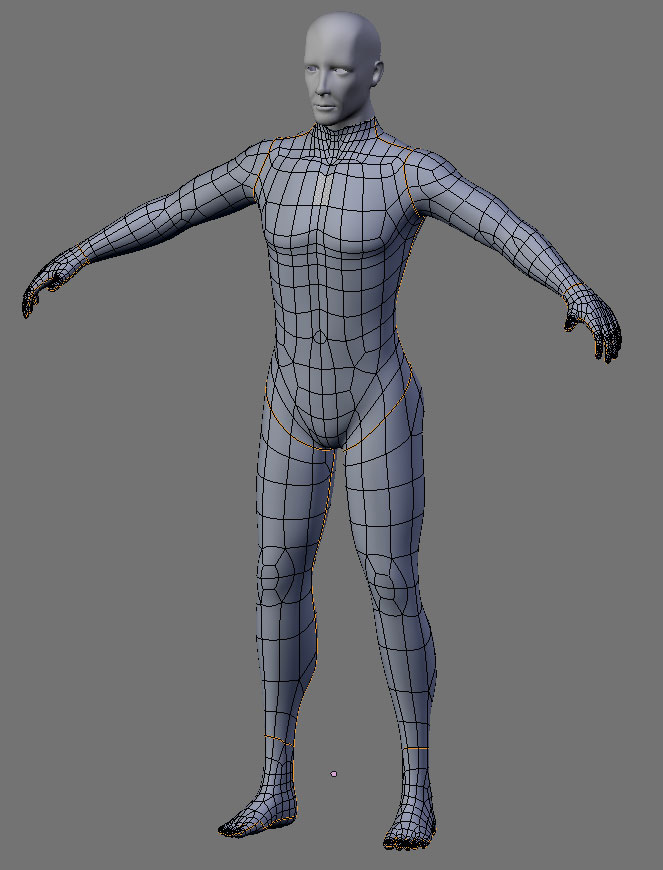
Well, in another thread here on BA.org, ( http://blenderartists.org/forum/showthread.php?t=145295 ) users have been very helpful giving topology hints and examples to someone wanting to learn. Kudos! That has to be one of the best aspects of the community style forum. There are some good resources popping up in that thread, well worth the look. One in particular is this one…
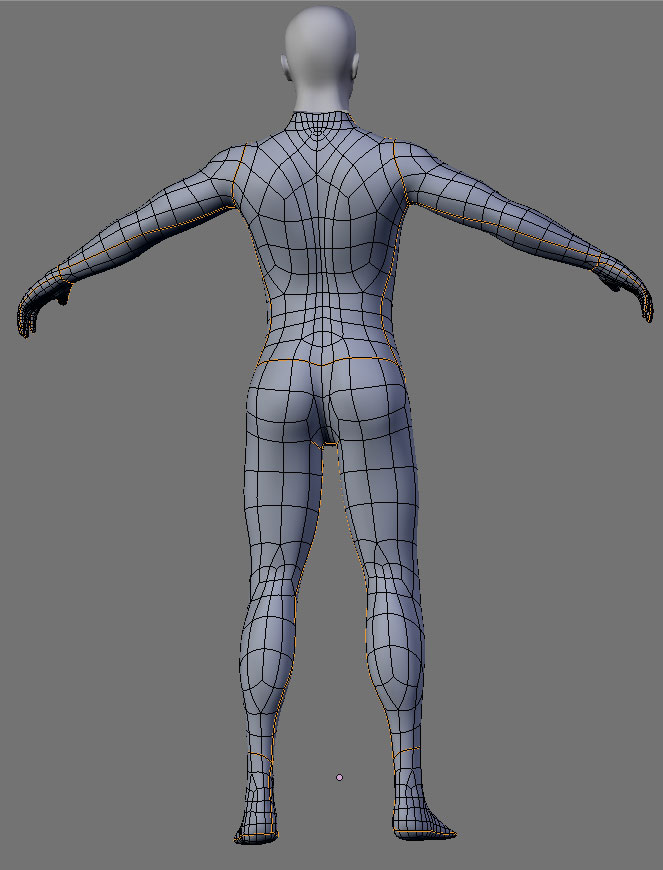
Not that there was much specifically ‘wrong’ with my current topology - the topology on the Spiderman character is amongst the best I’ve seen specifically for animation, particularly the way the loops flow from the upper torso (both sides) through to the arms.
Clean ‘flowing’ topology is important for stills and animation, but topology for animation is more crucial than helpful because the mesh needs to deform into other poses with as much ‘continuity’ as possible.
So, with that in mind, I decided to remake that topology for my character. Not poly for poly, but as close as I could get with a few changes here and there.
Triangles aren’t the cause of anything really bad in topology, but often they don’t help. So I removed a triangle here and there, but left some. Also, there are some areas along the middle line of the character with a ‘diamond’ (still a normal poly really) linking both sides of the mesh, mainly three on his back. I changed those so there is a continuous (I’ll have to double check) line down the centre of my character. This helps with anything needing to be mirrored, particularly shape keys. At the very least, I can still use the mirror modifier to make changes. The other modifications were to the neck, just so it would link in to my already made head, which is higher poly than Spiderman’s. Also, I kept my hand and foot mesh from the original character. The ankle might need a bit more work to flow nicely, but I’ll be doing another sculpt anyway for the muscles, etc.
One last thing with the topology - made sure there was one complete face loop that went under the arm pit and over the shoulder, to help with rigging/weight painting.
That is another thing about this topology - the polygons are all comparible in size and fairly ‘square’ which isn’t crucial to using displacement mapping - but it helps.
I didn’t realize you were working on a male character. I enjoyed watching your female character evolve. Thanks for sharing your work. It will help me (when I actually get around to do realistic people) and others a great deal.
linuxpimp21 - The male character is definately a more recent thing. The female character still isn’t ‘finished’, but she’s more or less on hold for now.
briannaolson - cheers and welcome to the forums! Thats at least two people finding the video funny now… http://au.youtube.com/watch?v=R-it7qdgE7g - the ‘original’ video, which is the data being captured by others. I think it’s probably the mix of a “serious” character with displacement mapped muscles etc doing a funky dance rather than fighting off orcs or whatever.
Not dead, just got put on hold for a while. (Working on a new steampunk project amongst other things…) I do plan to finish off a lot of WIP projects that I’ve started though, just in order of certain priorities, between retail work, small paid projects and all that.
Working with my modified version of the ‘spidey topo’ - with a couple more loops (one main one per arm and leg and a bit more topology here and there) the mesh is now entirely quads. I know I said a couple of posts ago they aren’t such a big deal, and they aren’t, but I realised I only had 3-4 to get rid of anyway and I could do so without drastically altering the flow of the mesh. I’m guessing with the original spidey mesh was designed for minimal polys (which is a good thing in general, cleaner mesh for rigging, less memory to render out) but seeing as I planned to sculpt muscles and use displacement, poly count wasn’t that much of a big deal.
The feet topology got cleaned up as well. Working with the base spidey topo also showed that it is really quite easy to add an extra edge loop or two if you need it. Not that my topology before hand was bad, it’s just that this is better.
There will be more progress, but probably not for a little while.
I still have the alpha version of the motion capture software too, but making the time for it (in this heat too - regularly over 40 degrees C the past fortnight) seems to umm, not happen.
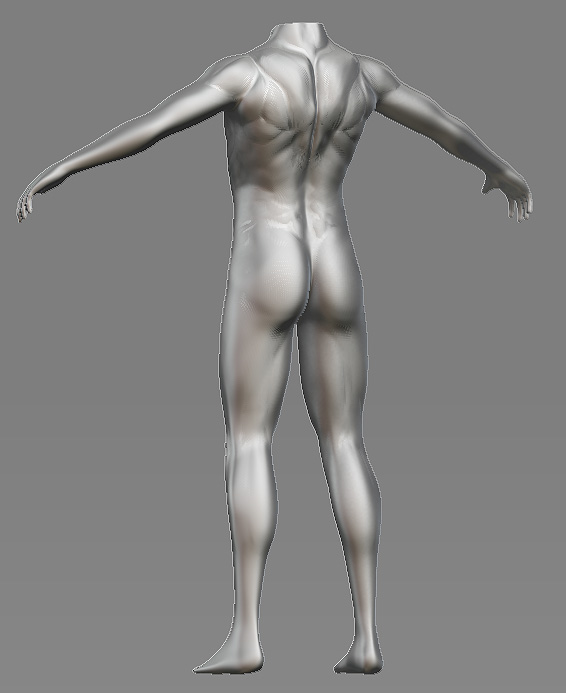
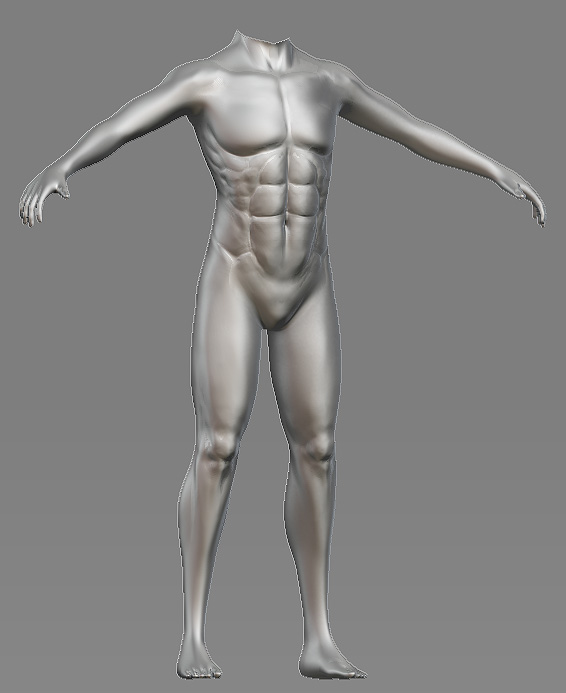
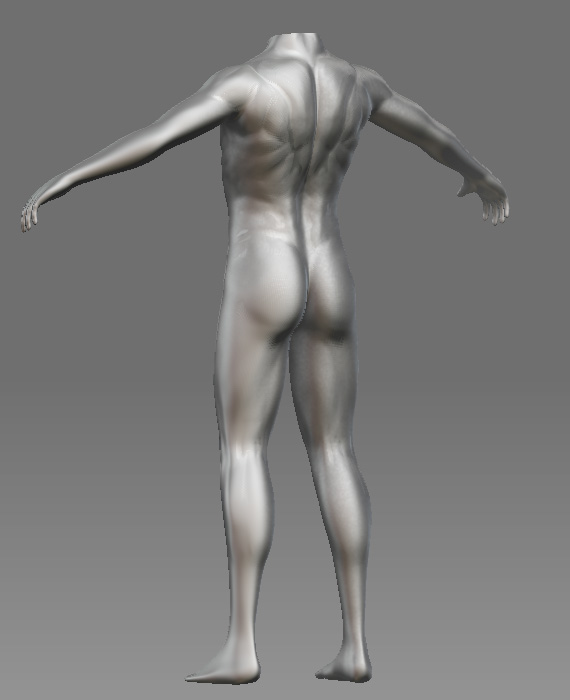
The arms muscularity in relation to the rest of the muscular body looks like a tour biker (“Tour de france” etc.). But really believable, ass i think they need arms musculature more for compensating the shocks from the surface and for steering of course. Me having not so much biking experience i must say.
lexi - should have pointed it out when posting, but the arms (except the shoulders a bit) haven’t been sculpted on at all yet. I do plan to bring the musculature up to an even level (of bulk and detail) when finished though.
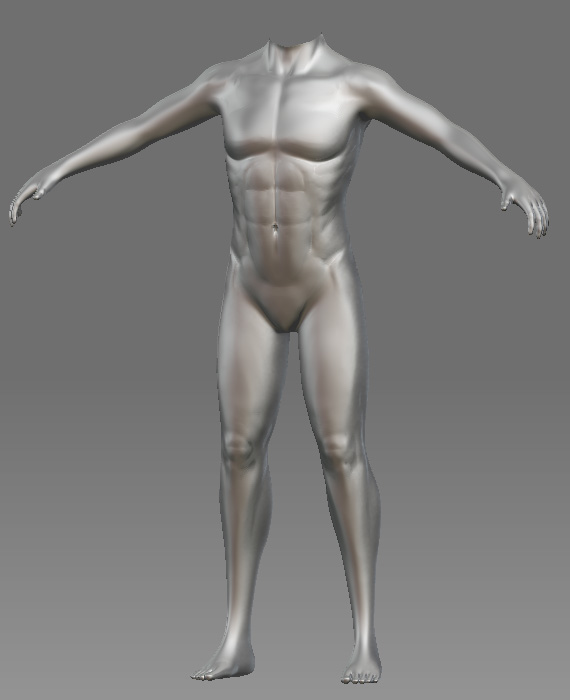
Minor update - actually softened most of the forms back a bit as well as neatening up some areas. He is to be athletic, but not necessarily a body builder.
Just reworking the areas I had already done, so nothing yet on arms hands or feet.
One more thing, the ‘silver surfer’ look just helps show the forms up when sculpting, will be proper skin at some point. May have mentioned that already, can’t be bothered checking.
Modelling
UV unwrap
Sculpting (Zbrush integration as well)
Displacement
Rigging
Texturing (Inc SSS skin stuff)
Setting up for Mocap (?) - experimenting with that now…
Lighting (?) Basic stuff, probably more links to appropriate resources and some .blend file templates
Rendering (?) Hints more than anything if I do it.
Well, I’m thinking this is more practical as a wide scale resource (for now) in the form of a section on the Blender Wiki. That way I can chip away at it and people can see the progress rather than wait for the whole thing in video form. Not only that, but others can help.
http://blenderartists.org/forum/showthread.php?t=147914 - the thread discussing such a wiki project. Feel free to discuss there things you would like to know or helpful resources you have seen so far on creating humans in CG and more specifically with Blender. The idea is to compile what I know with the tutorials that area already out there, put the knowledge in one spot and make sure it’s up to date.
Not sure which thread of yours to post this in now, with so many floating around on the subject. I have a point regarding the specular map you show in your head tutorial. I was under the impression that a spec map should emphasise particularly shiny areas (i.e. oily or wet) of the face, such as the surface of the lips and the “T-zone” of the brows, etc, but yours appears only to be a bake of those areas that (due only to shape from what I can tell) tend to pick up specular highlights. Is this intentional, and if so what do you use to achieve the effects I mention?
That spiderman topology pic seems to have interested a lot of people. It’s certainly very impressive.
The spec map part was interesting and needs more work. The book I was reading for reference was Maya based (they tried to keep it as software un-specific as they could) and they had a slightly different way of doing it that I’m still trying to find a ‘proper’ way of duplicating in Blender. I think the general idea is to bake a map that catches everything with Spec anyway with details of the pores and such from the bump which you can then use as a base map to play with - paint in more spec in some areas, less in others, play with brightness and contrast to get oily skin, etc. Their map was much more even as a base map, mine picked up more of the overall shape of the head like you said.
Thanks for bringing it up though, things like that will help when I actually get to doing the documentation more formally in the wiki.
As for the multi-thread posts… I’ll be using the two characters, so I posted in the two threads as well as the main one in News / Discussion. Regularly I’ll keep the posts in the news and discussion one unless they directly relate to either of these character studies.