I made this topic to ask:
How do I correctly model a head fully w/o using box modelling or modelling from a completed mesh, but just by using contours.
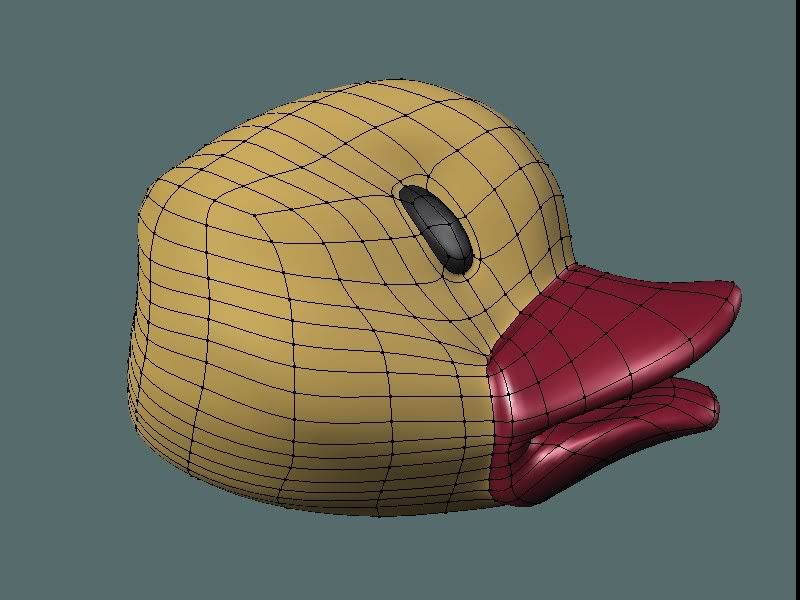
Here is the Duck I am modeling (final result will be a rubber duck)
When i refered to stretch marks i was talking about the mistakes in how the loops were set up around the side of the head near the back.
If you look at it you will see alot of stretching near the back… so the face isnt smooth and by stretching i mean sort of like wierd loops that cast shadows that make it look wrong:
Its faint but if you look near the back of that head there are some shadows that make the mesh seem to have wrinkles.
If you reset up the lighting to cast more shaddows on the side of the face you will see them better and see what i mean.
You get rid of the stretching by adjusting your UV maps so the area covered by a quad in the UV Image Editor is roughly equal to the area covered by the same quad on the model.
The Holy Grail of UV unwrapping algorithms is to do this automatically, somehow. In the real world, it usually takes some tweaking to get a result that is “good enough.”
Your problem isn’t really one of stretching, but more of a surface that’s not smooth. Without knowing the exact procedure used to model the piece, I really can’t advise on what’s needed to avoid it.
If however, you alt-right-click one of the verts near the back of the head, then hit the smooth button in MeshTools, the surface improves. If the same procedure is repeated for all 4 loops that go up and over the head, the result is a little something like this:
Of course, doing the smooth operation more than once on each loop would yield better results - you may just have to scale all the affected verts up a little to compensate for the shrinkage that occurs. But that’s no big deal.