Hi,
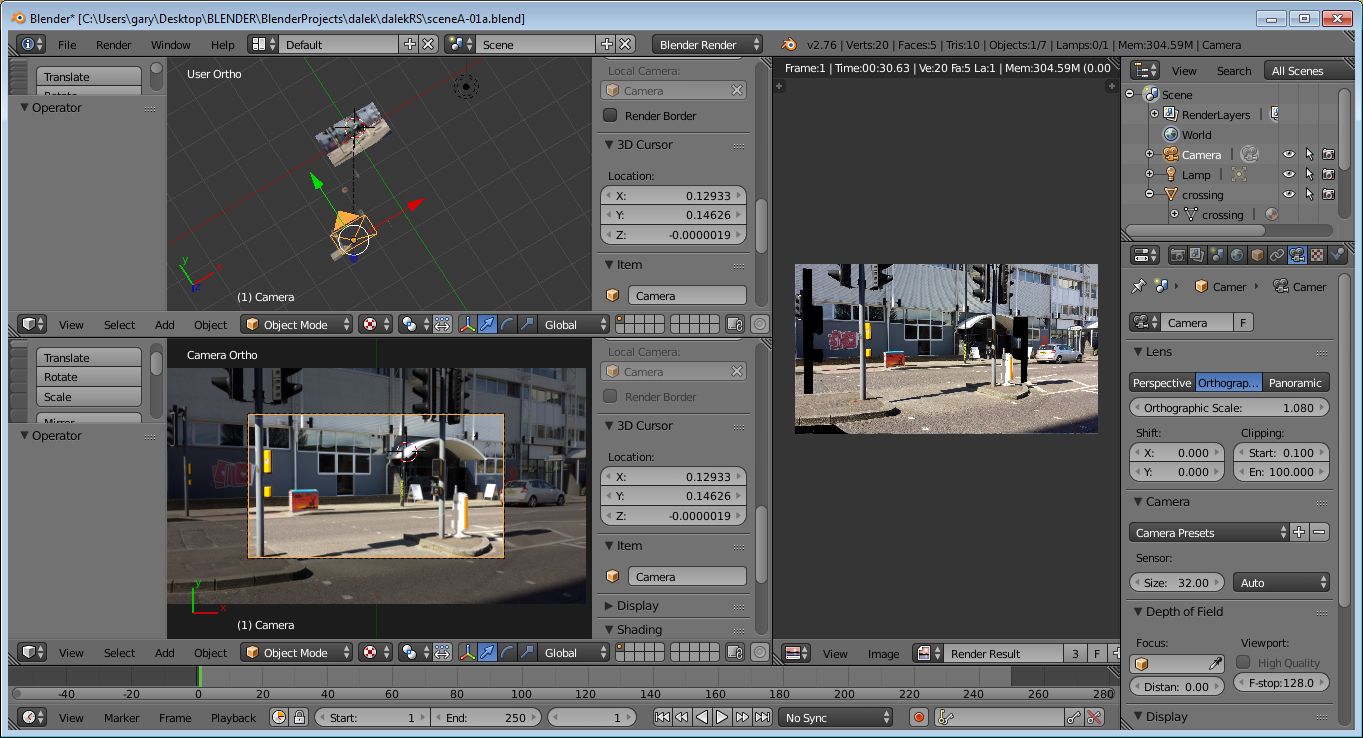
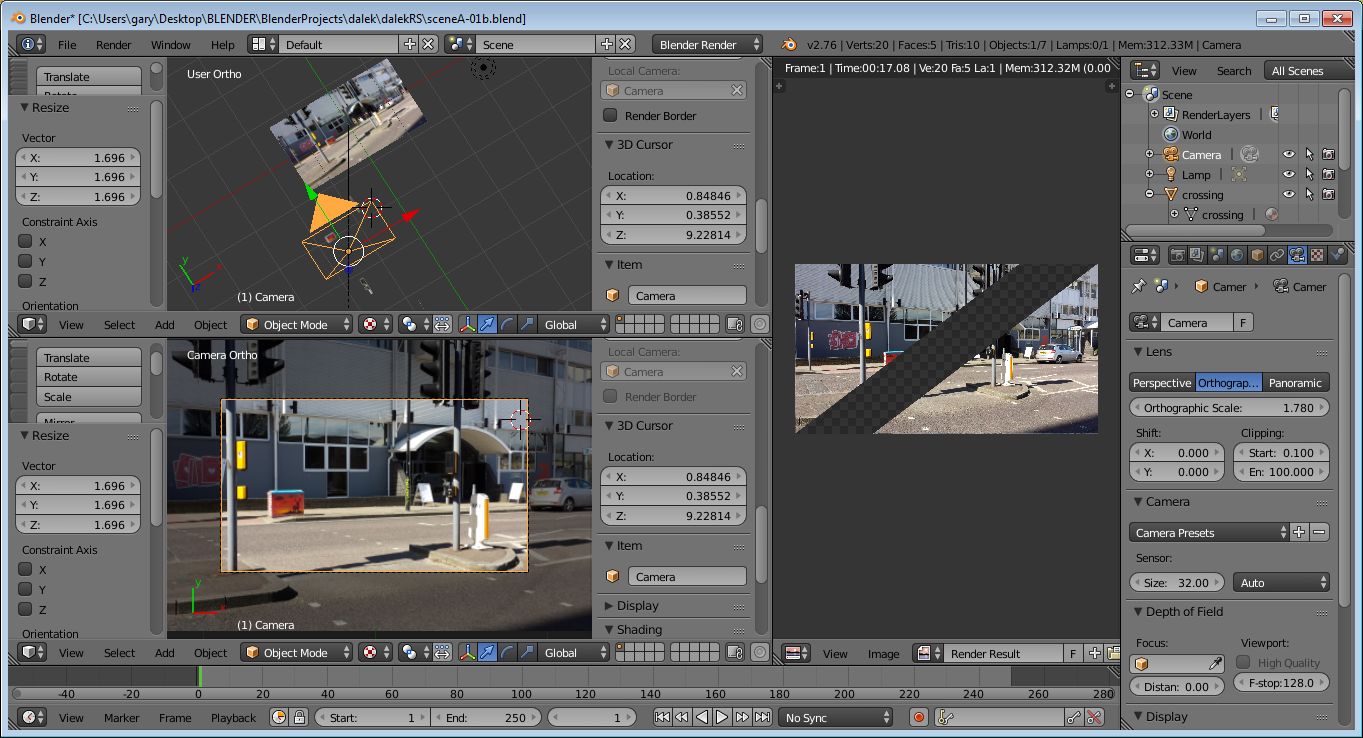
I’m using an ortho camera in blender 2.76b, and i’ve got a problem. I’ve got inages imported as planes, images apart from background have transparent areas and all materials are shadeless. What i’m wanting to do is zoom in on part of the picture. I’ve tried changing the orthographic scale (sceneA-01A) and i’ve tried scaling the objects (sceneA-01B). In both cases there is a problem with the render being different from the camera view in the viewport. What is causing this? I’m obviously doing something wrong, but what?
Thanks,
Gary
I opened you file (A-01a) and it works perfectly - besides of that you did not appended the images to your uploaded file so that I am seeing only white planes.
But after a few test renders suddenly something went wrong and I got a diagonal transparent bar in every new render - is that the problem you are talking about?
Oh dear, i’d forgotten that the images wouldn’t be saved by default in the blend file. That problem is what i was experiencing in the second blend file (01b); in the first (01a) what it seemed like is that the background layer wasnt scaled at all in the render but the layers nearer the camera were being scaled. In the viewport camera view everything looked ok but in the render everything went out of alignment. I’ll try and get some screen shots. If you’re seeing the diagonal band in 01a then maybe that’s something that happens after a few renders. I had thought that it was my scaling of the planes that somehow introduced it. (I’m very inexperienced). Did you scale the plane? If not, then perhaps I guessed wrong. In any case it seems to do some strange things.
Thank you for replies. It was my intention to use window mapping, as I’m creating some objects which contain only foreground elements from my background, I can then easily animate things going behind them. There may well be better ways to do this, but this is something I read about in a book for a much older blender version, which I’m adapting as best I can for use in the latest version. I’ve attached some screenshots, maybe they will make it clearer than I can explain in words. This is all quite experimental for me.
But I don’t think that using window mapping will cause the problems I’m experiencing here - or at least, I feel that it shouldn’t
The screen shots have the same name as the blend files. In 01a I tried zooming by changing the ortho scale of the camera; I’m sure I’ve been able to do this successfully before, but here it has gone wrong. As you see in the screenshot, with the viewport in camera view at bottom left, the camera has zoomed in and the viewport shows exactly the result I want. But the render on the right shows the background still zoomed out with no change in scale, and some of the foreground objects apparently scaled but now they have lost their texture.
In 01b I tried zooming by scaling the background plane (and all the foreground elements are parented so they scale in unison). This resulted in a render with a broad diagonal transparent stripe across the frame, as noted by LukeV1. I had originally assumed that this had somehow been introduced as a result of the scaling, but apparently LukeV1 has observed this behaviour from my 01a blend file, so it seems to be something that kicks in after a few renders.
I’m completely at a loss to know what is going on - whether it is due to incorrect settings - though I don’t think that should introduce the transparent band - or whether I have uncovered some kind of bug.
When comparing the “Texture” viewport to the render you’re comparing apples and oranges.
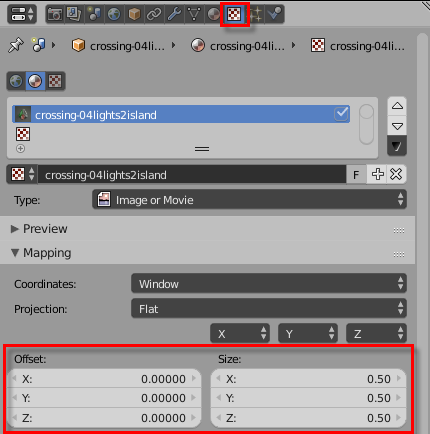
The “Texture” viewport mode does only and exclusively show the textures in UV coordinate mapping, regardless of what mapping you actually chose for that specific texture. And as soon as you switch the mapping for the texture from Window to UV, you will see that the render indeed matches the “Texture” view perfectly:
From my understanding “Window” coordinates always map the texture to the full view area of the camera (top left corner to bottom right corner). So, there is actually no “zooming in”, as the texture just follows along.
You will have to directly change the mapping parameters if you only want to see a portion of the background image: