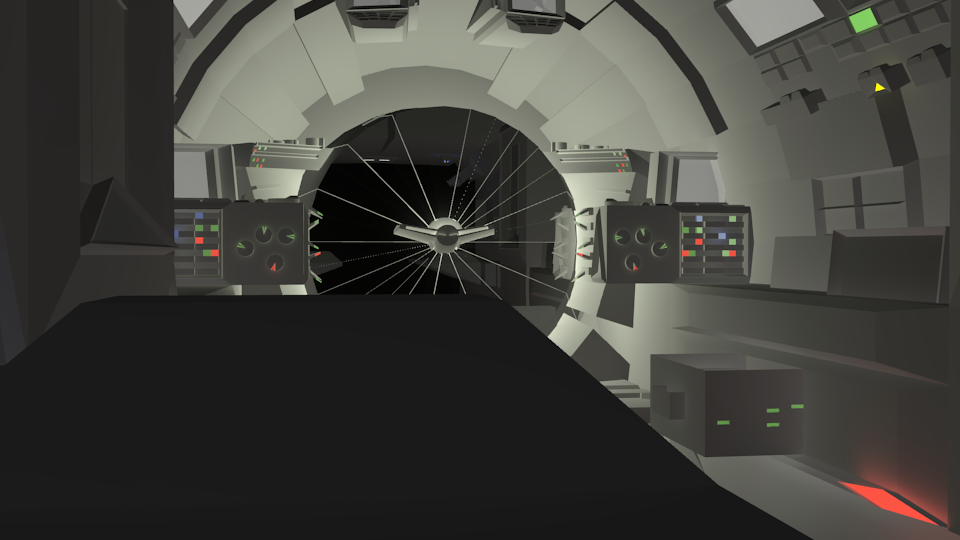
Light flashing is not intentional. The only lighting in the clip was the "LED"s on the computer boards and some on the screens. Those were created by using an emitting mesh with indirect lighting enabled. I don’t know how else to light up the thing. The light source that appears by default is gone. I deleted it. But for some reason the entire back area glows when it should not. I want it to looks clean, with nice white reflective surfaces for the walls and a clean lighting system for the Little lights on the computers and stuff. So far its just a grey mess with some limited lighting success. The only lighting I understand is using mesh’s to emit light or creating a halo which stops emitting light as soon as I join the halo mesh to the main model. There is some node thing I heard about, but it seems way to complicated for me. I would not know how to use it and if it would be better than what I have now.
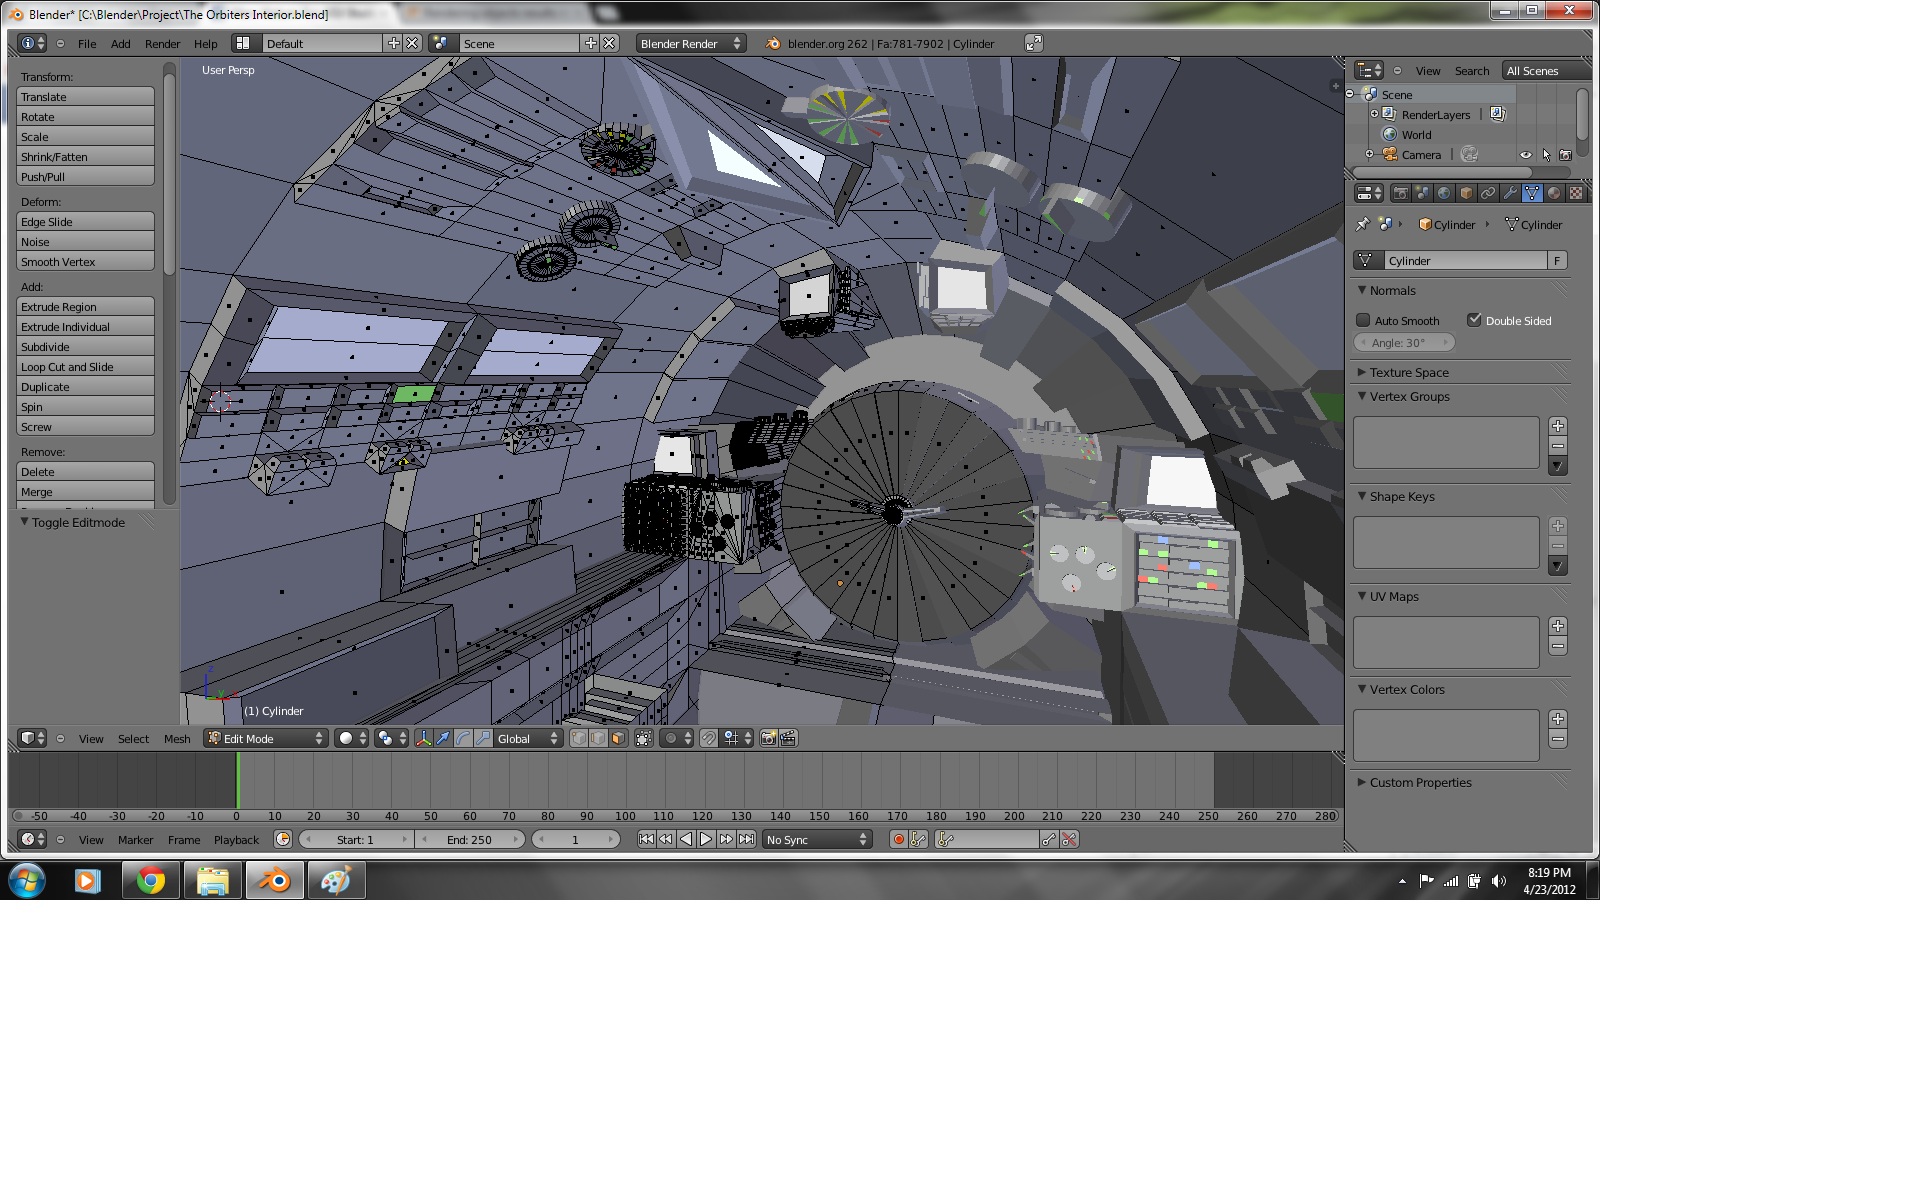
I really want to get rid of those overlapping faces, so I’ll tell you how I created the model’s interior. I basically got a cylinder mesh and then deleted the faces on the top and bottom, leaving a hollowed out middle. From there I joined a floor mesh by using a plane, then began adding instruments and computers by shaping out the mesh from blocks. Is there a cleaner way to do this?
That’s a very messy mesh. I can see on the engine where the faces overlap. You’ve got larger faces overlapping all the smaller ones. If you do some multi-loopcutting and then remove the doubles you should be able to fix it. Given the prevelance of overlapping faces in the scene I wouldn’t be surprised (although I can’t see any from these images) that that might also be the problem with the emitter meshes creating the lighting. When faces overlap, Blender can’t decide which one to render so it flickers between them. If you have an emitter material on a face and have a non-emitting material on an overlapping face it will create a flickering light effect. It looks like the flashing light is blue so I’d take a close look at any blue emitters you’ve got in there. But I would give the whole scene a look through to check for overlapping faces. I see a lot of them in these pictures.
If you don’t want to have everything connected to the same mesh, which would require an enormous amount of subdivisions for something this complex, you can separate parts of the mesh inside the same object, without having to keep the vertices connected. That can sometimes create artifacts where faces criss-cross perpendicular to to faces they’re not attached to though… you don’t want any faces to overlap at all.
How to you mean loop cutting? Do I select the entire mesh and then hit ctrl R and cut it in half? Then it w and ‘remove doubles’? I’m a bit confused thats all…
whenever I select the mesh as a whole I can only cut certain parts because there are a lot of faces (Using ctrl R method) and when I tried cutting it in half it just made a circular line around the mesh and then told me that 0 vertices were removed when I hit to remove doubles…
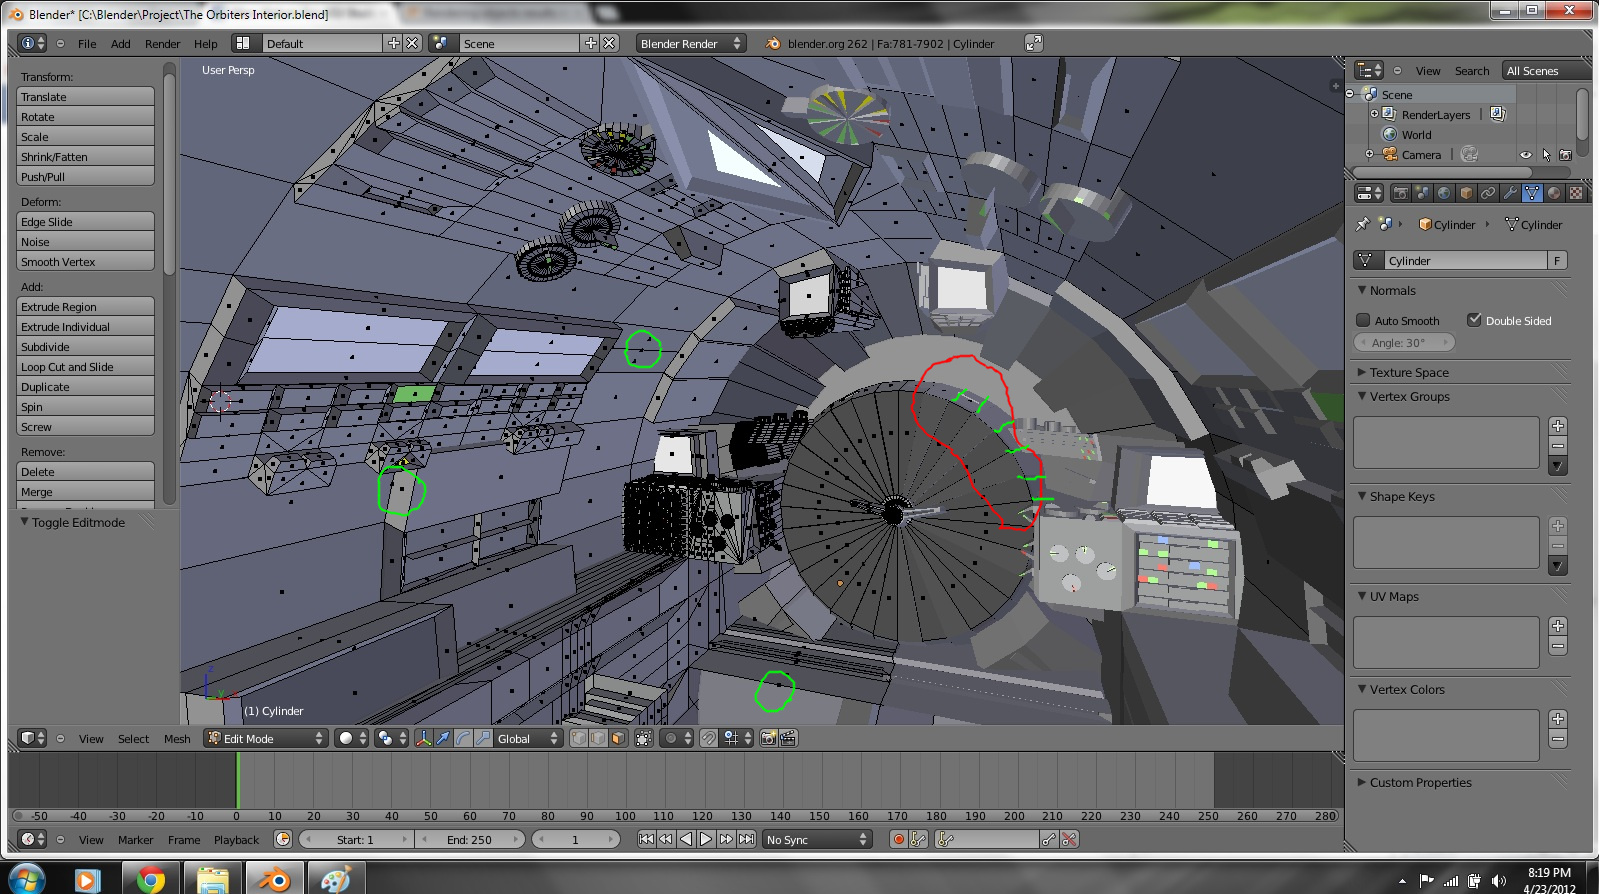
I circled one of the main problem areas in red. The green lines are where loop cuts are needed (CTRL+R and then use + key to increase the number of cuts). You can see that on the left there’s a lot of edges connecting to 1 face on the right and there’s a bigger face underneath underneath all of those faces. I also circled in green a couple other examples of areas where there are faces overlapping each other. You can tell because the black squares that indicate a face are exactly on an edge, or off-center of a face. Anywhere you have more than one black square in a single face or not in the center of that face is where there are overlaps. The simplest ones to fix are where the center of the bigger face is exactly on an edge because it’ll probably be an exact number of cuts… if you run into any that are even a hair off-center though you might have to go in and delete them by hand and remodel.
Another way to tell, but less reliable is if a face in the 3D view is lighter or darker shaded than all the faces around it, or if a region of faces is, that usually means there’s a bigger single face overlapping that area.
If you can click on the square directly it will usually select the face it belongs to. They’re really tiny though so it can be frustrating.
Just look for anywhere where you have an edge ending in the middle of an adjacent face. Those are probably problem areas.
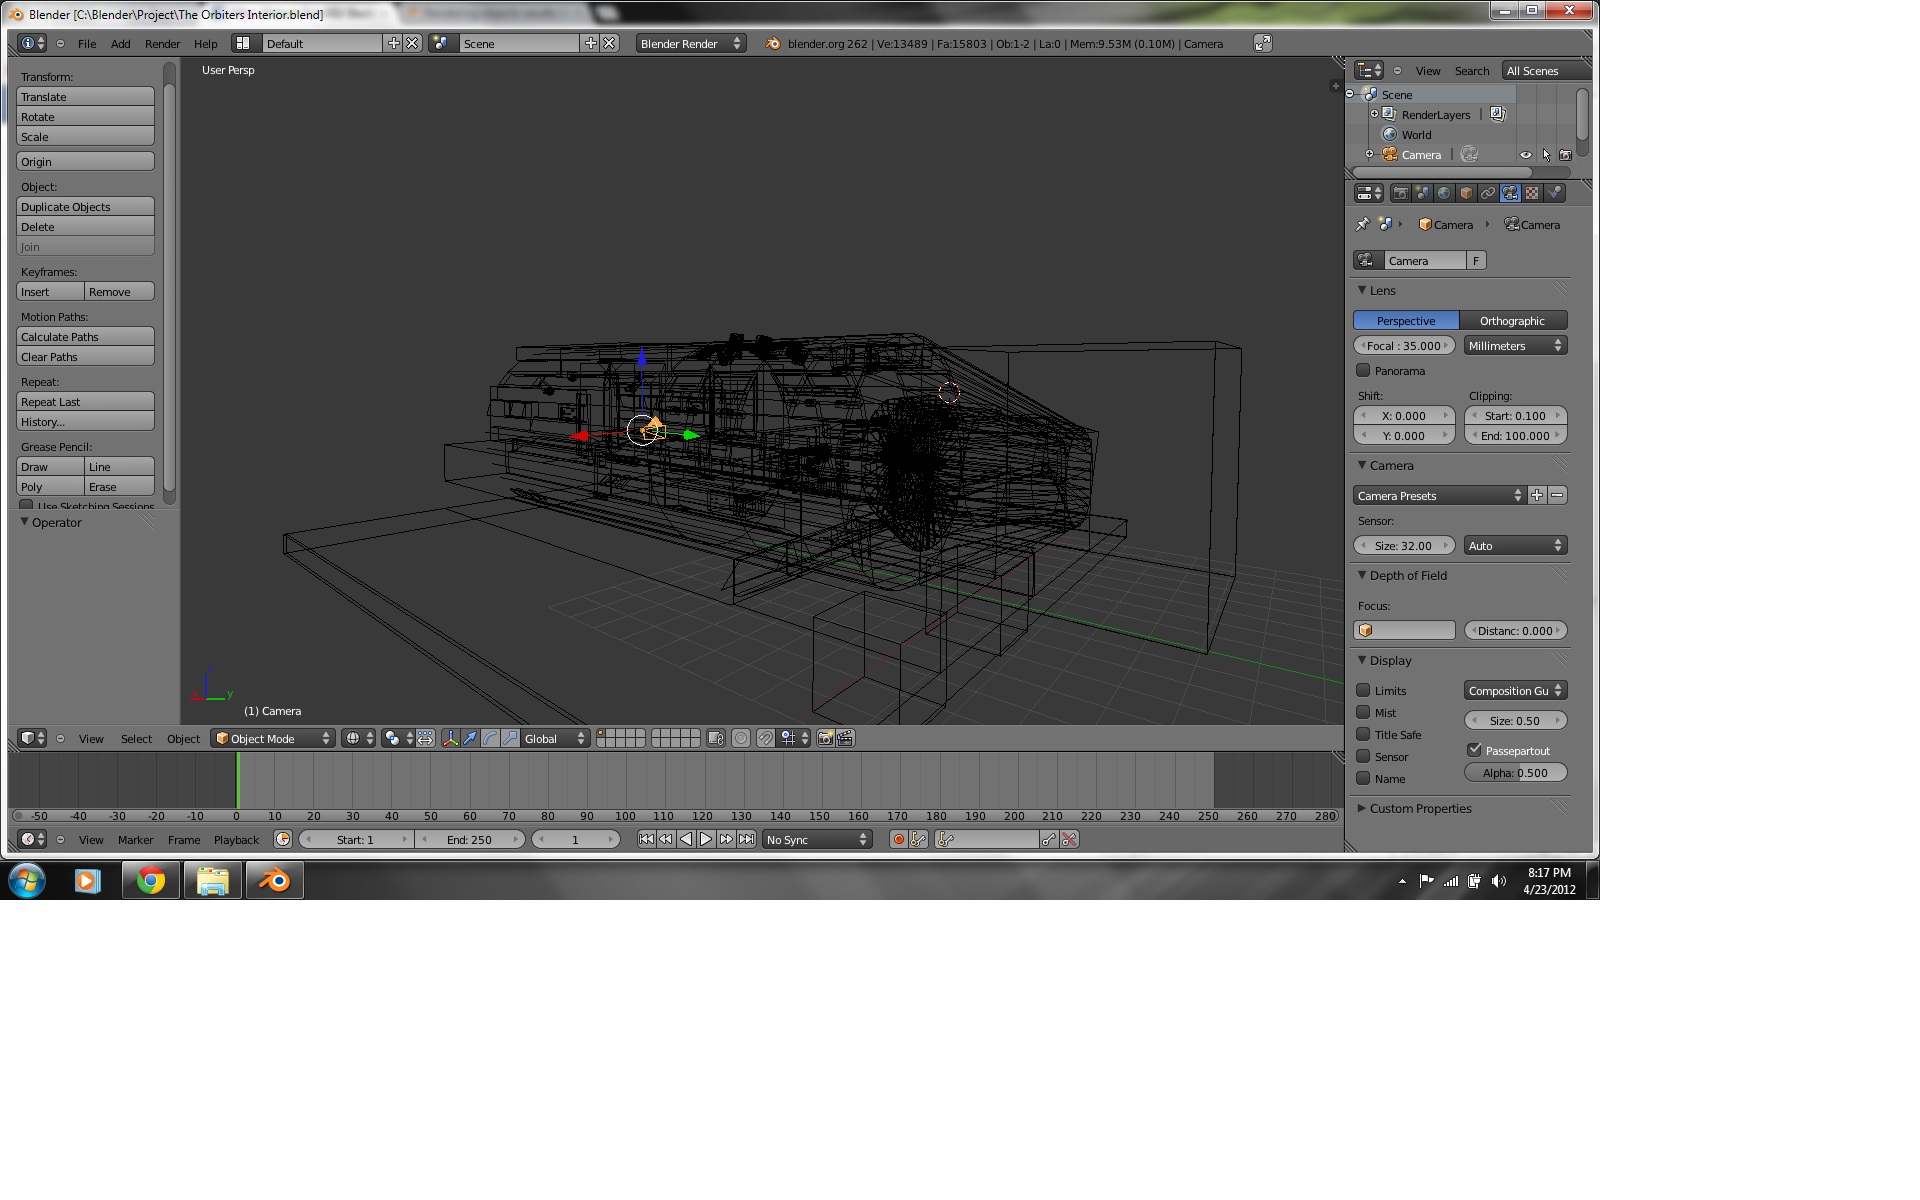
Also, it looks like you have multiple objects contributing to the mesh. It’s also probably a good idea to make sure no faces from the different meshes are overlapping too. That’ll be harder to see in the 3Dview but it will still create problems when rendering.
There are often a lot of good reasons for breaking down a scene like this into many independent Blender objects, perhaps each in separate files, which are then linked into other shot files or scene files. If, for example, you wanted to change the color of both of those video screens at once, the easiest way to do that would be for them both to be instances of the same object. You deal with the modeling of each object in turn. Then, you address the “assembly” of the parts into a whole.
This greatly simplifies the task by reducing it to a series of problems that can be solved independently, and/or by a team of people.
The “assembly” process can be aided by an old-fashioned idea: a scaffolding. A very simple geometric object, perhaps with no faces at all but only “points in space” to which specially-prepared Empties in each component object can be snapped.
There might also be opportunities for compositing here. In the model for the interior, certain objects might be represented by correctly-sized proxy objects that do not appear on-screen: they are “holes,” but of precisely the correct size, into which separately prepared shots of the objects themselves will later be inserted.
I think your recommendations are way beyond me Sundial. I am trying to clean my mesh but with GREAT difficulty. I am using Mirror modifier in order to create the interior. But for some reason I cannot in face delete or touch parts of the mesh when that modifier is enabled. As for linking, and then assembling it like you said. For me, thats impossible. Sure I could model each part individually. But I’d spend ages trying to place it symmetrically. unless there is another way to have it done for me. ATM I just don’t know how. Thanks Mr. pickle for pointing out those mesh’s for me. I can’t select them though to delete them. But I’ll try disabling Mirror modifier and doing it again
I think I fixed it. I never applied the modifier. I had it selected and it would work. But never clicked applied. I tried deleting doubles and over 700 vertices were removed. I feel SO stupid.
Does anyone know how to make my ship look less paper like? I mean the interior material is mostly a silly greyish color that looks fake. I want a more solid realistic appearance
Got any suggestions before the thread is marked solved?
I’m glad you got things fixed.
Some reflectivity would help the material look more metal-like, it would increase render times though.
So long as you have it lit up brightly like that, there’s not much gain from having all the buttons set as emitters too. It’s just going to eat up render time unless you plan on darkening the scene or getting up really close to them.
I’m bust fixing a problem where it seems everything inside the damned ship is emitting light and blinding the camera. I will have it fixed promptly…I hope.