Blender has many ways of adding soft-body simulation, but I’ve always found it takes a while to get it right. I often want to add just a simple ‘lag’ action to pieces of the model, such as antennae, backpacks, hair strands etc. I made this add-on some time ago in an ugly sort of way and I’ve found it handy. I gave it a re-vamp, ported to 2.8 and thought I might share it in case it’s useful for someone else…
Select the deform bones in your rig that require the soft body treatment
From the RigFlex tab in the sidebar, hit the Initialize button which will
Duplicate the bones into a new bone layer
Add a ‘copy transform’ to the new bones so that they follow the original bones for now
Modify objects with an armature modifier, or parented to the original bones to use the new bones
Animate the model as required, then use the RigFlex ‘Bake’ button which will
remove the ‘Copy Transforms’ constraints
add keyframes to the new bones to simulate a very simple soft body action over the specified range
To change the animation, use the ‘Free Bake’ button, and ‘Bake’ again after the change.
More detailed instructions:
Note: I’ve used a very simple simulation model on purpose. It’s just a ‘first order’ lag with a single ‘stiffness’ parameter from 0 - 1. A mass/spring/damping model isn’t that hard to code, but it’s hard to get the right result without a lot of fiddling. I just wanted a no fuss result. The other soft body methods are still available if required.
Also, not long ago I noticed an older add-on which has a similar aim. Jiggle Armature. If you haven’t seen it, you may want to check it out as well. Thread here: https://blenderartists.org/t/jiggle-armature-2
@CYNIC78 Sorry, but I think collisions would be beyond my ability.
It’s possible to add limit constraints to bones in the simulation layer. I had been thinking to add a panel to assist with this so that you could pose the bones to be simulated in the limiting position and then click to add the limit in a given axis (eg -Z). This could help to stop fingers and elbows bending back too far, or hair going through the scalp. It might help in a small way…
Ok thank you for answer. I think limit position (or rotation?) in local axis option would be helpfull. It could be even better than collisions, cause it don’t need extra calculations for engine. If you could add such feature it would be really cool! Thank in advance.
Thanks so much! What a simple, easy to use and helpful tool for this purpose. I’ve just tried it on a simple mesh hair simulation for a character, and it works a treat. I literally jumped for joy!
Nice video, this makes it easy to see what’s going on.
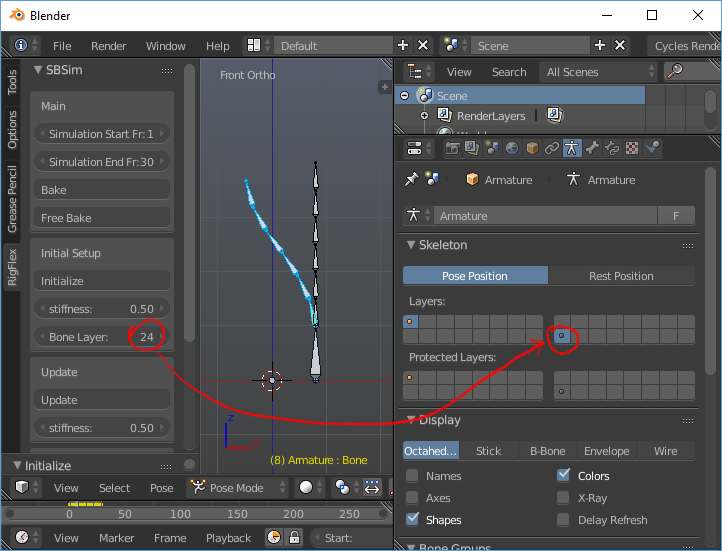
I think the add-on is probably working ok. When you hit the Initialize button, a copy is made of the selected bones and these are placed by default on bone layer 24. (You can select the bone layer in the panel) These are the bones which receive the simulation. You won’t see them unless you enable the layer in the armature panel.
If you had a mesh deformed by the armature, you would see it receive the soft body effect as it is modified so that the vertex groups now point to the bones on layer 24.
The idea was to hide the mechanics of how it works a little bit.
Hi THANK YOU IT WORKS !!!
I realize now that I forget to click initialize…if only clicking the bake button will auto initialize if it was not but it’s ok ! THANK YOU !!!
Yes, you’re probably right that auto-init would be handy. I used the addon myself recently and found it slightly annoying to initialize, set frame range and bake.
I’ve updated the 2.80 and 2.79 versions to first initialize selected bones and set the RigFlex frame range to the scene frame range if you hit bake on an armature that has not yet been initialized.
The 2.80 version also has a few changes to suit recent API updates and let it work on the latest version.
I first made this add-on for Blender 2.79! Blender’s come a long way since then! There are more well known addons like WiggleBones around, but I still use RigFlex myself fairly often. It’s just very simple to add a little flexibility to a bone chain after the main animation is done, and easily be reverted if needed:
The original tutorial video is still fairly relevant:
 Thanks!