Hello Blender community!
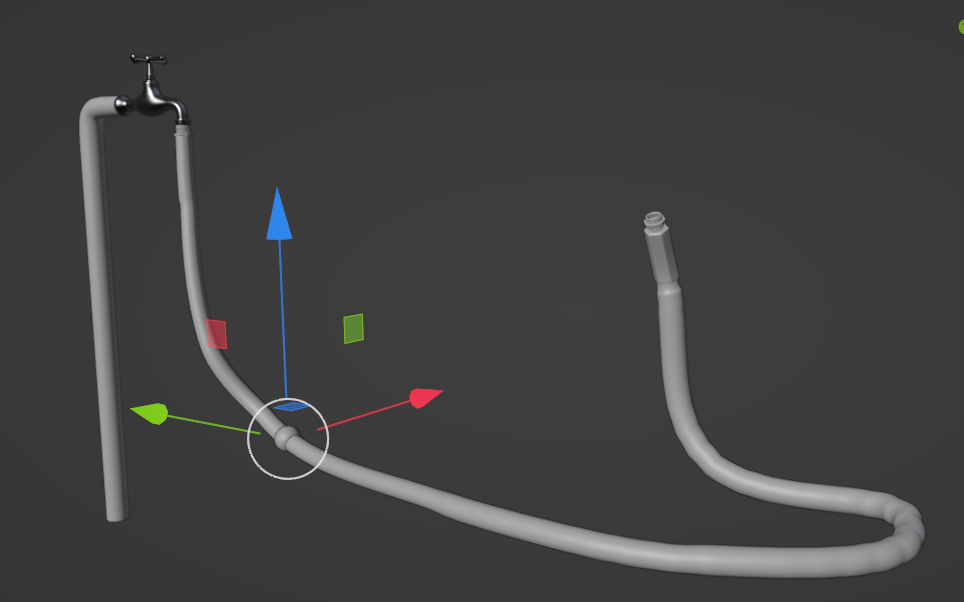
I’m seeking advice on achieving a cartoony water effect moving inside a rigged pipe in Blender. I’ve explored lattice and shrink wrap methods, and they work well when the pipe is straight. However, when the pipe is posed with bones, manually animating the lattice or shrink-wrapped object becomes challenging.
Question: How do I limit the movement of the lattice or shrink-wrapped object to stay inside the pipe mesh when it’s rigged with bones?
Any guidance or alternative methods would be highly appreciated!
Attached is a video demonstrating the current setup
what about using a curve as a base for the hose.
model the hose with small part of the hose + array modifier+ the curve modifier on that curve. (u can choose different object for the ends)
then you can do the same thing for the lattice object or what ever you’re using there for the bulge (curve modifier and and animate it on an axis it will move along the curve)
@cgPixel That’s interesting suggestion, i am sure it will work.
Right now this shot is animated with character and pipe is already animated, so can’t remodel it. Is there any way we can the
current rig.
@tajinder_pal is that hose rigged? if we can see the rig?
if not what i’m having in mind is a curve following the hose hooked to the same rig animating the hose (animation must be in the rig not the mesh)
so the curve will follow and use it for the last step only without remodeling the hose.
sphere = > curve modifier -? and animate on the corresponding axis.
tip: you can extract an edge loop from the mesh itself and convert it to curve
if it’s not in the center you center it using 3d cursor by selecting the two opposite vertices in the hose and get their center for each point in the curve
Yeh . i think we are going in right direction.
It still show some challenges. After hook , curve is not perfectly bending/deforming with the rig. Any idea on this one ?
i think you will need enough subdivision on the curve and enough hooks as per rig bones
what’s bending the hose need to bend the curve and the curve at same resolution as the hose
i think you can add armature modifier on the curve. for the same rig and ditch the hooks
just checked after i typed the hope of armature modifier but i didn’t find an example on how to use armature on curve (can’t do it myself since there is no vertex groups)
so try to have enough hooks to match your animated bones
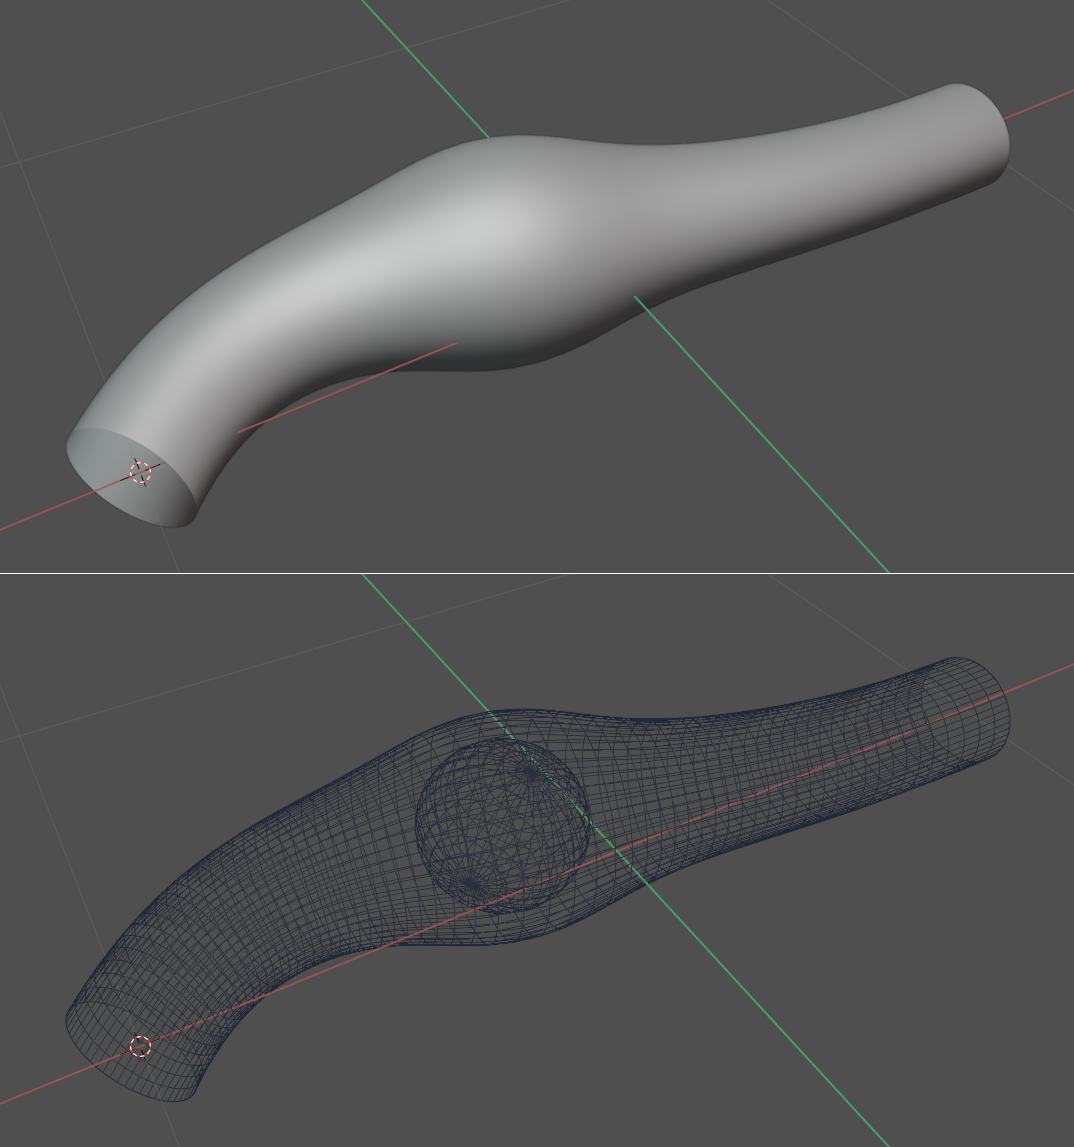
You have a long skinny tube that is armature deformed. You want to constrain a sphere (for shrinkwrap) or empty (for cast) to the center of that tube. Your tube isn’t straight and you don’t want to remodel it to work with curve deformation instead.
Additional assumption: you have reasonable topo on your tube.
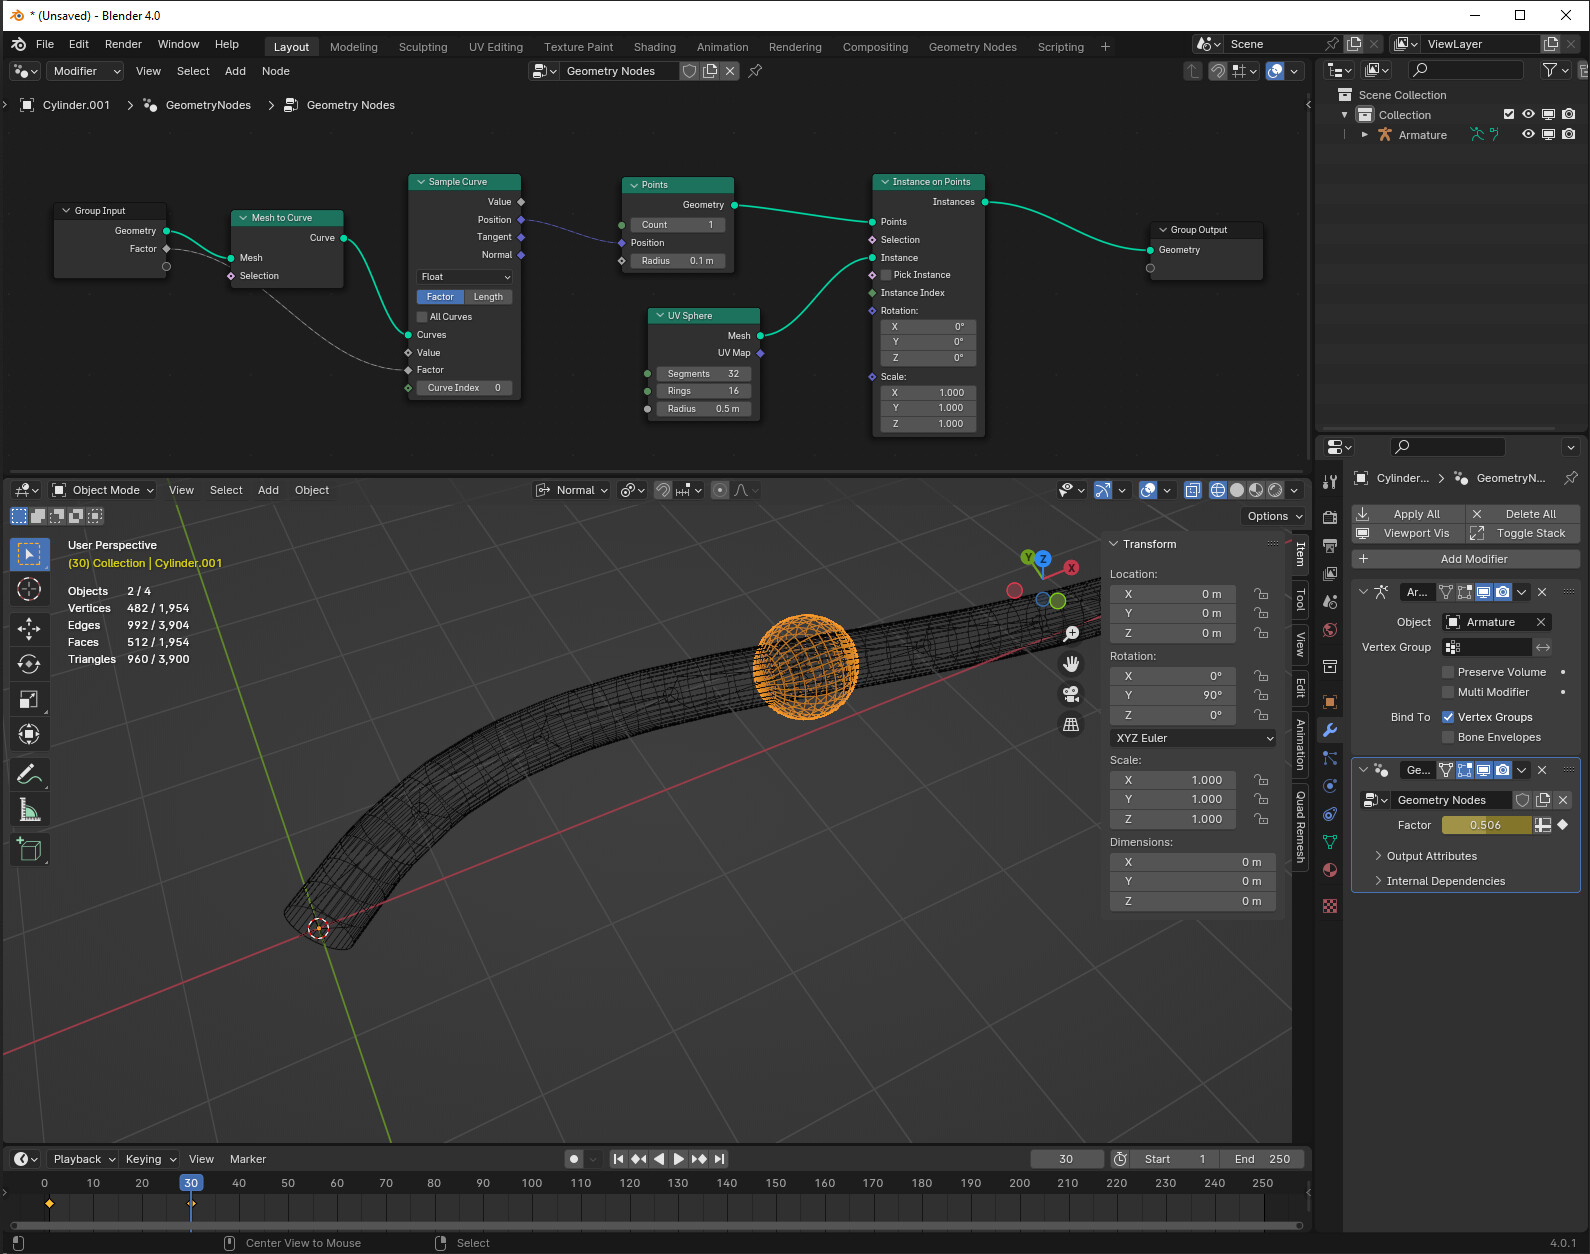
Other answers are good. But here’s what I’d do, using GN:
Make a string object that represents the center of the tube: duplicate to new object; edge select mode, individual origins pivot; select an edge ring along the length → select edge loops → scale 0; merge by distance.
Note that your armature deformed hose can actually change length, and you’re animating by factor here. That should be better for keeping a constant relationship between the mesh (like, its texture) and the bulge for reasonable deformation, but it means that if you stretch out the hose, you’ll be accelerating the bump-- just something to be aware of.
If you’d rather spawn an empty at that point, the most simply explained way to do that is to just instance a very very small sphere (radius 0.0001) and then use a shrinkwrap constraint on an empty targeting the GN object.
There are plenty of other ways. Romanji’s is doable live, previewably, by using UV warp and displacement modifier rather than doing it in shader nodes.
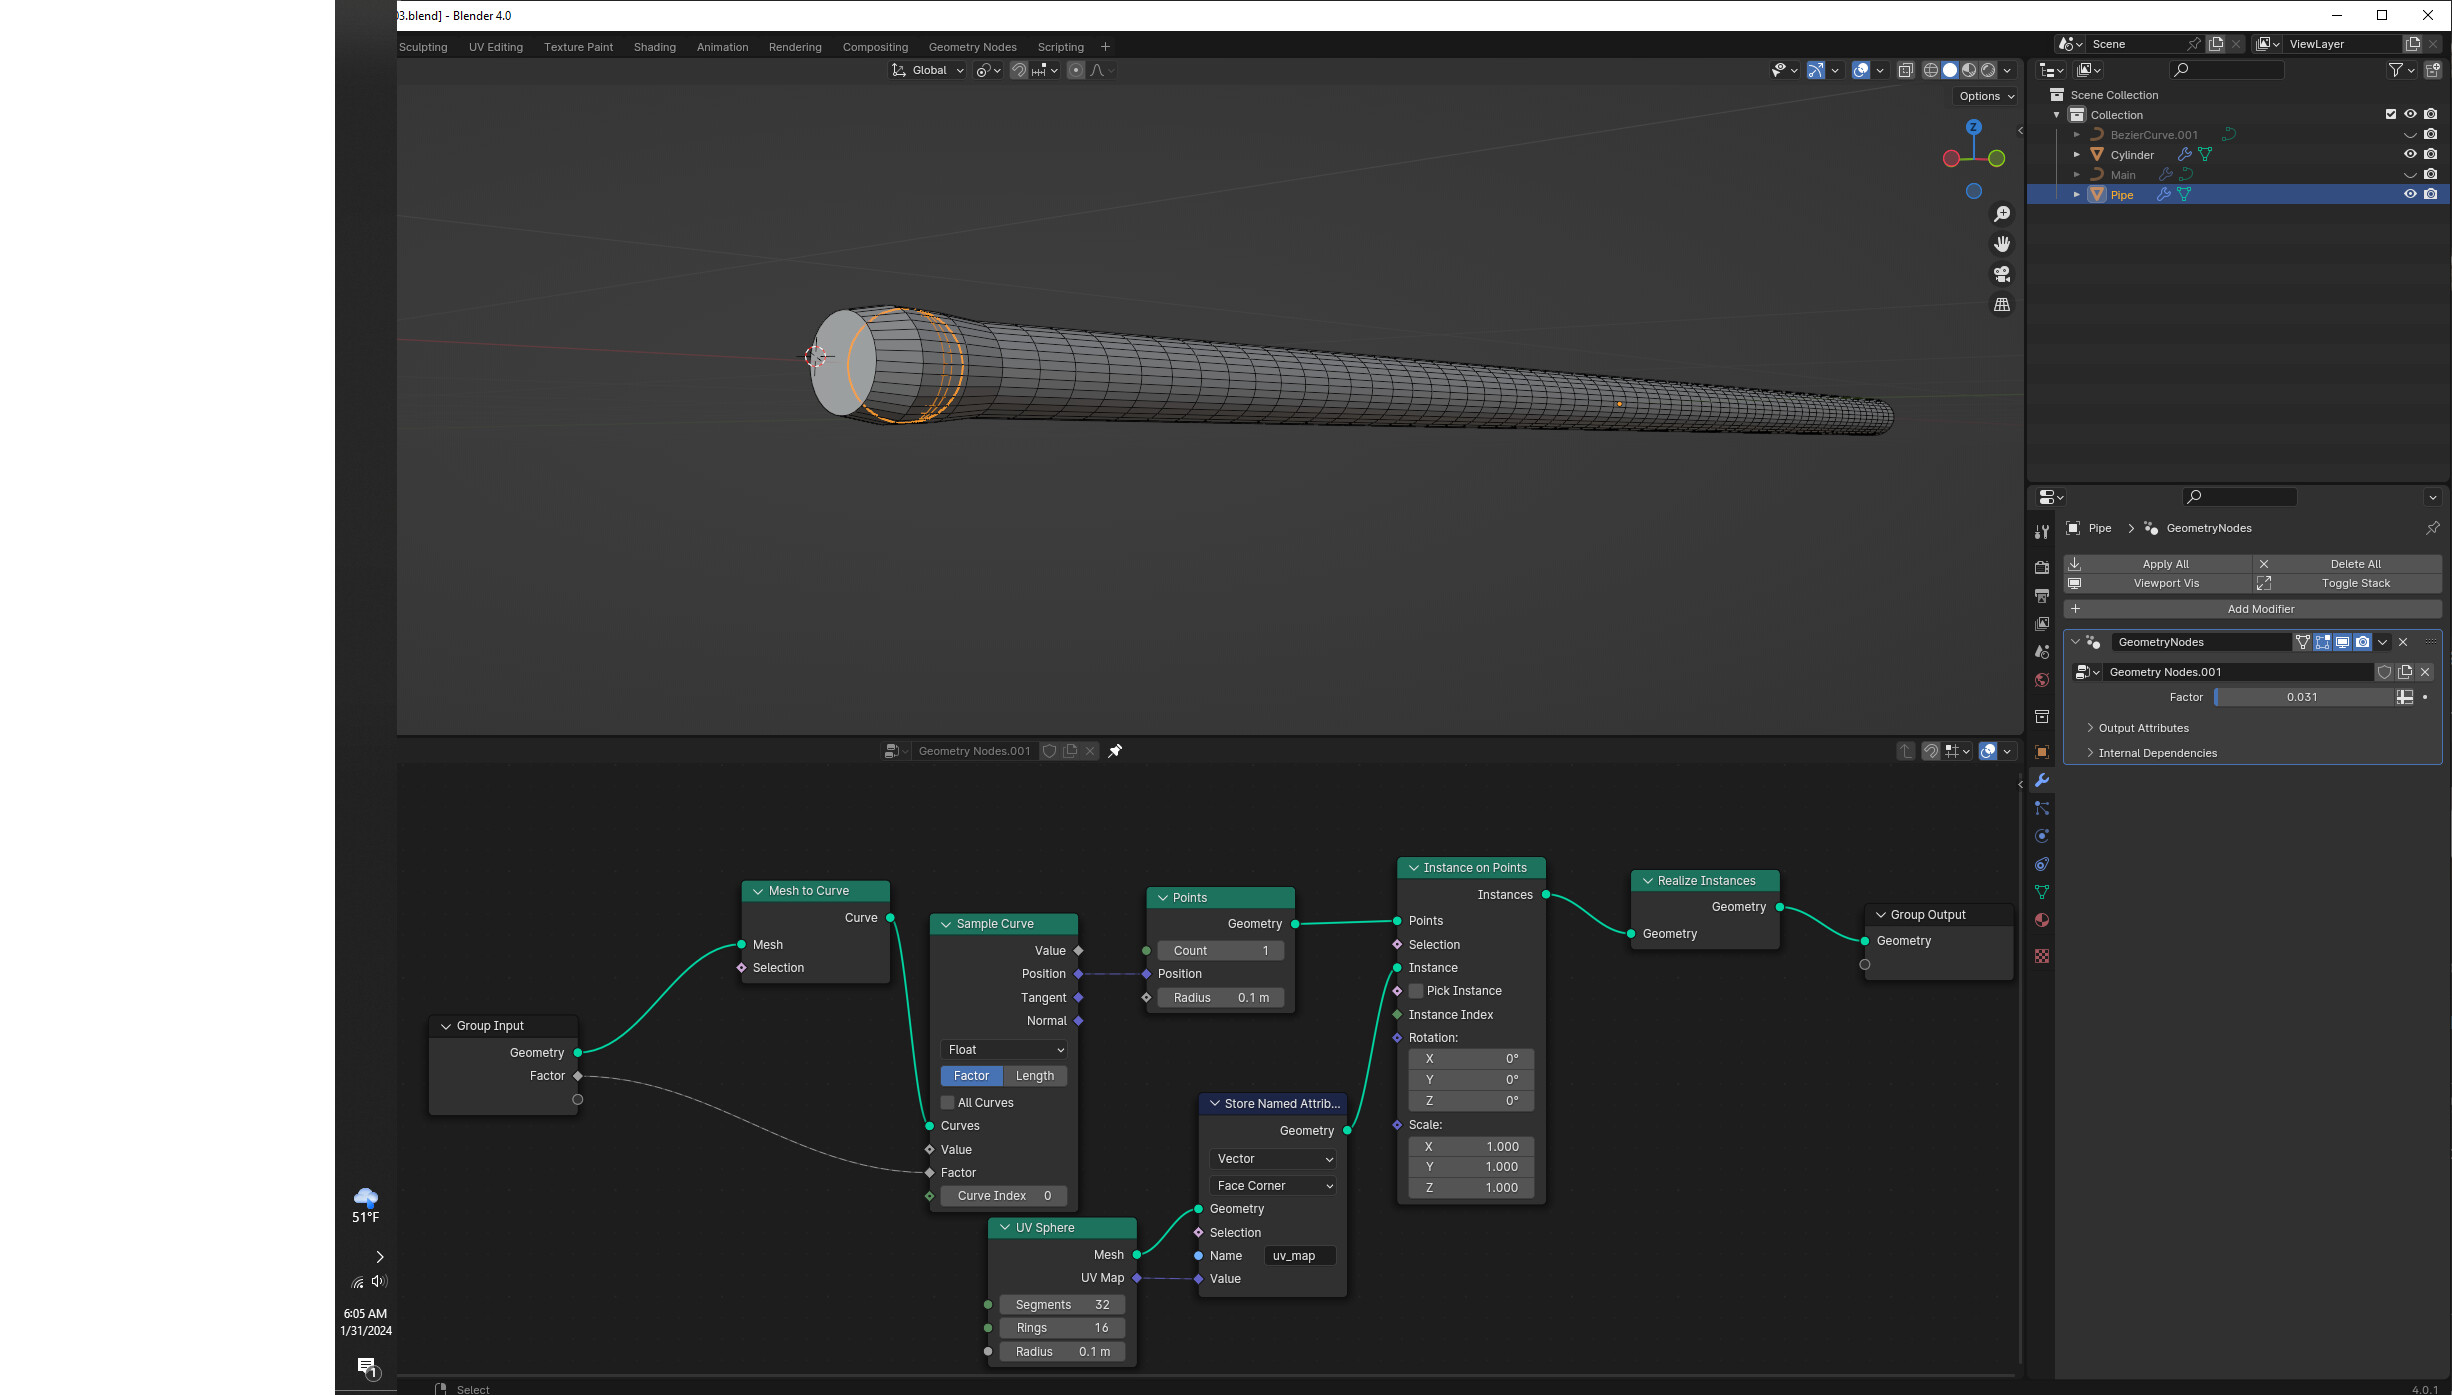
@bandages , Thanks for the detailed reply. It took little time but we just tested in same way “As you mentioned”.
Its one step further but stuck in last step.
Sphere created with GN is not effecting the pipe. (not able to use Shrinkwrap/cast modifier on it )
Attaching file. Bulge_Pipe V01_03.blend (857.0 KB)
You’ll need more vertices (more loops) on Main to get meaningful shrinkwrapping out of it.
Cast modifer uses object origins, not geometry, and if you want to use that, you’ll want to get the position of geometry onto an empty (I believe I described how) instead.