Rigging woes

Can anyone help me out with a problem I’m having with rigging a armature to the mesh of one of the model’s I’ve been working on?

The problem I’m having is that after rigging the model with automatic weight painting, the mesh ends up horribly distorted when I try to pose any part of the armature.

Granted, a certain level of distortion is to be expected as I haven’t manually adjusted the weight painting values of the mesh but the level of distortion after applying automatic weight painting is far worse than any other model I’ve worked on so far.

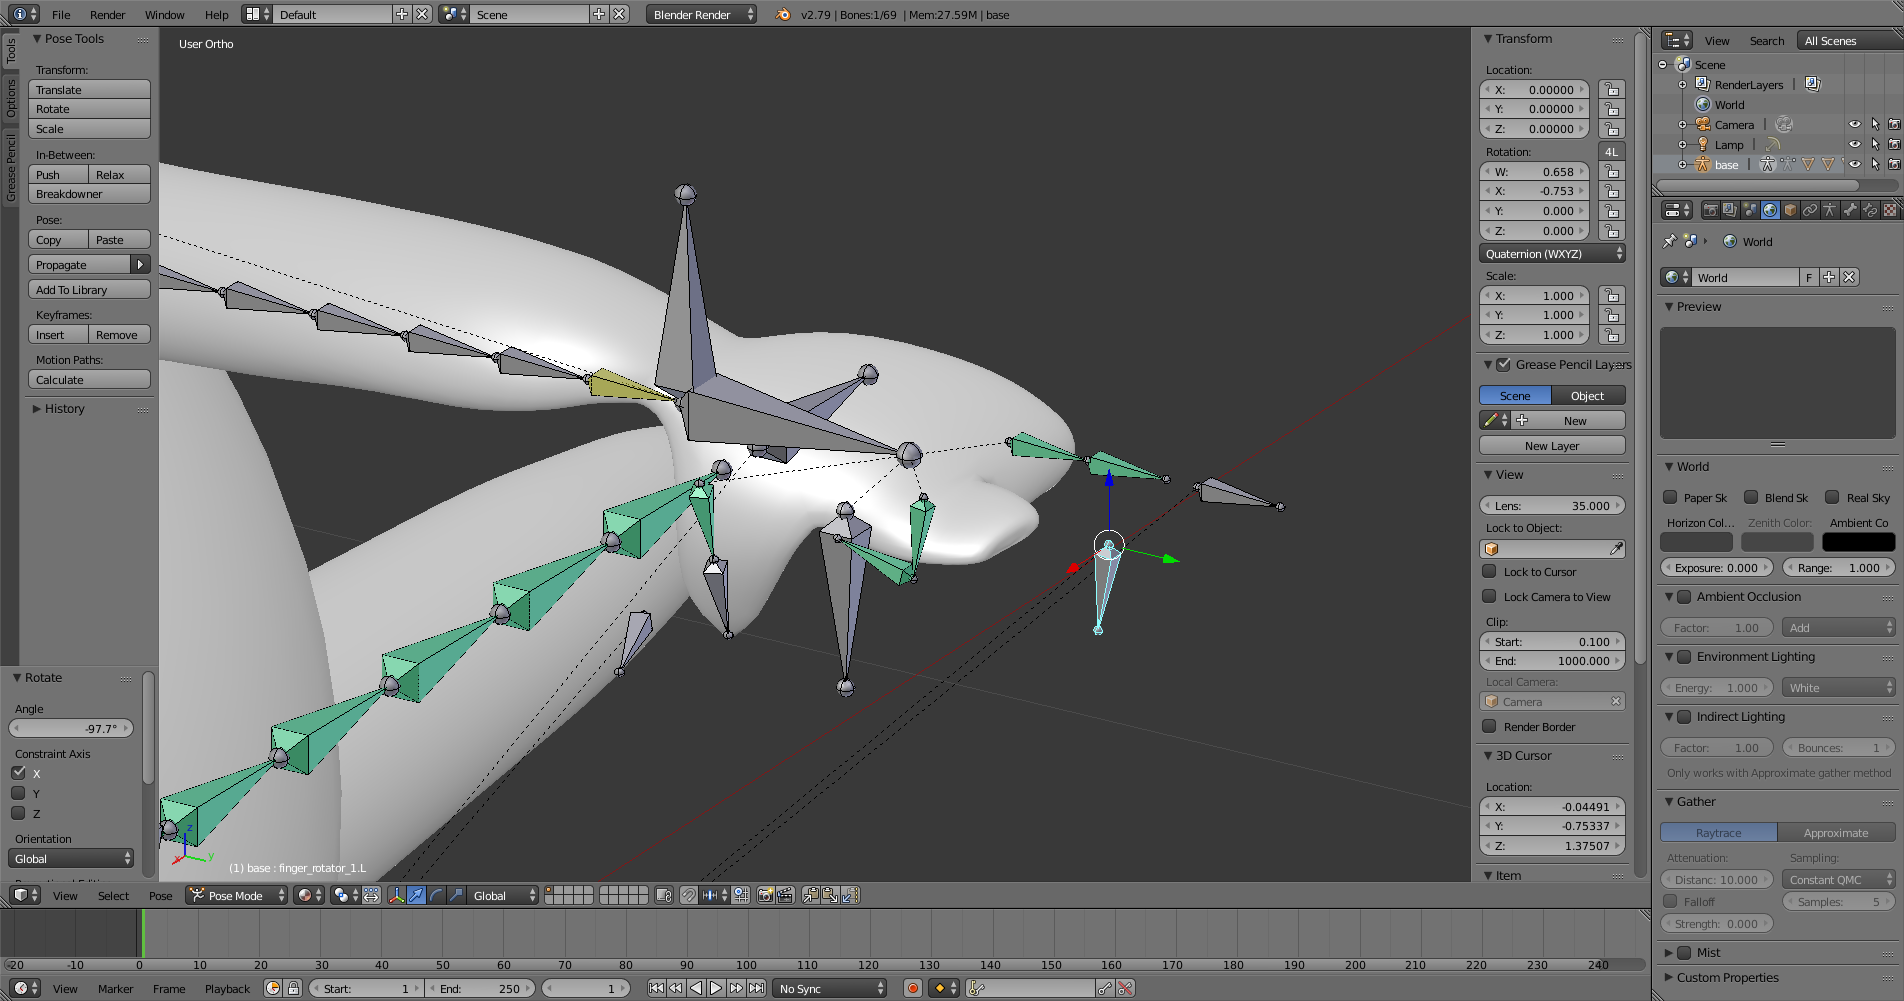
I mean when I try to rotate the fingers of this model, instead of the fingers rotating like they should, the fingers implode upon themselves while entire the arm rotates instead.

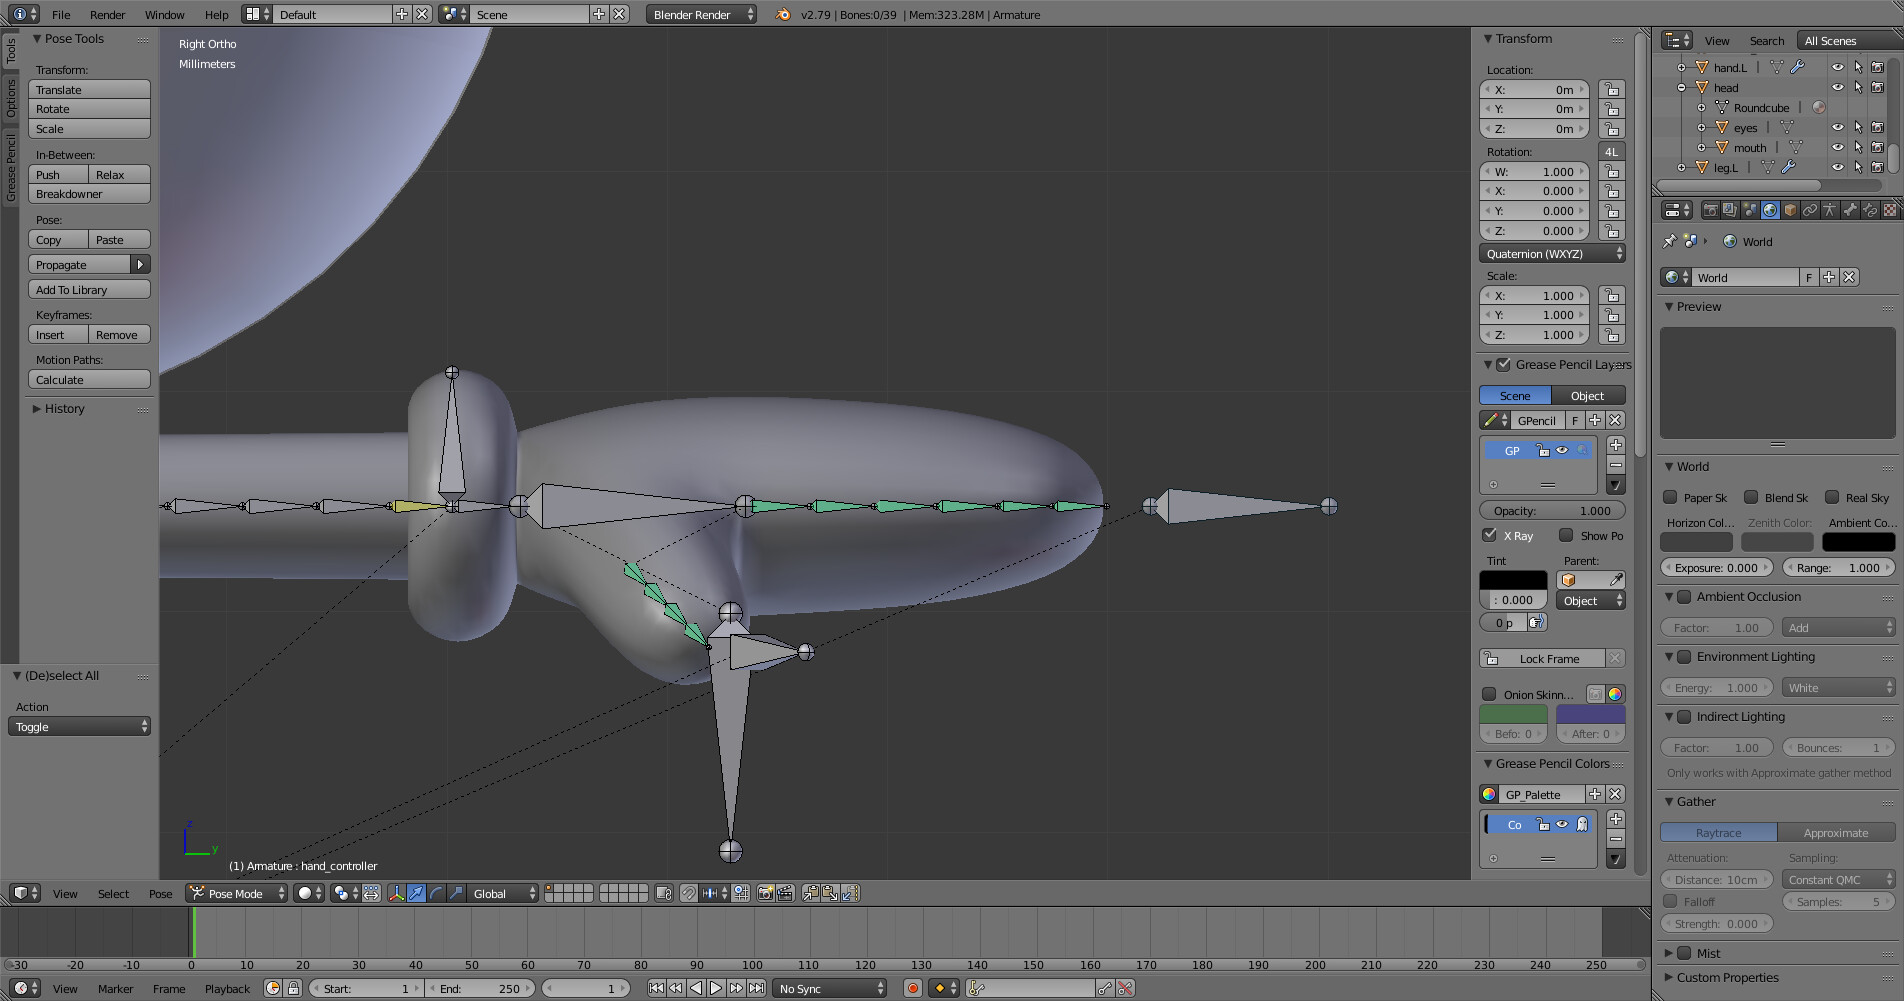
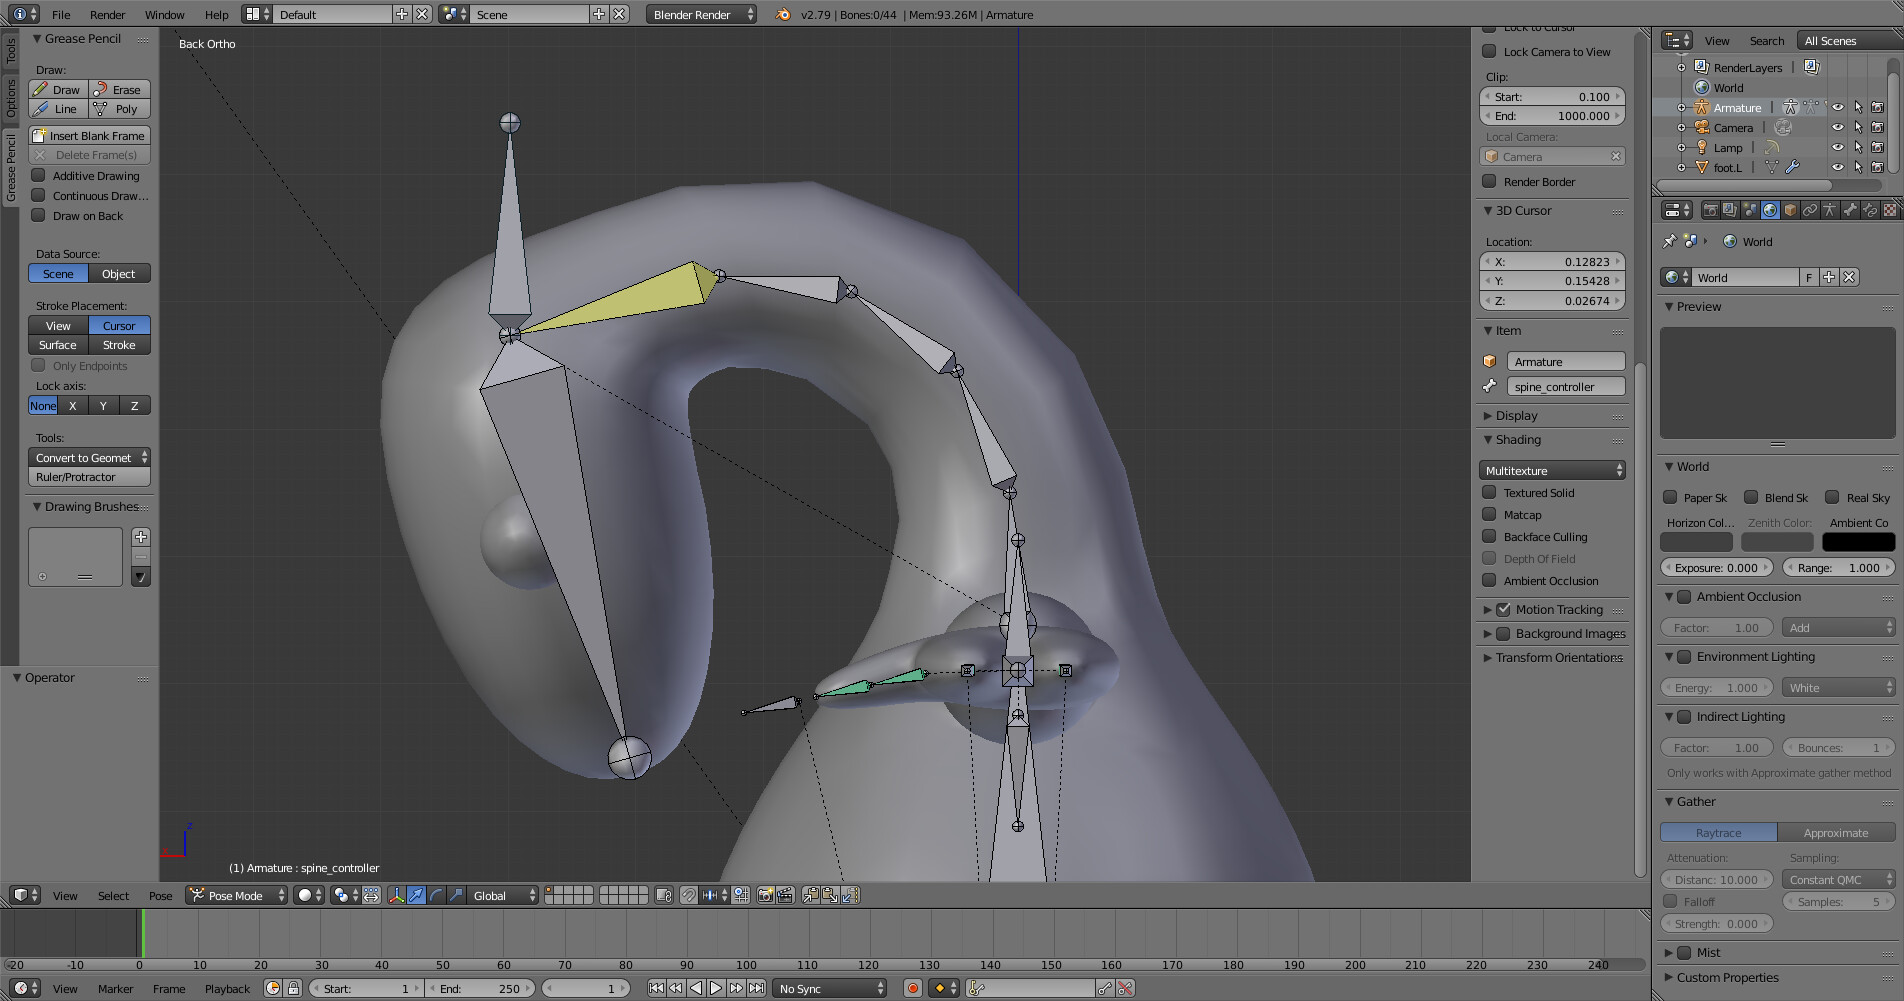
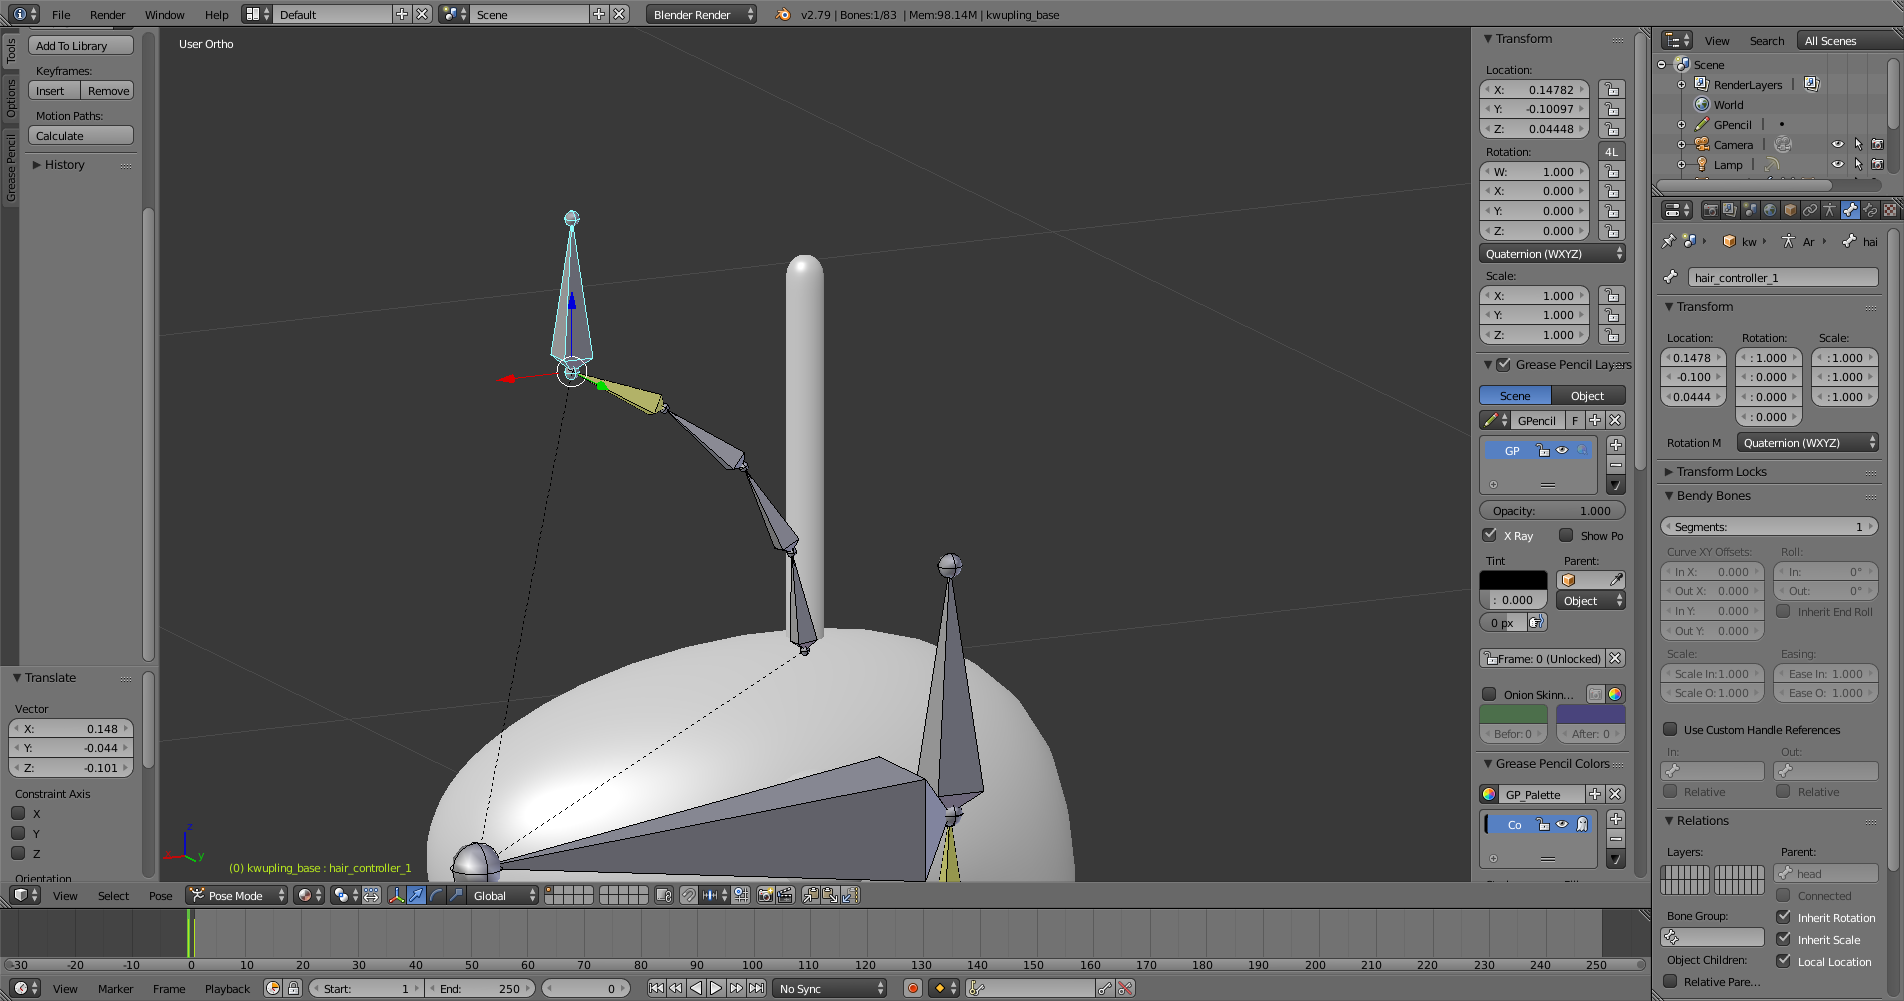
For comparison’s sake, this other model I made was also rigged with automatic weight painting without any manual adjustments. It’s certainly not perfect and still needs a bit of work but at least it keeps it’s basic form as opposed to the above mess.

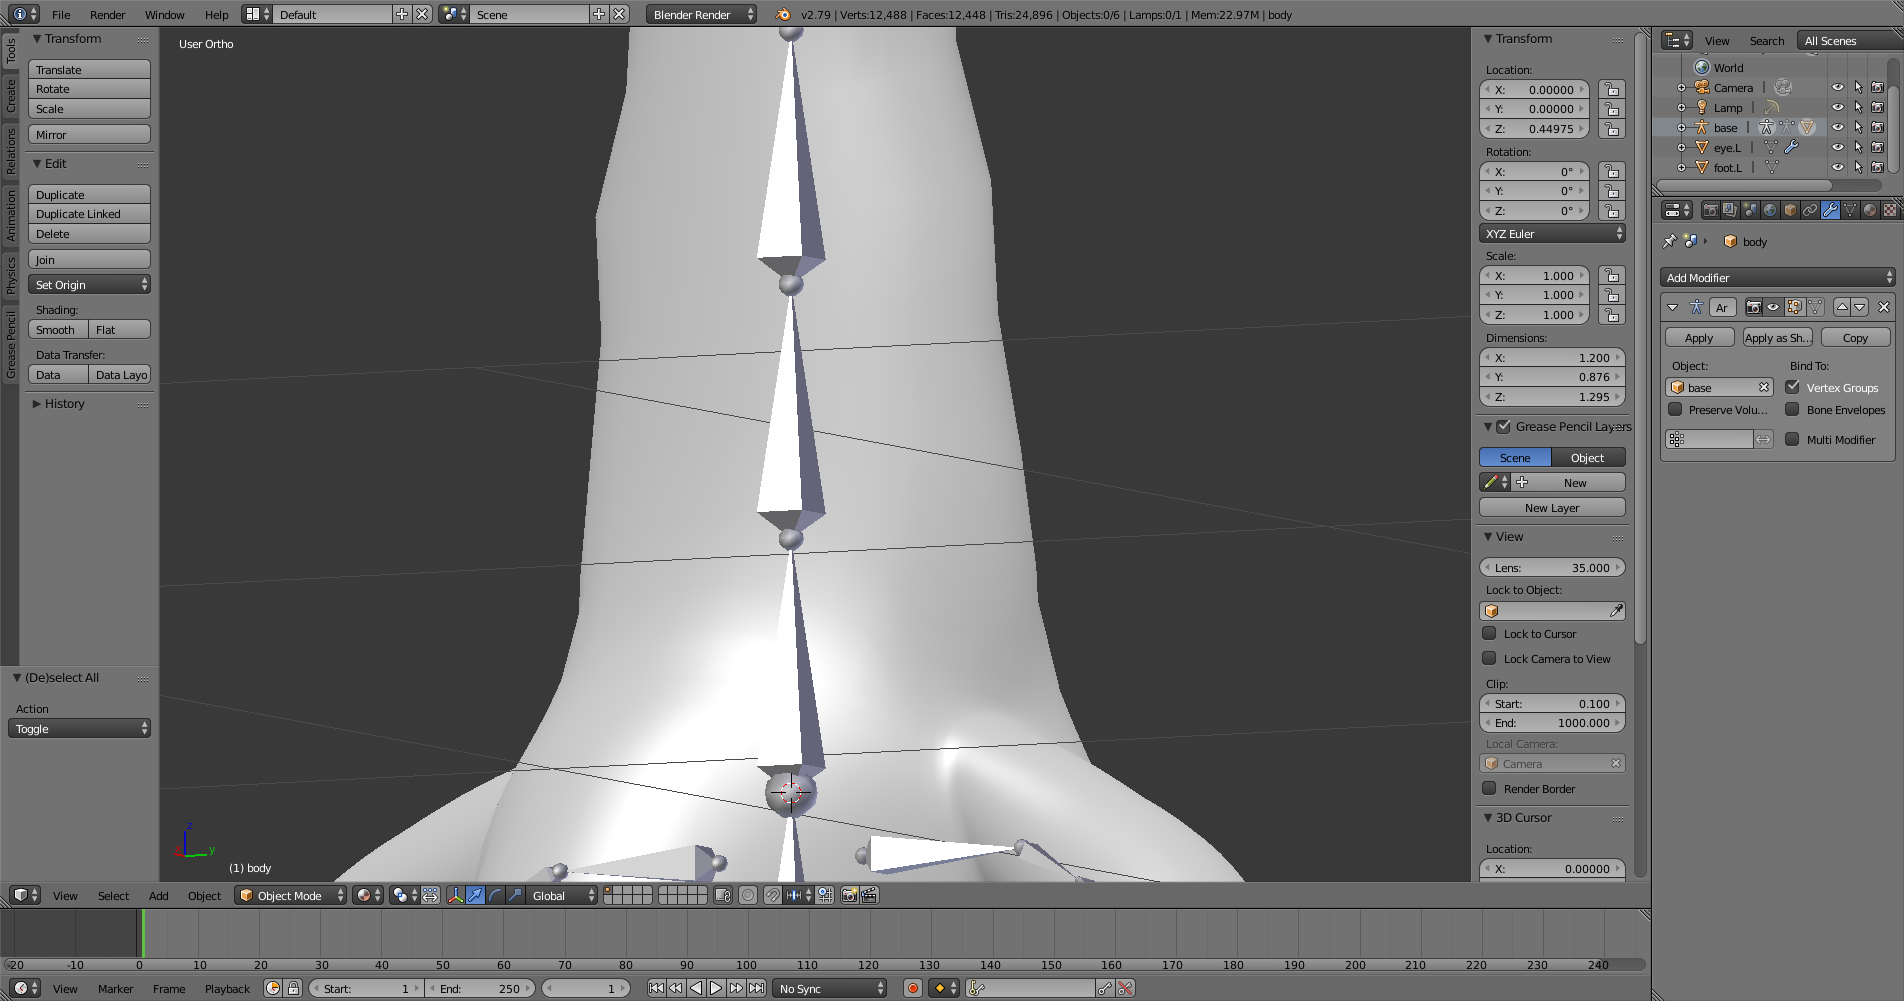
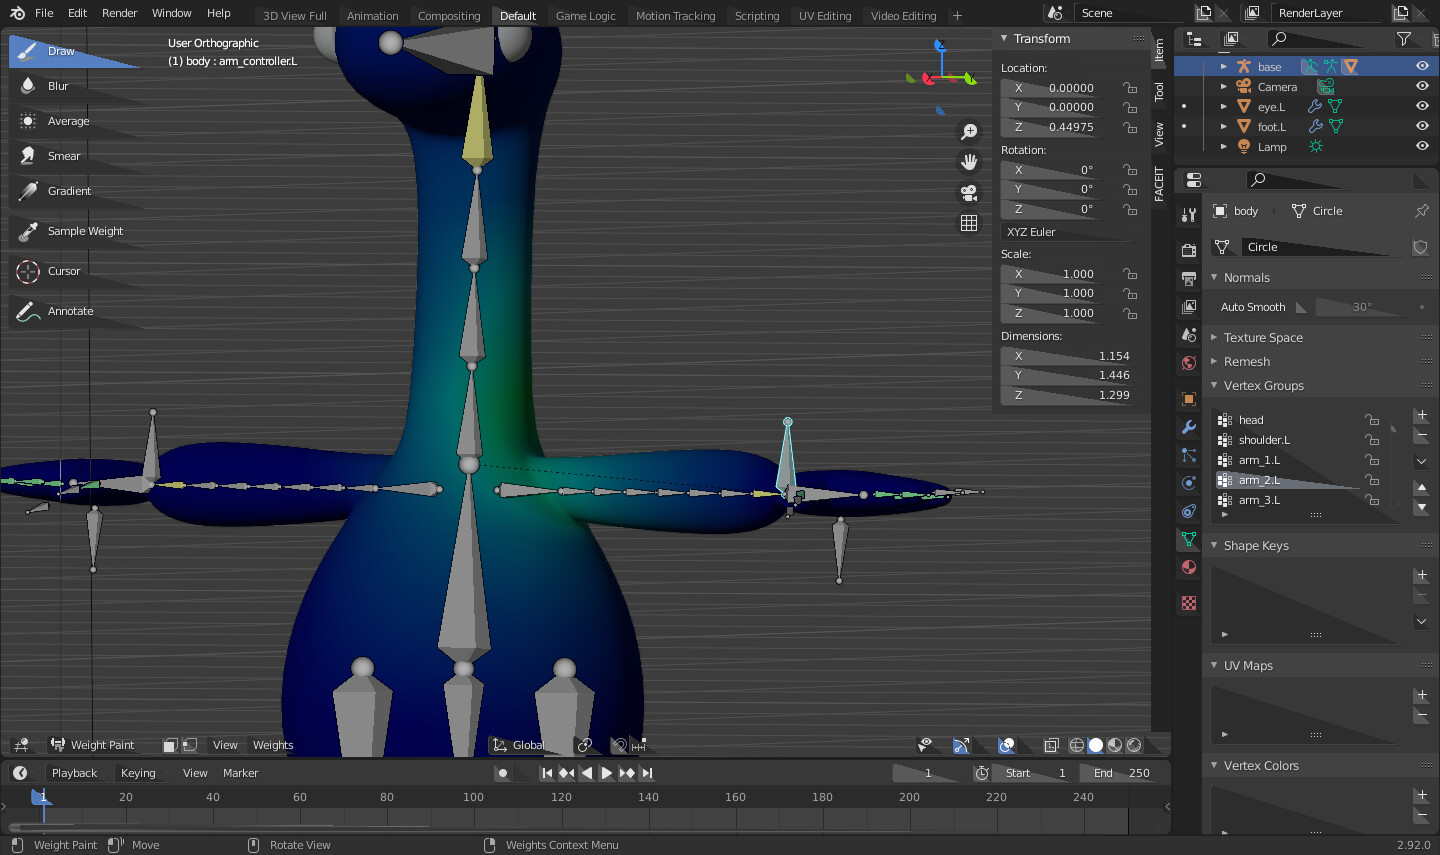
The one detail that particularly stands out to me is how jagged-looking the neck is when the arms are posed, despite the fact that I applied the Subdivision & Mirror modifiers before rigging the armature.

I have no idea of why any of this happening and so I need help in trying to figure out what the heck is going on. Any help whatsoever would be greatly appreciated.

I also included a Blend file below containing a un-rigged version of the model & armature with all the modifiers still in place.
Blend file: rigging_help.blend (567.3 KB)

Hi, you can see clearly in the screenshot that your weights are not in the right place:


BTW i don’t get the un smooth neck.

So the main reason why your autoweights are so screwed up is because your normals are backwards for a lot of the mesh. Turn on “face orientation” in the overlays dropdown: anything red has backwards normals. Mesh prefers to be weighted from its inside but your inside is the outside.

That’s the main source of your problems, but another thing that is going to cause you trouble is that your mesh is made up of multiple independent meshes (body, eyes, feet.) The weights at the joins between these parts are not likely to match, and you’ll almost certainly have to do some manual weight painting (or data transfer) to get these parts okay.

2 Likes

Yes, well spotted by bandages. I did as bandages said but left the feet and eyes as separate meshes and parented them individualy with automatic weights, it is possible to have a stylised character with floating limbs it’s your choice but you will have to parent them individually.
Here are the results:

1 Like

Thanks for the suggestions, so the problem I was having was indeed the normals being screwed up, I’m not sure how that happened but after recalculating the normals, the automatic weighting is now behaving properly.

However, while testing rigging my model I’ve run into issue I was hoping I could get some help with.

The new issue I’m having is that for some reason I can’t get the feet to be properly rigged to the armature as shown in the screenshot above. The feet and eyes are intended to be separate from the main mesh, but when I try to rig the feet to the armature the feet seem to end up somehow anchored to the main body which shouldn’t be the case.

Does anyone know what’s going on?

Have a look at my file: rigging_help1.blend (743.1 KB)

Status Update: I’m still having trouble with rigging the feet to the armature :anguished:. It seems that the only way that I can attach the feet without having the stretching issues I mentioned in my previous post is to move the feet & the bones that I want to attach the feet to away the main body. Is this the only way of doing this? Or is there something else that I am missing?

Umm, I checked the file and there’s nothing in there.


As if the rigging problem wasn’t enough there’s yet another problem I need help with. This new problem is with the way that the various extremities of my model bend, as they tend look rather jagged when they bend when they should be smooth as possible without driving the polygon count up too much.

I’ve tried a number of things such as adding bones, changing the bones’ positions, altering the geometry, adding additional loop cuts, and while it has helped a bit, there’s still some deformity in the way that the extremities bend.

I’m just not sure what else I can do to iron out these deformities so that I can get smooth bend that I’m looking for.

Any ideas?

use a smooth corrective modifier for that…

1 Like

There is definitely a file there but u are probably using an older version of blender so you cannot see it.
I use blend 2.92, is there a reason why you using older version?

Looking at the original file you uploaded, I’d say that you probably need to move your subdivision to after the armature, or else you need to apply the subdiv (or for multiple iterations of subdiv, some combination of that.)

If you subdiv before armature, you’re creating new, unpaintable vertices. These vertices are going to have weights that are linearly interpolated from existing weights-- and those existing weights aren’t linearly interpolated. So you can get some apparent jaggedness, where, in math terms, you have a “discontinuous derivative” of your weights-- the rate of change of the weights over the surface of the mesh has angles.

But your actual screenshots there don’t look bad. Presumably, this is for animation, and you’re not doing close ups on your character’s armpits. You should be prepared for some polygonality on your silhouette. You can’t stress everything, and a lot of things will look different with a material, an environment, an animation, and most importantly a story.

Re: your feet. Remember, the only thing that’s going to move are verts-- base verts, not subdiv-generated verts-- and you’ve got almost as many bones as verts. So there’s some limits here of exactly how much you can do with your feet. We’ll start by removing them from all vertex groups for a clean slate (ctrl g menu in edit.) We’ll apply the first mirror modifier, because otherwise, the big toe is unpaintable. And then we’ll parent with empty groups, in case we missed any vertex groups.

Then, we can “paint” just by assigning vertices (which is perfectly appropriate for a situation like this, where we don’t have very many vertices and the model is pretty stylized.) Select a vertex group, select some vertices, and hit the assign button (properties/object data/vertex groups.) Select different vertices, a different vertex group, and assign again. Here’s your posed foot:

Each vertex on your foot is fully assigned to only a single bone. The red verts there are fully assigned to your foot bone and assigned only to your foot bone; the rest, it should be obvious which bone.

Note, there’s still a little bit of stretch. You’re right that stretch has a lot to do with bone position. The further a bone is from a vertex, the more that vertex’s edges will stretch. So for example, your heel bone is going to cause some stretch, because it’s located right between two loops-- if you move it to the center of one those loops, it’ll stretch less.

1 Like

It’s been a while I created this topic but I’m still having problems with attaching the feet of my model to the armature. I tried following bandages’ advice above on the matter but unfortunately I don’t know anything at all about assigning vertex groups. The last time I would have done something like that would have been years and years ago when I was first learning how to use Blender, having forgotten everything about it since then.

There’s also a new rigging issue I’m having with this particular model that’s causing me trouble.

I’ve been trying to add hair to my model in the form of large stylized strands intended to be attached to the armature so that the individual hair strands can be posed in various different directions. The problem though is that for some reason I can’t attach the one hair strand I’ve made so far to the armature.

I tried selecting the hair strand, then the armature and then Set Parent To with Automatic Weights like I’ve done so many times with other models I’ve worked on. But for whatever reason, the hair strand will not attach to the armature like its supposed to, a problem that to my recollection I’ve never encountered before.

Does anyone what the heck is going on and how I can fix this problem in addition to the foot rigging issue?

Can anyone at least help out with the hair rigging issue? I honestly have absolutely no idea whatsoever why I can’t rig the hair to the armature, and I can’t fix the issue if I don’t know the cause of the problem.

Hair works on meshes not armatures if your using a particle system. What type of hair are you trying to put on the character? Use the armature to move the mesh and the hair will move with the mesh.

I’m not using a particle system, the individual hairs strands consist of seven cylindrically-shaped meshes atop my character’s head.

They’re supposed to be attached to the armature so that I can freely manipulate each individual hair like this:

The problem though is that for some reason I can’t attach the hair strand meshes to the armature. I tried Ctrl + P and selecting With Automatic Weights but it just doesn’t work, the mesh simply will not attach to the armature.

Can you put a blend in to download to see what you have?

Sorry for the belated response, I got sidetracked working on some other models.

Anyways, here’s the blend file:
model_help.blend (924.8 KB)

Your bones are not deform bones. Check the deform box in the property panel. Then give it a try. You will need to do each deform bone.

1 Like

Once again, sorry for the belated response but anyways, it turned out you were correct in that the bones for the hair were not set to deform.

I also managed to figure out why the feet weren’t bending properly either, as it turns out the problem was the same as the main body with the normals facing in the wrong direction. After recalculating the normals, the feet now bend in a more correct manner.

Thanks to everyone here for helping me out!

1 Like