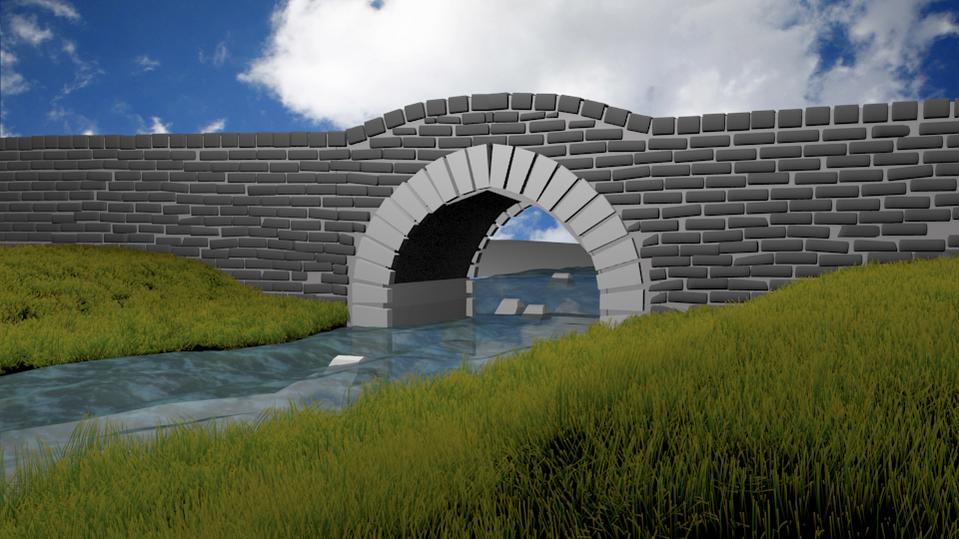
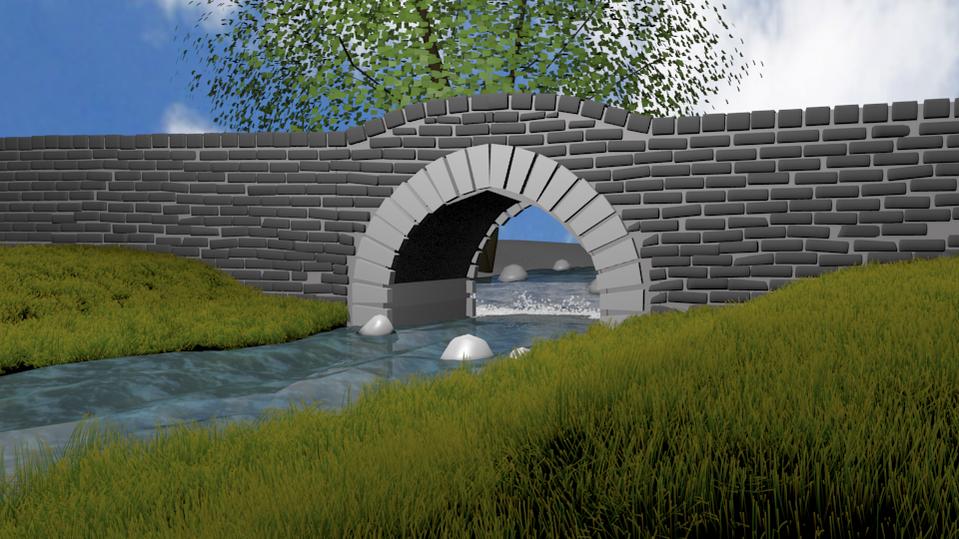
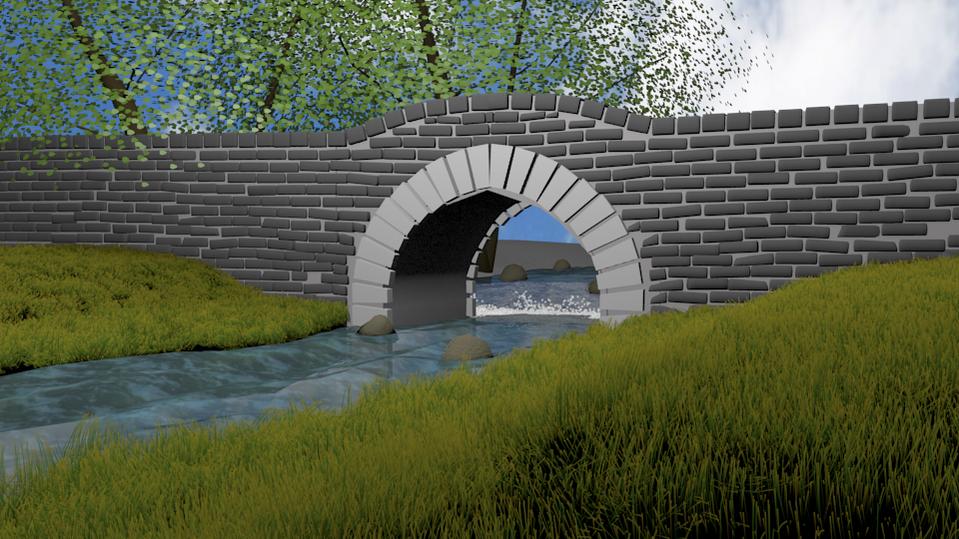
Right so Ive modeled the basic concept of the water fall and rocks (which are the strange square things) but it is quite hard to see that the water is actually going downwards so i need some foam and splashes, but have no idea how to do that…also, do you prefer the bridge in tact, or semi demolished? (images above)
Not to worry water is one of the most complex things to model because it’s so dynamic.
First thing to do is start off with a reference image.
Next thing to do is think of the water in several parts.
Layer 1 is the upper most area - where the activity is happening crashing into rocks and making foam etc.
Layer 2 is the current water - ripples of water that are on the surface as it’s moving
Layer 3 is the under the surface. The river bed (muddy water etc)
Then model each one independently. This can be done with a few different tools in blender but you’ll find a normal map is your biggest tool here. Normals (bump map) will let you add dimension to the water.
Some procedural textures to consider
- Noise will despeckle the surface (add small bumps to the surface)
- Cloud will give more of a undulating effect
- Wood will give the ripples.
You may find that you will want your own custom normal map. You can use the procedurals to get a feel for the surface but as you have rocks and so on in there you may want to match that up with the normal map. I don’t know if you have used photoshop or other graphic software like Gimp or Paint.net. All pretty much can do the same thing as the procedurals can but you can tweek/edit the image they produce to get a custom map.
A normal map can also be used to modify the mesh being used for the water. Hint the greater the resolution of the mesh the more defined the modification. More verts=greater definition. Also blender can only do this through the ‘z’ axis as you’re working in that axis not much a problem.
Depending on how detailed you want to go with the water you can make it more or less complex. I would start off with just the bump (Norm) map and go from there. You’ll be surprised as to real you can get it looking.
For the foam you can use particles to make that happen. You will need an emitter for that and you could use the rocks themselves for that.
Thanks for the in depth help their, i shall play about with it later today and post some progress 
hmm ive had a go at trying to create some foam at the bottom of the waterfall and have got this result…
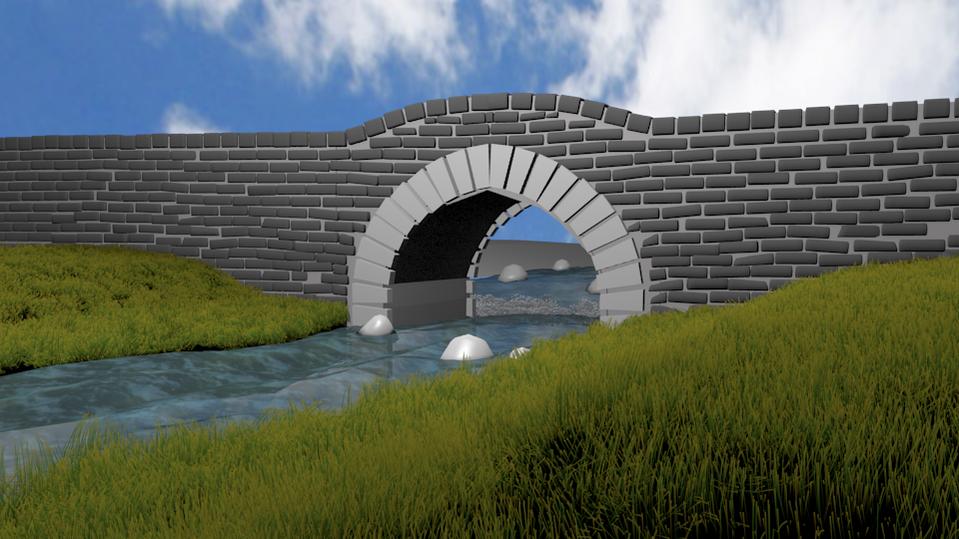
The results aren’t really very good and i don’t know how to improve them…
Foam’s not to bad. Just needs to be white though as it is oxygenated water after all. One other thing. The water fall would be better if it was down river from the bridge. The running water will eat away at the bridge over time but the waterfall will add to that perhaps by 5 times or so depending on it’s veracity. A bridge would be moved to avoid that (upriver from the water fall) if the waterfall could not be adjusted. With a bridge you need smooth running water underneath to keep it from erosion.
If you type in Bridge and Waterfall into Google Images you will see what I mean.
http://www.yourlocalweb.co.uk/images/pictures/16/47/bridge-and-waterfall-on-castlerankine-burn-162259.jpg
Sometimes they will even put a waterfall on the up river side to slow the water down passing under the bridge. To further reduce erosion. As a waterfall can back the water up a bit.
When you’re adding foam to the river ‘waterfall’ you have to think of what you see. The force of the water churning is what is making the foam. So the amount of drop/friction is what is going to make more or less foam. There isn’t just ‘foam’ in the foam there is splashing water and other objects sometimes (rocks, logs, etc). So you need to have a source of the foam then work with in it. As the water accelerates it will start making foam as the molecules collide with others. Then as it rushes over the falls it will be mostly foam then as it passes away from the falls it will gradually slow down and calm out again. So there are a few stages to the waterfall.
I would start off with an image (black and white) white is the high point. So a gradient fill will the white in the center. Then draw some lines of black through it with an airbrush type tool. Not to to many about 20-30% of the white area.
- The black is your flowing water
- White is you foamy parts.
1 image for 2 different textures. You can use the same image but invert (negative) color one in your texture map (map to)
1 is your bump map of the water fall (the black on the outside image). Don’t add color only norm to your texture.
2 is your color map that is what will be your foam color. NO norm on that image only color but you can adjust the amount.
The amount of norm will give you the undulating effecting of the water moving over the falls and the color will give you the color of the foam. From there you can play with the images adding in noise (despeckle) to give the foam a starting and ending point.
Render a view form above to get the location of the waterfall and size of the river. Then use that as a ‘guide’ to your texture map. Take that and put it into your paint program what ever that would be and make a note of the size of the river and where your water fall is in there. Then bump up it’s size by at least 2 or 3 times. This will give more resolution to your texture and finer control over your river.
Also keep in mind this is only a visual bump not a physical bump. So you have no occlusion with this texture - Yet. The mesh is the same size and shape you are only adding an optical illusion that there are bumps and so on. But as I said above you can get blender to alter the mesh based on the norm map.
Mesh => Transform => Displace
In the new Blender 2.57 build it becomes a object modifier (Displace) and it can go through more then just the z-axis.

That will take your bump map and physically alter your mesh to match. Both are dependent on good resolution (your norm map + mesh verts)… As it will move the verts to reflect that of the norm. As it’s water it’s not to big a deal and you can definitely fudge the results…
Trying to be helpful and hard not to be confusing 
thanks again, your not too confusing, i understand what you mean
Right, so my foam now looks, well…like foam, which is good. The stream also looks much more down flowing now but still isn’t 100% there…and i have started work on a tree, Ive never modeled a tree before so i figured as long as there are leaves and you can see the odd twig here and there it wouldn’t have to be overly detailed.
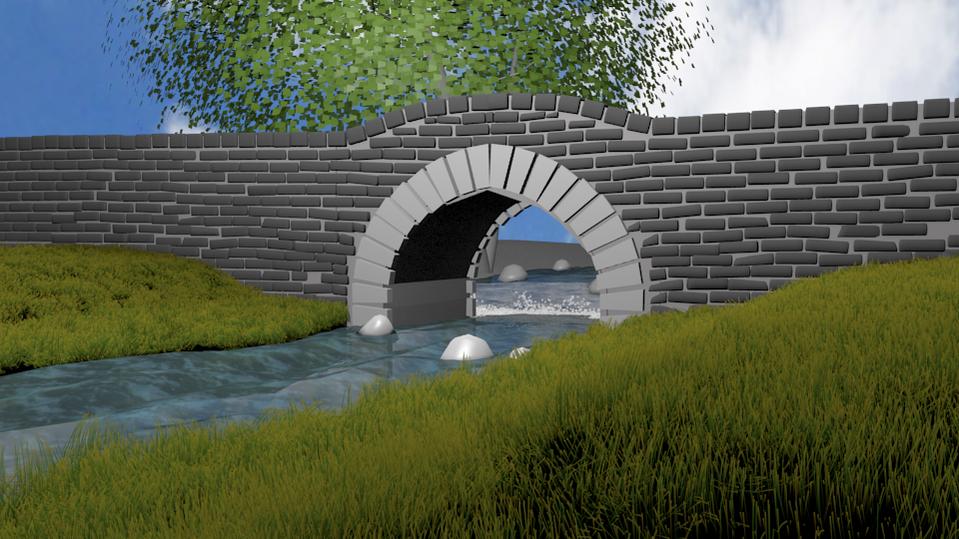
Strange thing i notices was that i modeled a basic leaf, but when i set the particle to emit that object it didn’t work, but if i insert any over shape (im using square now) it works???
Ive made some more adjustments to my tree, reducing the amount of leaves and making some more branches…using particles for leaves seems to work quite well, although it would probably look alot better with oval leaves and not square…
Looking much better. Although the leaves are quite big for the distance they are from the camera? I would reduce there size by about half and perhaps using a distorted UV Sphere you could clump them together a bit more randomly. If you remember the ref shot I posted here a bit back (page 1) you’ll note the ‘foam’ follows the current down river quite a bit especially in the rapids. Your foam looks quite good just the same.
Nature is one of the hardest things to model because it’s so dynamic. A car or a building say have a predefined shape but natural objects are well organic. So the modeling is much more tedious to do. That’s why ref shots are so important. In your minds eye you may see stuff from your memory that are better or worse then they actually are. Blender 2.5x series isn’t quite up to the scripting yet so I’m hurting because of all the missing scripts from the 2.4 series.
Your model is coming along nicely though.
yer i know what you mean, nature is a hard topic like you say it is so unique and unpredictable…Hmm i never noticed the size of the leaves…shows how biased you become to your own work…thanks
its been a while since my last update, haven’t done too much, ive added another tree and have put a texture on the bridge which looks ok but the arch looks a little odd, ive also added a basic texture to the small rocks which may change, i dunno yet.
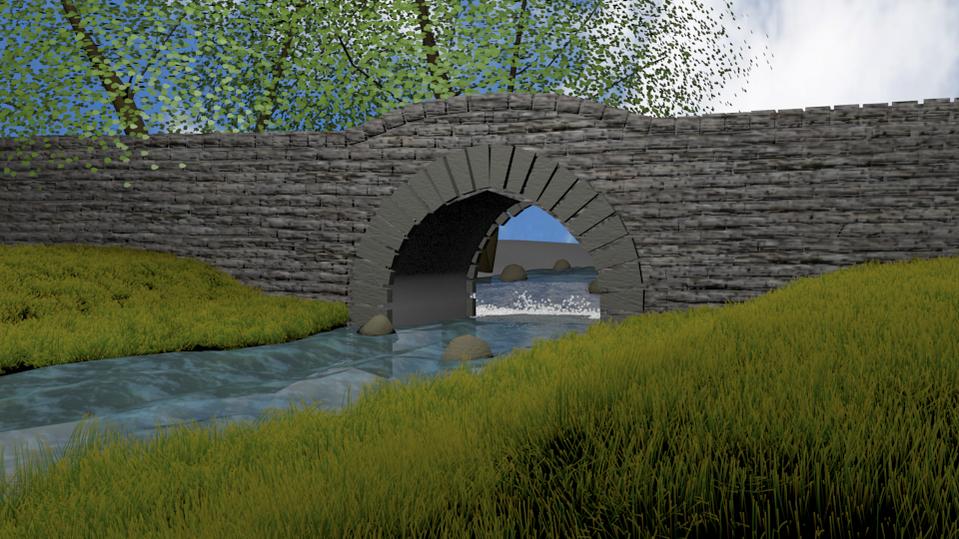
I liked it better with the lighter mortar and darker stone. Opposite might work as well.
Some reference pics
http://www.planetware.com/picture/campania-outside-naples-amalfi-i-ir1606.htm
http://www.planetware.com/picture/usa-stone-bridge-across-minnehaha-creek-us-mn233.htm

http://infomotions.com/gallery/manchester/Pages/stone_bridge.shtml
If you need some textures for your tree here are a couple from a maple(remember its your work don’t use anything you don’t want too). They are low res but its all I have time for right now. The leaf is a PNG.

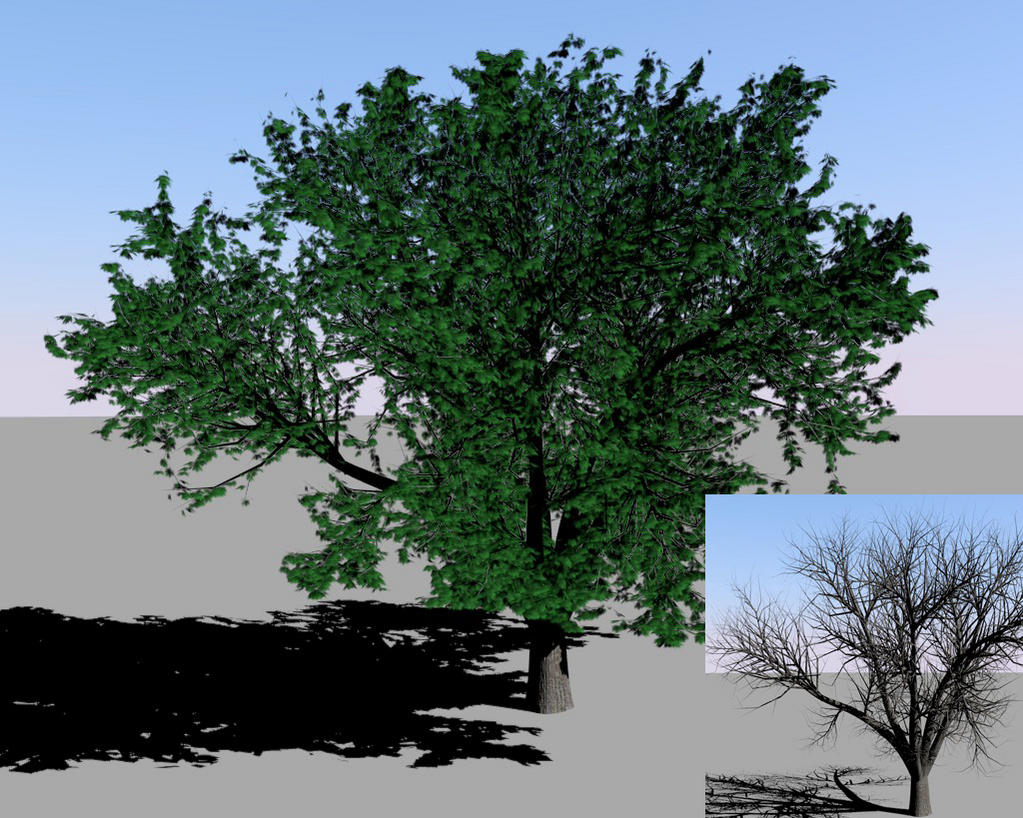
Applied to a low poly tree. Probably would look better on yours since my tree is shaped a little funny.
Attachments
thanks for that, how did you apply the leaves?
smalltree.blend (1.81 MB) The important part is on the second layer. Because its a png which supports transparency I just applied it to a plane and used that plane as particles. If I remembered to pack the textures into the it should look like this. To get it to look like the picture you have to change the amount of particles to 15000(reduced to save space).
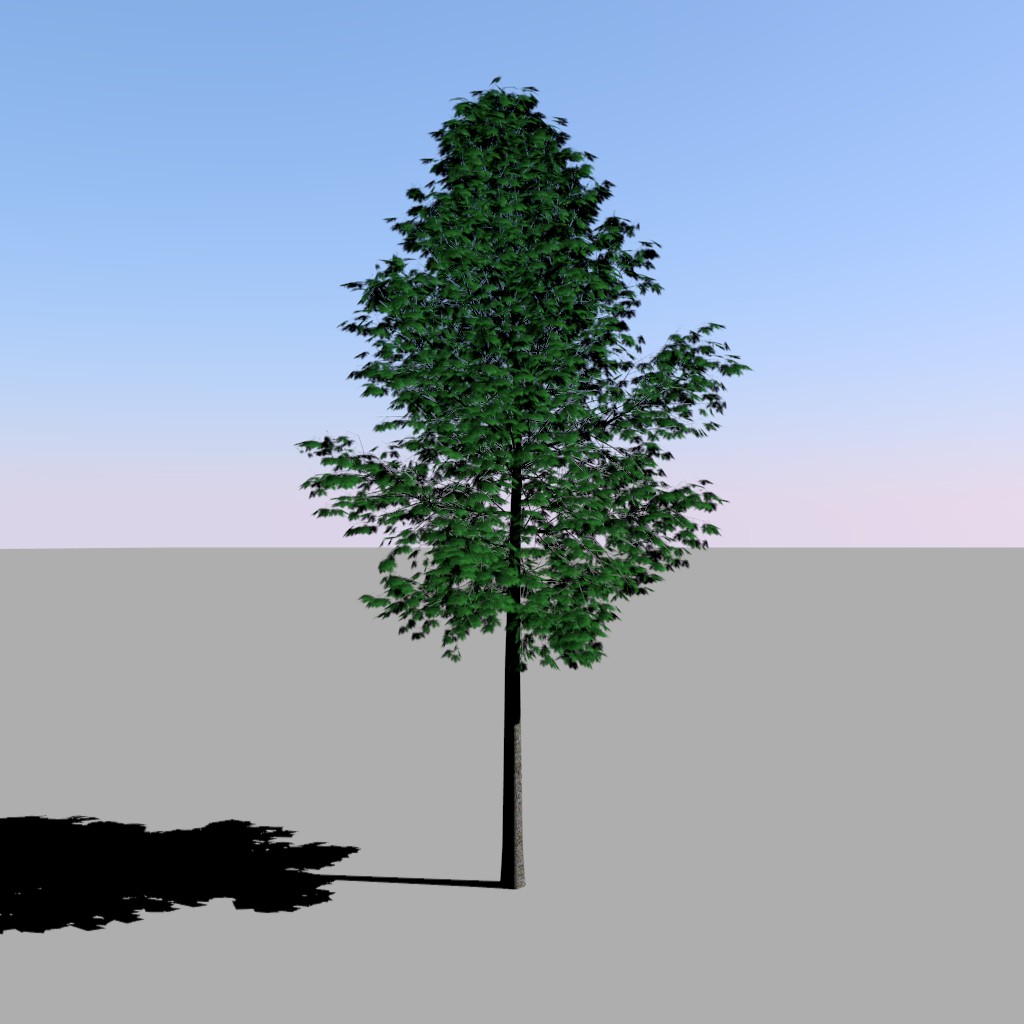
Important thing to consider: note the origin of the leaf plane, transparency in material settings, increasing contrast of the leaf texture can help give the leaf some detail when viewed from a distance, subdividing branches to increase faces increases density of leaves relative to the rest of the tree(alternative to particle mode cut),even distribution is turned off in particle settings, particle>velocity>emitter object>z setting to change leaf droop angle
opps, forgot add spec oh well
Well, I am wondering what the screen is under the bridge! You know the river seems like the upper reaches of a fall!
hmm, the screen may be my particle emitter and i have forgotten to set alpha to 0…i think thats what your talking about, if not i dont know what you mean…