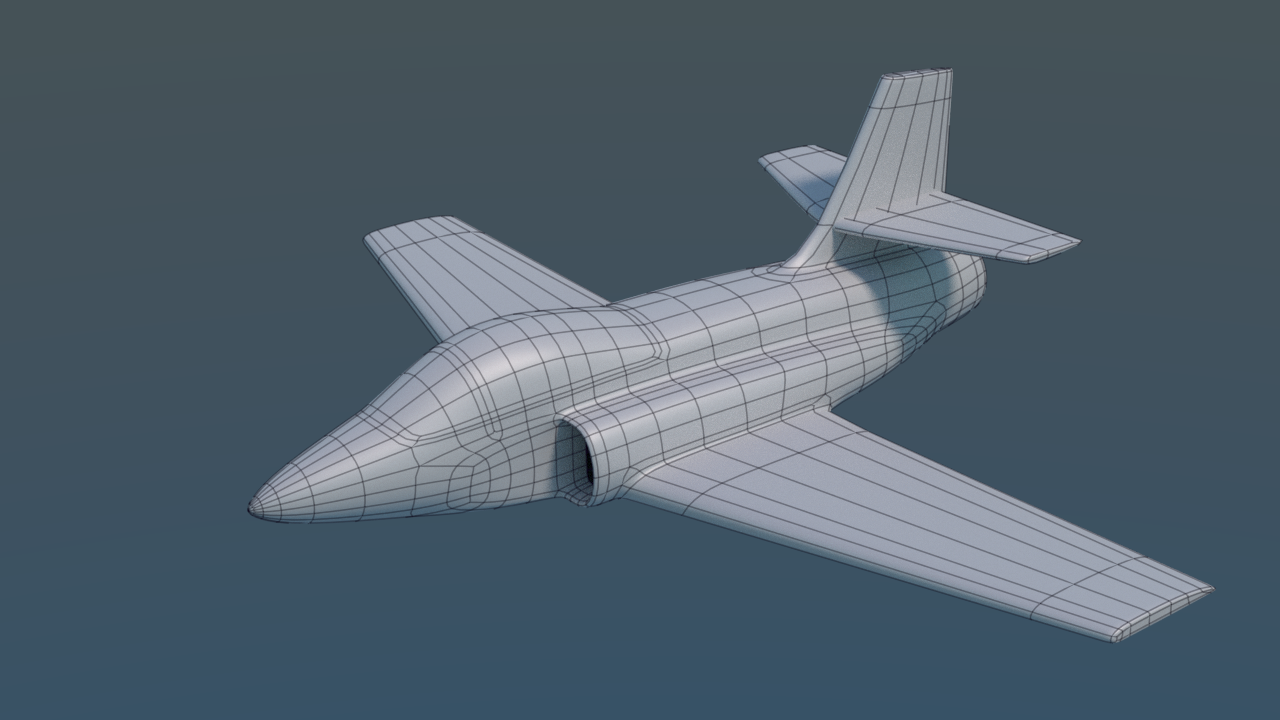
I’ve been modeling this military trainer style jet out of a bit of boredom. Just making stuff up as I go along, so if it looks like anything in particular it’s only coincidental. (A lot of recent designs for this purpose have this overall generic look to them.) I’m thinking of UV mapping before chopping stuff apart (control surfaces, opening canopy, etc.), but it’s still fairly early. Also thinking of shortening the wings by one edgeloop from the current tips. The canopy shape took a little longer than I liked while modeling, no way to mask vertices for proportional editing. (Seems like there should be some way to restrict editing to vertex groups or their inverse, but nope not currently. Would be useful though.)
And if anyone asks, quick Cycles render with all edges marked in Freestyle for wireframe. It’s a handy little trick I picked up in another post somewhere on the BA forums.
I’m having a bit of a small debate in my head… Chop into initial parts first or map first? And I’m still undecided on chopping the wings. Thoughts on this? (For mapping, I’m trying to think of workflow considerations and what would be easier in Blender.)
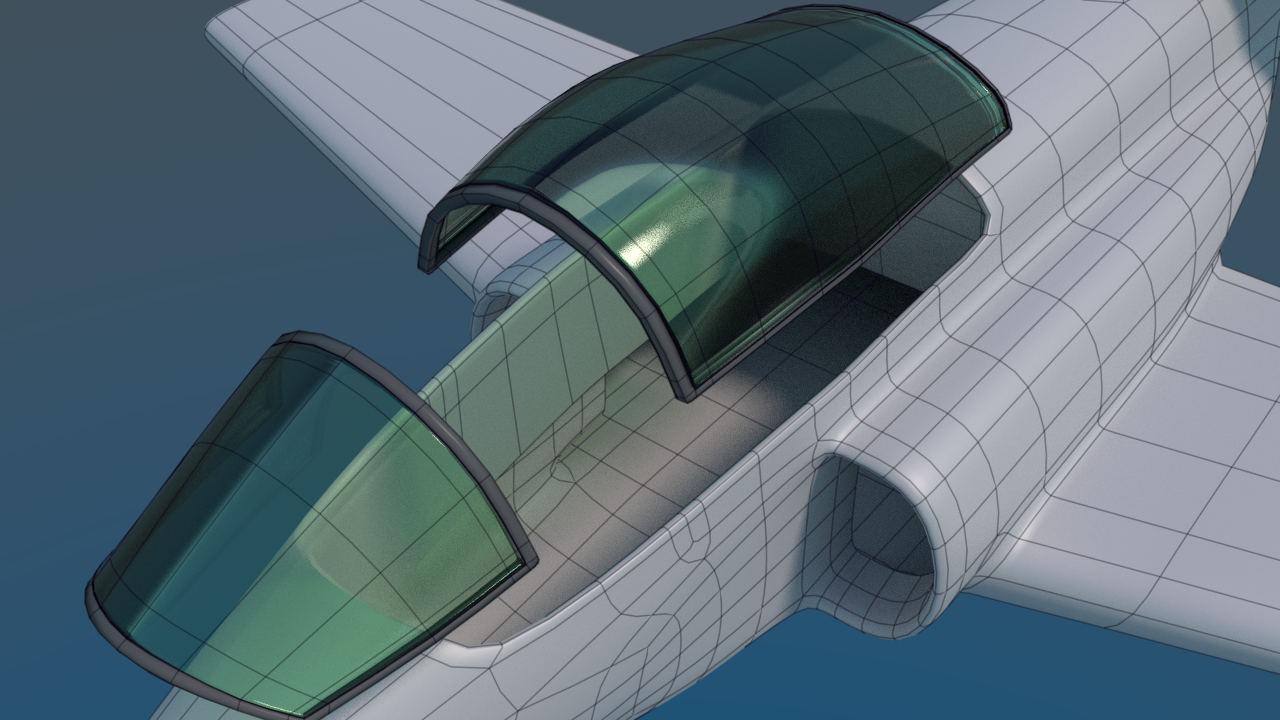
In the meantime, I added some material zones for the canopy and a rather simplified engine. (It’s just a hollowed out cylinder, since there are no plans on making it where the parts will be seen.)
nice looking jet should be nice and easy to fly, the wings do look large and out of place, but it is a trainer jet and for this reason you would want to create as much lift as you can.
Managed to cut the canopy pieces off and partially tub out the cockpit. Can’t make it too deep since I have to remember to leave space for the front undercarriage and that kind of stuff. Leaving room for the other stuff means the seat is a bit smaller vs. what open volume there is. So it also means the plane is a bit bigger than it looks, once scale is established in regards to the pilot. (I know it sounds funny but I’m thinking out loud here, no refs and making up stuff.)
And of course I did dock the length of the wings a little, maybe less lift - but a slightly faster bird. Hopefully it’s not too stubby. In sims, these kind of jets are a bit fun. (Like the Aeromacchi in FightGear.) But I’m not sure if I’ll convert this over, no plans in that regard yet - anyhow it’s not a real jet and some aspects of this model may not be that practical.
This is quickly becoming a nice looking creative project. You’ve definitely nailed the trainer look to it. It’s got a very BAC Jet Provost look to it and judging by the first render I thought you might have the seats side by side like in the Provost too.
Personally I’d make the cuts (for control surfaces) before unwrapping it. You don’t necessarily have to separate them into the individual pieces for ailerons, etc. but you’ll get a texture stretched in weird ways if you unwrap it and then add in a few loop cuts here and there.
Thanks. This might be a single seat trainer aircraft rather than a side by side. The kind used to solo and keep up general qualifications or whatever. Just smaller and not as fuel hungry as a regular combat fighter.
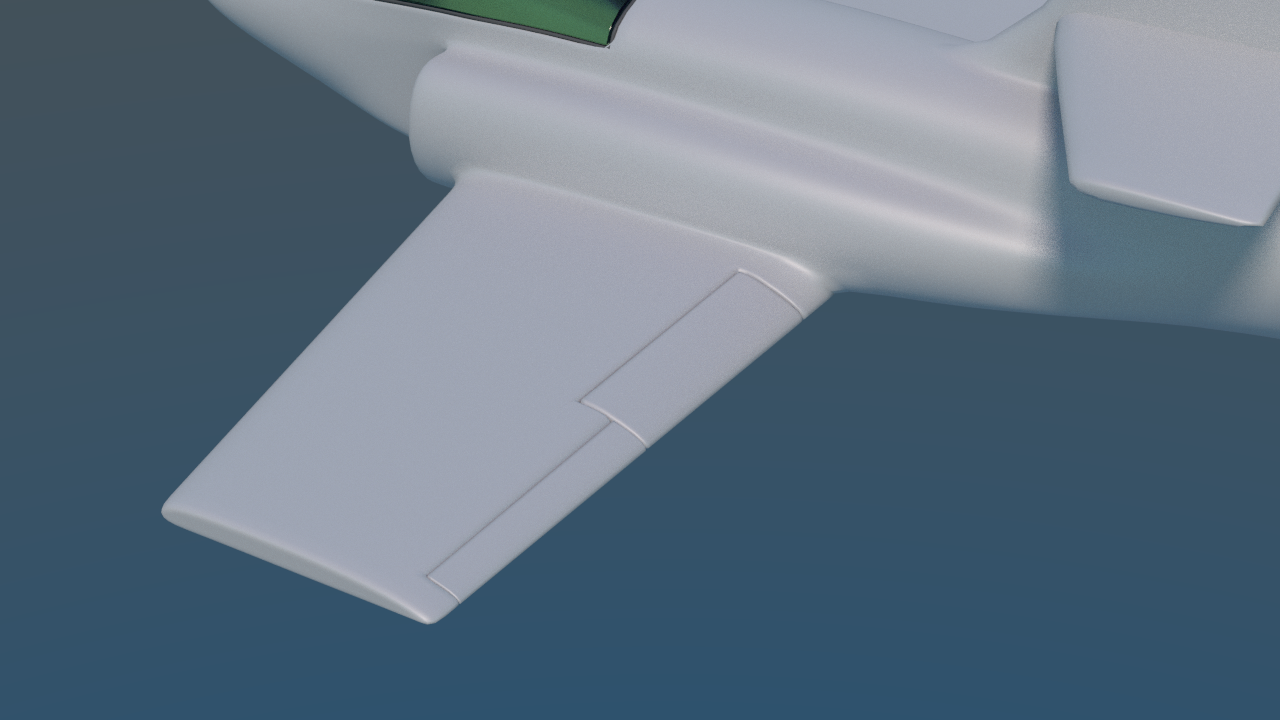
Anyhow, some work on the ailerons. And yeah, I figure I’ll do the chopping first before mapping.
I tend to model by the idea of “if it looks good, it probably is good.” If I ever apply the subdiv, then I’ll tweak and fix the flow when I get to it. (May have to do that for final texturing, just so there is no stretching.)
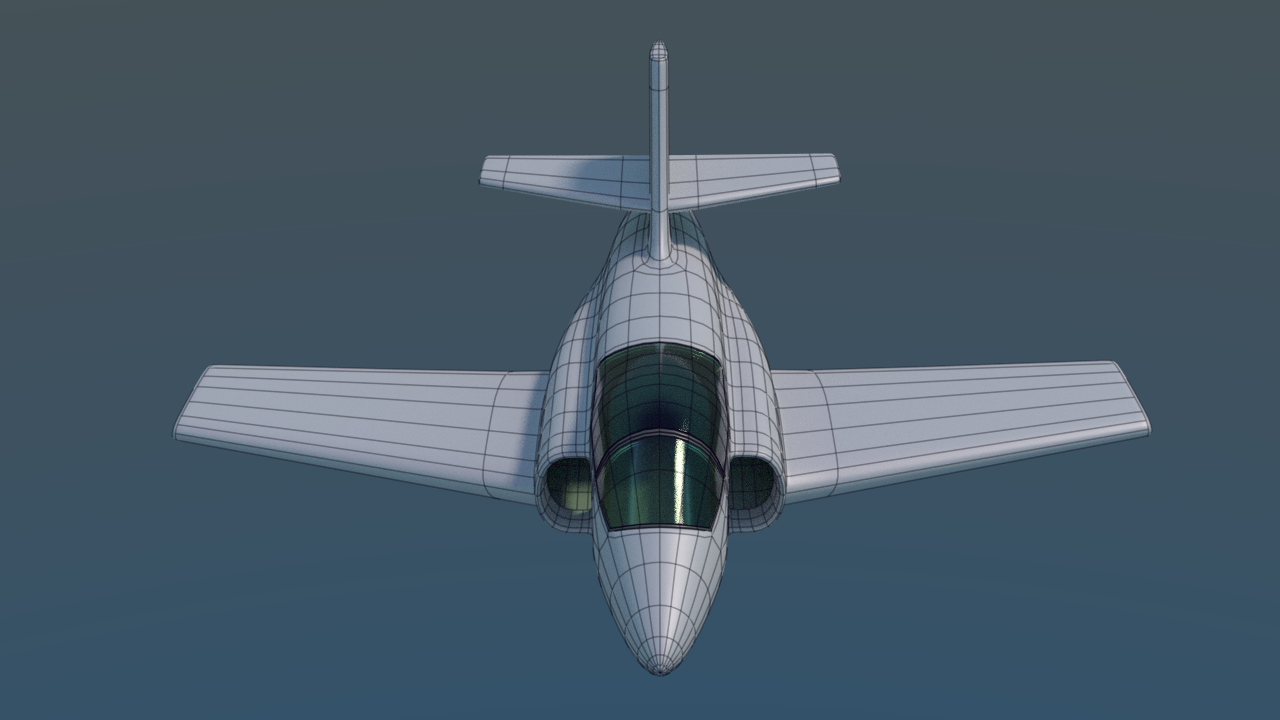
I also did another piece on the model, some Y-shaped thing going from the nacelles to where the engine would be. However it’s more of an internal geometry thing and it tends to be fairly dark inside on a frontal render. But at least it looks a little more finished from the front where you can see inside the nacelles.
Will have to notch out the horizontal control surface on the tail to allow for rudder travel. I think I’ll cheat a little and move the whole horizontal though rather than have a separate elevator surface, some real jets do this because of issues in trans-sonic flight so I figure this “cheat” is ok.
Landing gear is going to be a pain in the butt. I think I’ll have to poke some through just to get an idea where they go so I can make cut-outs for them in the right locations. Oh, and maybe some kind of simple air brakes. Then I can start UV’ing.
i would make the flaps a bit bigger. the stab is plenty high enough so they would not cause any dirty air there, that way you may also be able to do away with the air brake.
i would make the flaps a bit bigger. the stab is plenty high enough so they would not cause any dirty air there, that way you may also be able to do away with the air brake.
are you going to round the tips bit?
I think I’ll stick with the air brakes. The control surfaces were a pain enough to get right just cutting them out the first time. (Or at least I want to keep moving forward at this moment. And the placement I’m considering for rear landing gear is pretty tight as it is.)
I sort of like the squared look, it’s just different enough. Maybe I’ll put some hardpoints there?
I would definitively make it a one seater also for some reason it reminds me of the Acrostar BD-5J Microjet used by James Bond in Octopussy.
Speaking of the BD-5J, actually I did a model of that one. That BD-5J was modeled in Wings3D though, and doing a plane in Blender is still different enough. (I miss having a few things from Wings3D.) Actually got around to rigging it in Blender, so you can find it at Blendswap. Dunno if I’ll get this new plane as detailed as that one, and this new aircraft will still make the BD-5J look small in comparison. (BD-5J Barely fits the pilot, as where this one is probably slightly bigger than a Cessna 172 at the size I’m picturing it.)
Try hiding the vertices that you don’t want effected.
I know you mean well but the problem with that is that they’re hidden, and sometimes it would really be nice to see things in order to position them in relation to each other. There really needs to be a way to lock their movement while still having them visible. (I know there’s a workaround, but it’s a pain and involves a few extra steps and making extra junk that has to be deleted again and you still can’t proportion influences on vertex movement. A vertex mask of sorts that actually works for modeling purposes would really speed workflow.)
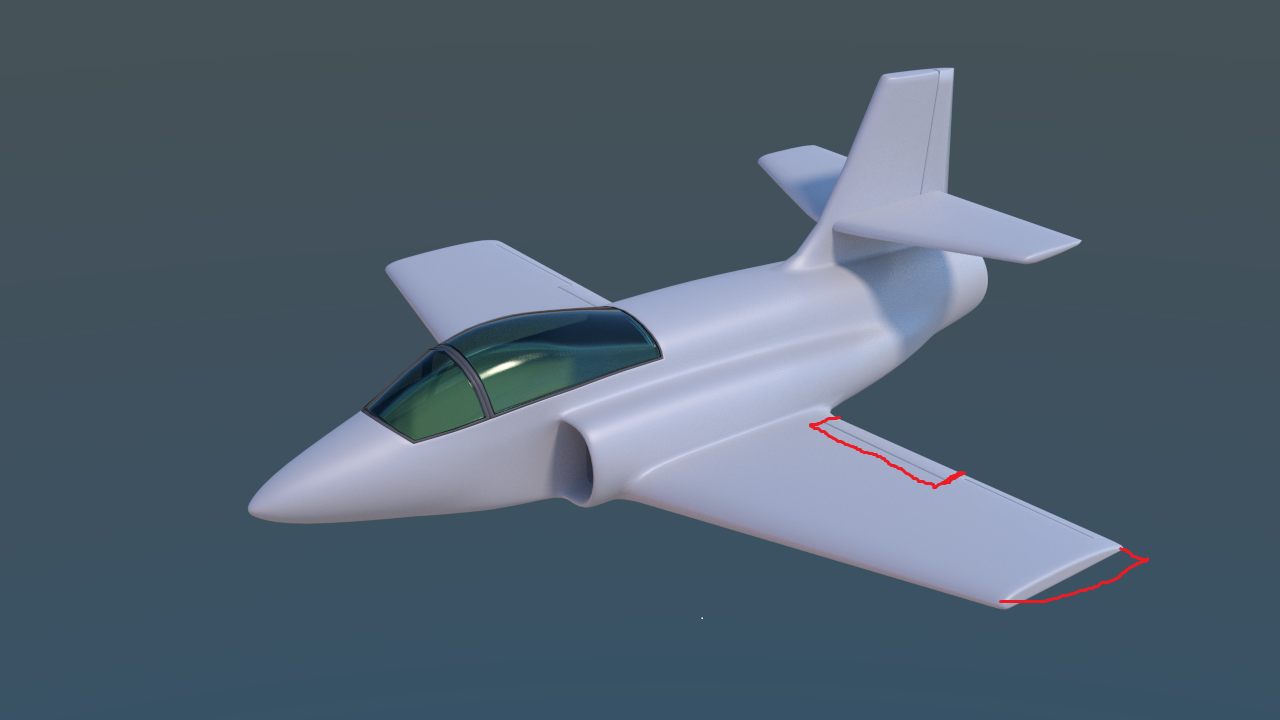
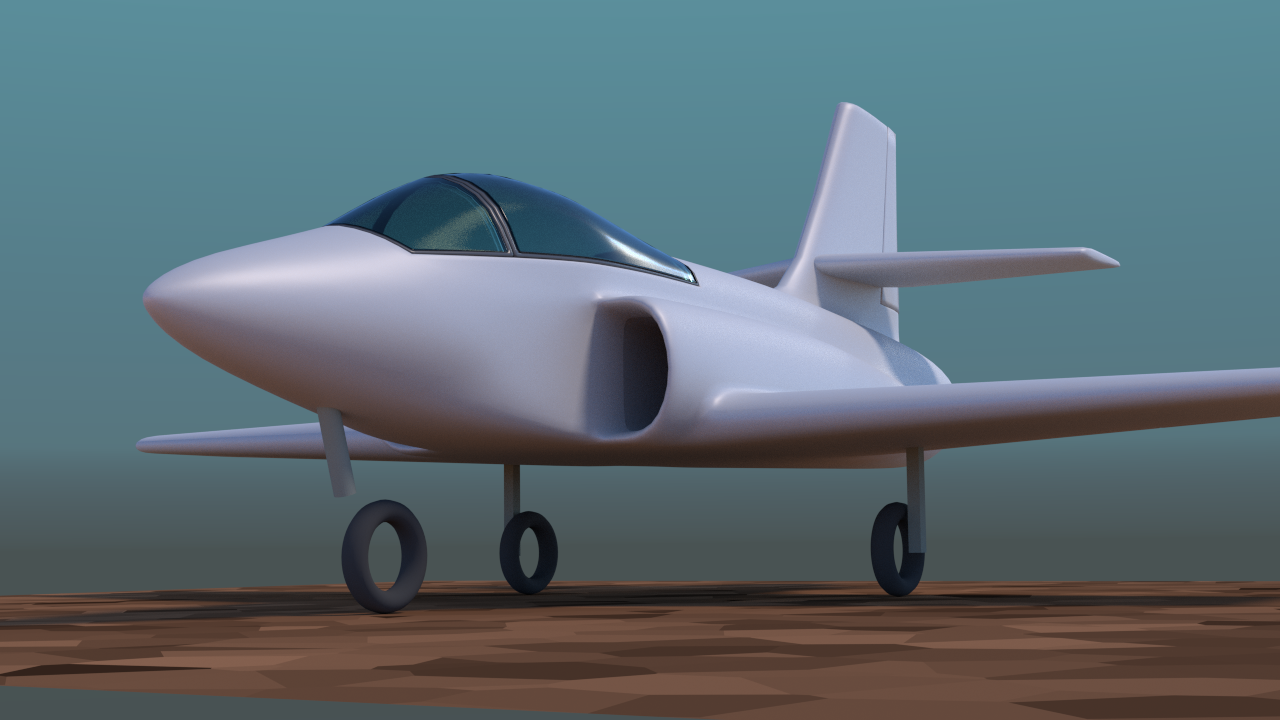
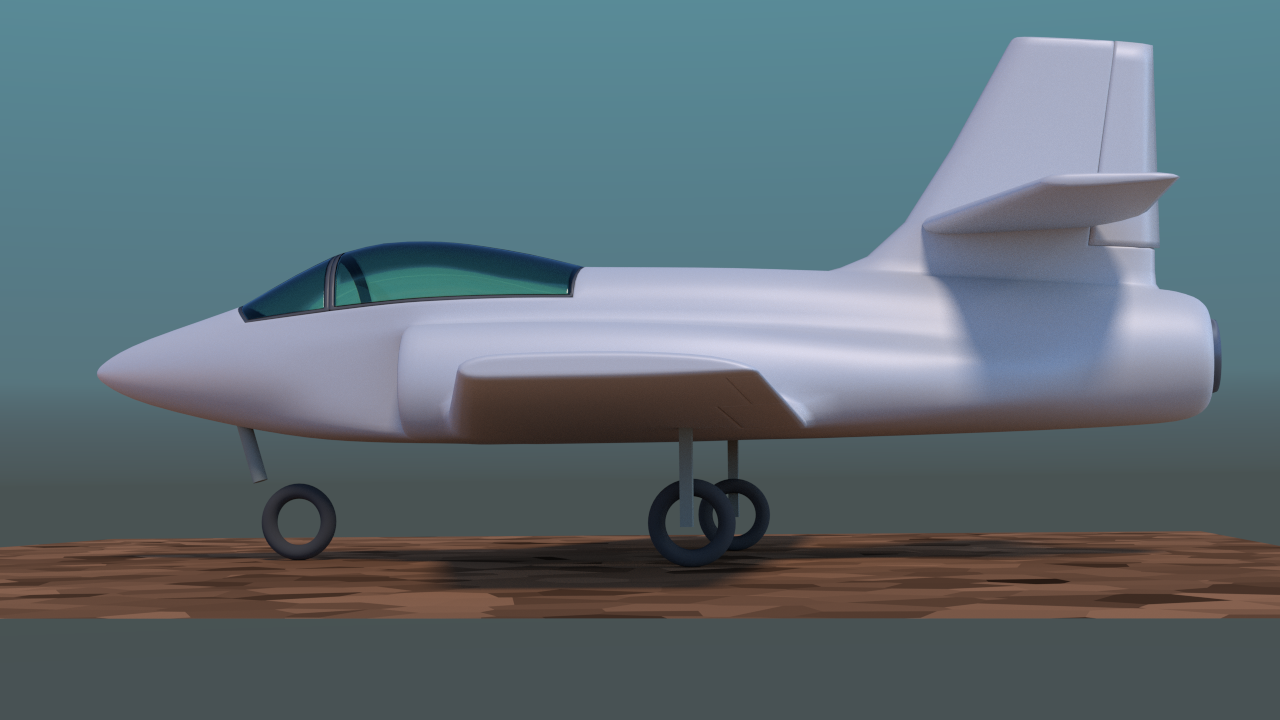
Some “quick n’ ugly” renders showing a mockup of the landing gear. Basically to get an idea of this aircraft’s stance when taxiing on the ground, and to get an idea of internal clearances by moving this temporary gear into a folded-up position. I think this is about right for this aircraft.
Still bugs me though that it seems a little tail-heavy in the following view. I know jet engines are fairly light compared to piston engines vs. the volume they occupy. But also how does that compare to where internal fuel may be held and things like support systems? (I want to keep the airframe pretty clean, so I’m not sure about putting a trailing tailwheel gear on - and nowhere for it to fold internally when considering the engine placement.)
I think I may be able to nudge the rear gear back just a bit more, but not much. One still has to keep in mind the imagined connections and operating gear for the flaps, and those will need their clearance. It’s part of the reason why I didn’t cut them out any bigger. However I might be a sneaky SOB and borrow a design trick from airliners and modify those flaps. Split the flaps interally and give them a trailing lower half, basically almost doubling the area of fully lowered flaps while still keeping the same sectional cutout in the raised position. If you’re into flight sims or just happened to be a passenger with a wing seat during a flight, you can probably picture what I’m talking about. However my focus right now is on the gear with the panel cut-outs and bays, modifying the flaps will be something I consider when I get around to it.
Just note that the rear wheels need to be behind the center of mass and lower then the front wheel so it has a good angle of attack.Also making the wheels too long will cause stability issues during takeoff and landing.
jet looking sweet, cannot wait to see some colours going on, have you thought of a scheme yet?
just a couple of thoughts.
balancing could turn out to be an issue if not careful so taking the gear back is not a good idea noting where the CG will be, the other thing to keep in mind is that the gear may not fit in the wing if too far back and need to stick out a bit, this is not really to much of an issue unless you want to put gear doors on. The turbine should sit as near to the CG as possible (balancing purposes) and the fuel tanks on the CG, reason being is if they are not, the CG will change position in flight as the fuel drains. CRASH
as DCBloodhound mentions, the AOA is not correct and the nosegear will need to be made longer or the mains shorter. i would also consider a trailing link gear for the front, the idea that you have is correct at the moment, but the strut needs to be a lot closer to 90 degrees. (this for sometimes a little harder landing than expected)
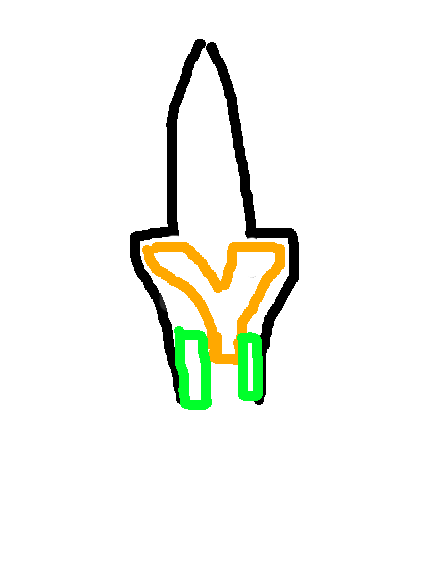
i have attached a sketch of how i think the fuel could work with the 2 air inlets tapering into 1 in front of the turbine, this way air also get forced into the turbine, the more air the merrier.
hope you do not mind me scratching all over your render :o
I don’t mind doodles on the model. Interesting to see what other people think may be going on with the unseen bits. (I doubt I’ll ever get around to doing an exploded diagram model with this.) Helps to see if the design appears plausible despite just being eyeballed and having stuff added as it goes along.
A trailing arm type suspension/pivot thing is planned for the front gear, and the rear wheels kind of go into the fuselage a bit more than the wing when folded up. (Some internal volume behind the scoops compared to the smooth external tapering.) And yeah, I’m planning on some system of doors. At least I’m not having to deal with any serious engineering issues, more or less going by “what looks cool”. Which I suppose is part of the fun of being a 3D artist.
And I’ve seen examples of some real jets that seem to have really “screwy” designs for how they retract landing gear. But I’m sure those that made them like that had their reasons. What I’m doing is still pretty basic compared to some of that stuff out there.
No, I didn’t give up on the project. Just needed a bit of a break. (And other stuff like Minecraft is fun at times. Particularly when the brain just doesn’t feel like going into logic-mode.) Also did a bit of R&D on various aircraft to take a look at how the people that designed them did some things. So I’ll probably be doing a little bit of borrowing in places.
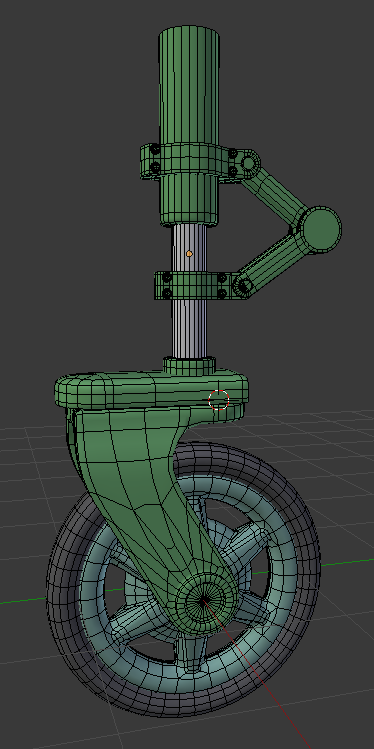
I started on modeling the nose-wheel landing gear. Still needs some parts (like caster style piece that attaches the wheel) and other details, but I think I have the general idea regarding what I want to do with it.