I used the Spiral AddOn to create the curve. Then I created a circle curve. I put the circle curve in edit mode and set all the control points to Vector. This left me with a square shape that I rotated 45 degrees (so it did not look like a diamond). I used that square as a bevel shape for the spiral and created a taper curve as you suggested. This gets me pretty close to the spiral part after I convert it to a mesh. I am kind of a noob at mesh modeling so I am not sure about how to take the edges from the spiral out to form the cube area. Do I just select and edge then extrude out and kind of align it by hand or is there a better way?
You just add another curve, a cycle, Just ask for a four sides quad resolution.
Very nice results already, BTW.
Sorry to go on about this, but I am not that good at modeling. Can you explain a bit more about how to add a cube exterior to my above spiral?
Do you mean I should add another curve around the entire piece and use another square bevel shape? How do I get my quads to line up to I get an even loop flow?
Atom, if you mean this one, (http://www.blenderartists.org/forum/showthread.php?273033-Sculpting-with-UVs-and-displacements&p=2355477&viewfull=1#post2355477),
You have to go with the screw tool, not curves. Do the operation, editmode W remove doubles,
Continue to build until you reach a rectangular outline shape.
Then solidify it or anything you like.
Start selecting loops and extrude (inset is much more handy)
I suppose, there isn’t any standard way to go when modeling.
The basic principles is to have nice, handy loops.
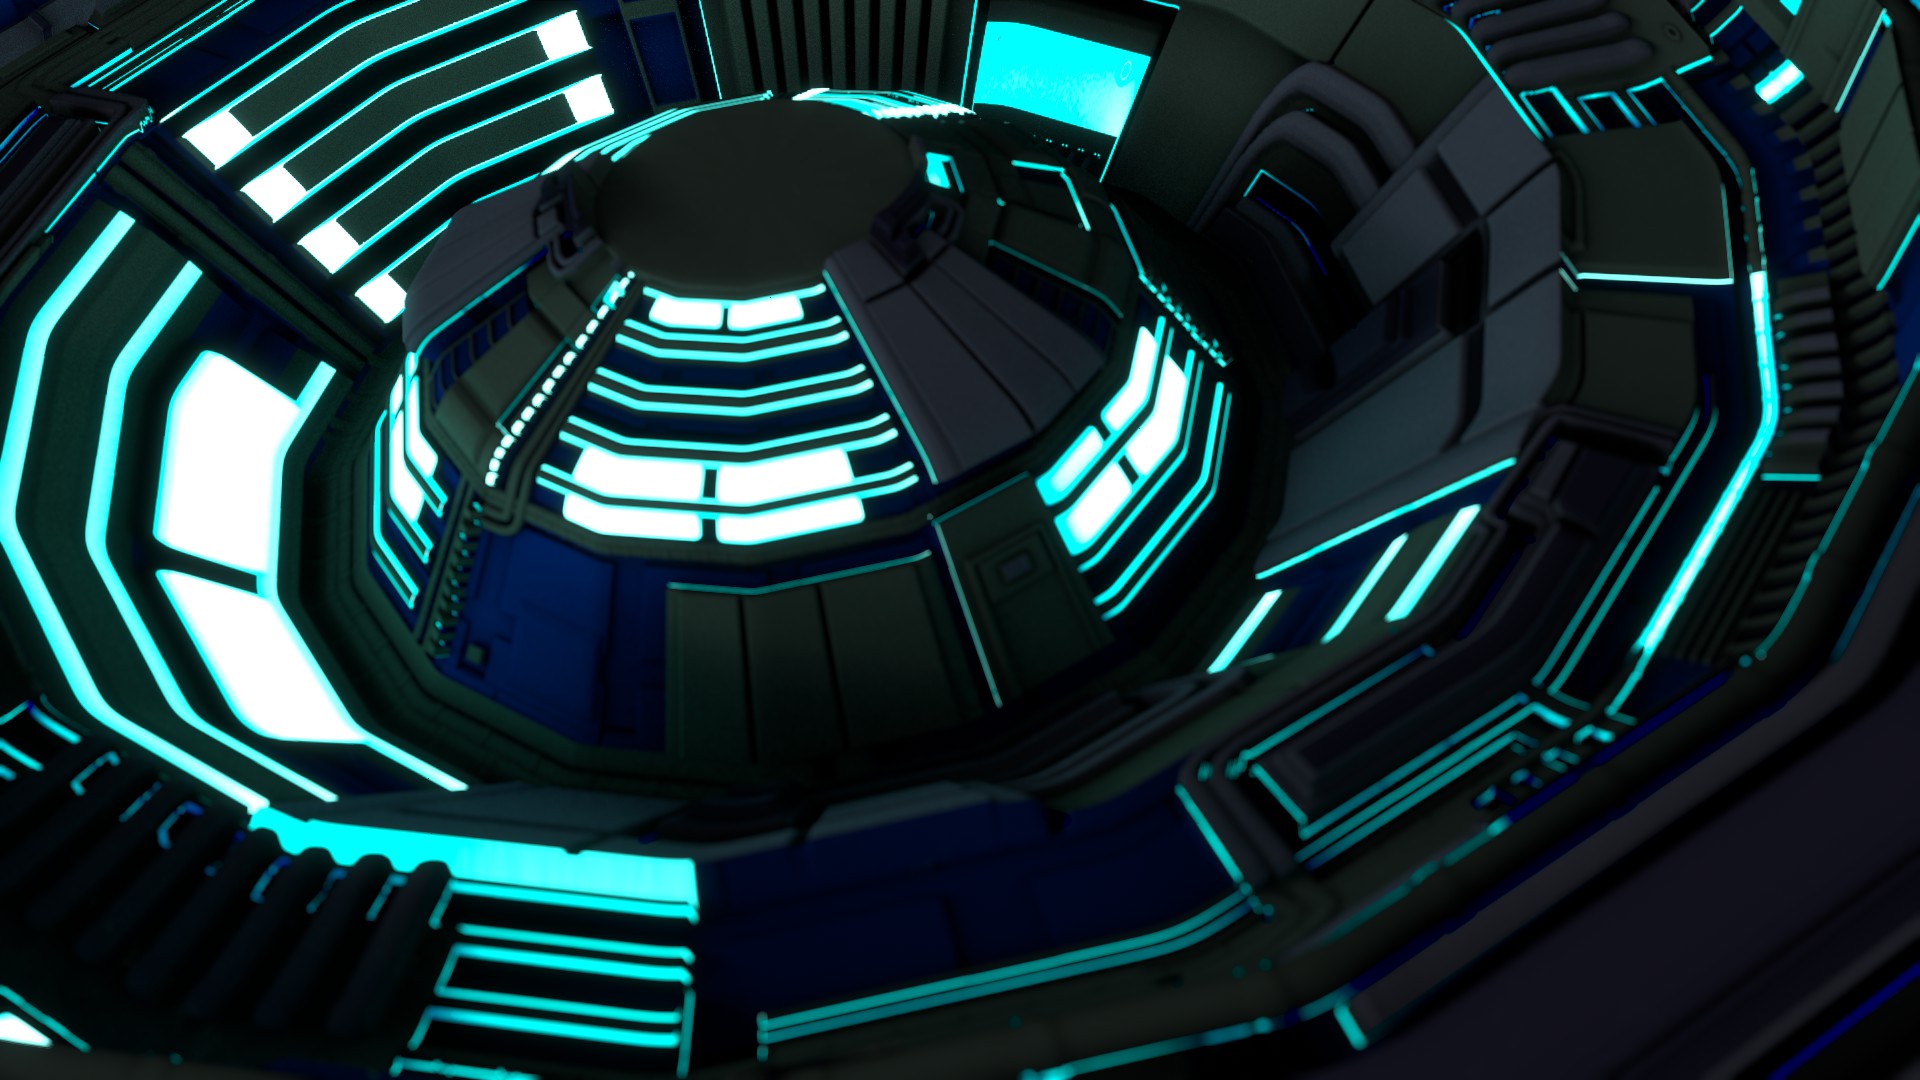
New work, a little different approach.

Michalis, thanks for the tips.
I noticed a new AddOn that Offsets Edges in the direction they are facing. This was just what I needed to extrude out the sides of my spiral to connect it to a rectangle mesh.
Attachments
@michalis,
I likes the new approach, that looks awesome (ô¿ô)
@Atom,
Great work, has emission shader added to it as well?
Cheers,
~Tung
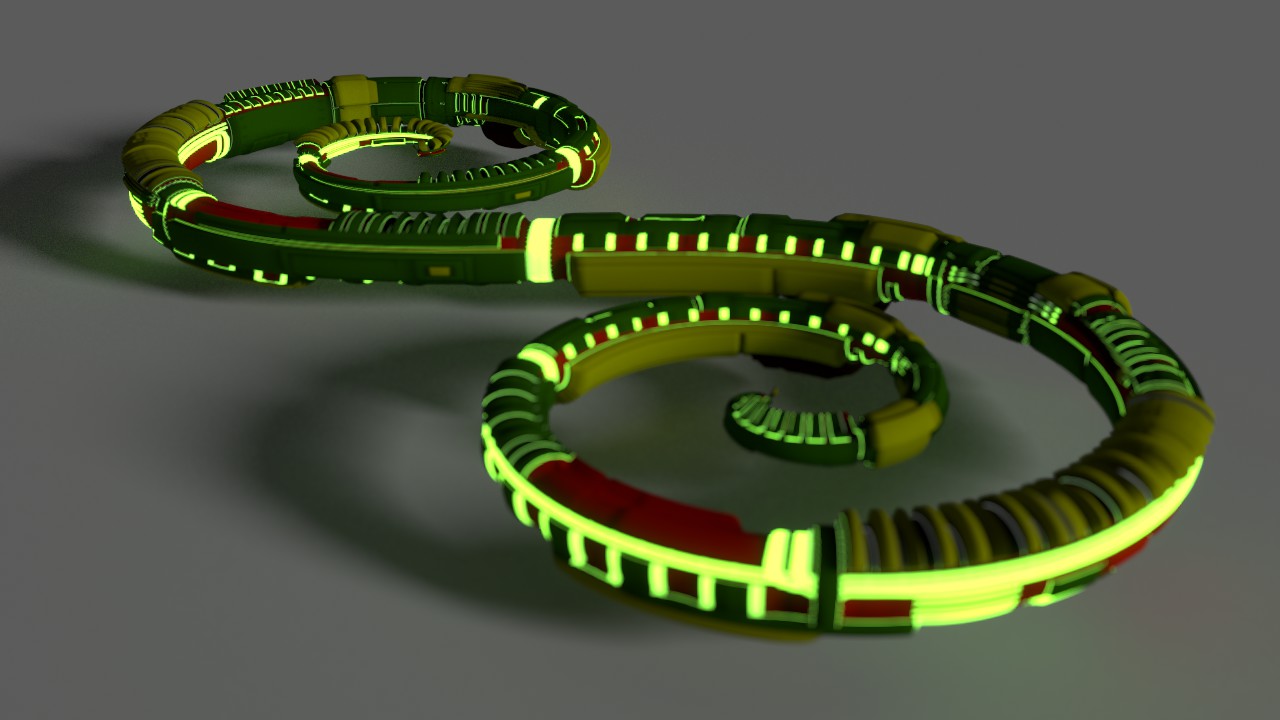
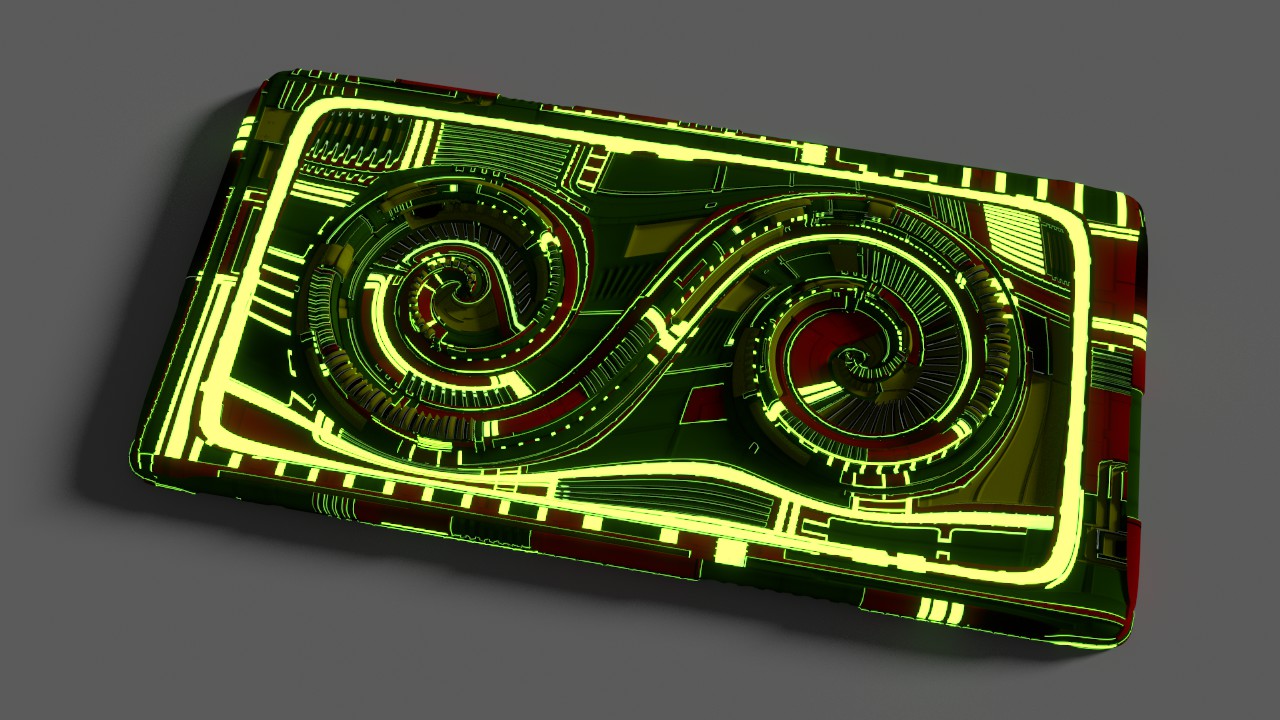
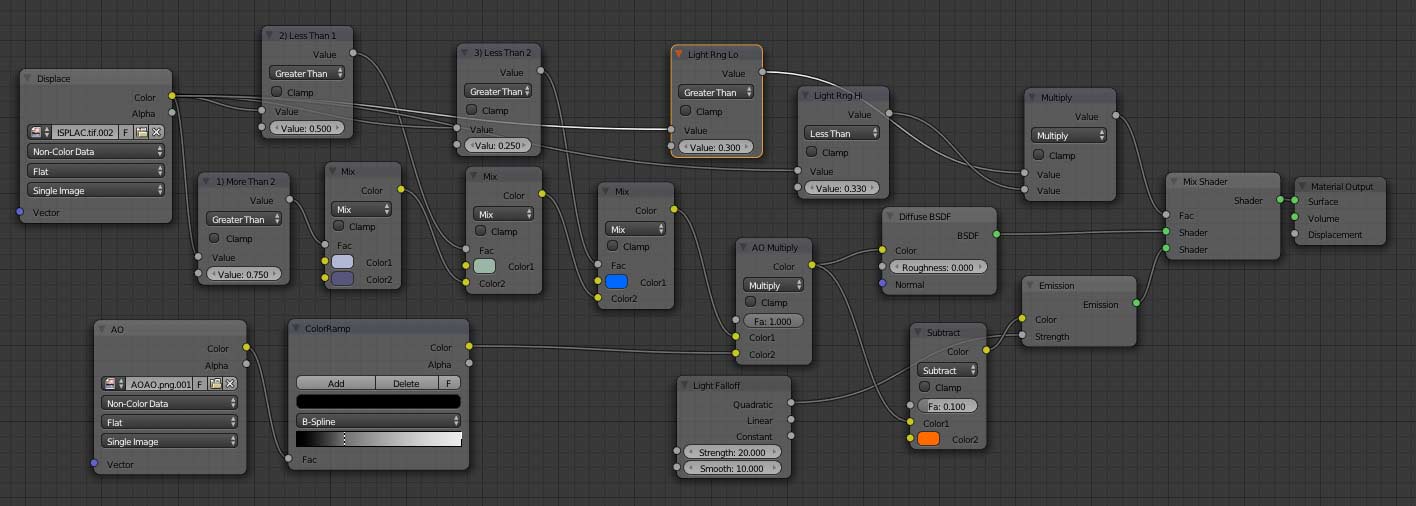
@tungerz: Yes, I added an emission range to the 4 color by height setup I have been using. If you put your viewport in Rendered mode you can adjust the HI/LO number and interactively dial in the right amount of emission for your object.
Attachments
Thanks Tung.
Nice work Atom.
Topology is the most important on this method.
In fact, I learned a little more advanced UVs and some more modeling tricks because of this thread.
I hope we all learned something, The most important.
In my case, I also learend a bit more of zbrush. LOL. UVs and topology, same principles everywhere. Only the UI changes.
However, the UV editor in blender is one of the best I’ve seen around. Not fanboyism.
Not sure why, but when I render the .tif AO and save it, it changes shading.
Have you had experience with this.
The one on the left is the render, the one on the right is after it is saved.
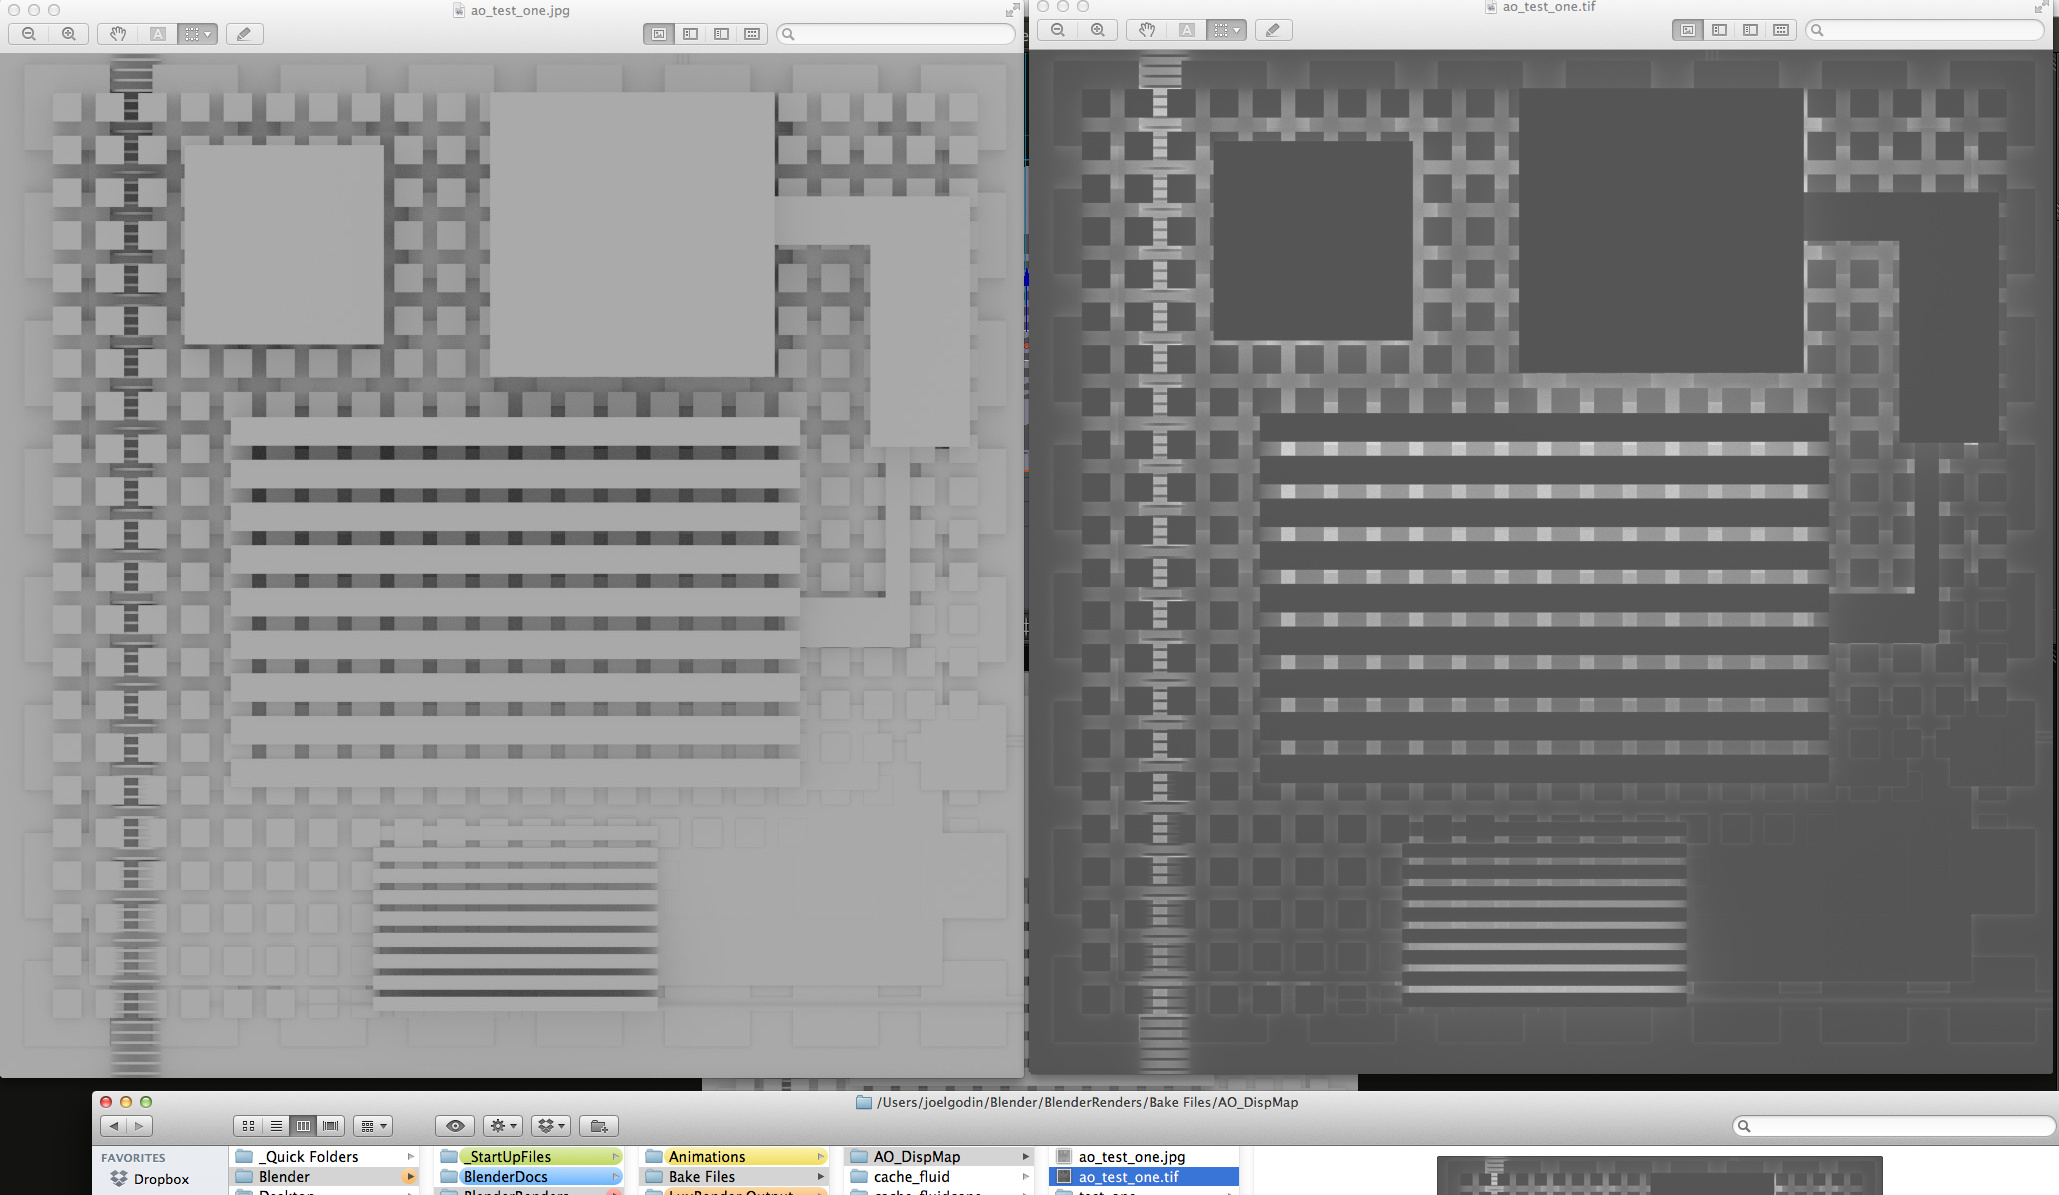
It is negative.
Invert it. I wonder how this happened.
That is strange, what file format are you saving to? Are you saving via F3 from the image window?
Yes, Saving via F3 as TIF. See screenshot of saving. r59202
I should say the above was F3 as JPG and right was F3 as TIF.

same thing with r55057
I wonder if it is a bug.
1st shot, regular color TIF
2nd shot, BW TIF
3rd shot, BW JPG
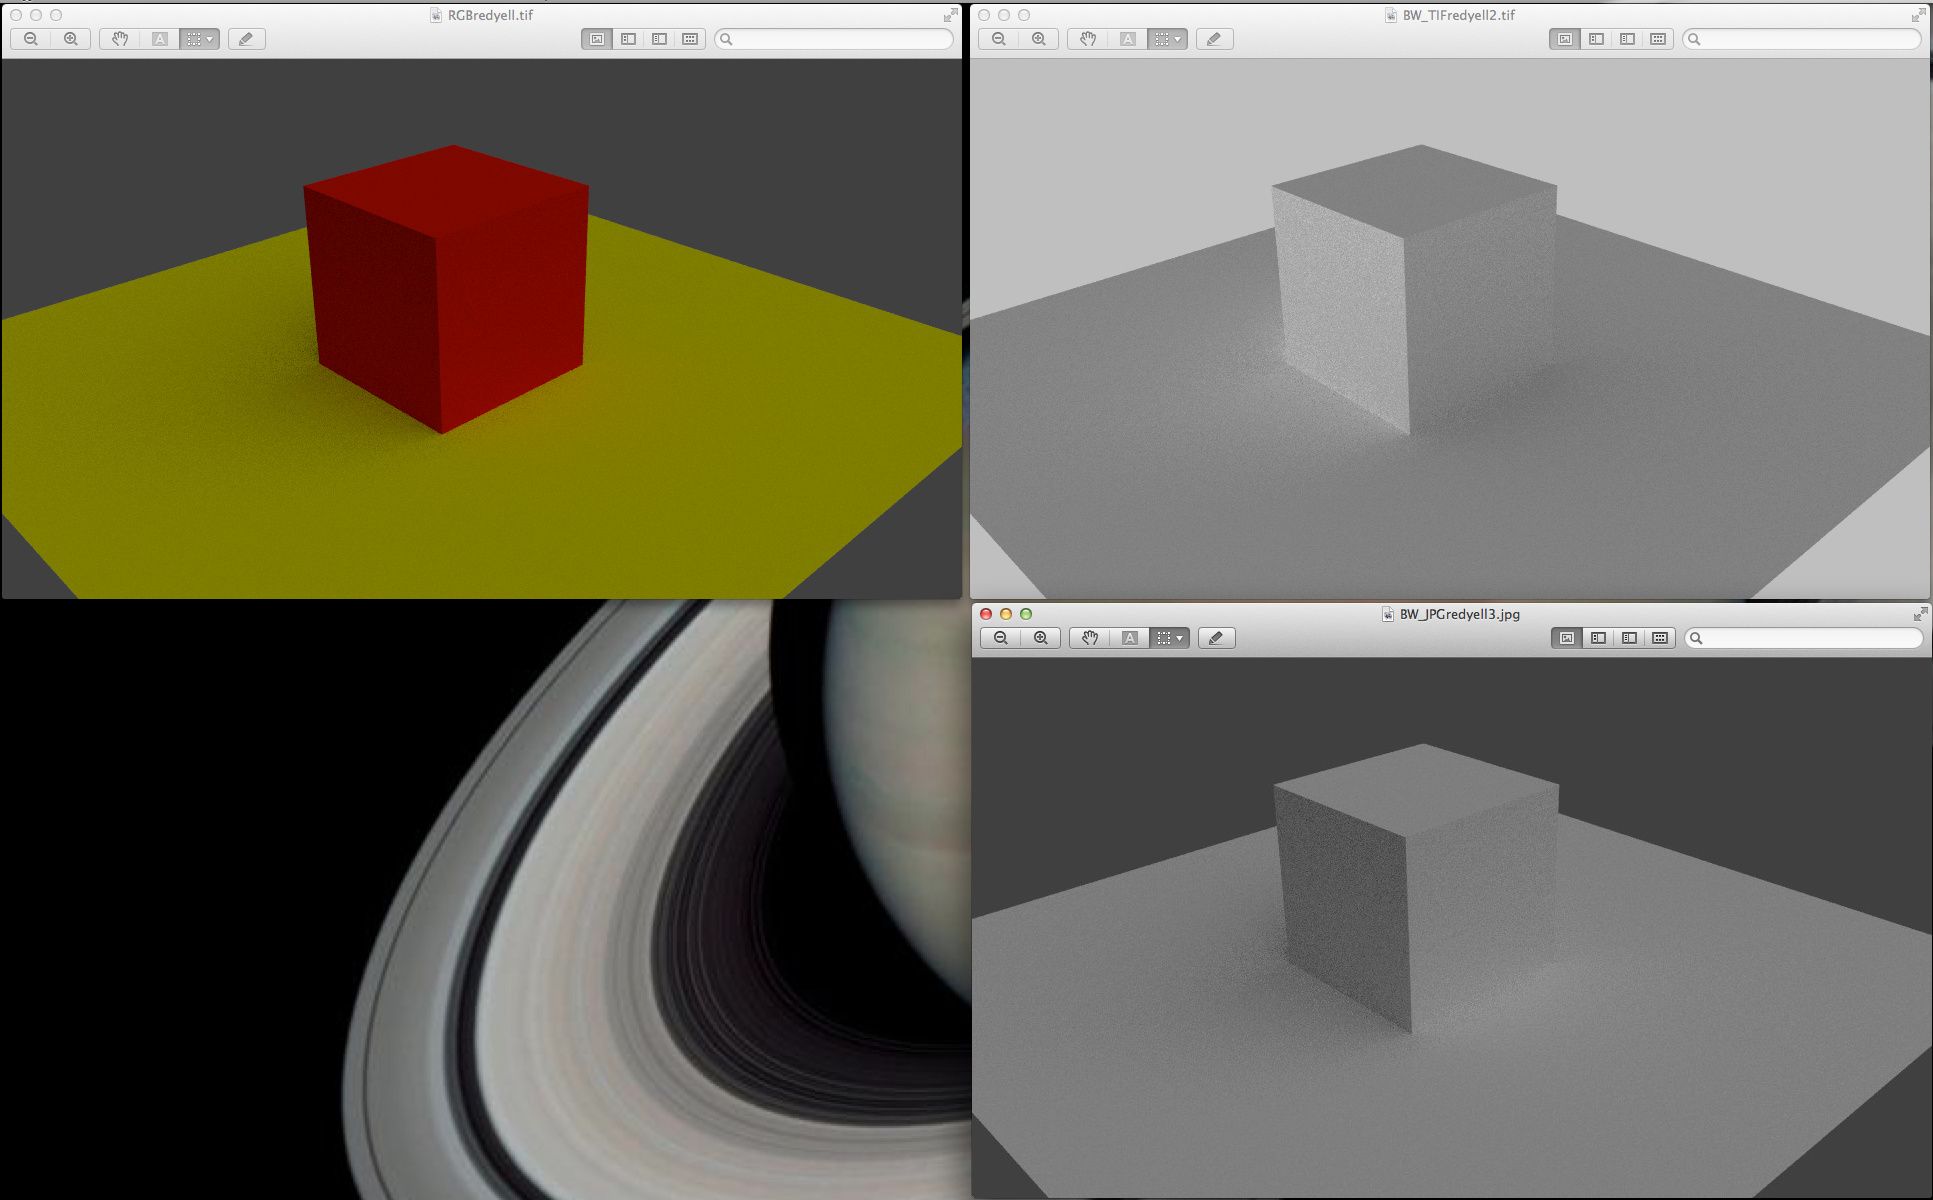
The TIF does look inverted.
Okay, I think the problem is with OSX preview. After some search, I found in Adobe forums this:
“Inversion is not uncommon in Preview, which is not able to handle complex PDF properly”
So I opened it up in GIMP and it is fine. So probably it is just a Preview problem.
I confirm it under OSX 10.8.4
Pshop opens it correctly. OSX preview shows it as inverted.
However, if you convert it to RGB (in Ps), then B&W again, save, OSX preview shows it correctly.
Probably something on the exported from blender file, that OSX doesn’t approve.
I had a few more issues with older B&W images after upgrading from 10.6.8 to 10.8.4
In any case, both apple and adobe can’t be wrong. Something is incompatible on the blender tiff B&W exporter.
We 're probably facing new ideas, which are coming from iOS compatibilities and other nonsenses.
Just more experiments.

Oooh, that one is nice. I like the subtle displacements. Are you weight painting the mesh?
Thanks Atom, in most cases, yeah, I use WeightPainting.
Here’s another.

Verry nice michalis, but please no white background the next time 