I don’t recall commenting on this one, but I particularly like it! I gotta get on board with this ![]() (I think I said that a while ago lol)
(I think I said that a while ago lol)
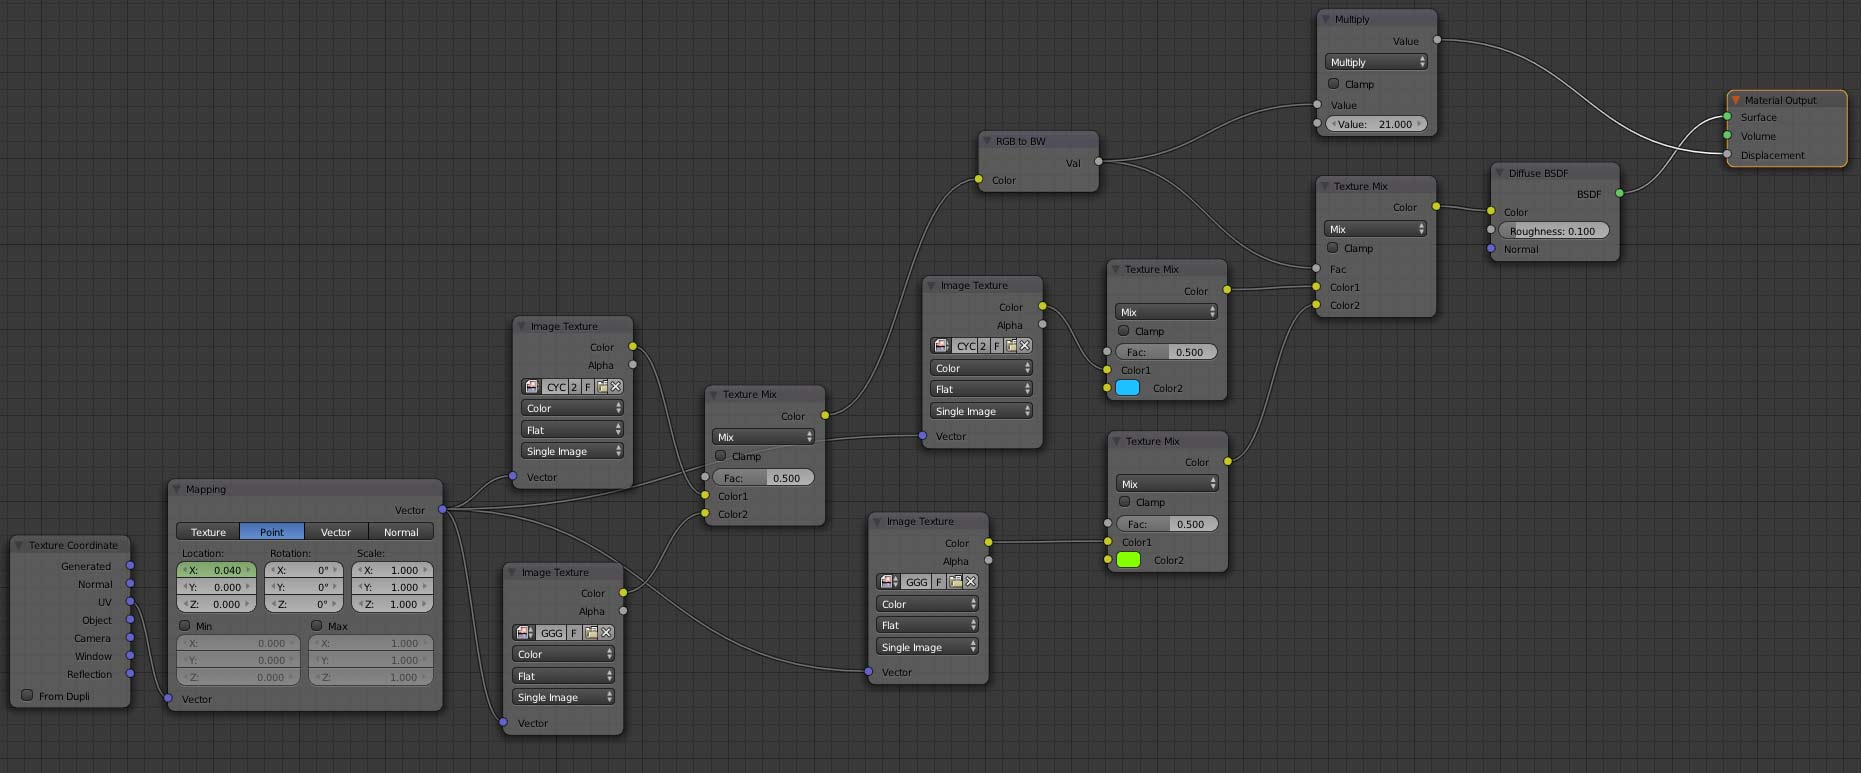
How about using the created displacement maps and mix and match those, perhaps with different UVmaps (attribute node)?
I fear procedurals don’t work very well with the intention of this thread.
But using the displacement input of the material output should open up some interesting options the displacement modifier does not have. Like mixing Displacement Textures, setting strenght of displacement with a colormap (Normals as color, even?) instead of having to use vertext groups, etc. pp.
Would be interesting to find a workflow for that without being able to see the result until rendered. 
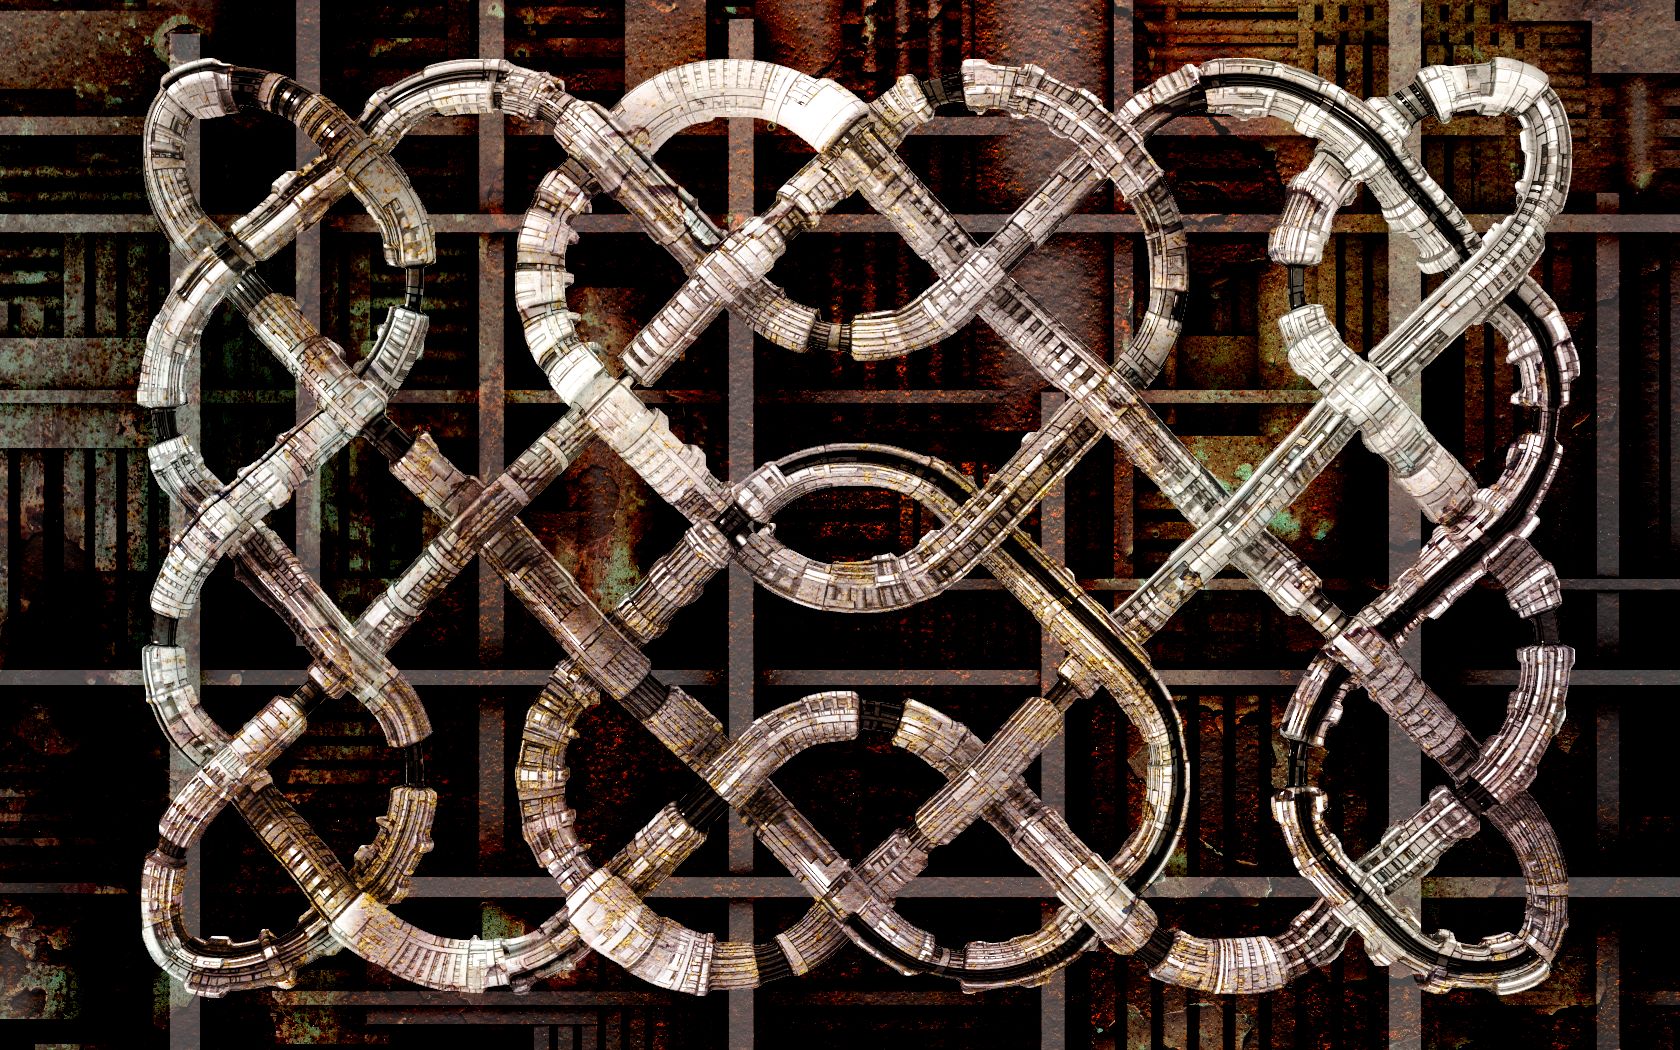
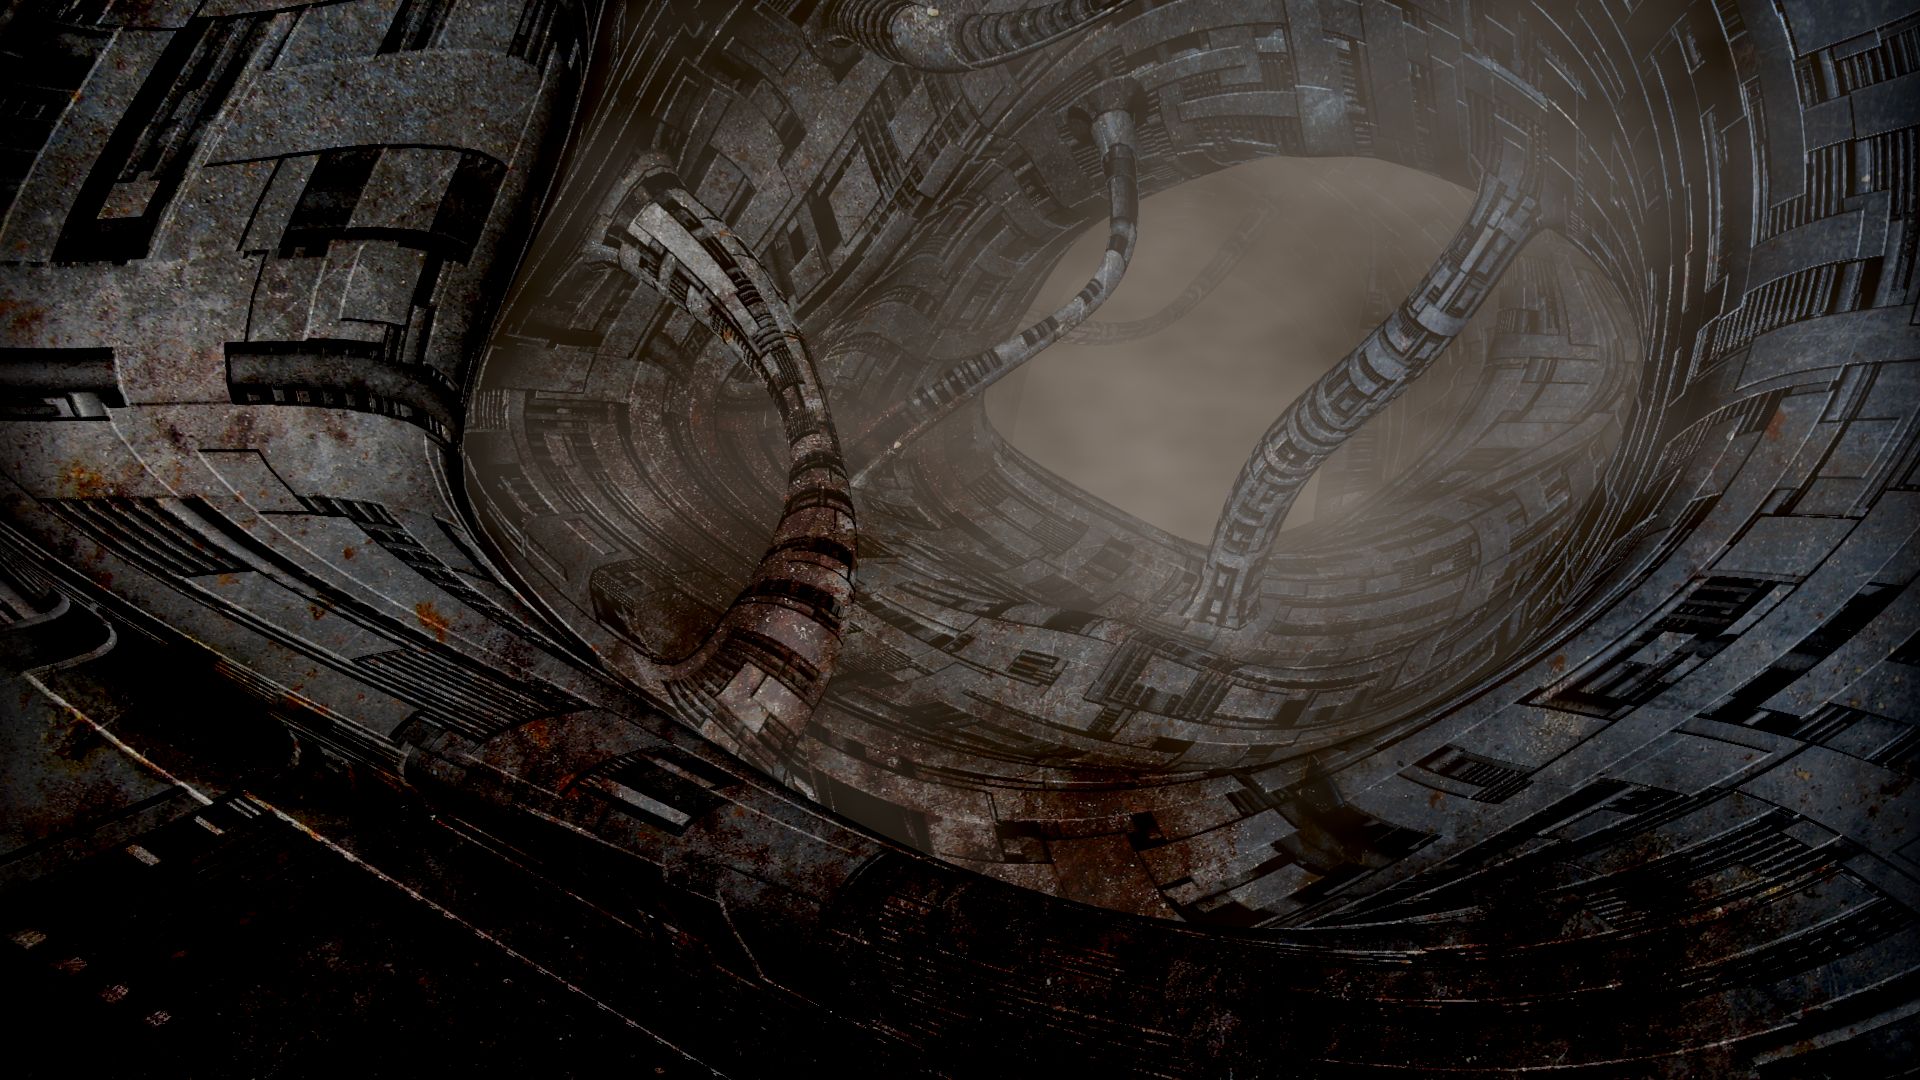
So, I took Atom’s file, opened it in blender 2.69, set both subdivs one higher and replaced the displace procedurals with two random displacement maps I had lying around.
Then hit F12:
I can kind of see where the maps influenced each other.
I just saw I totally disregarded the Surface aspect of it all. My bad.
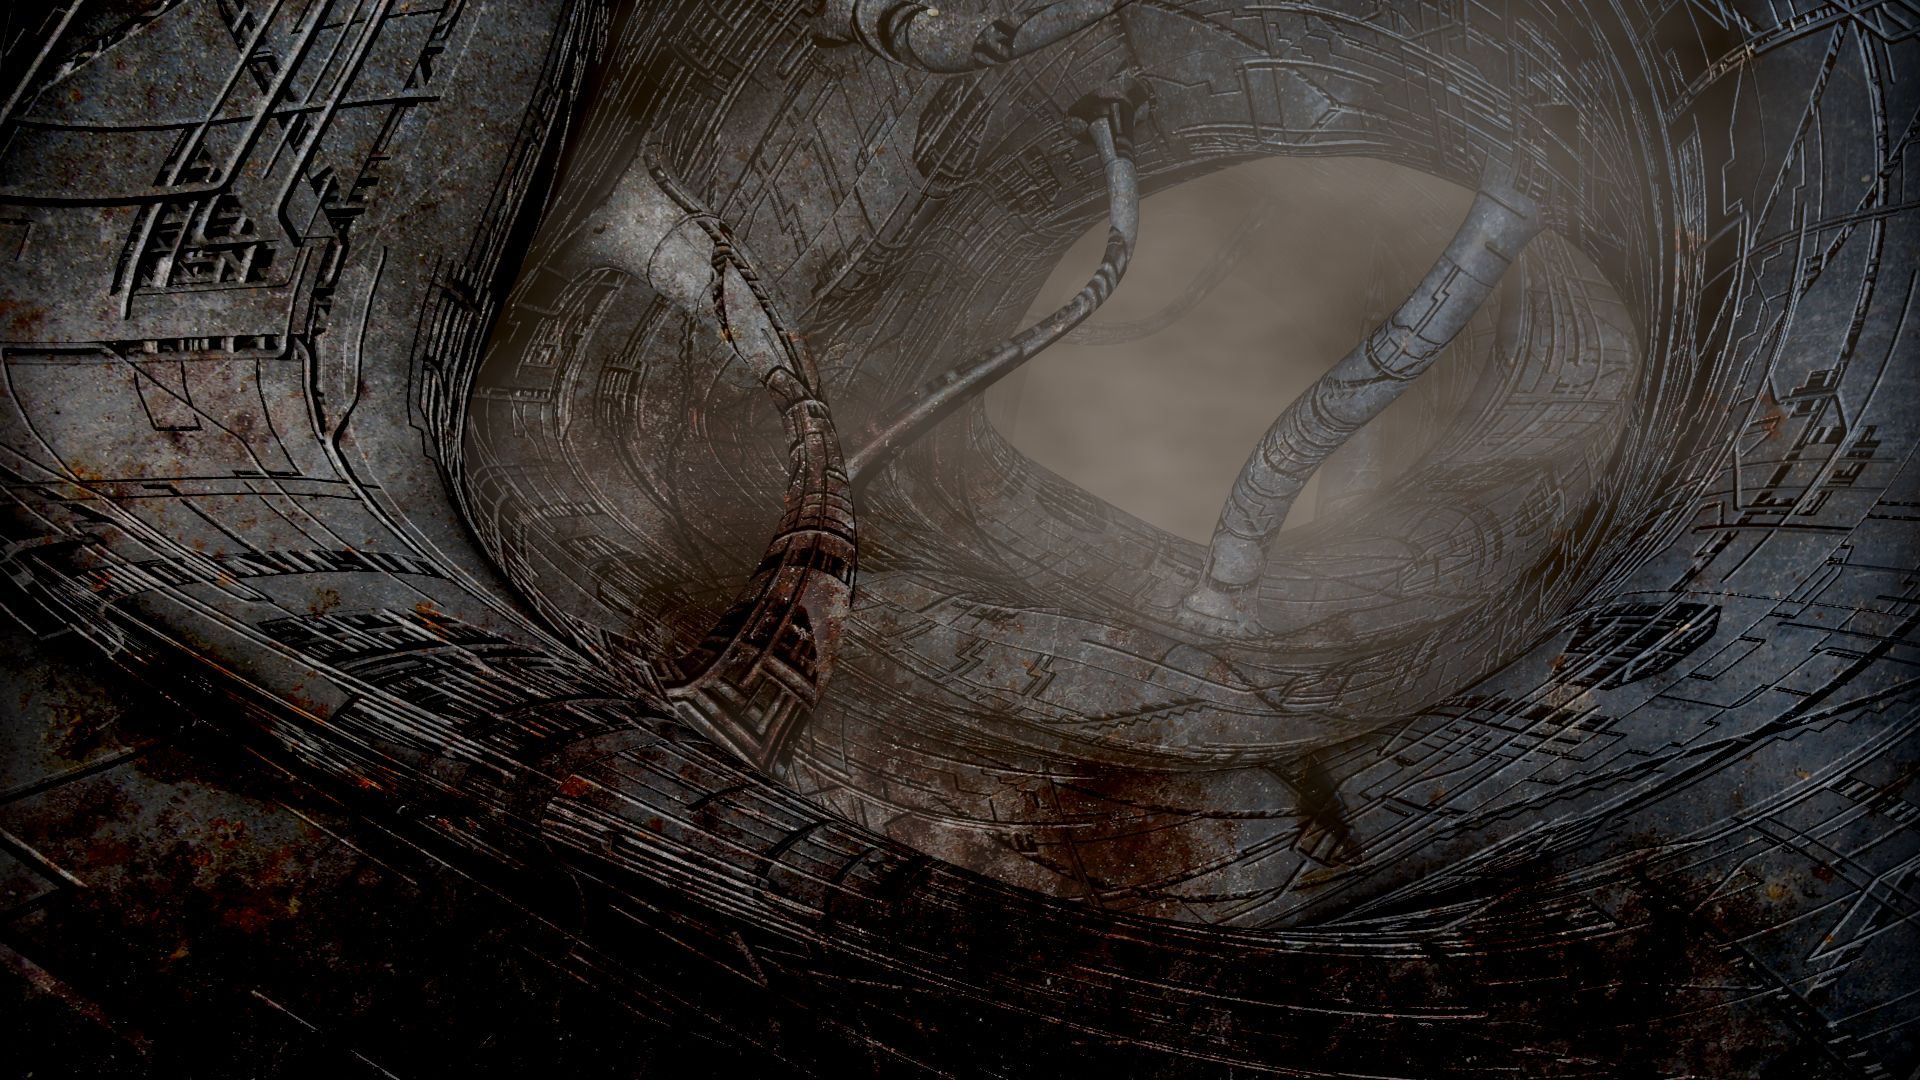
An here’s the same thing with two changes:
Replaced the AO texture with the AO version of one map and replaced the wave map with the displace map for all surface uses, too.
Also did some basic UV unwrapping.
Result: Mixing displacement maps works. But you knew that. 
I kind of like how that turned out in the center. That “window” on the right not so much.
I apologize for the lack of effort I put into that.
I think this has potential. Now you can add as many UVs as you like and use the math nodes to “mix” the displacement at overlapping loops.
Or make edges more interesting…
The word I was looking for was “weight painting”.
Using a texture instead of weight painting should give you control over the faces instead of just the verts.
So my idea is to create two (or more) kinds of displacement maps:
One (or more) for the “geometry”. All those blocks and cylinders and basically everything that looks good as displacement / bump.
Another one with ramps and things like that. Basically a map full of gradients.
And then mix those together.
That’s what I did in the pics above. The one that is also applied as “AO color” is a texture where I wanted to see how smooth gradients look as displacement. Spoiler: Horrible if only applied as displacement. The structure and size is not right atm.
This led to the effect in the center: The gradient map is responsible for the “bigger” displacement while the other texture, a more traditional mix of cubes, created the more detailed displacement.
wow ulliroyal! nice reflections too 
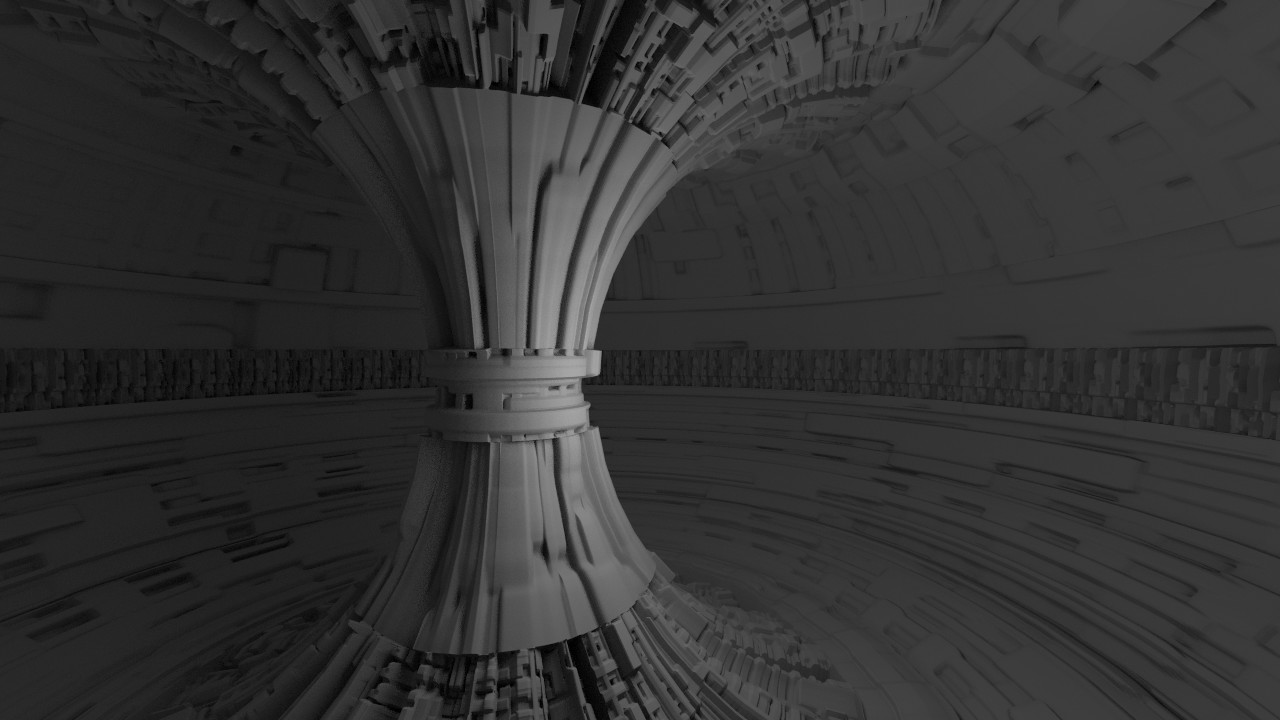
I thought I’d try out Sir Richfields modifications to my scene, myself. I have replaced the procedural nodes with Texture nodes in image mode using the maps from this thread.
At this point I can’t go any higher on my subdivision surface. I have two modifiers and any settings higher than 3x3 crashes Blender on my 16Gb machine. I had hoped for a little more…?
Attachments

does 3x3 mean subsurfing 9 times?
Yeah, but 3 times for each modifier applied. As Michalis suggests earlier in this thread, use two subsurface modifiers, the first one set to Simple and the second one set to Catmul. Both should have subdivide UVs turned OFF.
Hmm, in my opinion and experience, you don’t have to try to kill your PC with subdivisions.
I think it’s more important to think about what you want the result to look.
Also I found that if you think your scene needs 3x3 subdivs, you might as well use bumps to reach the same effect…
Indeed sir richfield
Instead of a heavy and expensive subdivision, split the mesh into 2,3,4 objects, then bumps may do the job. Bumps need AO maps badly, right?
thanks for explaining the 3x3 atom
Thanks for posting this thread…so amazing to see. As a newbie to blender this blows the mind with the creative thinking displayed.
Could you give us the a note on the render settings for this? Really a stunner.
Thanks
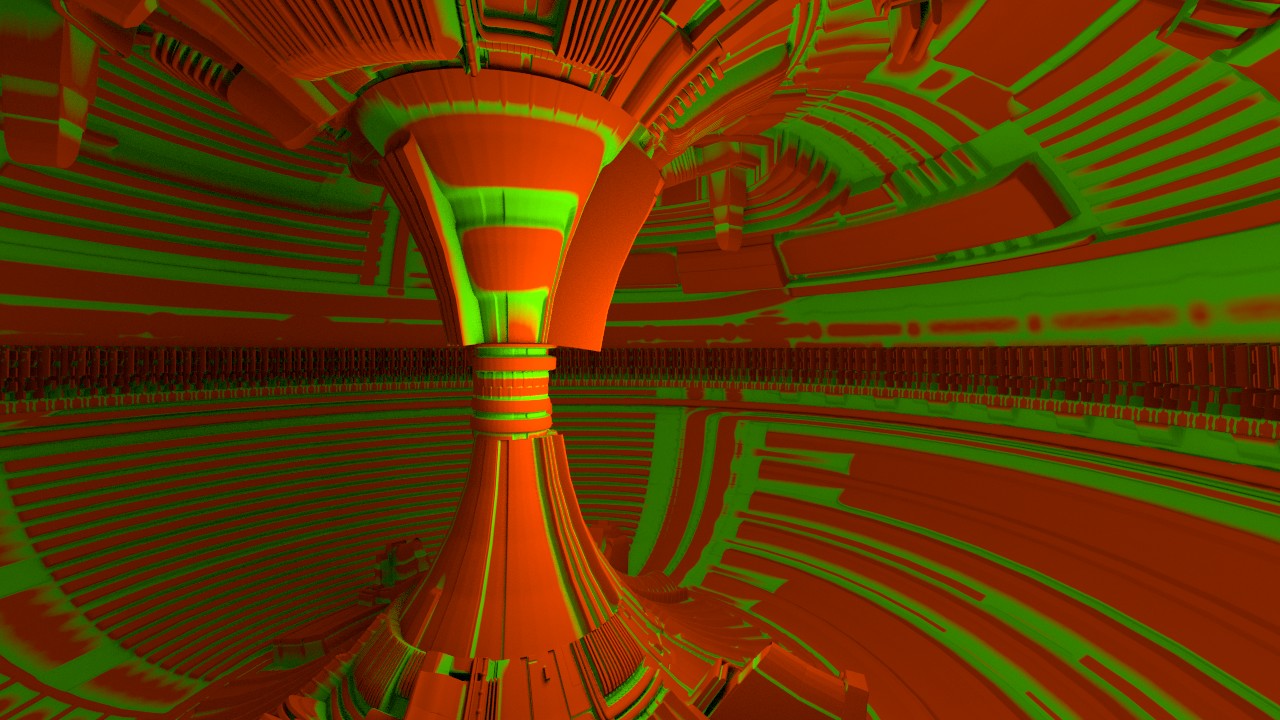
It is postpro actually.
In compositor there is nice trick. Pay attention on the xy values in blur node.
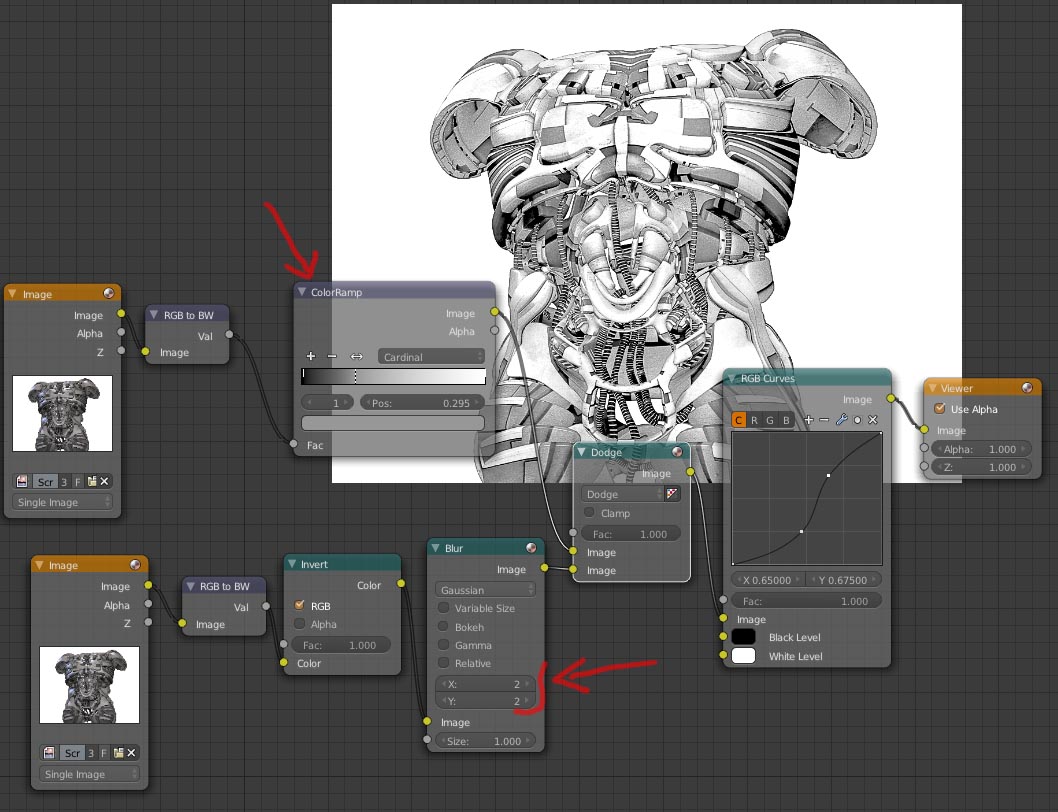
It produces an NPR like effect, the result can be used as overlay on another pass.
I also used a second pass (BI, shadeless - edge render)
I always bake and use both displ-bumps and AO maps. AO maps can be treated via a colorramp and produce sharper, dramatic effects.
Displacement modifier alone won’t be enough, it is also very expensive.
Baking in cycles is already here.
Still experimental, displacements in cycles are also experimental and not compatible with UV maps.
This is why I avoid to post a new detailed tutorial.
Things gonna change soon.
are you still updating first post of this topic with links to new ideas mini tuts michalis.?
atom: could you just use another 16G of swap memory? swapping is really slow, but it shouldnt crash blender…
are you still updating first post of this topic with links to new ideas mini tuts michalis.?
Not really,
Any ideas?
I may missed some.
Please ask, I’ll update it.
I was just testing the new cycles baking updates.
Bake normal maps from a displaced object works just fine.
All these are still experimental though, I’ll post a tut when it will be in trunk.
No reason to let those files rot on my harddrive, might as well throw them in here.
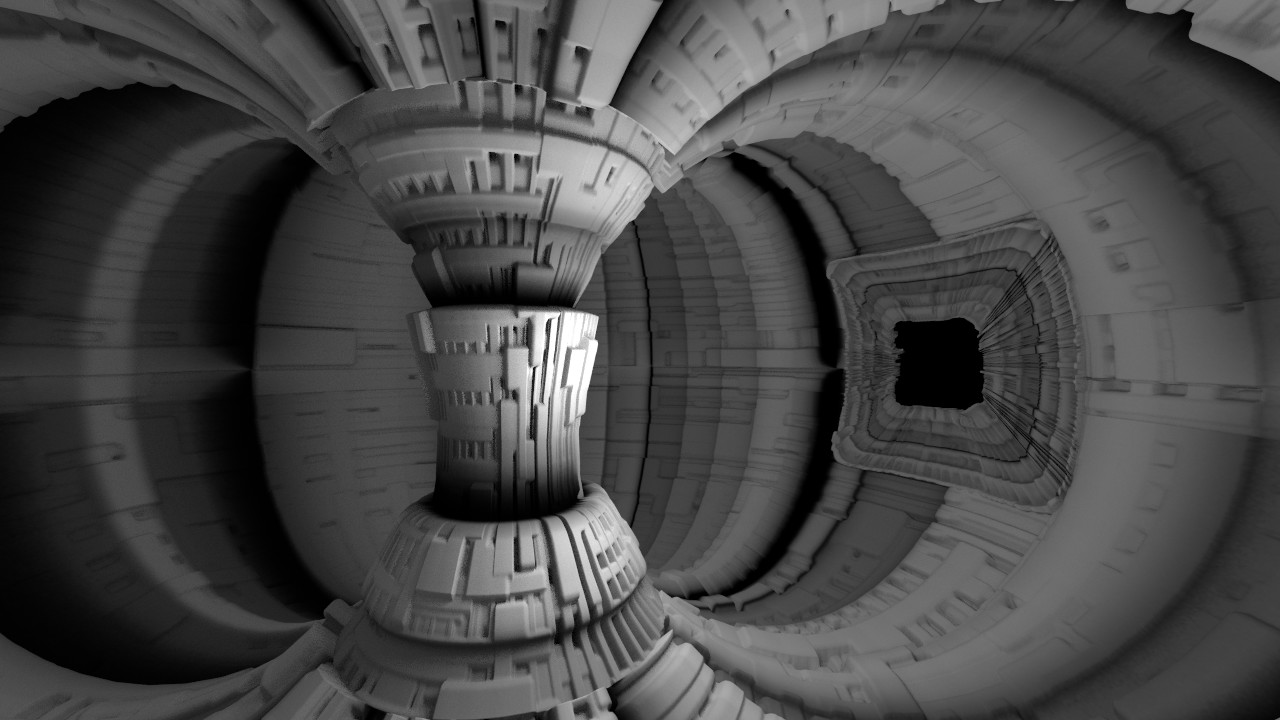
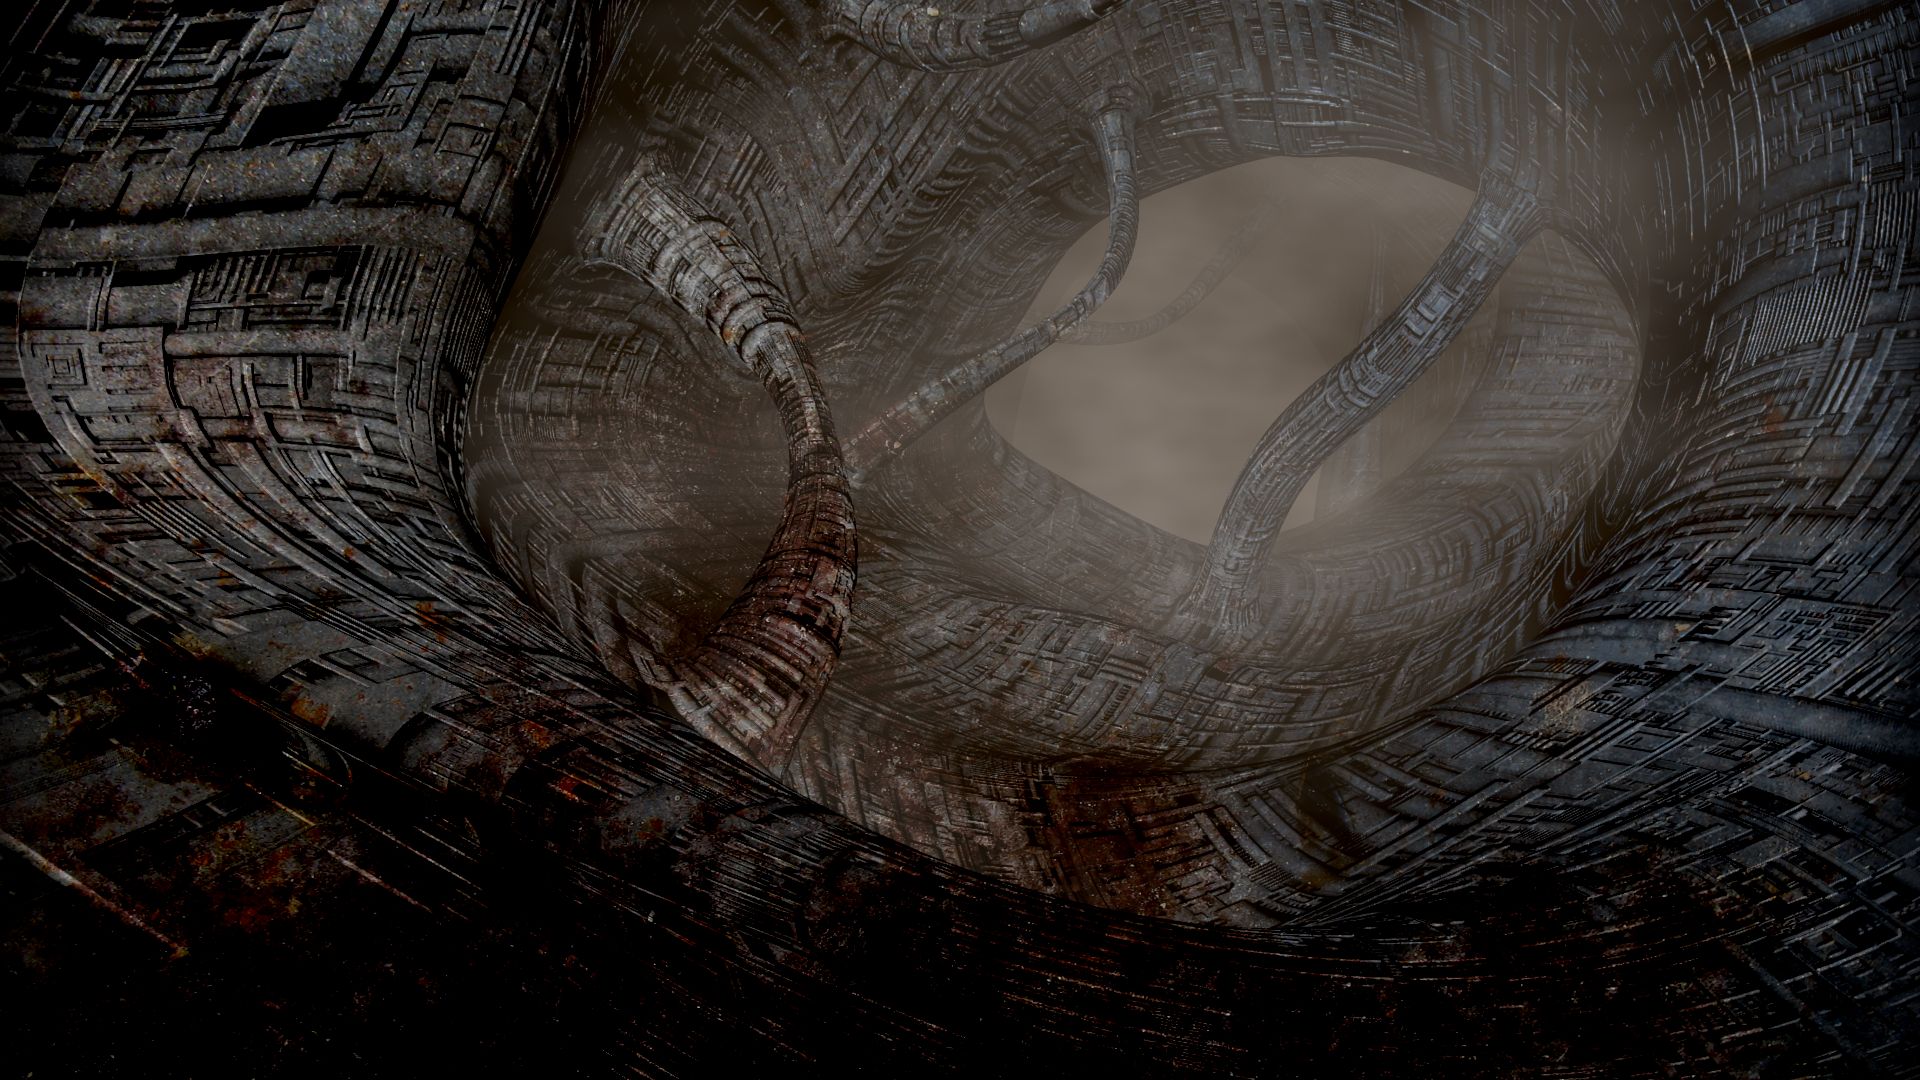
First, a quiz: Spot the displacement.
Bonuspoints: Tell the difference between Cycles and BI, without looking at the filenames.
(michalis, you don’t get to play. I know you can spot the difference a mile away. )
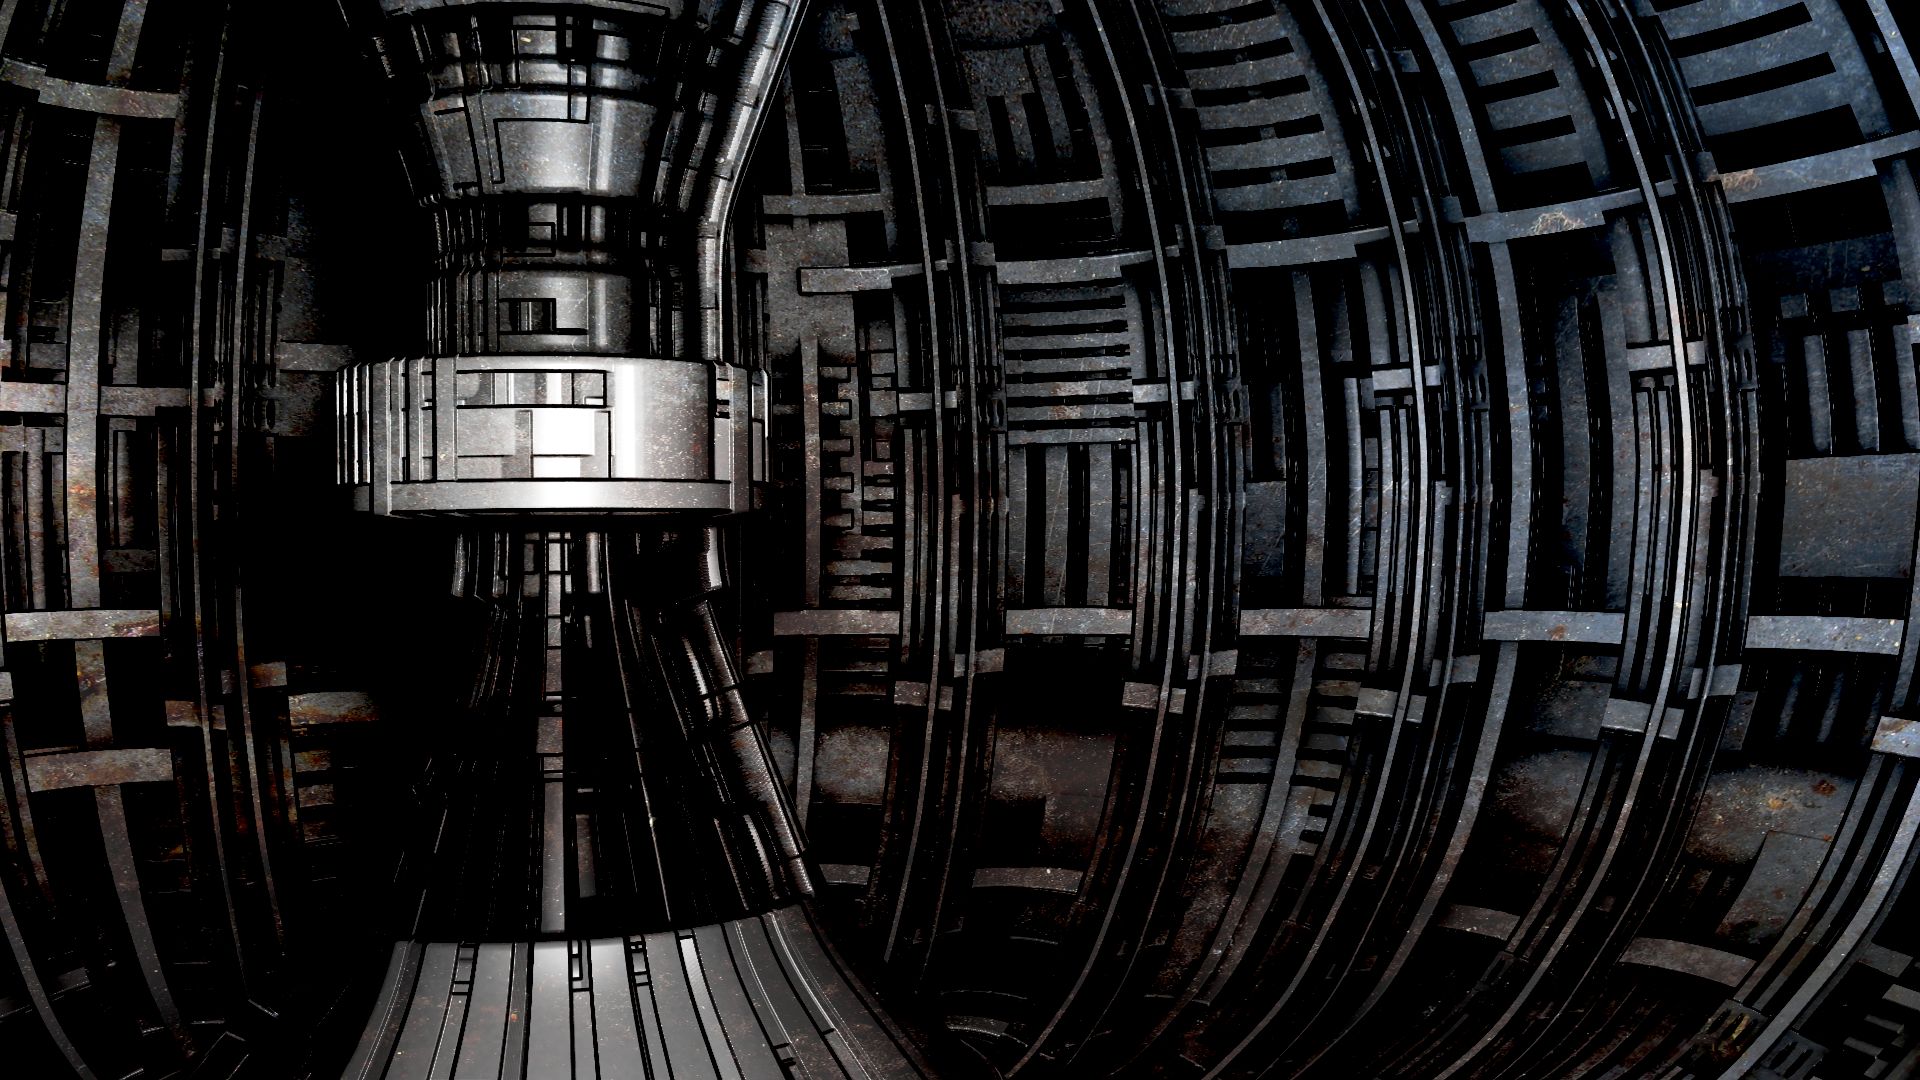

(Spend WAY more time at compositing than at the actual scene. Much improvement could be done with light setup and reducing the white of the AO bake set to color. Using the same compositing node settings for cycles and BI will give horrible results for either.)
Second:
Testing three maps on the same scene.
All settings are exactly the same, only the bump/color map has been changed.
(always using the AO “bake” to support the bump effect).
One of those maps is no use for the displacement modifier.
Which one is it and why?