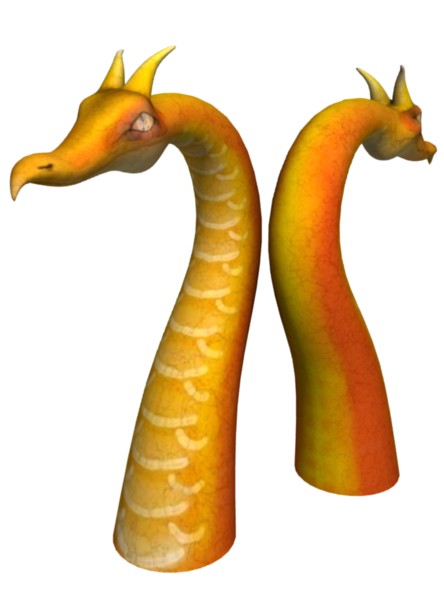
I made this completely seamless UV map using UV layers, texture baking, and texture paint. ( and a little post processing which may have caused some very minor seam artifacts. ) It’s just a model I cranked out for testing purposes, so, not very fancy. I suppose i am the last one to catch on to this technique, then again, maybe not. Here’s my humble test dragon
Very nice texture painting. I guess you refer to seamless techniques that were for example described in one Blender Magazine. Or are there any new special features in 2.47?
I didn’t see the article, but what I am doing is unwrapping, then painting, then adding a second set of coords, with with different seams, then texture baking the first image onto the new coords, and doing some touch up painting over the areas that used to be the seams.
Yes, quite same workflow was described in one Blender Magazine article. Anyway very nice.
The procedure you describe fascinates me, and the results on your dragon don’t look bad either. IThis looks like something I’d like to try soon.
this something I need to learn how to do, seems very cool
@Jirih would you happen to recall the name of the article you refer too I would love to read up more.
Cire wrote an excellent tutorial on using render baking and multiple UV maps to remove seams. It appeared in Blenderart magazine issue 12, “Texturing Special”.
This is it.
Here is direct download, search page 23:
http://urbanwebstudios.com/downloads/blenderart_mag-12.zip
What I do is mix the 2 uv maps in the node material using a geometry node VCol output as grayscale mask, pretty easy and fast
Some nice results there, I like what you did with the mesh.
here’s a quick mini-tutorial
A) unwrap your mesh
B) texture paint your mesh (see illustration)
C) save the image
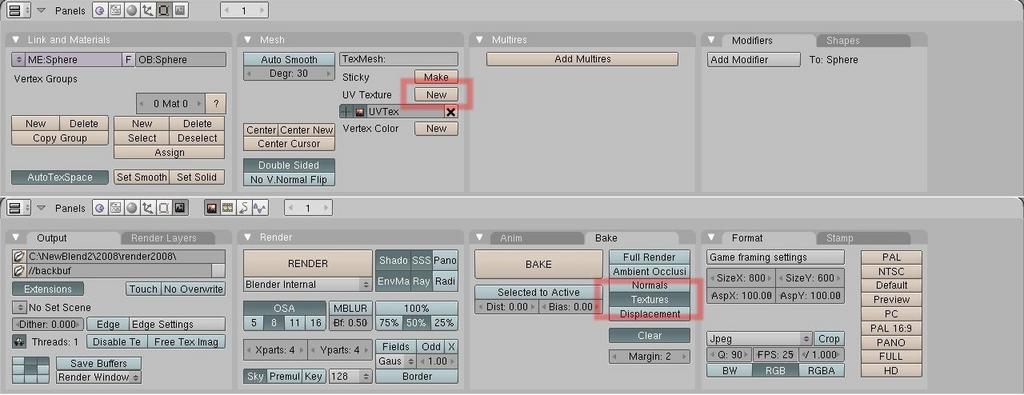
D) add a material to your mesh, go t texture buttons, add a new channel, of type ‘image’, and load the image you painted. Back in material buttons, set map input to ‘UV’
E) go to edit buttons, and while in edit mode click ‘new’ ( see illustration )
F) erase your old seams and make new ones, this time, in different places from where they originally were. unwrap.
G) add a new blank image to these coords ( in the UV window, not in texture buttons )
H) in render buttons, click on ‘texture’ and then ‘bake’
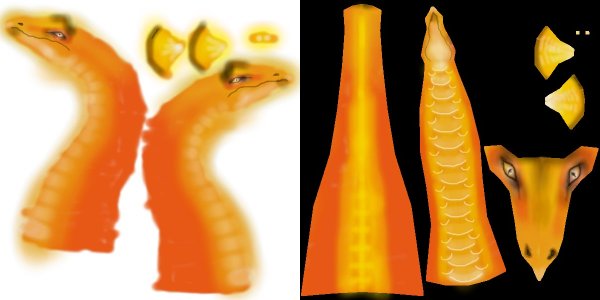
I) now texture paint over the ugly old seams. ( see illustration ) as you can see, in the first unwrap, i had the seam running right through the middle of his face, and in the second one, i made the seams go right through the middle of his profile. so the two sets of seams are as far away from each other as possible.
J) now save the new image, and replace the old one with it in texture buttons. in edit buttons, set the new coords as both render and active.
Attachments
I don’t know if someones working on it or it was only a suggestion. But somewhere in the wiki I’ve read that it should be possible to uv paint in the 3d window over seams and blender would automatically correct it.
Thank you for the work-around. I’ve had issues with seams before.
Have any devs looked into what is wrong with the seams in the first place and how to fix it so we don’t have to re-wrap the models in the first place?
The way blender treats seams is no different from any other program that I am aware of. Some of them have various ways of dealing with seams, such as deep paint 3D, in which you can toggle into ‘project’ mode, which freezes your model in space and adds a painting layer above it. when you leave project mode, it calculates how to lay that out on your UV coords. But it has all the same issues with seams and brush size etc when in normal paint mode. So, it’s not that there is something wrong with blender, unless there is something wrong with all UV painting programs.
It turned out great! I’m just curious though, how long did this method take you?
well, i did about 5-6 tests of this method in one day, including some crude modelling as well as unwrapping, so it’s pretty quick as far as I can figure.
ZBrush does that too, but I think it does that also for it’s modeling as well, but I think that way of modeling is waaay too gimpy (and I’m not talking about the good kinda GIMP) even though it saves memory.
I think Blender and Mudbox have the best ideas concerning sculpting, but Mudbox uses projection through it’s layers feature to do some painting.
I think the next step for Blender would be for it to implement the projection painting function through a layer sorta thing. That way you wouldn’t have to freeze the scupture, you could just over lay a layer and use it as the projector.
You have a good method though, and thanks for the tutorial.
I never really thought of doing it that way.
-Jimmy
Well, there is a projection script that already exsists, I imagine it could be integrated into texture paint somehow.
thanks for the mini tut
no problem, btw I should make a note, that the painted textures are actually two image files that I merged into one, just so I could upload them easier.