C&C please! Based on Torq’s face tutorial.


Awesome modeling! Uh… 3d render? Please? 
Lots of detailed work in there. Good luck with the ears!
I tried to get through some of the tutorials on face loops, triangles vs. quads, etc., but right now most of that is going over my head. Maybe because I have hardly any time to devote to Blender… Anyway, from what little I did understand, you’ve done an amazing job getting the different face loops to work out.
Can’t wait to see the final render for this - keep it up!
Yeah, I’ve got to see the actual render to say anything other than it looks like it’s going to be awesome! Good luck man, don’t forget to post that render!
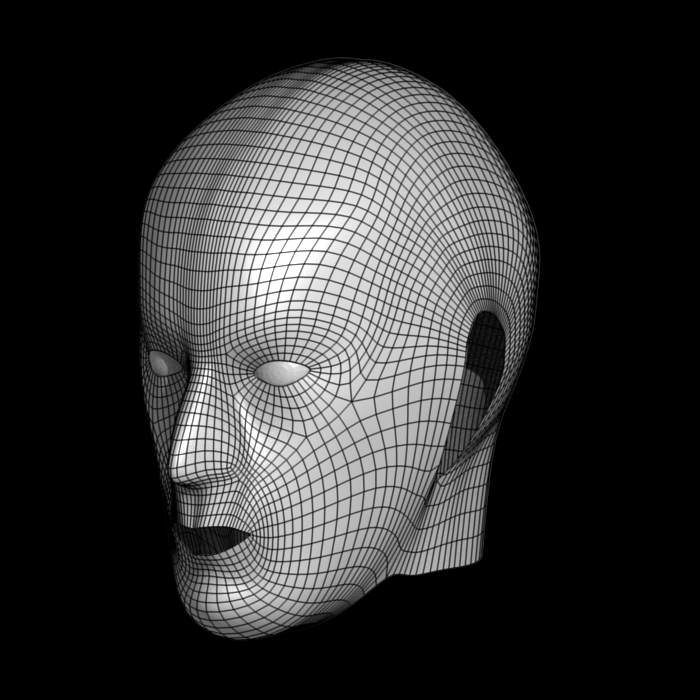
Here are some orthographic renders, I haven’t given myself nostrils yet. From the top my head looks a little deformed, but I think I can fix it by pushing some verts around. (heh, that sounds funny…)
[Edit] Fixed the top of my head!
Attachments


Good start,
The head is still squashed in the X direction, and goes too pointy at the top.
Get some pictures of skulls, or better yet a skull. Look at as many angles as you can, all the proportions and start drawing them continuously. It will really help to think about the underlying structure of what you are making.
I’d suggest making a mockup of a skull (only very rough) and putting it underneath your mesh.
I tried making it a little wider. It will be wider than the reference if I make it any wider again, though. I’m having a lot of trouble with the nose. I’ve been trying to follow Torq’s gif animation with no luck…
[Edit] Here’s the .blend so far, packed with the reference images: link
[Edit 2] The packing didn’t seem to work.
size = 8.00 X ofs = 0.24 Y ofs = 0.25<—Front
sixe = 8.00 X ofs = -0.50 Y ofs = 0.00<—Side
Attachments

Hello,
I’ve got an extensive amount of human (head and other) tuts that I collected last semester, I’ll post them as I find them. It’s hard as hell to get right drawing in 2d, let alone digitally sculpting a head in 3D. Back soon with another hopefully more helpful post.
Ben
I had a look through my backed up files and I didnt have nearly as many good ones as I thought. Apart from Torq’s tut, there was another good set under ‘Human’ at
http://www.objectsspace.com/books/index.php/Blender_3D:_Tutorial_Links_List#Human
These were the ones on http://apieceofstring.com and unfortunately I can’t remember the author’s name to give him/her credit and the tuts dont seem to be online anymore. Fortunately I have a copy at
http://www.filefactory.com/file/156020/
in winzip .zip format. Also in that zip are two .blends of heads I made by effectively combining the two tuts and making a few changes. Note: The DrCoxModel.blend has better proportions, but the other file has a bit better topology/edge loops. Hope some of that is of use to you.
Good Luck,
Ben.
The major thing that stands out right now is the ‘squash’ between the left and right sides - on the top of the head and back to the neck. Other than that, this looks very realistic - I can’t wait to see this textured. (It will be, right? )
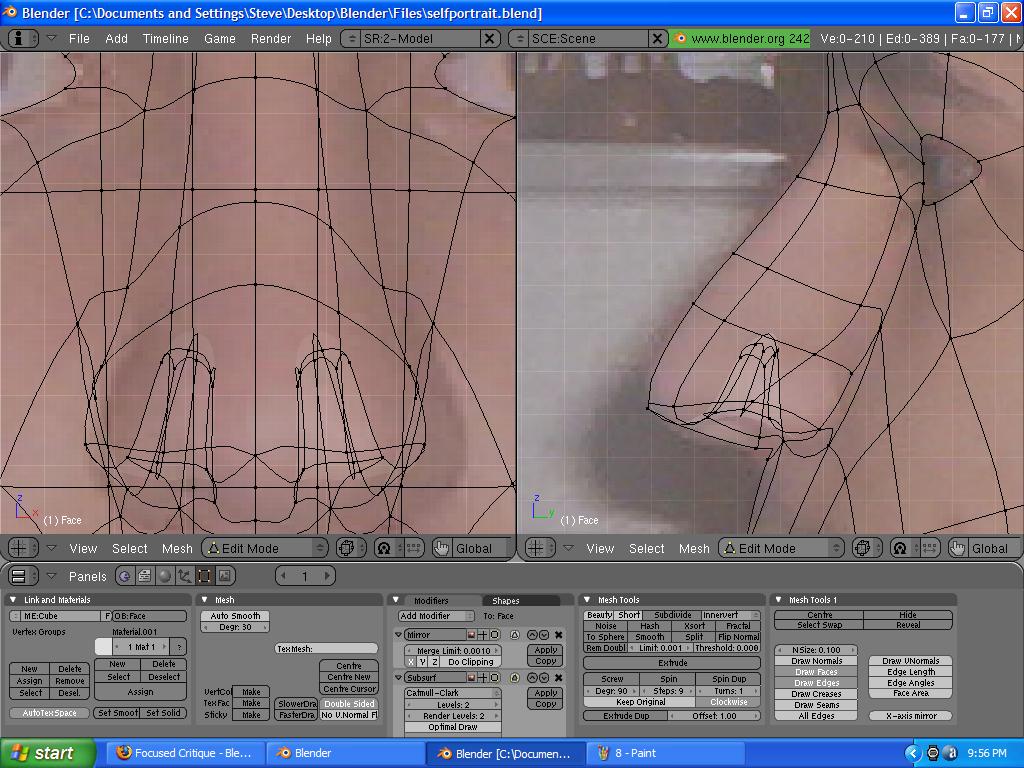
What do you mean by ‘squash’? Could you do a quick MS paint job over one of my renders to show me what you mean? I’ll try to texture it, but the best I can do would have to be vertex grouping and procedurals, I don’t have any knowledge of 2D programs like GIMP or PS to make a texture to UV map.![]()
Thanks for the links Ben! I just tried looking at some of the tutorials from the first link, but all I get are 404 errors in both Firefox and IE.
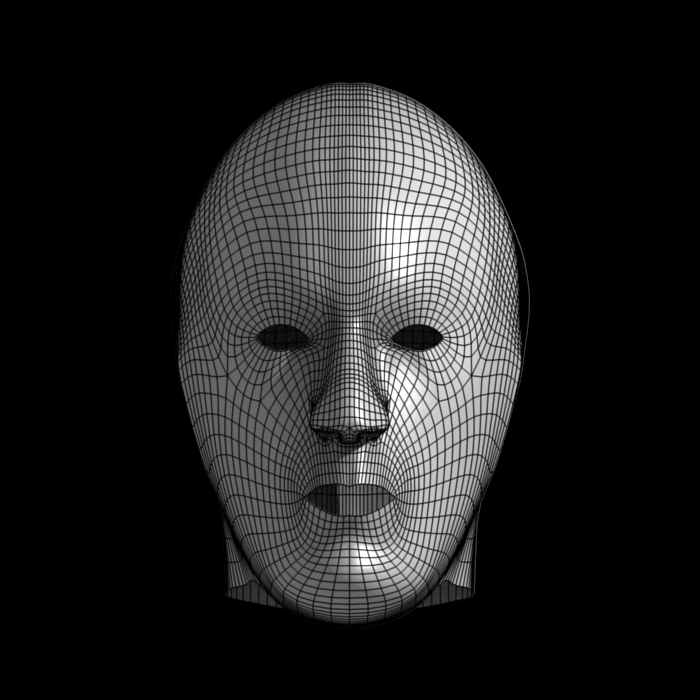
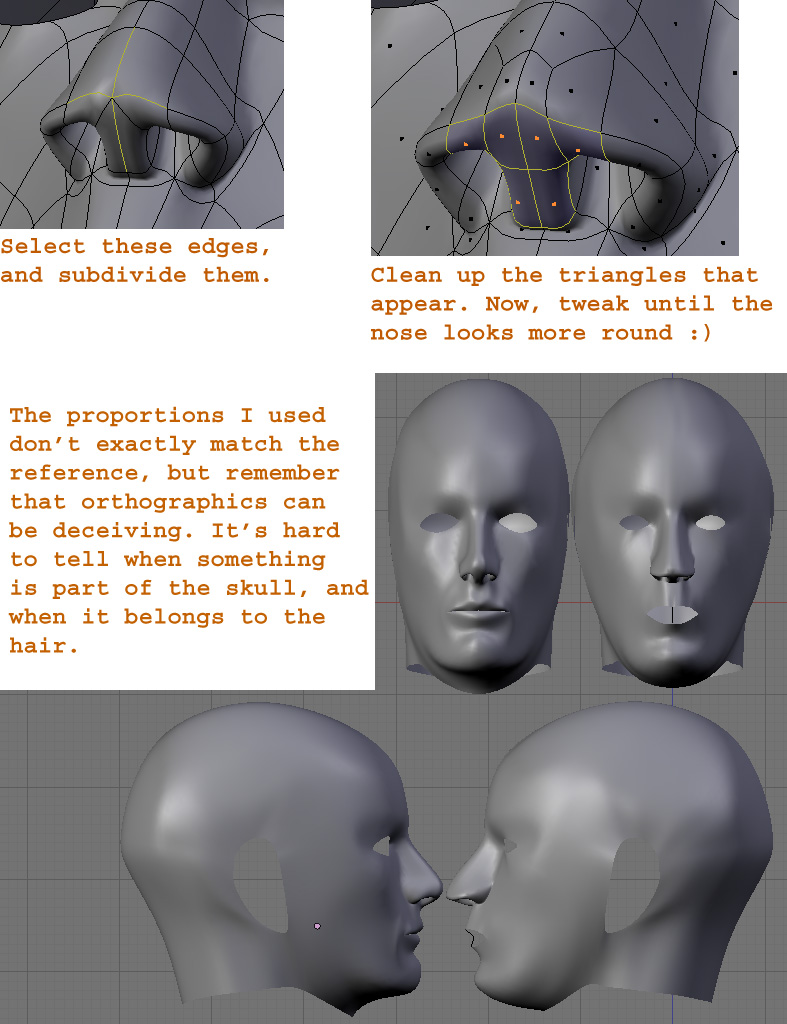
[Edit] Could someone help me out with my nose? I’m having a lot of trouble trying to get it to look right, it keeps on coming out like some warped sort of pig nose.
Attachments

What I meant by squashed is that the seam between the two halves (left and right) of your head is indented.

I mean, I could be wrong, but that doesn’t look like it should be there.
Anyway, good luck with your project!
I think you have a LOT of polygons, but not any definition that requires so many. You could probably get the same result with half or even less, and it makes working on the model so much easier.
(Edit: Downloaded the model, seems that was just the subsurf. Never mind that then : ) )
As for the nose, I made a quick paintover. Feel free to correct me, anyone, because I’m pretty new to this too ; )

Er, yeah, I know how the nose is supposed to look, I’m just having trouble getting it that way.:o
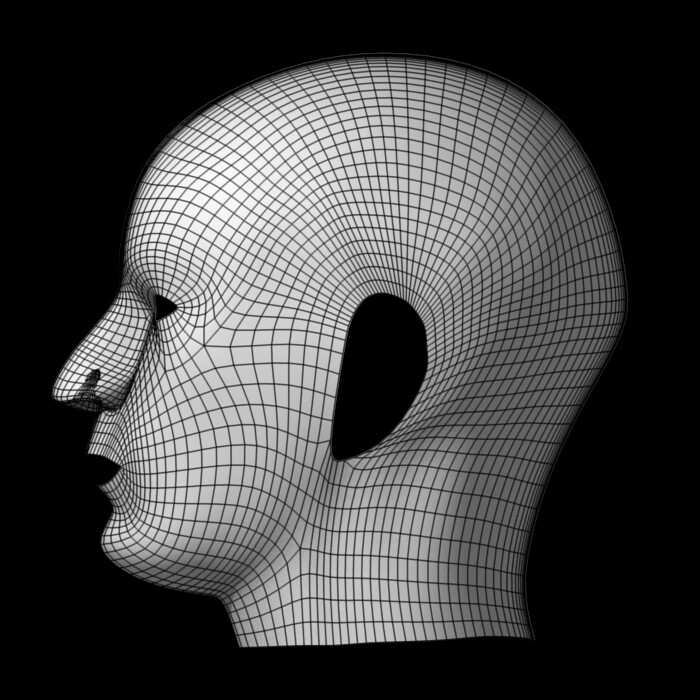
[Edit] To spare any further confusion about poly count, here’s an orthographic edit mode shot.
Attachments

so is the poly count 188 or 188x2?
I think that you can reduce your poly count on him by a lot. Try merging those verticies around the top, side, and back of the head. They are going to be covered up by particles or some other representation of hair anyways, and even with very few polys, the shape of the head can be pretty realistically represented.
Remember that vertices represent definition on the mesh. So to have a vertices there just for its own sake, or because their was a vertices directly above it or beside it doesn’t make sense.
I like the model
Edit: Also a tip for the nose is to remember that nostrils curve back around to meet the cheek. From there it curves within a very confined space and turns around the meet the slope of the face again.
Here’s my shot on it, don’t know if you like.
Changes made:
Removed one loop on each side of the head, to prevent the weird smoothing.
Made the eye sockets somewhat larger. They are, after all, the sockets, and not everything that’s around the eye.
Removed the pole on the nose and in doing so gained extra vertices to play around with.
Added simple lips to give more of a complete image.
Tweaked the proportions of the nose and mouth. Also made the side of the head more of a straight line, rather than it bulbing out around the middle/top, as it was.
(.blends can’t be attached, so I just took a screengrab)

The original looked great to begin with, but that just added a lot! The face - especially the nose - looks a lot more real. My only critique is that the corners of the lips seem too sharp.
Keep it up!
That does look great, I’m just wondering if it still matches the reference images? Do you mind telling me specifically how you fixed my nose? Don’t get me wrong, I appreciate you fixing it, it’s just that the whole point of this exercise is for me to learn how to do these things.
[Edit] Looks like you added an edge loop around my mouth too… Looks good.
[Edit 2] Here’s the updated .blend. I haven’t been able to mess around with it much lately, so the really the only changes are the neck and the condensation of the edge loops towards the mid-line of the head. link
Attachments


Note that my proportions are incorrect, because your face is in fact wider than that (as far as I can see from the image).
Despite you adhering to your orthographics, your chin, for example, looks way too sharp. So what if they aren’t pixel-perfect, as long as they get the likeness across, and I think at this stage you’re better off trying to define what your prominent features are.