Hello Everyone,
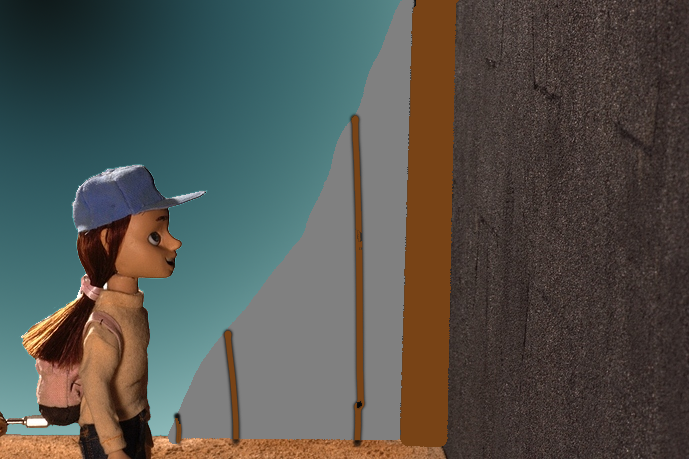
I am working on a stop motion short with a three person team, and I am using Blender to create the background environments. I have a shot. Pictured Below. In the shot this girl touches big wall/fence. Every other shot in this film my blender environments are being used as still background images. But this shot we had no planning for and it was shot without VFX in mind. Now we have to see if there is a way to salvage it or if we need to reshoot. Is there a way to extent this wall shes standing next to. It’s supposed to be like a border wall.
My question is given this image, how would you approach compositing a background into this shot that is “seamless” with the foreground I have in the image.
If I understand your problem correctly, you need to extend the existing wall (and probably the ground plane). Is the camera fixed or moving? Luckily you shot against a blank white background (it would have been better against green but you gotta work with what you have). “Knock out” the background in compositing, create an extension in Blender (especially if it’s a moving shot) and composite your new background (containing your wall/ground extension) behind your animated shot.
Bonus points if you still have access to that wall and ground plane. I wish all my compositing problems were so easily solved! Good luck!
Hi,
You’re actually looking at the alpha, I do have a clean plate! and the camera is still the whole time. I just dont see how to merge the extended wall and ground with the originals. It’s the actual process of creating the extension I have no clue where to start. Without me literally taking another photo of the wall and patching the two together (which wont work because of limited space.
Rule No. 1: Don’t panic. Take a deep breath. It will work.
You yourself explained in your reply what needs to be done. You have an alpha channel already…shoot that wall! You’re lucky you have access to it! It all depends on your compositing skills. It’s a still shot! Just hold your nose and dive in.
At least try it. If it doesn’t work to your liking then you’re no worse off than before, no? Cheers!
Thank you for the words of encouragement, I was not able to shoot the wall at the same angle, because of physical space limitations! Anyway to this without the way I described it? As now I know for a fact this is not a route I can take. Otherwise ill be scrapping the shot. Thanks for the help regardless!
It’s Blender…a 3D program…in which you can create planes…with textures…of a wall, for example…to place at any angle you like…that you can composite behind your main shot.
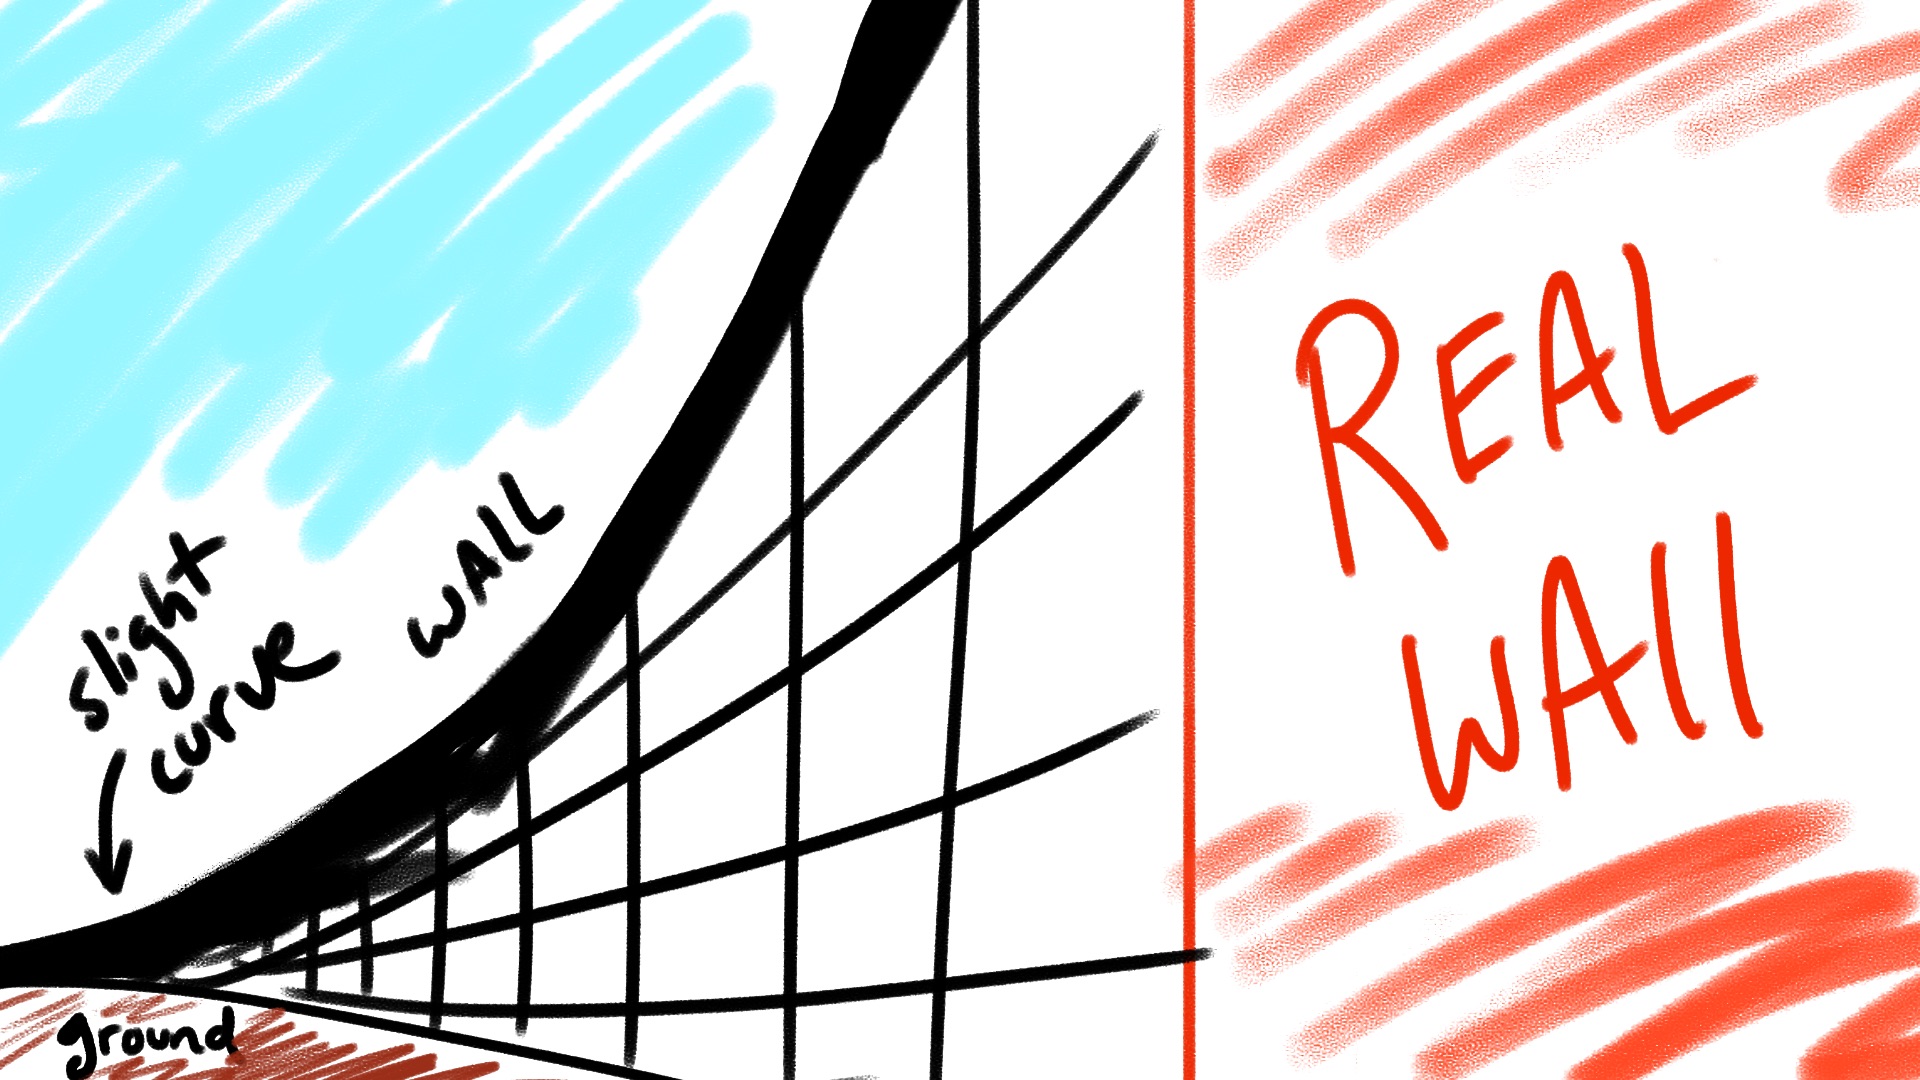
Thank you again for your continued replies, essentially I do understand the basic principles of how to composite. I’m new to blender not to VFX. My question is essentially the textures I’ve test for my cg wall never seem to physically line up with what I have on screen. For example there is depth in the wall texture that I don’t understand how to model creating and obvious seperation between the two.
This is why I started my post off asking how to deal with the seam of the two walls. Is specifically what I don’t understand. Not the basics of composting…
Like do I maybe need to edit my displacement maps in Photoshop or something? I’ve been trying to research this on my own as well obviously.
Forgive me if it seems I’m underestimating your abilities, Nick. It was not at all my intention to belittle you in any way. We don’t know each other (it’s the first time we’ve ever communicated!), therefore I have no idea of the level of your talents or capabilities in regards to this problem.
In any case, I’m confident you’ll soon arrive at an acceptable solution. But, as I said in a previous post, if it doesn’t work out, you’re no worse off than before. Good luck!
You have to. first take a photo with neutral(as possible) lightning of your wall.(if you kept it).
Then use something like this to extract your pbr needed maps. Albedo. Roughness. Displacement. And more if needed.
I think that s more about what you are looking for… if you need others tricks. We ll be there.
Thanks for your reply! You may have saved this shot @skuax We were already planning the reshoot, I will give this a shot and I’ll update with the results in an image! Thank you both for your help! So essentially I’m shooting a nuteral shot. And that second tool really is going to take the guess work out of this thank you!
This community is very helpful I hope to be helpful in the future too! I really love Blender! I am basing an every increasing amount of elements in our film pipeline on Blender. (Once I figure out how to bring elements from Resolve into resolve for compositing I can die happy. But thats a problem for another day/post)
Thanks again from your reply I was planning on reshooting with the character not intersect with any composite elements which I thankfully dont have to do.
Ok so I know this is pretty ridiculous, But there is one instruction I cannot follow from the Camera Calibration thing.
“Ensure that the plane is selected. In the 3D view tools (on the left side of the 3D view) select the Tools tab and find the Camera Calibration PVR menu. Press Solve Focal+Y .” I thought it be on the right where Real Sky is, maybe I need to downgrade to older Blender im on 2.81a
Texture maker worked pretty well I just need to put more effort into it!
Here is the texture I have prepped so far ![1Untitled|633x500]
Hey Thanks for jumping in, I would love to just stick something like a girder in there, but client is firm on a big flat concrete design. I do have a mock up of what was originally intended to go behind the thing. I do like your suggestion of adding a Hill in there I able to take that kind of liberty.
Currently my issue is that when using this plugin I cannot follow the last step cause I can’t find this toolbar and all the demos for this are on 2.7!
“Ensure that the plane is selected. In the 3D view tools (on the left side of the 3D view) select the Tools tab and find the Camera Calibration PVR menu. Press Solve Focal+Y .”
Appreciate it! If I have to Ill regress for this shot on another machine. thanks so much! Ah i see what you meant use the plugin in 2.79 and then append the cam from that file smart!
 Good luck!