I’ve created a shader that lets me play with “inverting” the normal perspective projections.
It uses the object output of the texture coordinate node with the object set as the empty being used as a “projector.”
It’s working well on the faces closest to the projector empty, but it’s showing up on faces that it shouldn’t - e.g. the top face (shown) and back faces:
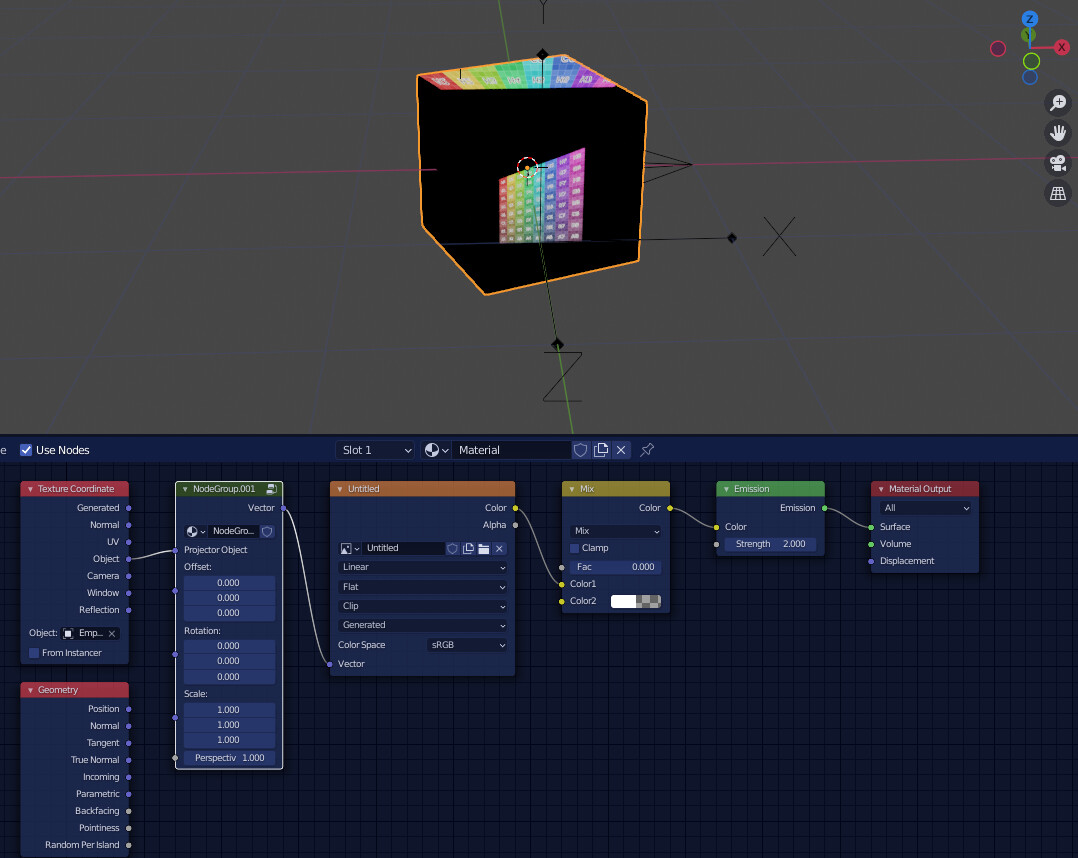
I think I can fix this by calculating the angle between the point being coloured and the projector empty, and not using this part of the shader for angles >=180˚.
I’ve tried playing with taking the cross and dot products of the normal and object outputs of the texture coordinate node, but so far it’s not behaved like I expected.
It could be due to the orientation of the empty- it’s arranged so X aligns with world, but Z aligns with world Y (-ve Z towards the object.) I don’t really understand how the empty’s location/rotation/scale is transformed in the shader on the cube. This is the orientation that ended up behaving in a way that made sense- ie projected image not mirrored, moves on the surface in the same direction as the empty is moved, and gets bigger as the empty moves closer to the surface.
Questions are:
- Can someone explain to me how an objects coordinates are translated for the object output of the texture coordinate node?
- Why does the projector empty need that particular orientation (-ve Z towards object)?
- How do you calculate the angle between the current pixel’s normal and the empty?
- Is there an easier way to enable/disable this shader flow for pixels not reachable from the projector empty?
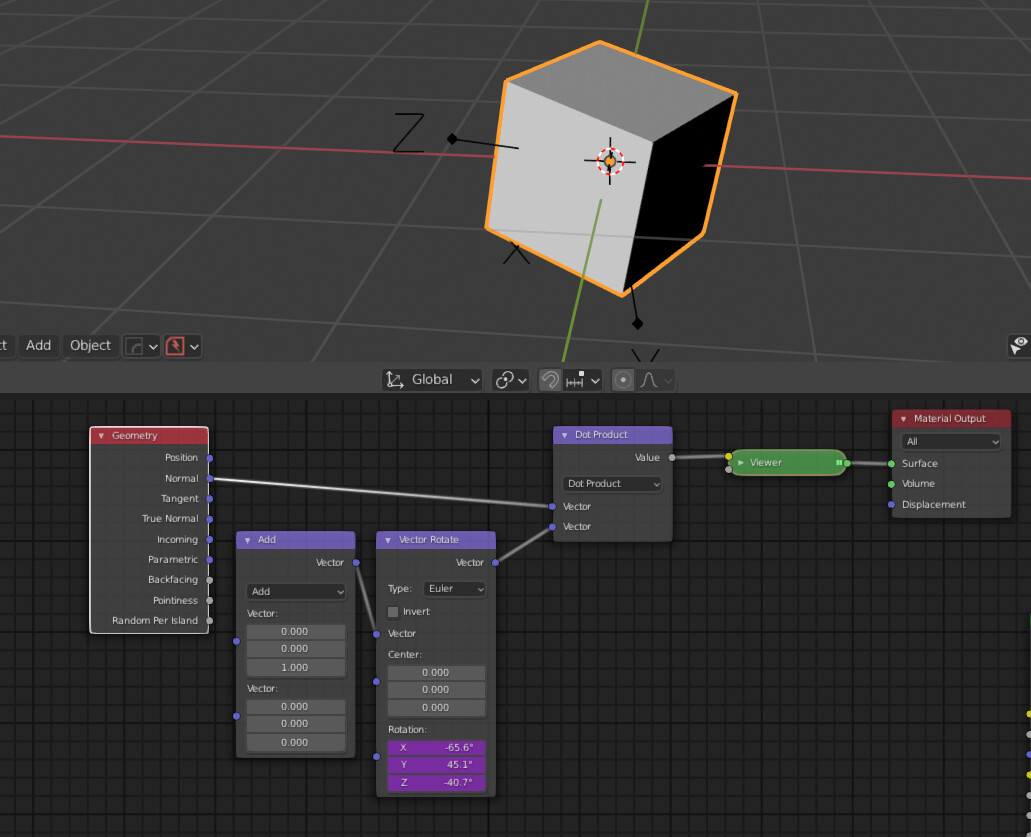
Here are the perspective adjustment nodes:

Thanks in advance!