Hi, this might be a really simple issue but who knows.
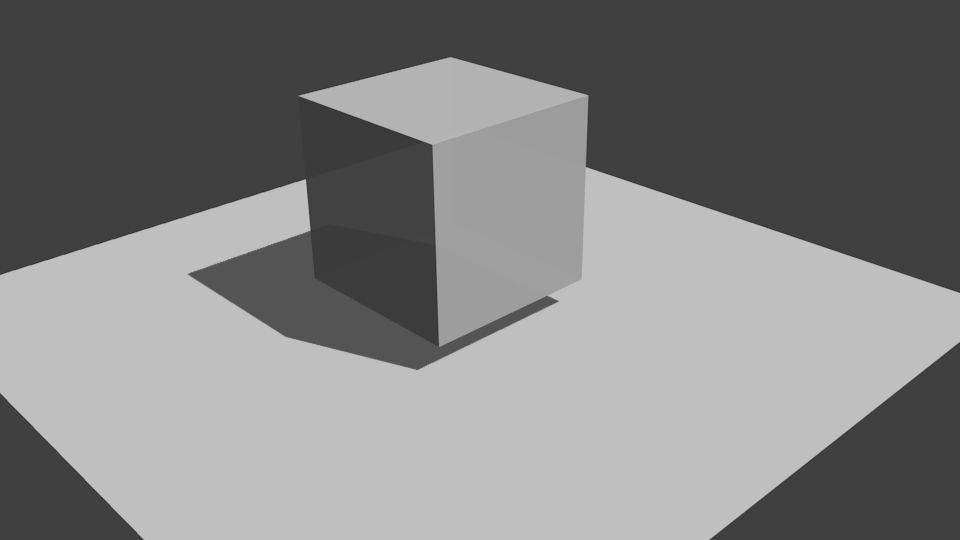
Am making an animation in which one object gradually appears by increasing the material’s alpha from 0 to 1. However, even when the alpha is at 0 the shadow of the object is still casting, as well as the ambient occlusion, I think. Am I missing something, or is there a better way to accomplish what I’m doing?
You’re gonna have to dup0licate your light source and change the duplicate type to “Hemi” which does not cast shadows. Next set the hemi’s energy to whatever your max setting is and while hovering over the energy field press I key to insert keyframe, go to last frame of fade in, set energy to zero and I key again. Do this in reverse for the shadow casting lamp and you’ll get a fade in. It’s a simple cross-fade and this won’t work for some light setups but it does work with a sun and a hemi. Examp0le file attached below image.
Edit: Duh!, just thought about it, you can duplicate any light set up and disable shadows on one set ehile enabled on the other then repeat the process above.
Interesting idea about the cross-fade, it hadn’t crossed (har-har) my mind! I tested it, and it worked well, but I realized there are more issues and my scene is a bit too complicated for it to have solved it completely.
The cross-faded spot lamp worked well, but the shadow from the AO is still showing, and as far as I know it wouldn’t be possible to duplicate that?
Also the main issue, my scene has other objects from which I do want shadows; they move into the view over time. It’s only the object that appears later that shouldn’t have a shadow until it appears. While all the other objects kinda fly in to the view, this one is stationary as it only fades in, so it’s there throughout the animation.
AO==No, gonna have to do a cross fade with plates in the compositor for that one. The principle is exactly the same in the compositor as it is with the lights, you’re just gonna need multiple scenes for this one (full copy just delete the cube in the second scene so that you get a clean floor plate with no shadow from faded-in cube). Use that render layer from scene 2 to cross fade in scene 1 via a mix node with a time node in it’s Factor socket.
You can set lights to only illuminate objects on their own scene layer (Light buttons>Lamp tab>“This Layer” check box) or use exclusive light groups assigned to only illuminate specific materials (materials buttons>options tab>“Light Group:” text field). Yes, it does have to be a light “Group” even if it’s only one light (enabled via Ctrl+G while light/s selected).
You can load multiple scenes into the compositor via the scene button on the lower left corner of a render layer node. Just put objects on one scene layer and the ground plate on another scene layer and do not enable rendering of any objects other than the ground plate via making them visible via scene layer buttons while not renderable via the buttons on the render layer. In this way they will cast shadows and AO while not being renderable in scene 2. This will save you gobs of render time. The developers may not have thought of everything but they gave us enough tools to make most things possible in the compositor.
Sounds like a plan! I’m still fairly new and haven’t done much of anything in the compositor yet, so this’ll be a fun challenge! I’ll check it out tomorrow and see what I can do. Thanks for the help so far!
Alright, from what I’ve managed to understand and do so far it seems like just the solution I needed! Hooray!
But I still haven’t quite gotten it, I think now it’s mostly my lack of knowledge about render layers/scenes. In the compositor now I’ve got two Render Layer nodes connected to a Mix node with a Time node factored in. The time and mixing seems okay, the problem now is that one render layer has nothing but the world background on it.
I’m still quite iffy on what the difference is between render layers/scenes, as both words seem fairly interconnected. See what I did was duplicate everything (except the objects I didn’t want to cast shadows, as you said), and put the duplicated objects on layer 2. I went to Render Layers in the properties panel and added another render layer, and had that one render layer two. Am I missing a step?
OK, so I may have steered you wrong here…you just need to enable the Transparent Shadow button for all materials the cube will cast upon. Forget the light cross-fade. Now the render-layer/scenes setup is gonna get a lot more complex.
There are 3 separate scenes, Main which contains all objects for render, a shadow only scene (shadows on plane only), and an AO only scene (AO on plane only). You make these latter 2 scenes by duplicating the first scene then making the plane to receive Transparent Shadows and Shadow Only. The AO scene has the lights deleted and the Shadow scene does not use AO.
You’re gonna have to learn how to use the masking tool here:
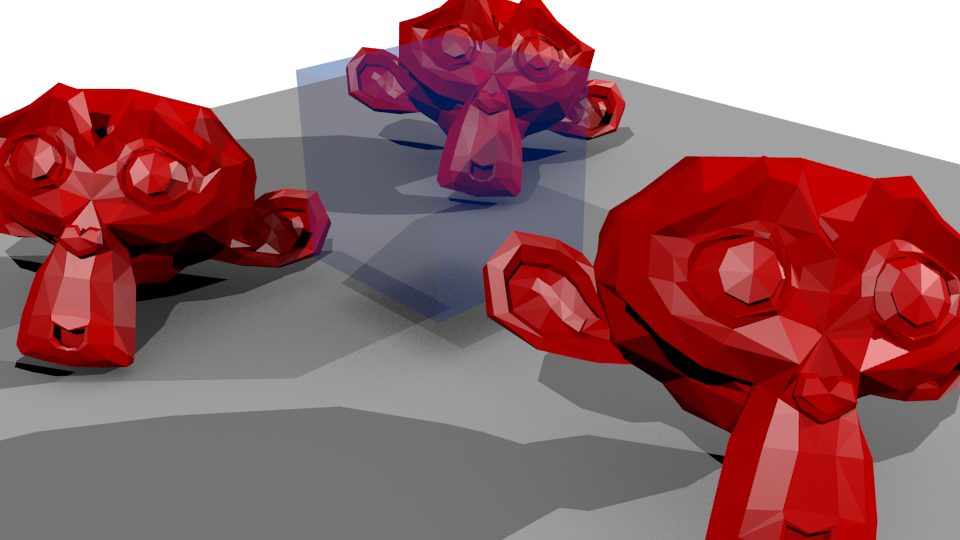
Scene #1: Cube render layer has All Z enabled so that you can alpha the cube over everything and it still looks like it’s in the proper order instead of riding over the top of the munky in front). If nothing is in front of your transparent object then you can skip the All Z function. Plane in this scene is rendered without shadows or AO. Shadows and AO from other two scenes are recombined to layer over plane.
Scene #2: Transparent Shadows only.
Scene #3: Masking tool is used to subtract cube’s AO from render, slowly ramping it in so that it appears with cube. AO is a trick using the depth buffer so the cube’s AO is always present even though Transparent shadows is enabled. That’s why you gotta mask it out.
Scroll through the 3 open scenes via Ctrl + Right Arrow & Left Arrow (Main, Shadow Only, and AO Only).
If I left out any instructions just ask. I’m getting fairly sick right now and my head is getting kinda fuzzy. If you want your AO color to match the cube you have to do that with the ambient color in the world settings, but if you go and try this then everything is going to get much more complex with the masking and scene setup in order to compensate so that the munky AO isn’t blue also.
Edit:
You can get somewhat the same effect via a single scene by clicking on the little camera icon next to the AO and Shadow passes on the Plane render layer but you can’t get as fine control over the effect (i.e. just try masking out the AO portion for the cube so that you can ramp it in with the cube’s fade in and watch what happens). This way is gonna teach you how to better navigate the possibilities in Blender and you can get real precision over your effects.
Actually, I think I solved it myself, it was pretty simple and I’m not sure why I never thought of it. There were some other objects on pretty much the same spot as the object that was being faded in, though the other objects only entered the scene after a few seconds, so the only time I didn’t need to see the faded in objects shadow would be the very start.
What I did was simply restrict the rendering of the object until the other objects are there. Then when there’s already a shadow from the other objects the (still invisible) first object starts rendering, and it isn’t a problem! I hope that made any kind of sense.
Thanks for the help though, it was really appreciated!