Hello everyone!
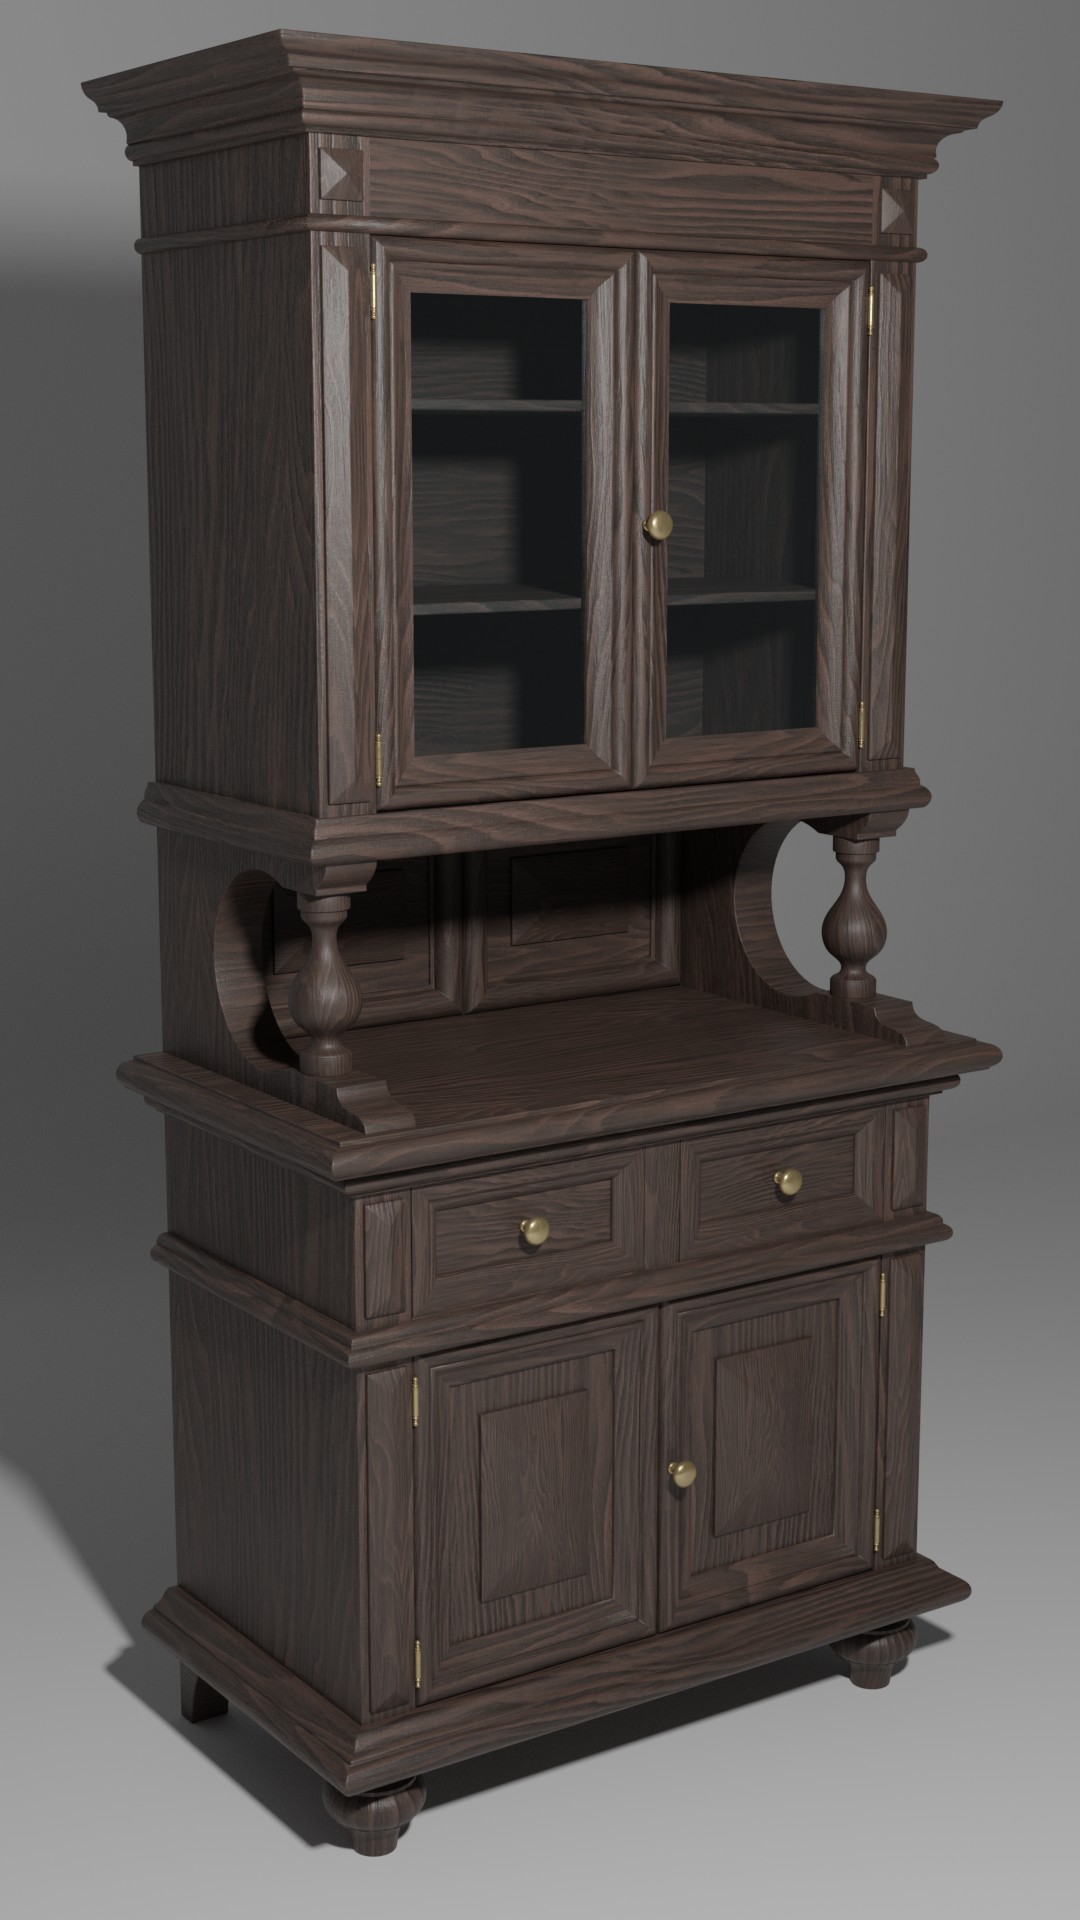
This is my first serious model that I am making with Blender. The renderings are just preliminary for now.
I am submitting my work to you for advice, suggestions and criticism on how to make it better.
Also I have some doubts about some issues:
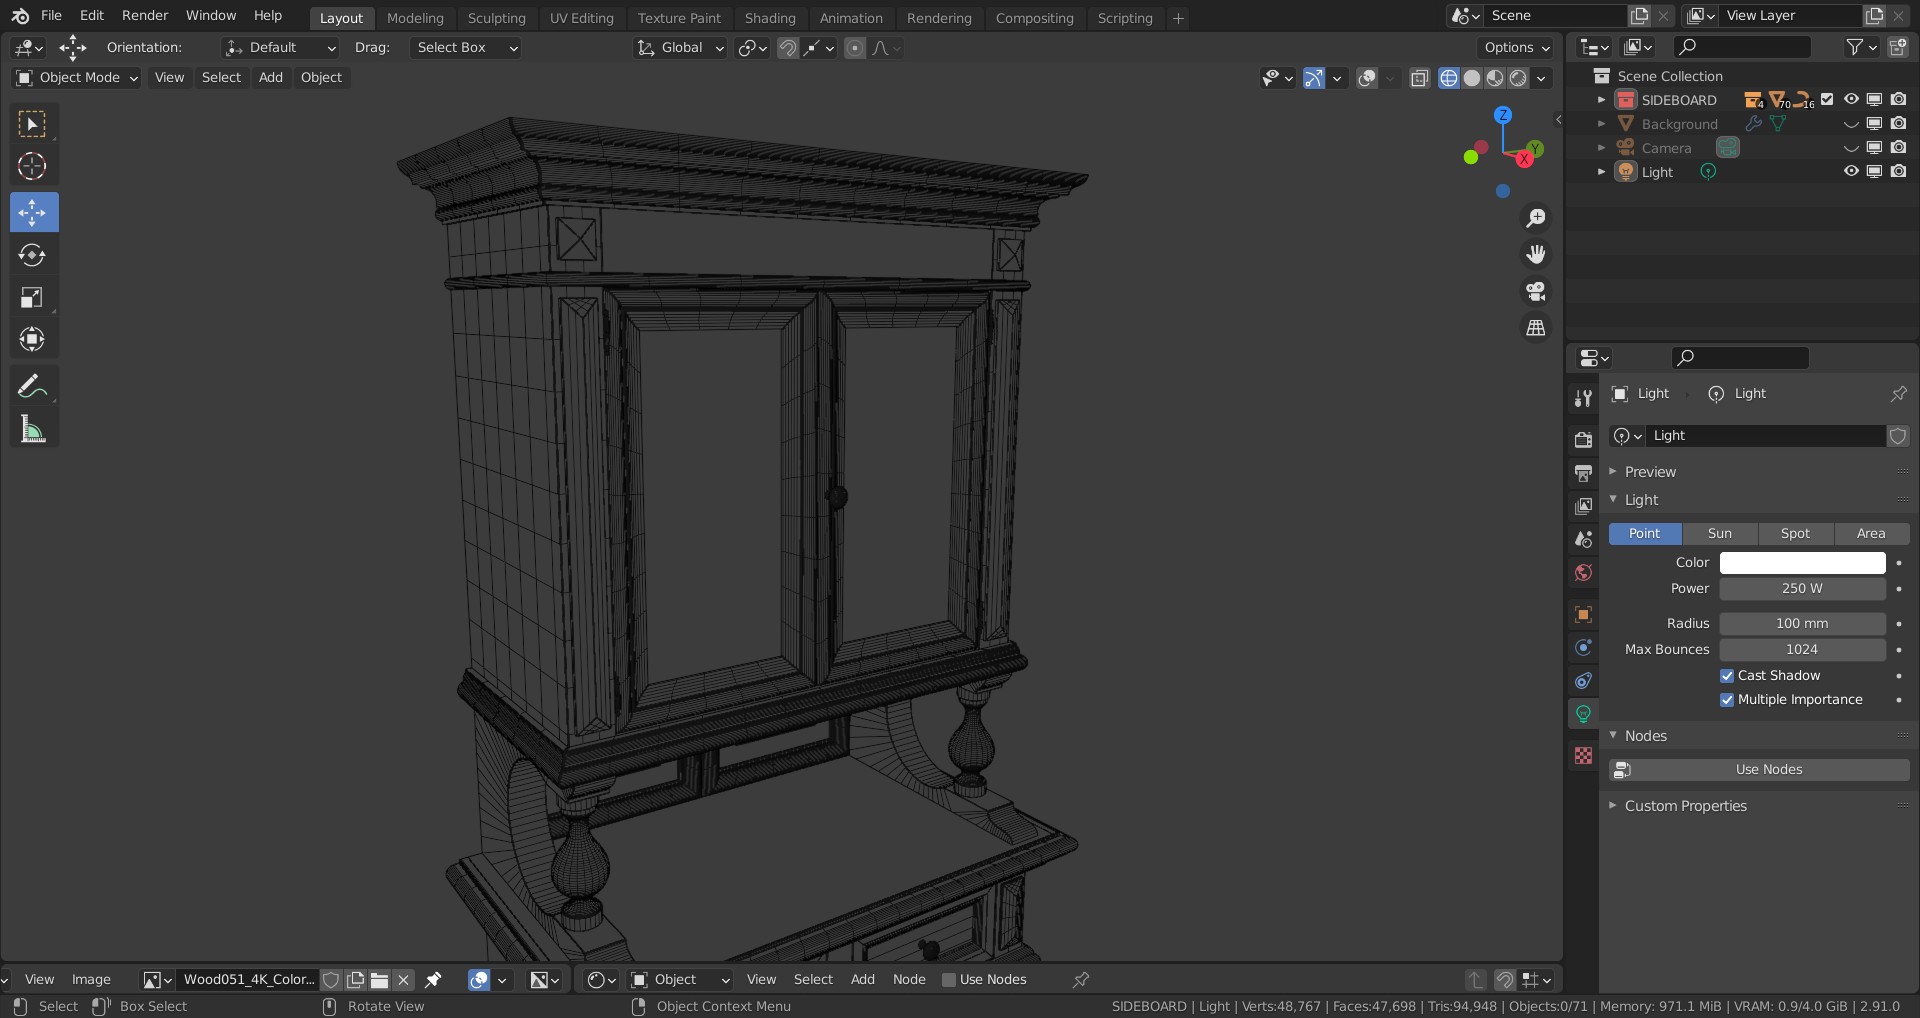
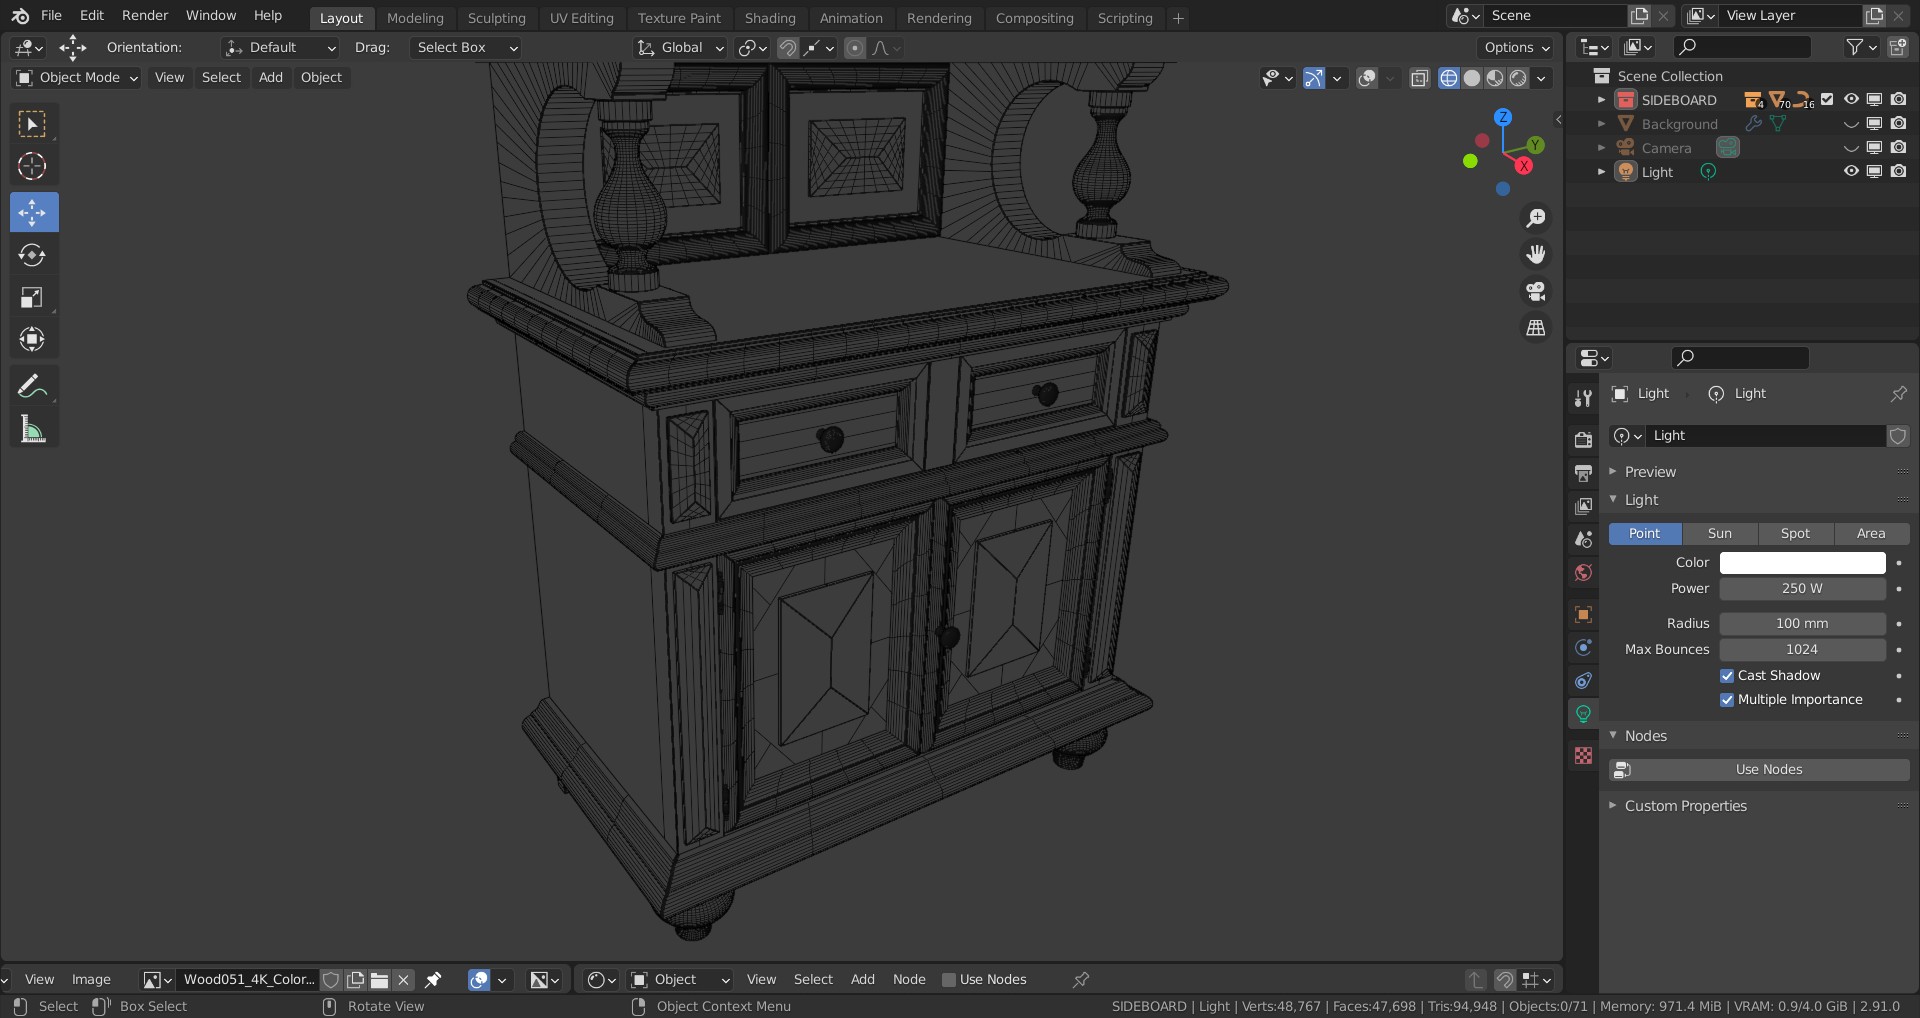
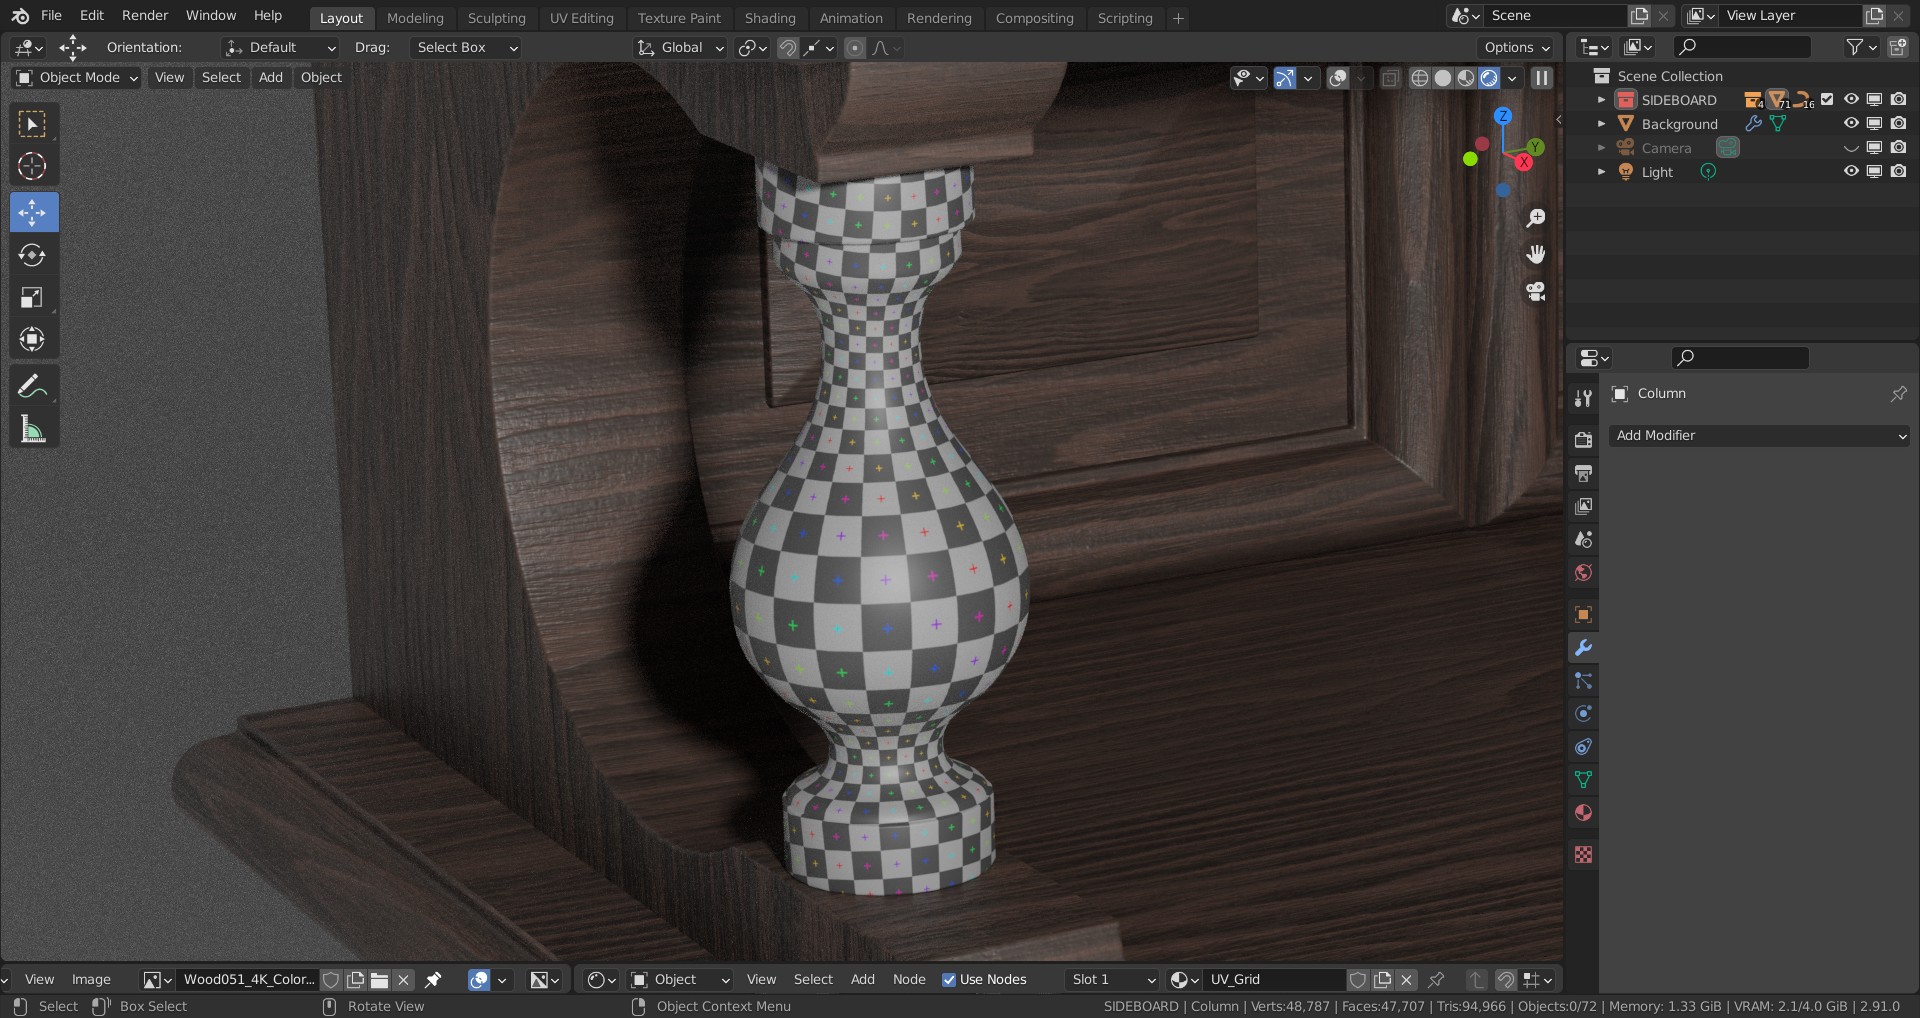
In the Rustic_Sideboard_043_Screen-3 image you can see that I can’t properly map the small column. I don’t know how and where exactly to put the seams, to make sure that the squares are all the same size and with the same inclination.
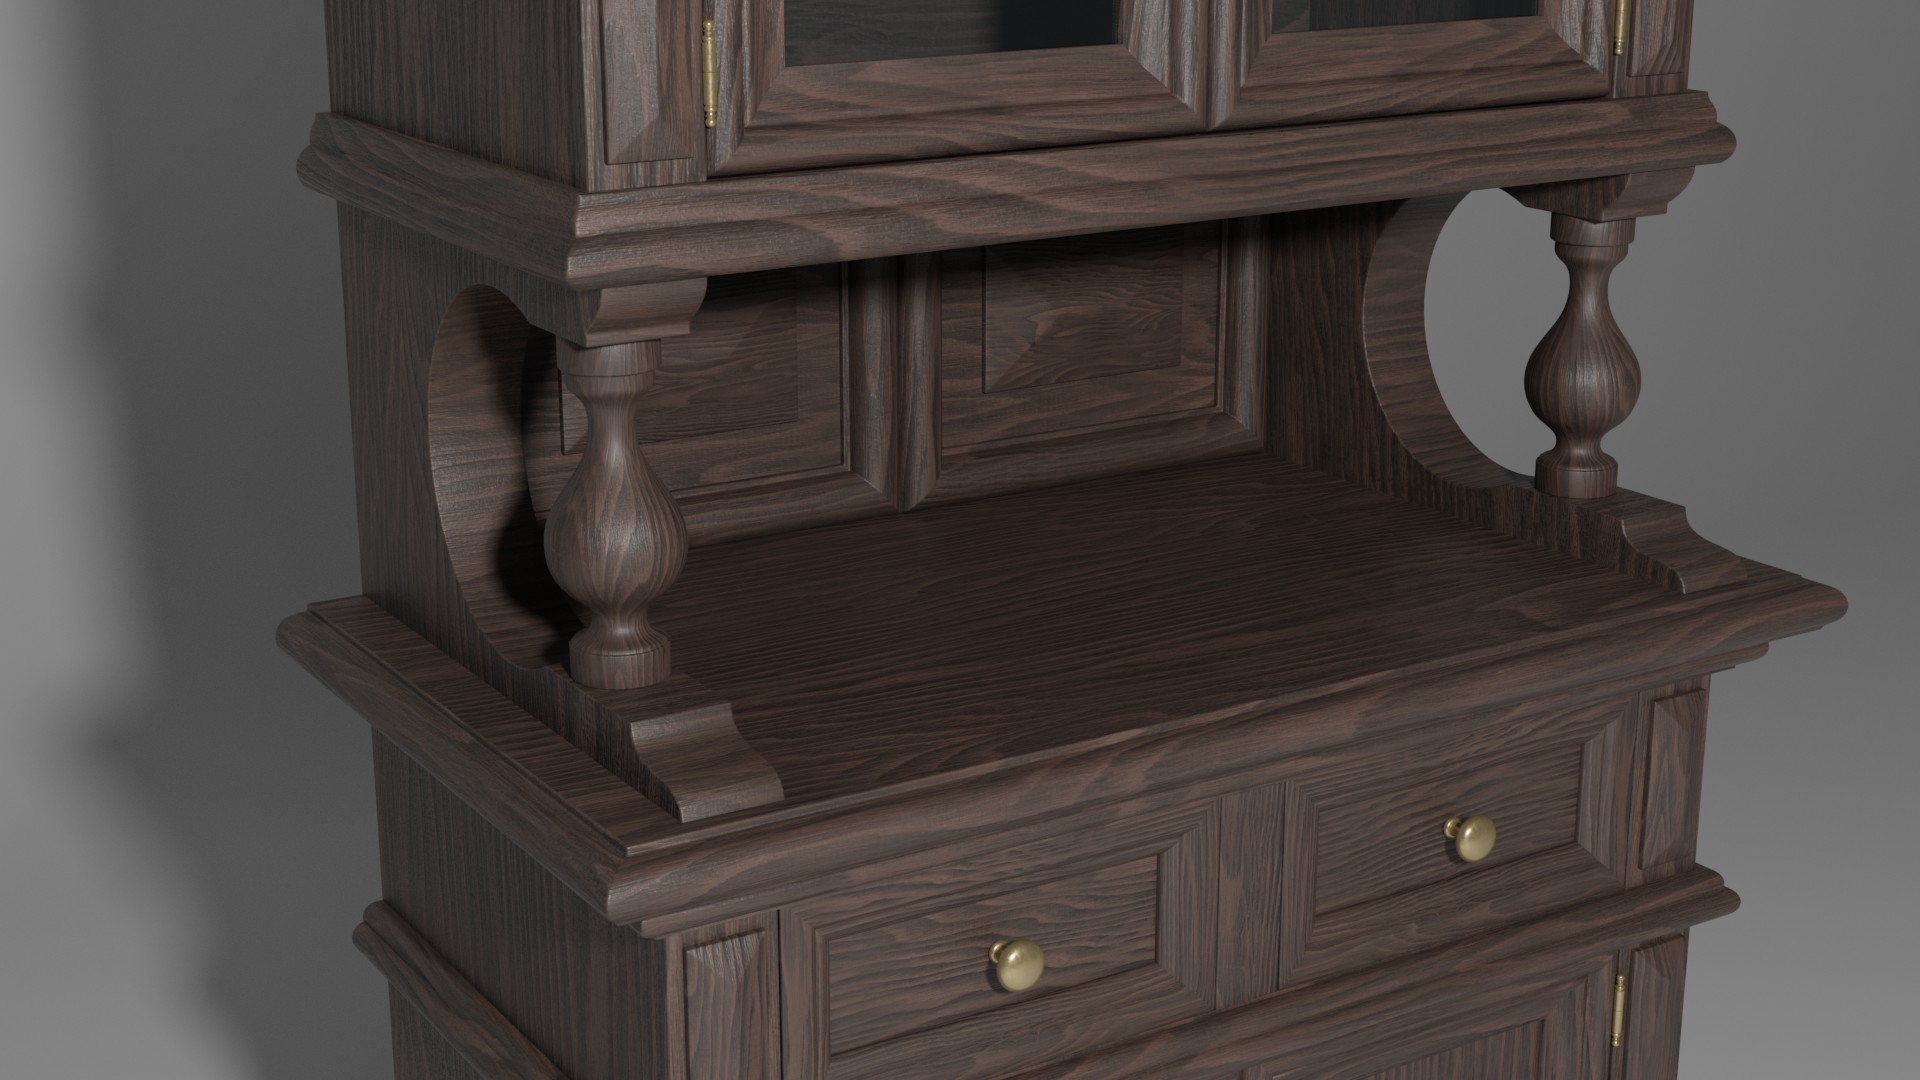
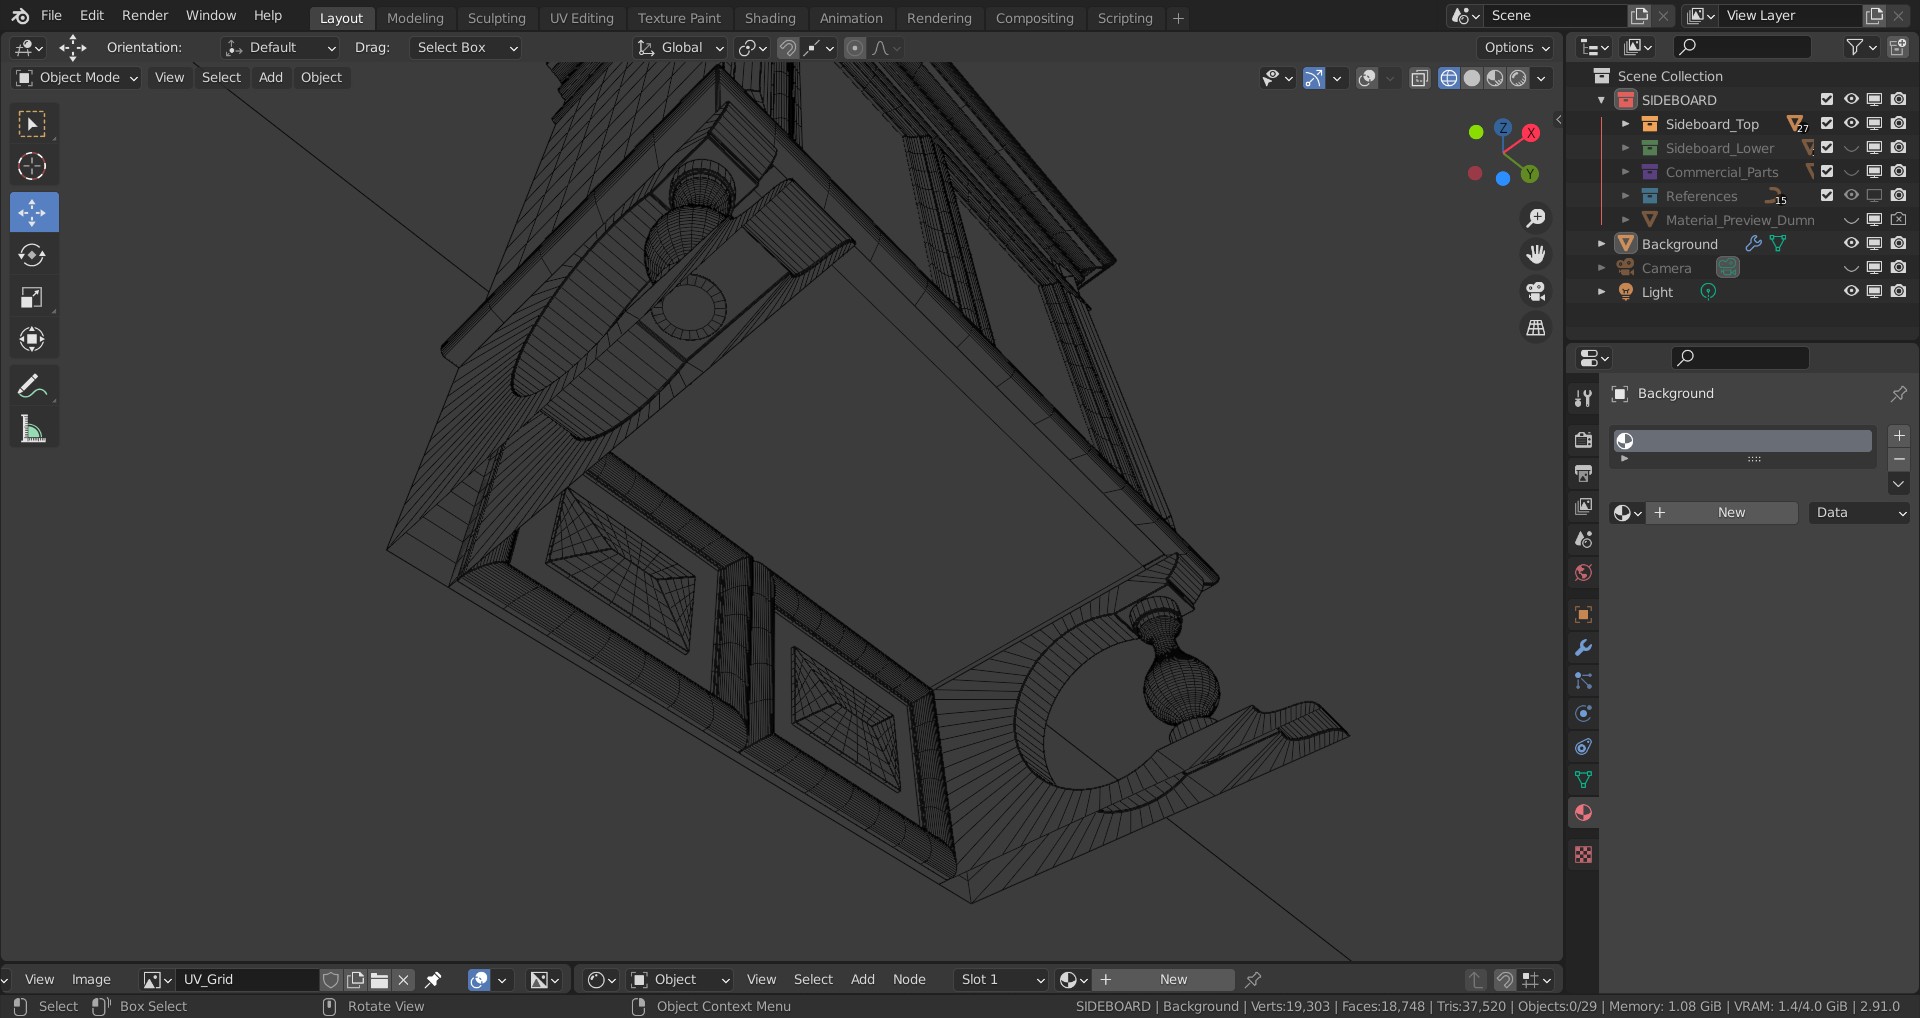
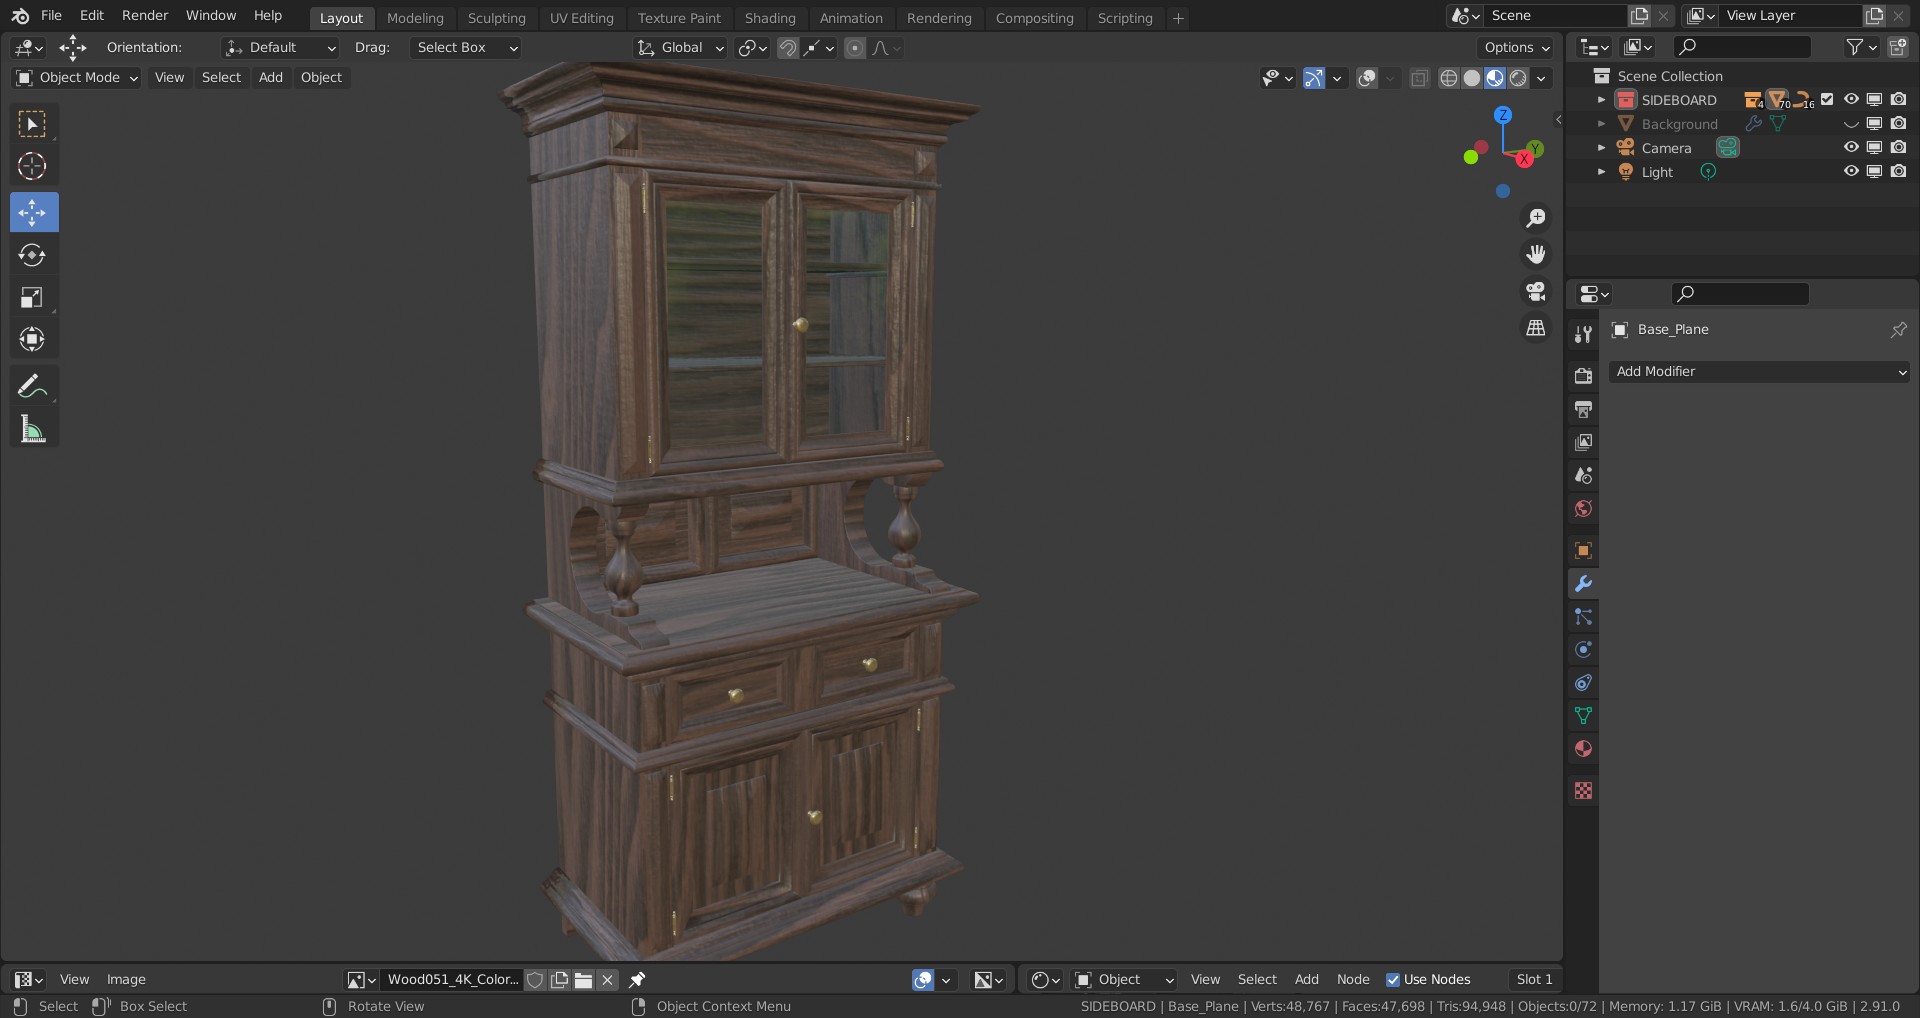
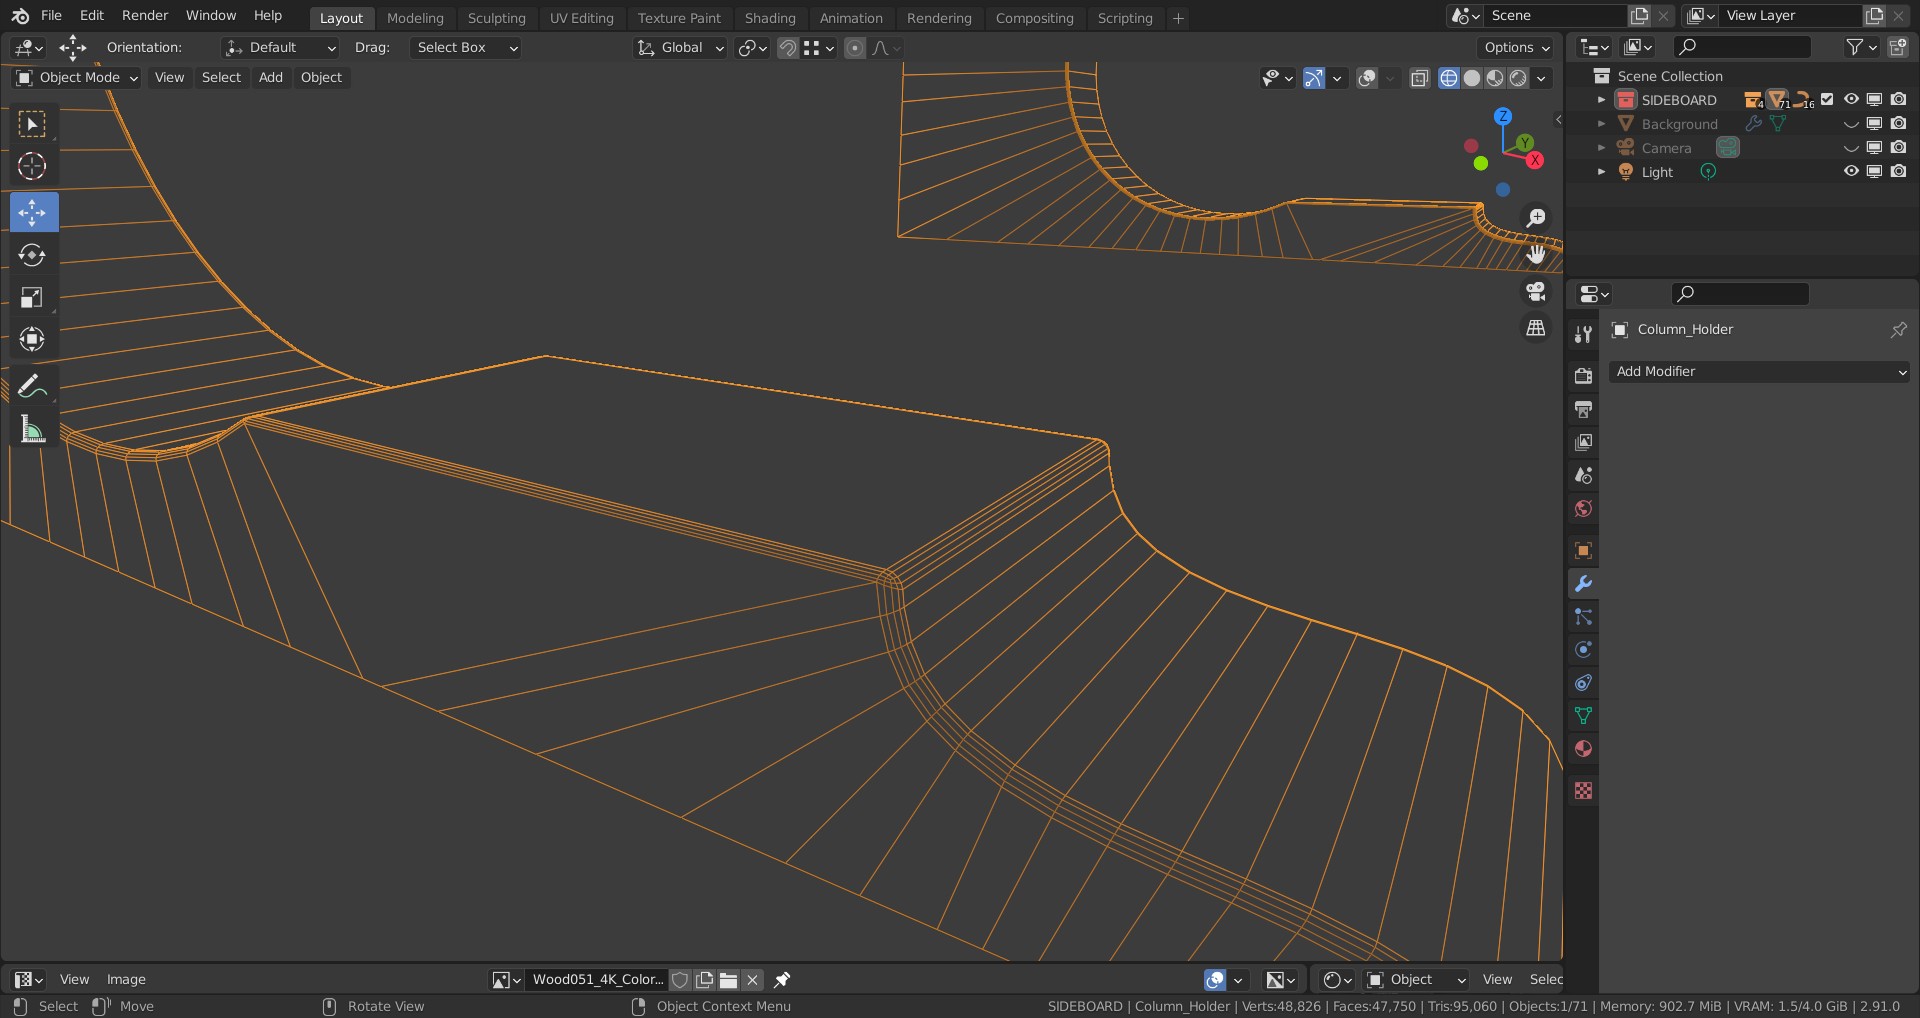
All the objects in which there are faces that cannot be seen, as in the image Rustic_Sideboard_043_Screen-4, I have cancelled the meshes that, being adjacent to others, can never be seen. Is this choice right or should it be avoided? Keeping in mind that this model is thought to be put on sale.
Hi,
I always remove unseen, adjacent polygons - I believe that is good practice.
What does that small column’s UVs look like? I would use a single seam down the back, with the top and bottom polygons deleted. Then straighten the island. There will be some stretching with that shape, but you will get minimum stretching that way.
That’s the way I do it - maybe someone else will post a better way.
Daf
Hi Daf57,
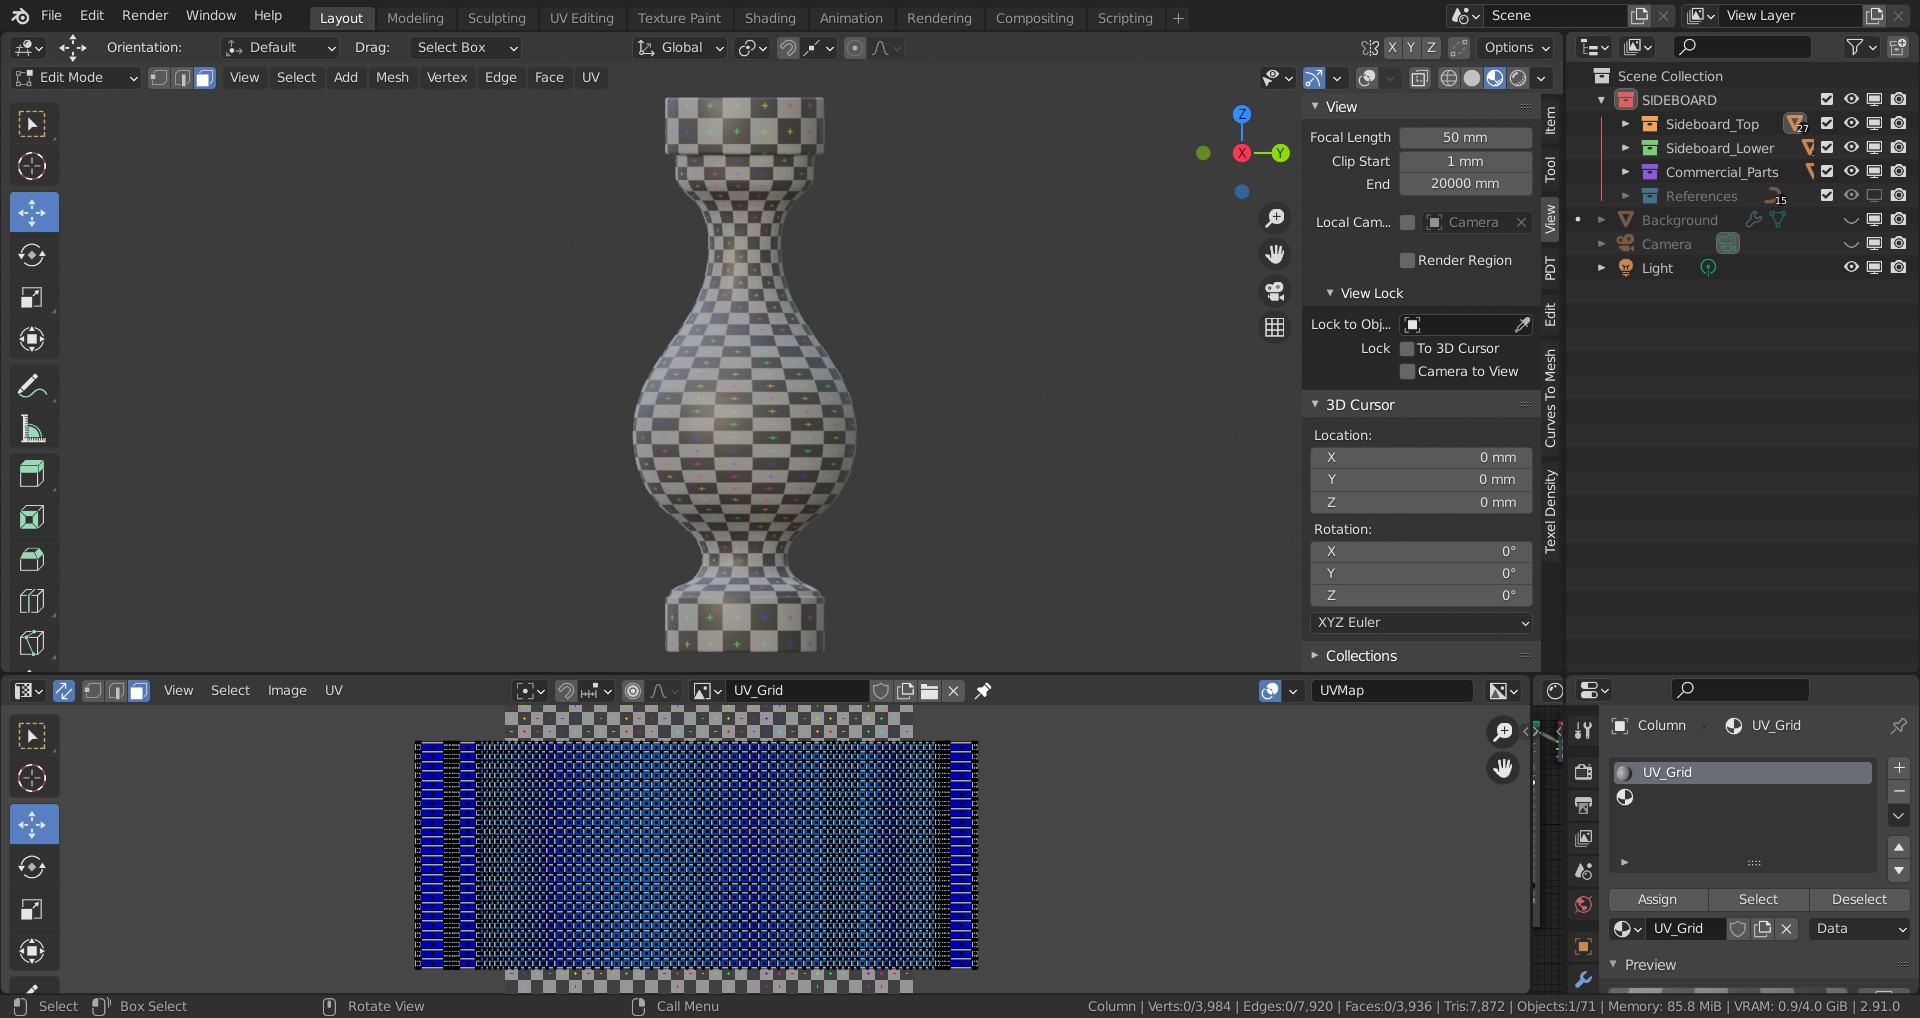
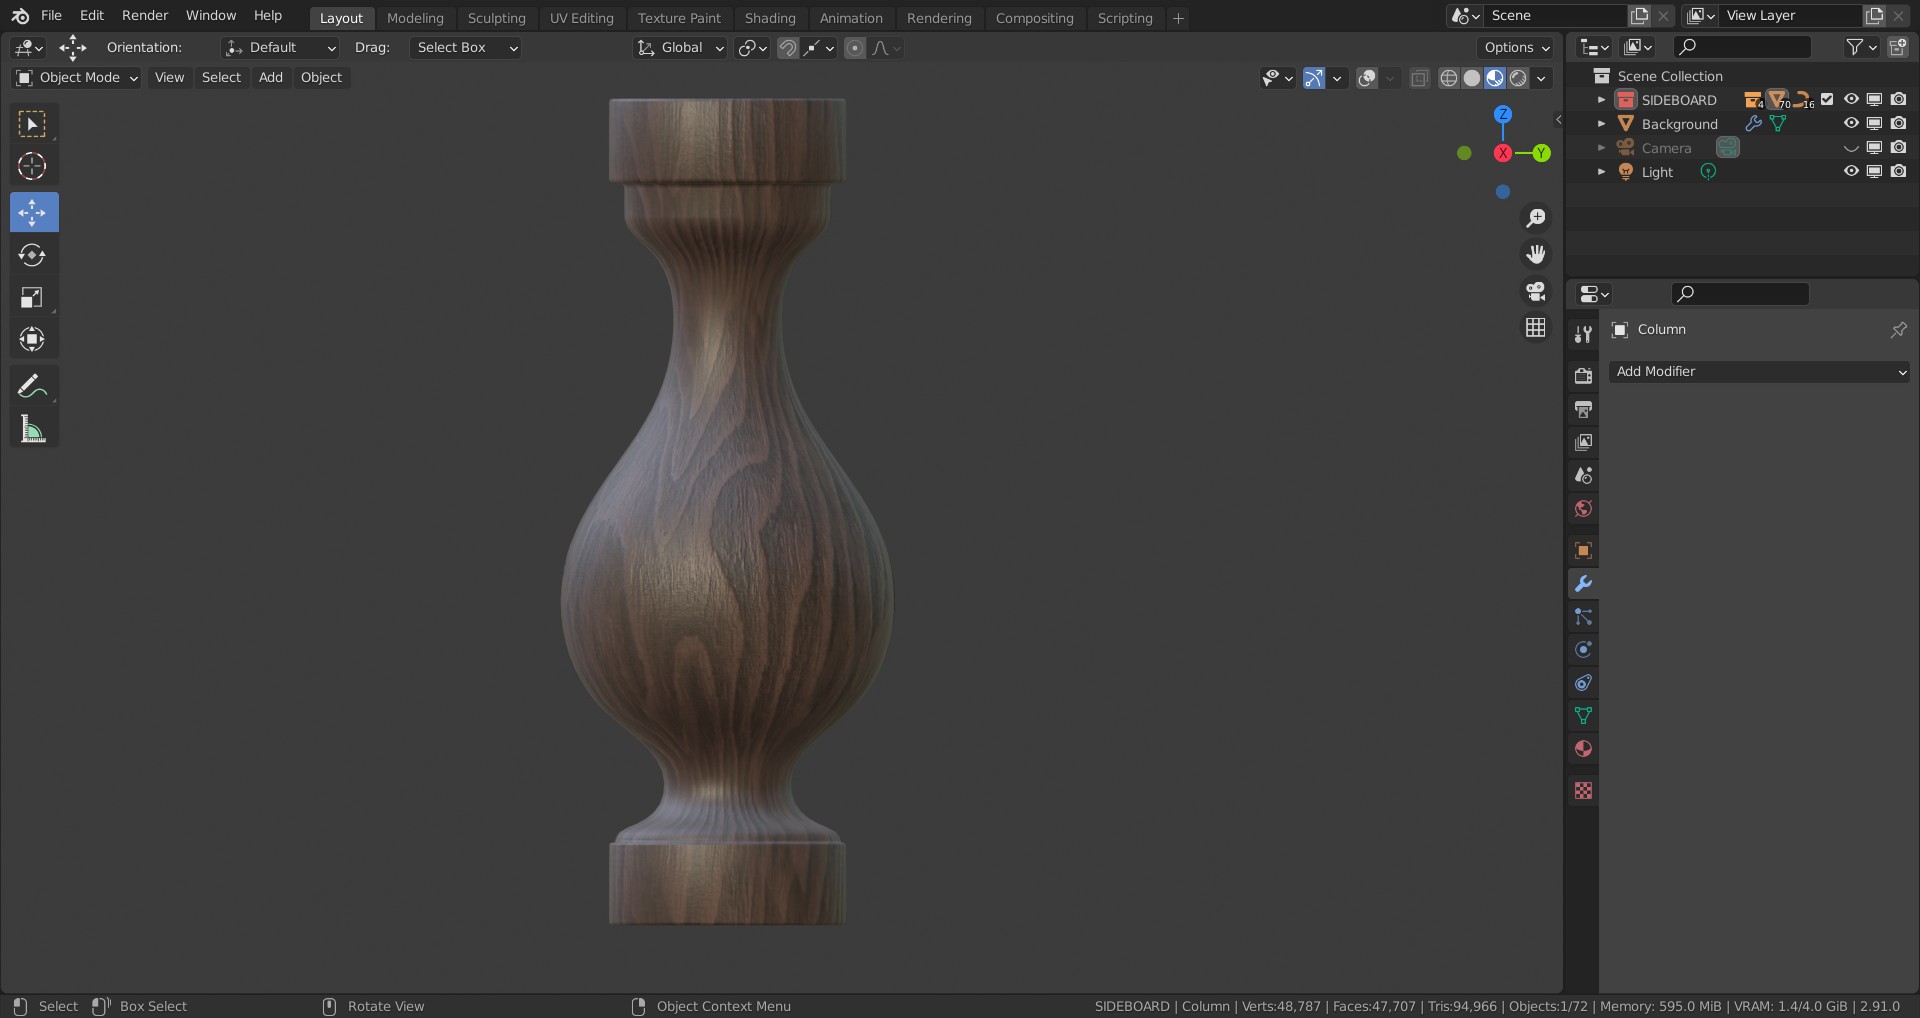
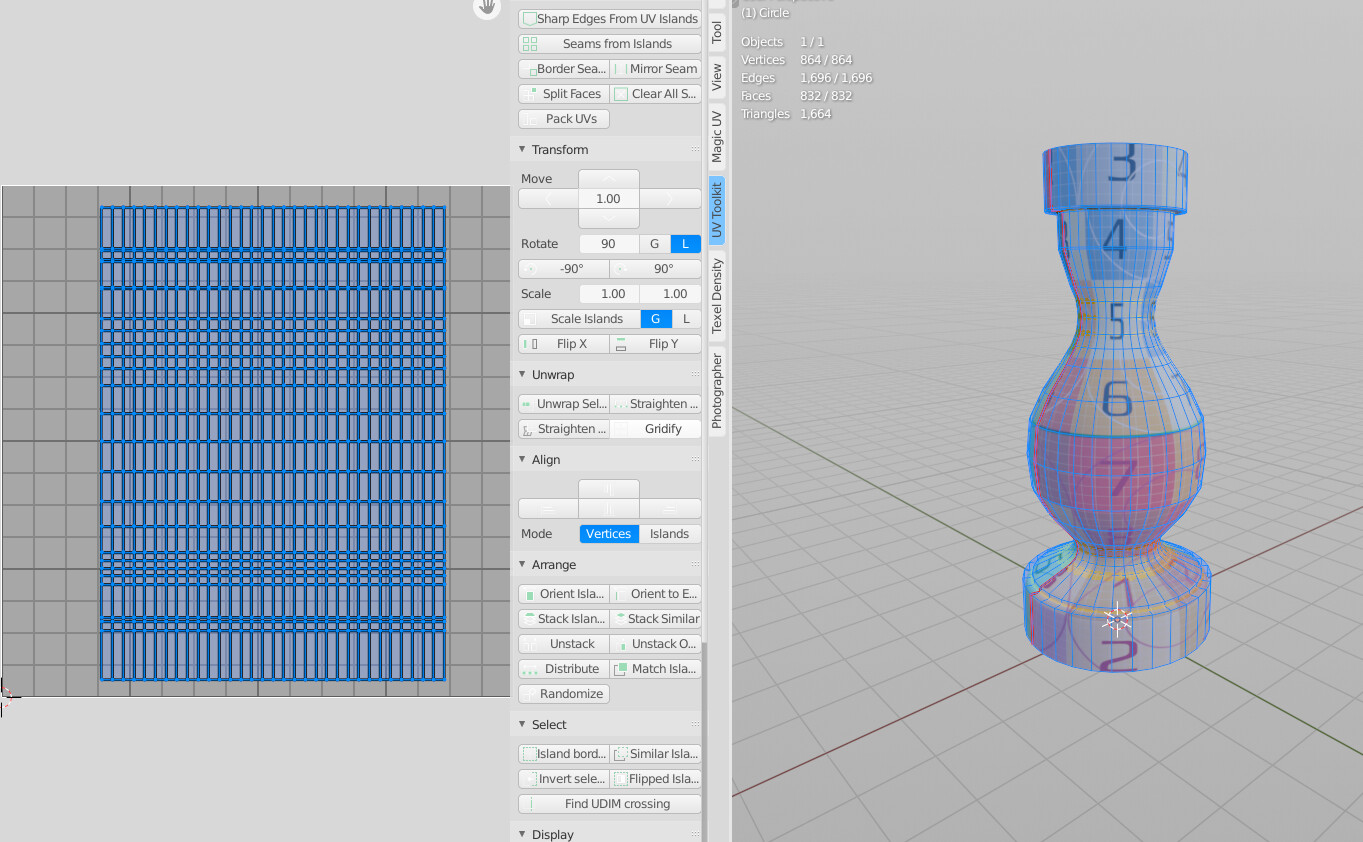
I used a single seam on the back too, it seemed like the best solution. Then I aligned the island with the Follow Active Quad command. The result is as in the images below, where you can see the squashed squares in the widest area of the column and the preview render.
What do you think?
It doesn’t look bad, honestly. You’re using a high enough resolution image texture that the wood doesn’t look distorted even with the stretching. I’d say leave it, it looks great
I agree with Joseph - the texture on the column looks fine as is. The wood texture is forgiving - other textures will not be.
I, personally, have never like the Follow Active Quads method. I like to straighten the islands - you get a lot better results with that type of shape. There are some addons that can do a good job with the straightening. The one I use is UV Toolkit. It’s reasonably priced and as you do more UV’ing you will find that it has many useful tools.
There may be other UV addons that do the same - some may be free.
Here’s a useful link with info on straightening
Below are a couple of screenshots I took to illustrate the effect - I recreated a similar shape and UV’ed it to show the stretching. You can see that some textures will need to be straightened in order to get the proper orientation.
Also - hard to tell in your pics, but be sure that your UV islands stay within the 1:1 square.
Thanks to both of you for the help surely some of these addons will come in handy!
But why do I have to stay in my UV island within the 1:1 square? If I stay within the 1:1 square the result is as in the image below. The textures look too big on the model. By necessity I have to scale up, enlarging the meshes in the UV editor, to get a more real look of the wood textures.
If not, how else can I do it, staying inside the 1:1 square?
All islands have to be within the UV 0,1 square. Have you UV’ed and packed the entire cabinet together?
When you do so it should pack with all islands in scale with each other. Some individual scaling may be done at that point but all islands must be in the UV square.
It’s a bit complicated but read up a bit on Texel Density to understand the concept.
Yes I packed the whole cabinet. I just used texel density to make sure that the proportions of individual objects are respected. Then I grouped everything into a single island and scaled everything together (enlarging the island by 7 times) to give a more realistic look to the cabinet with the result visible below.
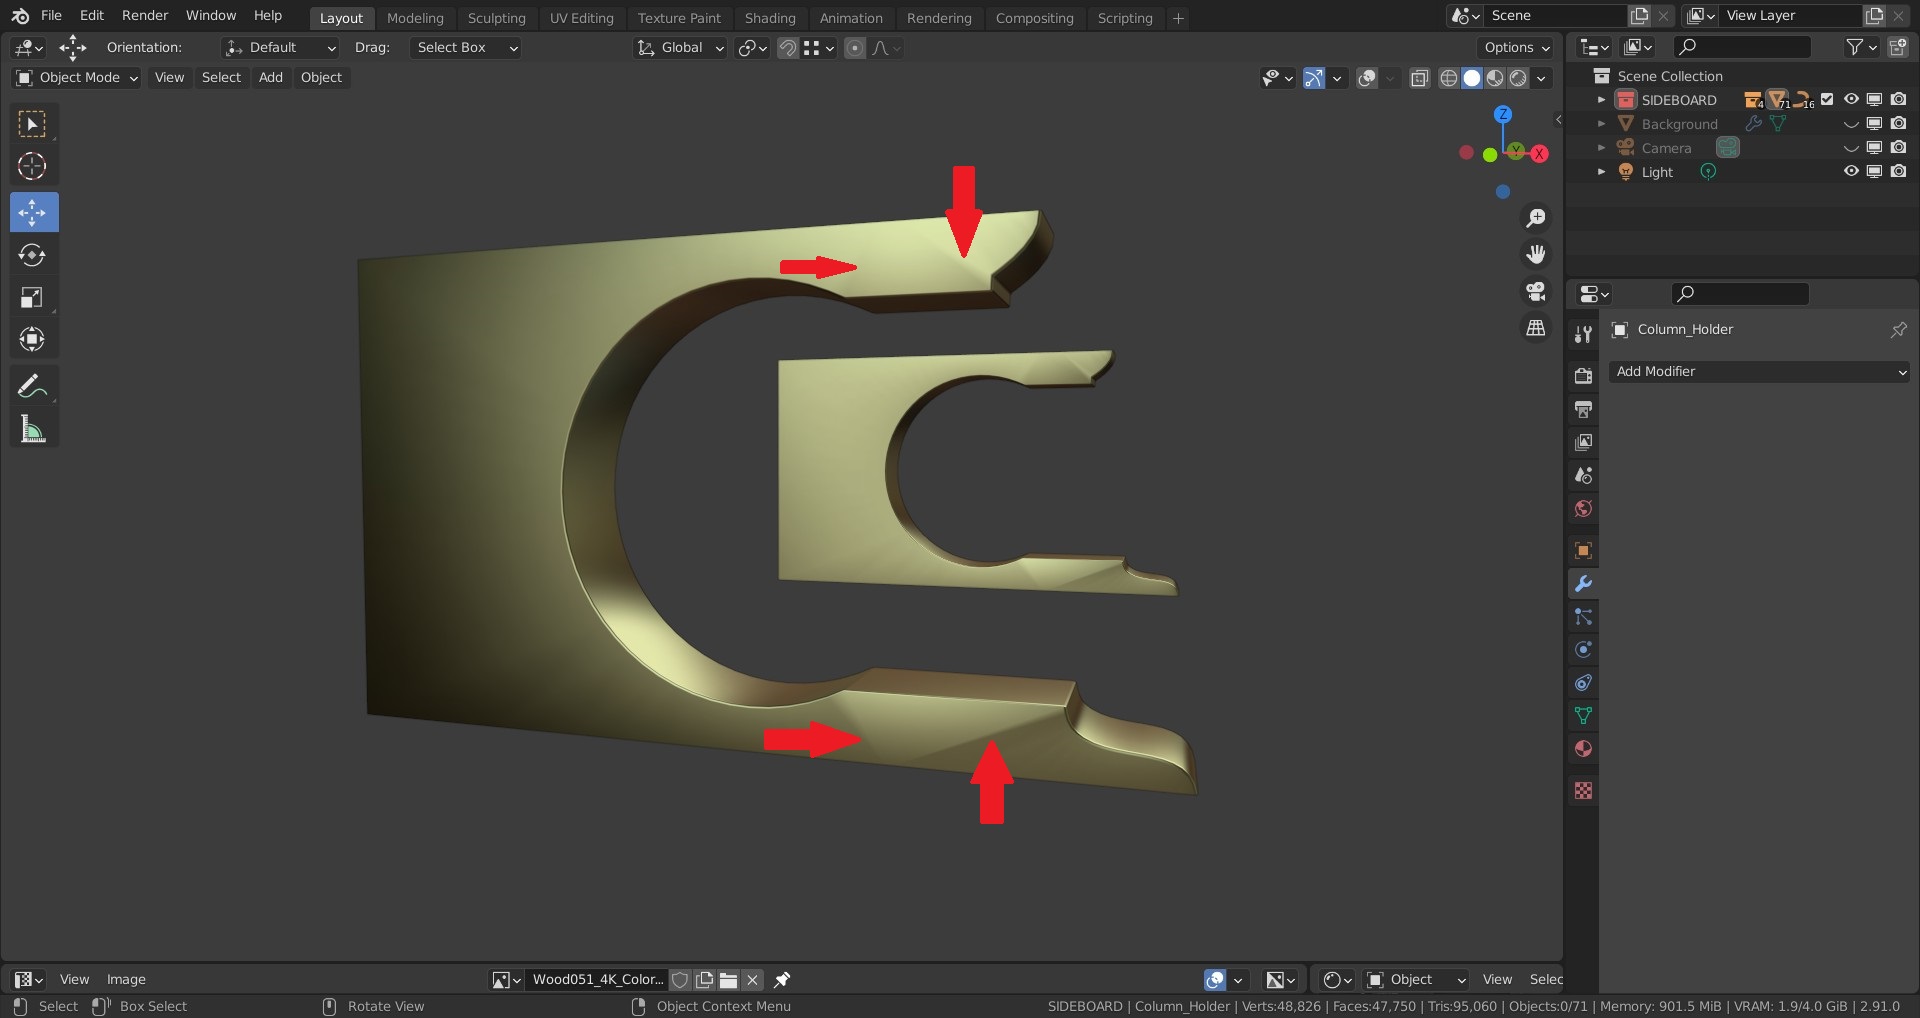
Guys, I realized that there are artifacts in the areas of a mesh shown in the image below. It’s a day and a half that I try to solve the problem, modifying the mesh in various ways, but I can not eliminate the artifacts.
What do you think I can do?
I think it’s because of your bevelled edges, which may have added split normals, which will nullify Auto Smooth. You might need to clear your custom split normals and then the auto smooth will work.
Sorry, I should have been more clear. I don’t mean delete the bevels- I mean delete the custom normals, as the only way Auto Smooth isn’t doing anything is if you have custom normals. You can do that like this:
So I went in mesh edit mode, now at the “Properties” window, at the “Data” tab, click on “Clear custom split normals data”.
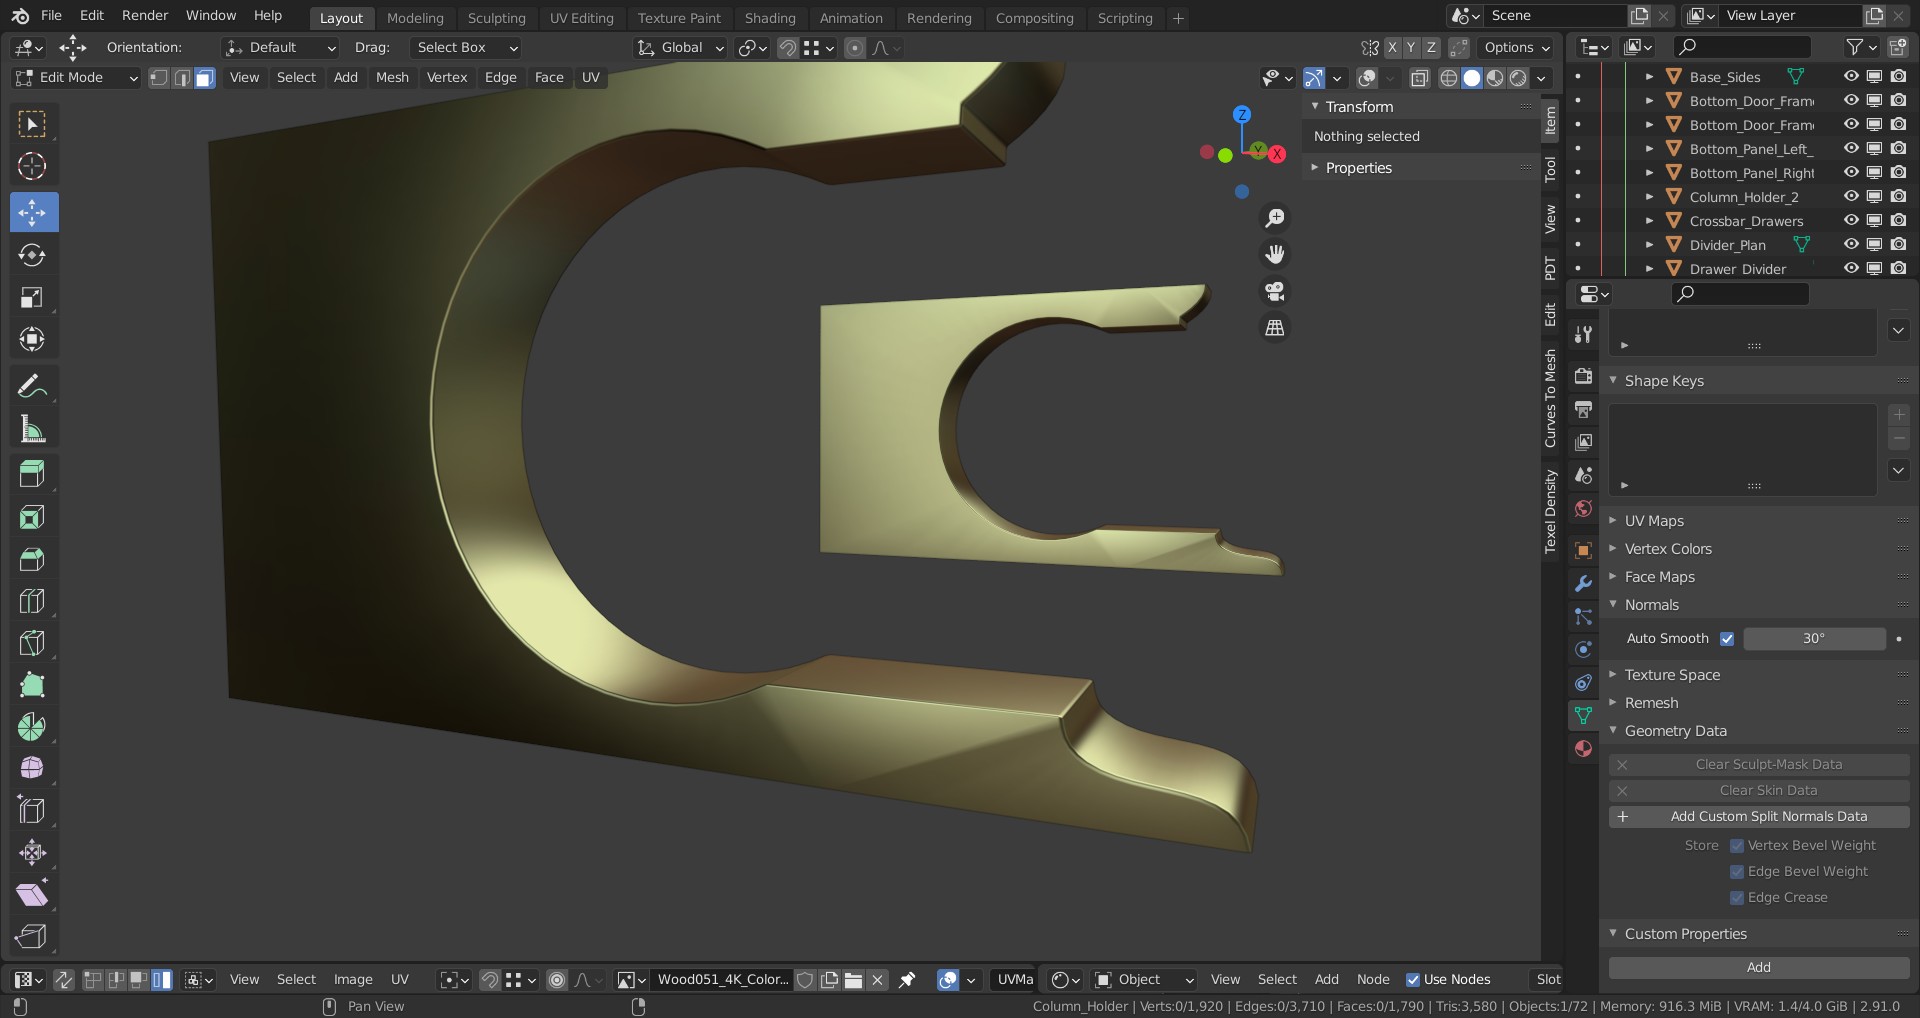
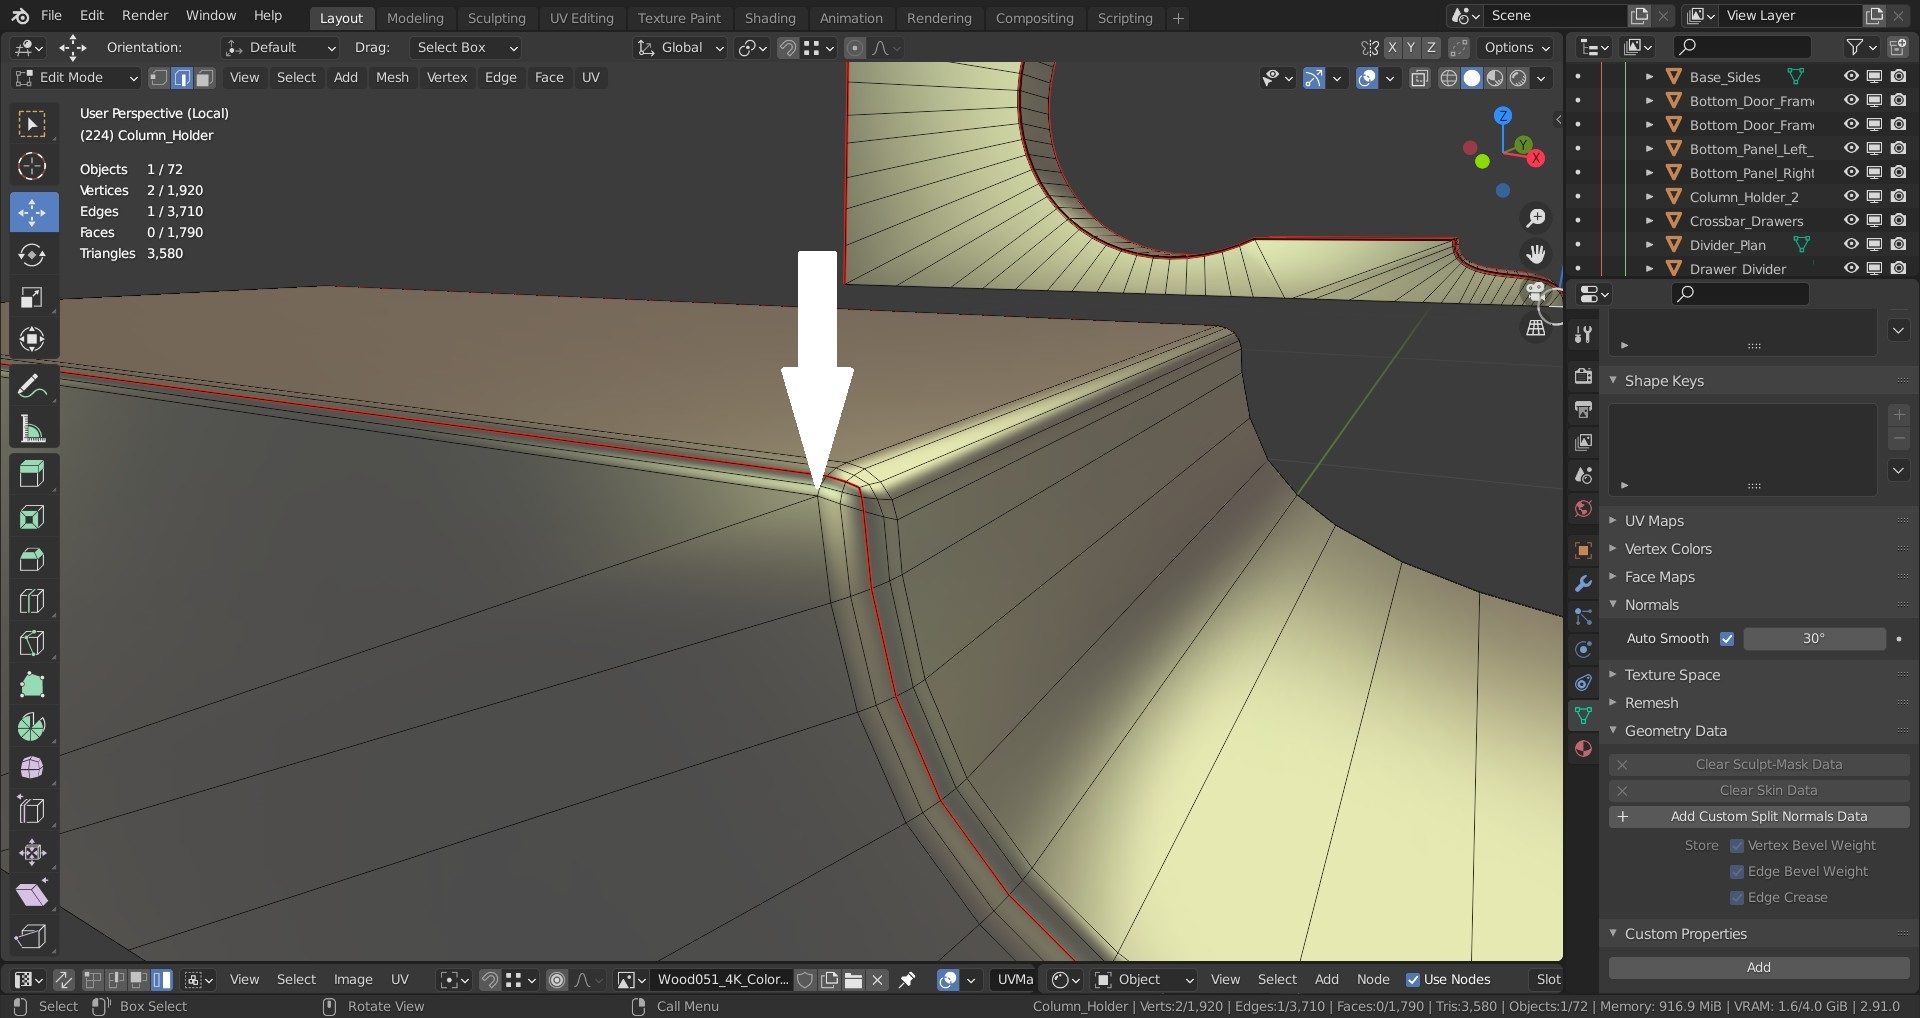
Sorry Joseph, the fault is mine, it’s me who is still a beginner with Blender. I went to the Geometry Data panel, but as you see from the image there is “Add Custom Split Normals Data” and not “Clear custom split normals data”. So it means that the normals data are already deleted? And the artifacts are still present.
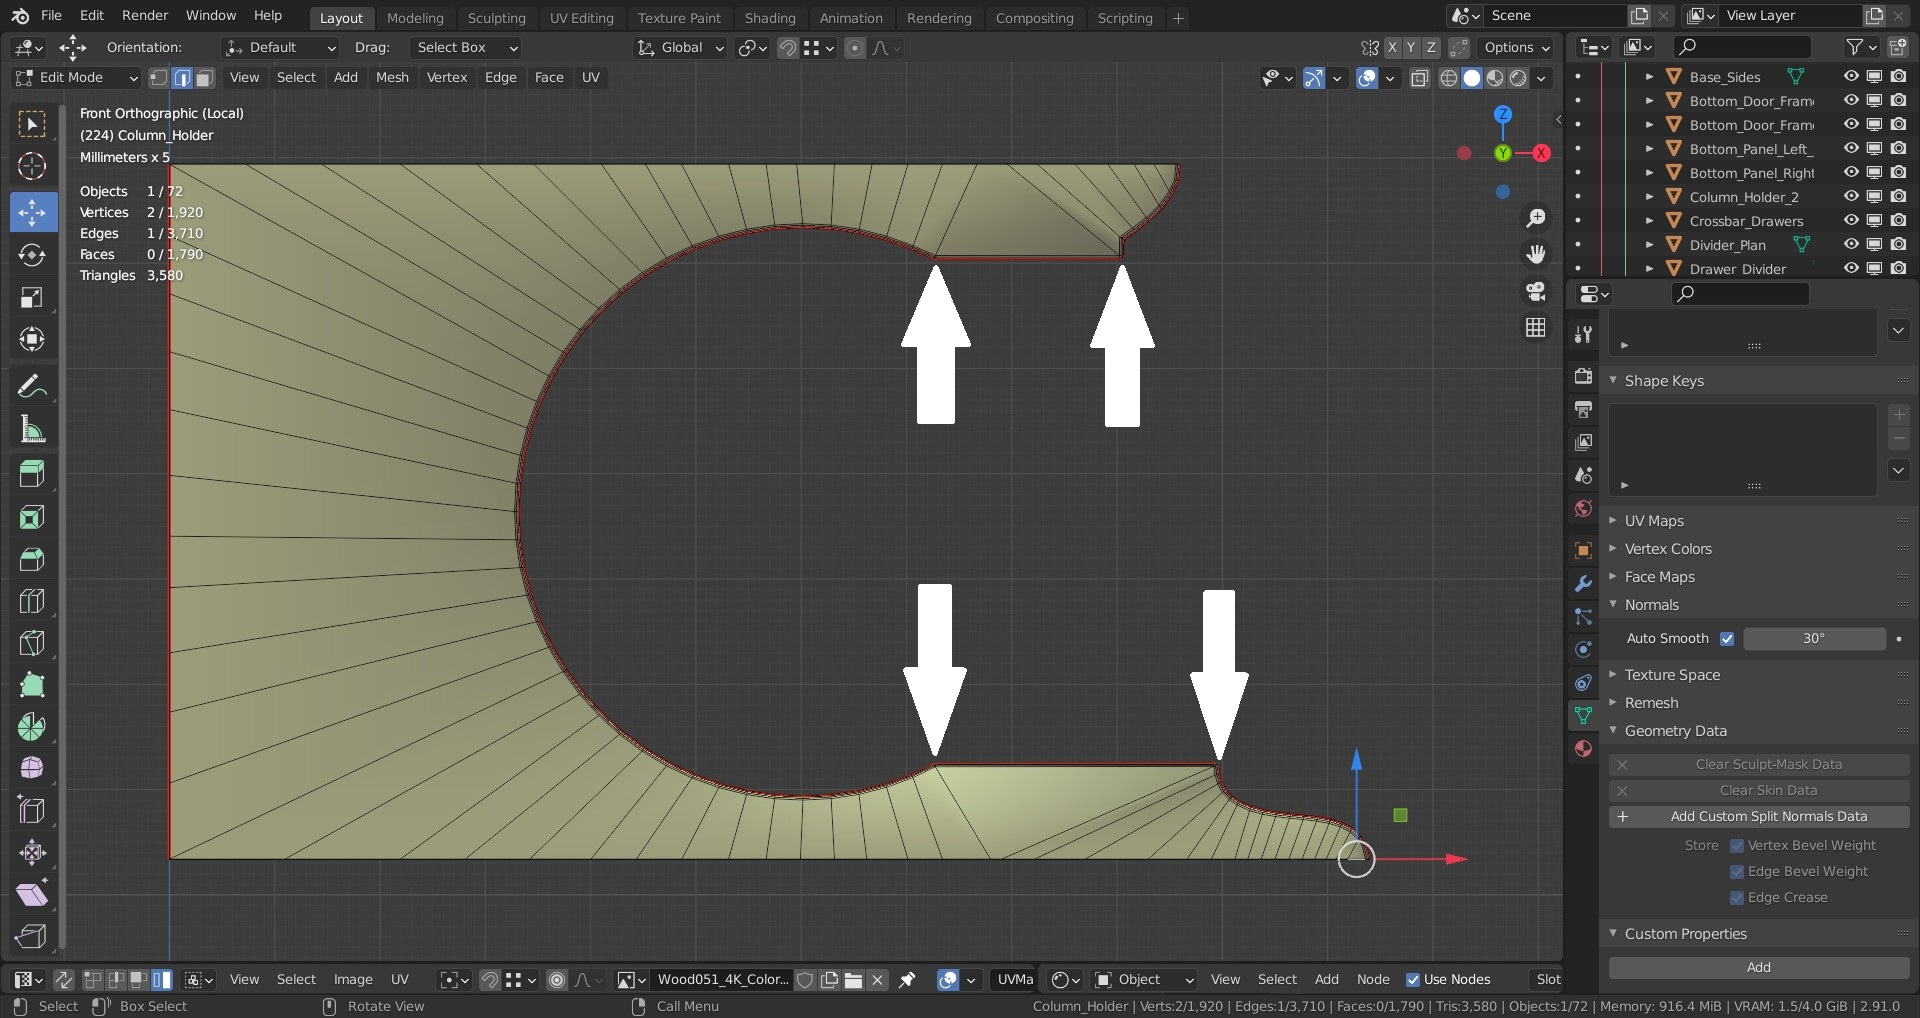
Maybe the problem could be that in the points indicated by the arrows in the other image, there are vertices where 5 edges converge instead of 4. I’m trying to model the mesh to delete a vertex at each point indicated, but I can’t, I don’t know how to do it.
Does anyone know how I can recreate the mesh with only 4 edges per vertex?
That’s just my guess, I don’t know if that’s really the problem.