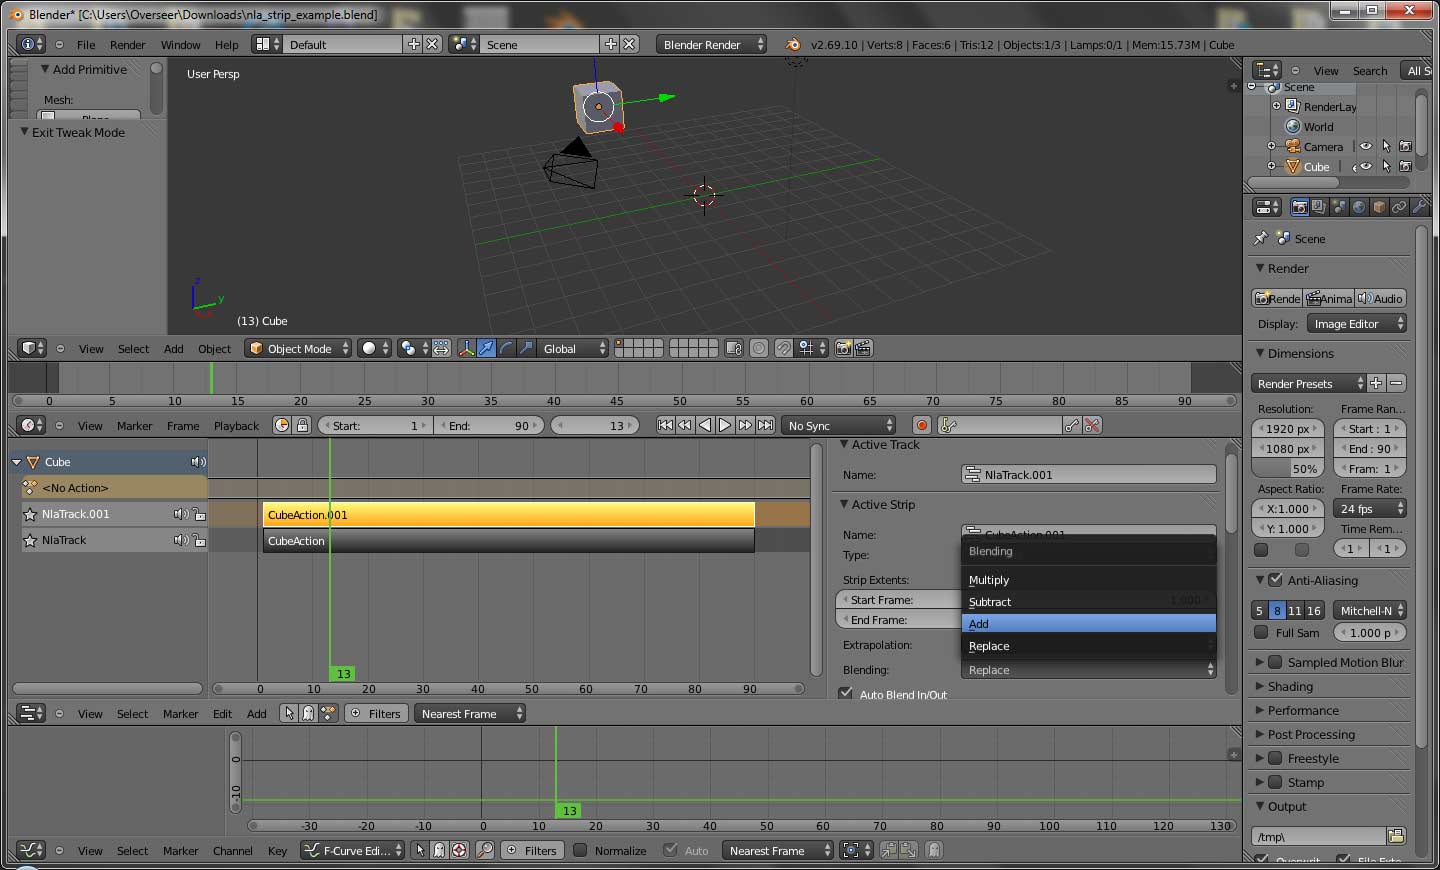
My understanding of the Snowflake icon is that it ‘locks’ in the current key set as a NLA layer. Then you can add more keyframes to the same object. For instance say you want the cube to move. Add a couple of location keyframes to the cube, then click the Snowflake icon. If you examine the Graph Editor at this point you will see that your keyframes have disappeared and a new strip has been added to the NLA. Now do the same thing. Add more location keyframes and click the Snowflake icon again. You will have two strips and no keyframes in the Graph Editor. You can select a strip and press the TAB key to edit the keyframes in the Graph Editor again. Press TAB to exit strip edit mode and lock in your changes.
So what can we do with these two strips?
By default the new strip’s Active Strip (reveal this panel by pressing the N-KEY in the NLA view and unrolling the panel) is set to Replace the animation as indicated by the Blending drop down. If you want to “mix” the two strips you need to change this default to Add or one of the other options. If you don’t, the last strip you created with the Snowflake icon will replace the animation from the previous strips.