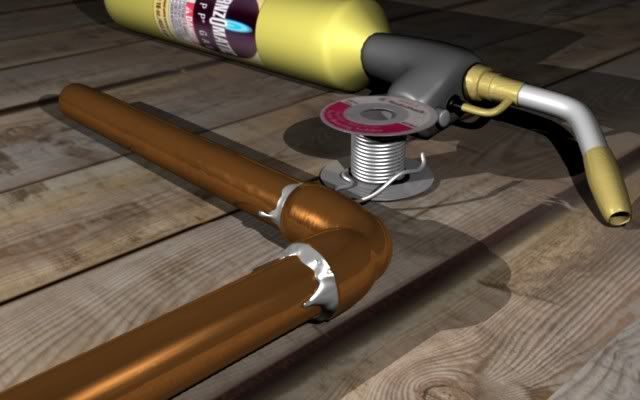
I’m Trying to gear more towards somthing practicle.
I cant figure out how to mage the solder look more like it is stuck to the pipe.
And Im still working on the torch.

I certainly wouldn’t hire you as a plumber. 
These parts should be fitted tightly. With that in mind you might have better success usign texture and material maps to simulate the solder at the joints. Everything else looks pretty decent.
Great materials, there, but that solder joint… :no: Here’s a quick suggestion

The solder and the pipe are all one piece, the solder is a separate material index.

Here’s what it looks like rendered.
Your joint looks a lot like you didn’t heat the pipe enough before applying the solder. The solder should be sucked into the joint by capillary action, in a well made joint, there’s very little solder showing on the outside of the joint.
The other major gaffe is the crimping at the end of the tube. A lot of home taught plumbers will do that as a makeshift, rather than buy the proper tool to roll the pipe larger or smaller, but it is not a sign of a master plumber. It’s almost guaranteed to leak.
Thanks for the sugestions. In a perfect world thats how the solder would look. But there are always some drops. How would you get that effect with your method?.
and I really am a Master Plumber.
Take one of the solder colored faces and extrude it for a drop of solder. You’re buying supplies at Radio Shack? :spin:
No , that was a high res pic from online
Thanks . I’ll try that…
Worked on the solder… Thanks for the onput Orinoco. Now I’m going to start on getting the torch more detailed.
You’ve got a good eye for materials. The solder on the spool, though, looks a bit dull. You might try some ray mirror on it, and more hardness. Right now it looks like aluminum or pewter. (Of course, most of my experience is with electronics solder, which is very shiny…)
Things are looking good but the pipe color is too uniform, the copper will change color when you heat it. I don’t have a picture I can give you but go heat a piece and you will see what I’m talking about.
If you smoothed the solder out, and had it penetrate the surface of the pipe, it would look stuck to the pipe. Although, a cold solder joint as you have shown there globs up and is not smooth, so it looks good.
The copper, if overheated, takes on a rainbow kind of specularity. Use a specular color ramp as nightowl suggests to get that look.
If you used raytracing, and turned on a little reflectivity for the copper, it would look better. I use Benzomatic btw.
Yeah I know about the discolorization at the joint. I agree I need to do somthing about that, and I will. But I am an extreme amateur at this and that is really more that just a rainbow. I also have to put the discolor from the flux.I hope to get somthing close to this when I’m done.
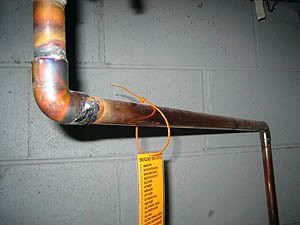
I didn’t do this one. It is just a pic from online. Mine are never that bad.
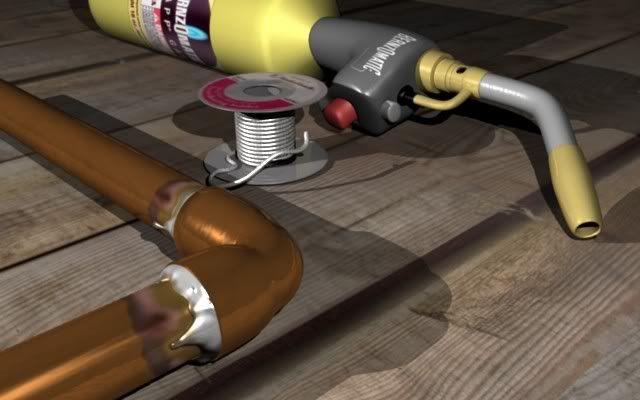
I’ve started working on the discolor. Its not where i want it yet, but I’m starting to get a feel fot it. What do you think?
I wouldn’t try and use procedurals for something like this. After working in a little studio using 3DS Max, and having a guy there with us who worked on “The Wild”, I have a much higher appreciation for UV mapped textures and their worth in making something look real - even if it’s an almost uniformly colored material. The torch materials could use some discoloration, flux, grease prints from hands, etc.
I agree with PapaSmurf - allow the solder mesh to protrude through the pipe mesh, and I hope you can get the flux mess textured on there - it will look really good.
It’s a good start, but you need more detail on the wood. You also are going to need to make alot of textures.
I dont really know what you mean by procedurals, but I agree that I need to add a lot more dirty textures. This is probably one of the first things ive done that i havent lost intrest in yet.
I have seen some post great work and then say they did it in an hour or two. So far, off ond on, I have probably spent 10-15 hours trying to figure out what things have different effects. In any case I will post updates as they come.
Hello Fellas,
Years back I worked for a general contracting company in New Orleans, (my hometown), there was a guy there, one of my co-workers, (a supervisor actually), by the name of Joey. Joey could solder some of the prettiest joints you ever wanted to see, like the one Orinoco posted. The only problem was that after I’d hung, float and taped the sheet-rock, textured and painted everything, when they turned on the water, the darn pipes leaked like a flower sifter. And in the end not only did I have to go back and redo the sheet-rock and re-frame some of the upstaris bathroom, but I also had to help redo the living room ceiling. masterplumber has it right, good job masterplumber, I’ll hire you any day.
procedural textures are textures created in blender.non procedural textures are created (often from photos) in a program like GIMP or Photoshop.they look far more realistic if you use photos.
Well I’ve done a little more. I dont know if its is progress or if it is too much. Still working on the pipe. Havent really started on the torch or the floor.
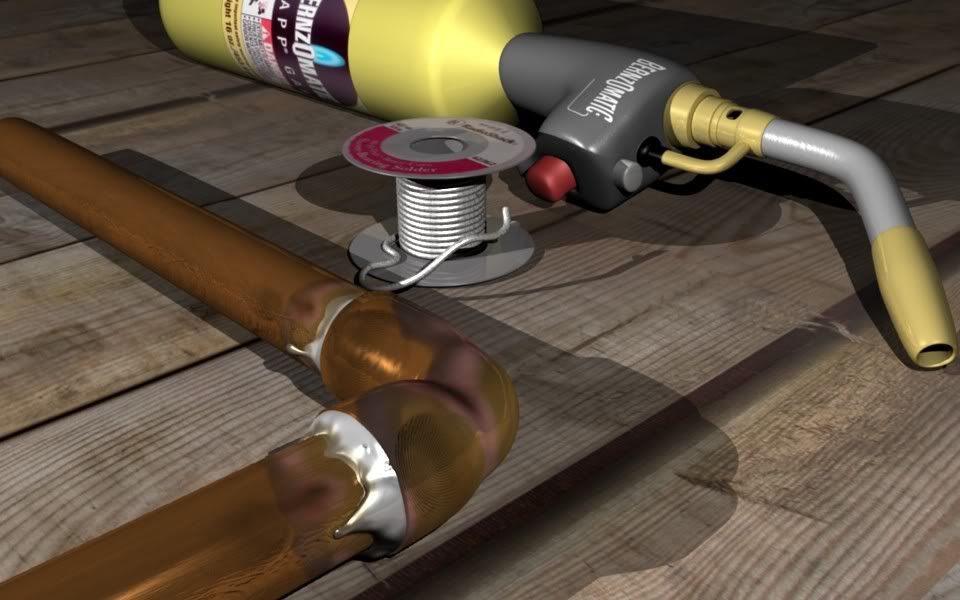
You’re getting there. The solder is still a bit too thick, particularly since you now have the Cu looking like at got good and hot. Those drips are nice, but other places should thin down to nothing. Maybe there should be a spot where the solder goes onto a bit of the outside surface of the ell? The edge of the heat discoloration on the front pipe is too abrupt. All comments imho.
In the very first image you had the far end of the rear tube polished – as if cleaned with steel wool in preparation for the next joint. I liked that; bring it back.