Space: Earth, volumetric cloud shader, rayleight scatter etc

I have been working for some weeks (!) on an earth space-scene for a live action short that I want to make. This is part one in that project. The other part is about a space station/ship that was actually the beginning. Because of the differences (thats more about modelling) I have decided to post that later, separate.

Since my only workhorse is a macbook air I have put quite much work into finding fast optimized ways of doing things. Yes, I cheat as much as possible (My knowledge is the limit). My goal was to make a fast renderable scene that still looks “nice”.

Maybe I should also add that I had never used blender before this project so there’s a lot of trial and errors included in this RND time, but I like to see it as a proof of concept if I succeed.

I have also gone back and forth between blender Internal and cycles because I found that I could produce similar quality with a lot faster render times. However, I finally decided to stay with cycles, because of the fantastic node features. I didn’t get any nice volumetric effects in BI anyways so…

Goal
I want a model of the earth that is realistic (cinematic) with following properties:

- specular oceans
- volumetric clouds
- atmospheric effects such as raylight scattering and halos
- real displacement if closeup on mountains
- good looking from far
- cycle materials and nodes
- fast renders <5 min frame
- Something I can take pictures at from any angle

Heres what I have so far:


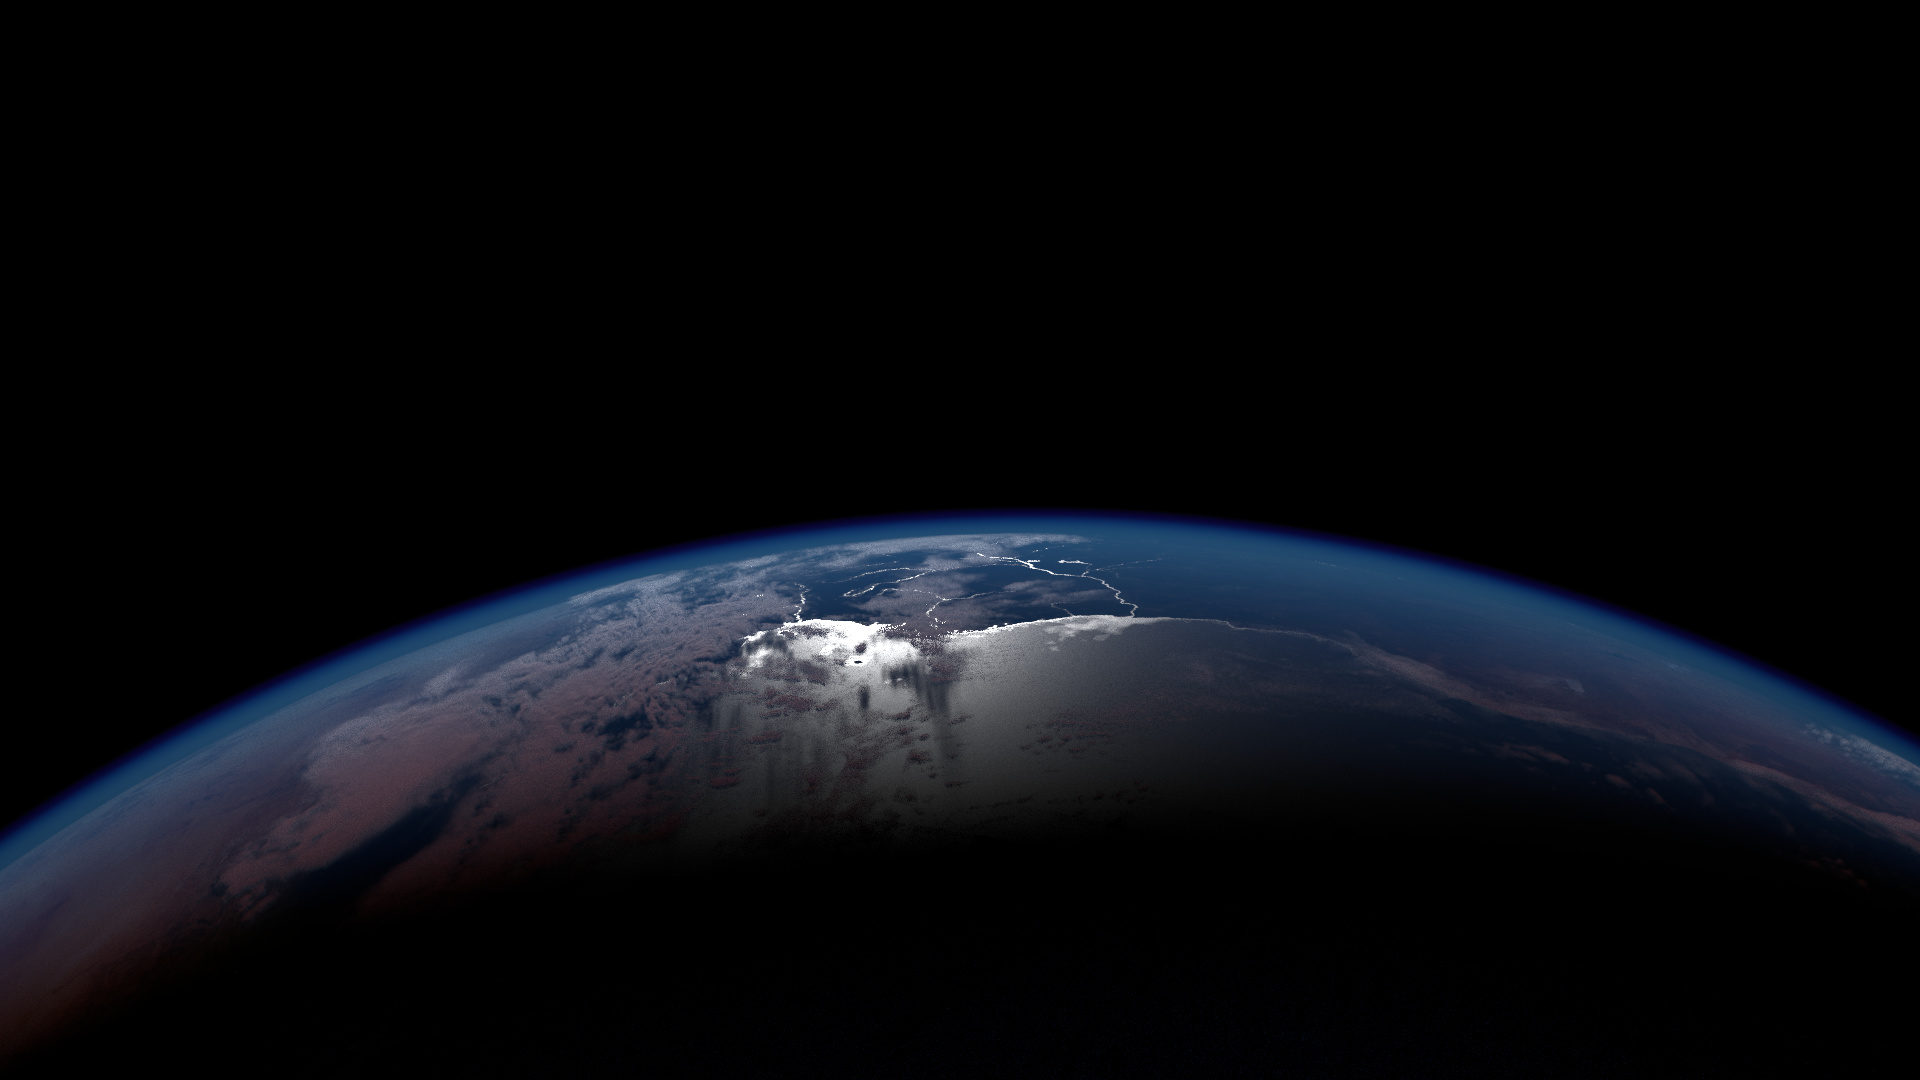
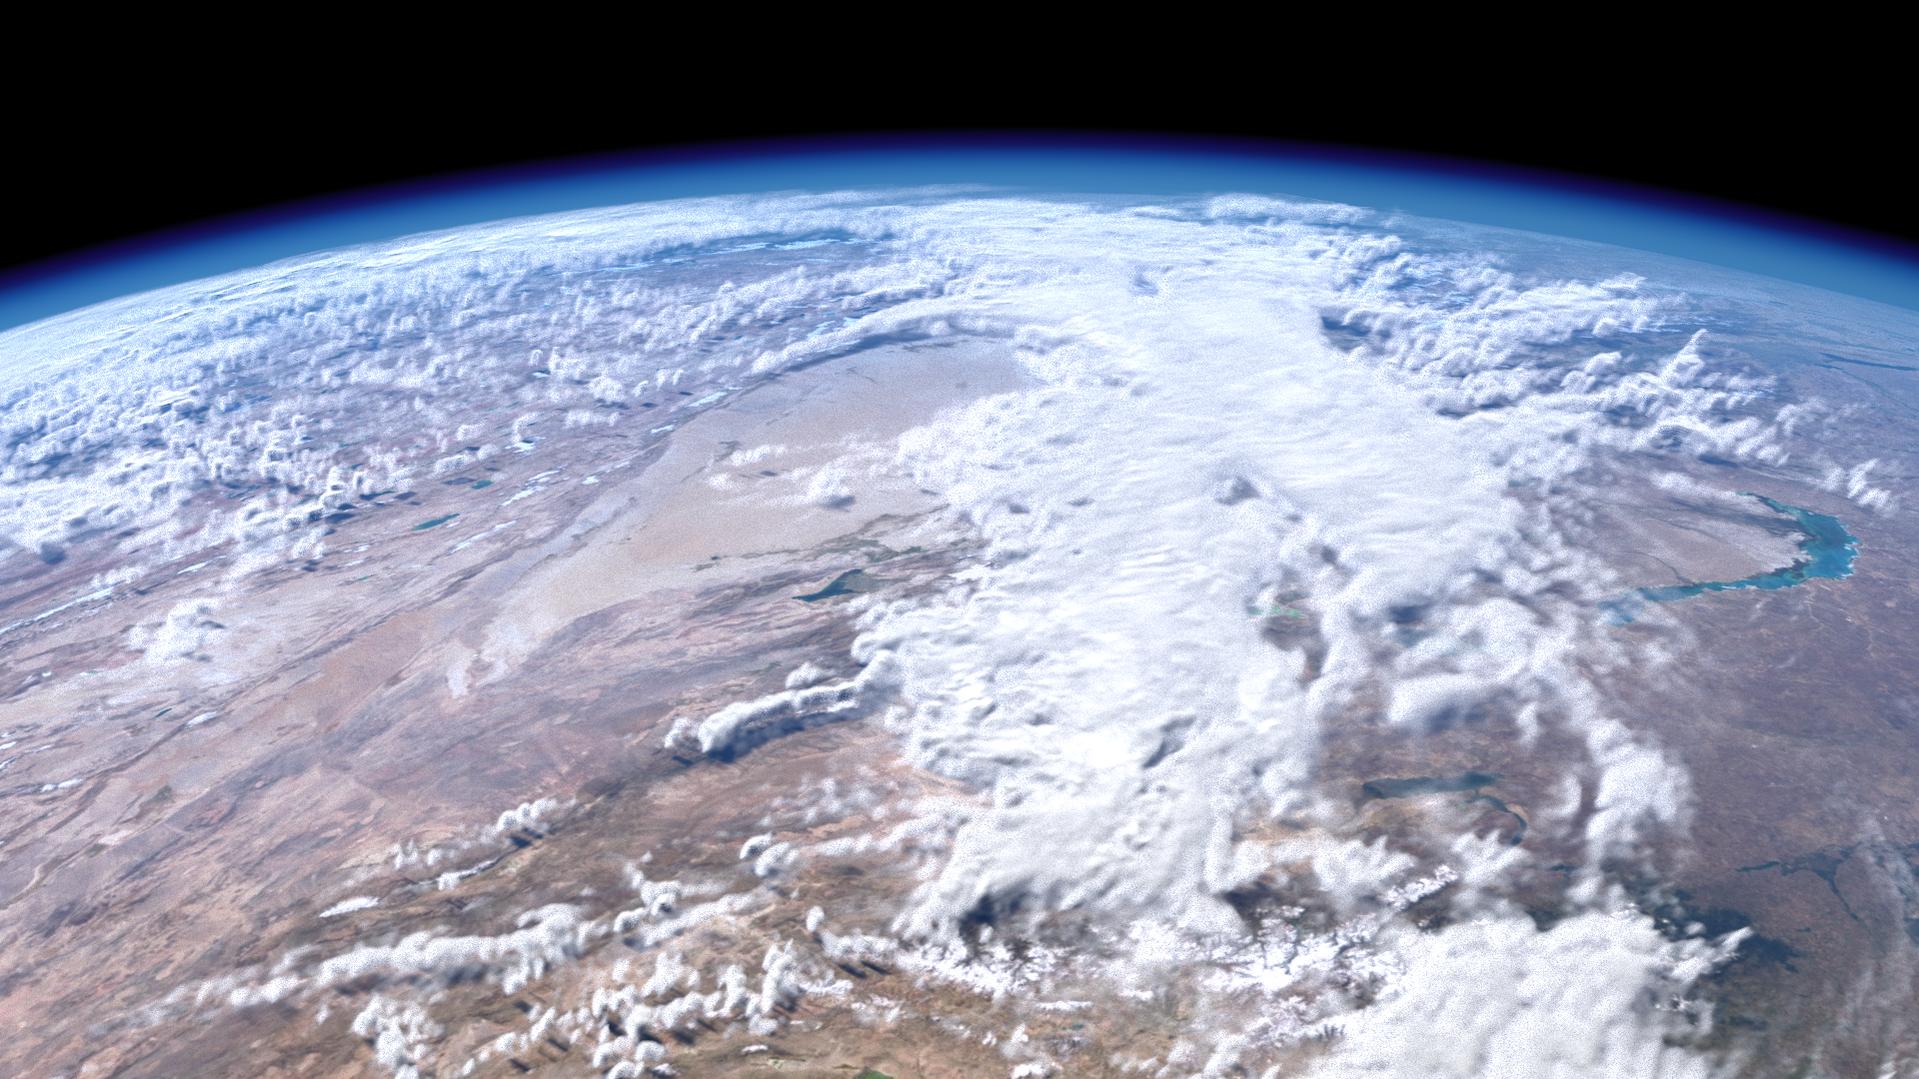
All images are rendered with only 10 samples.

I have reinvented some old techniques
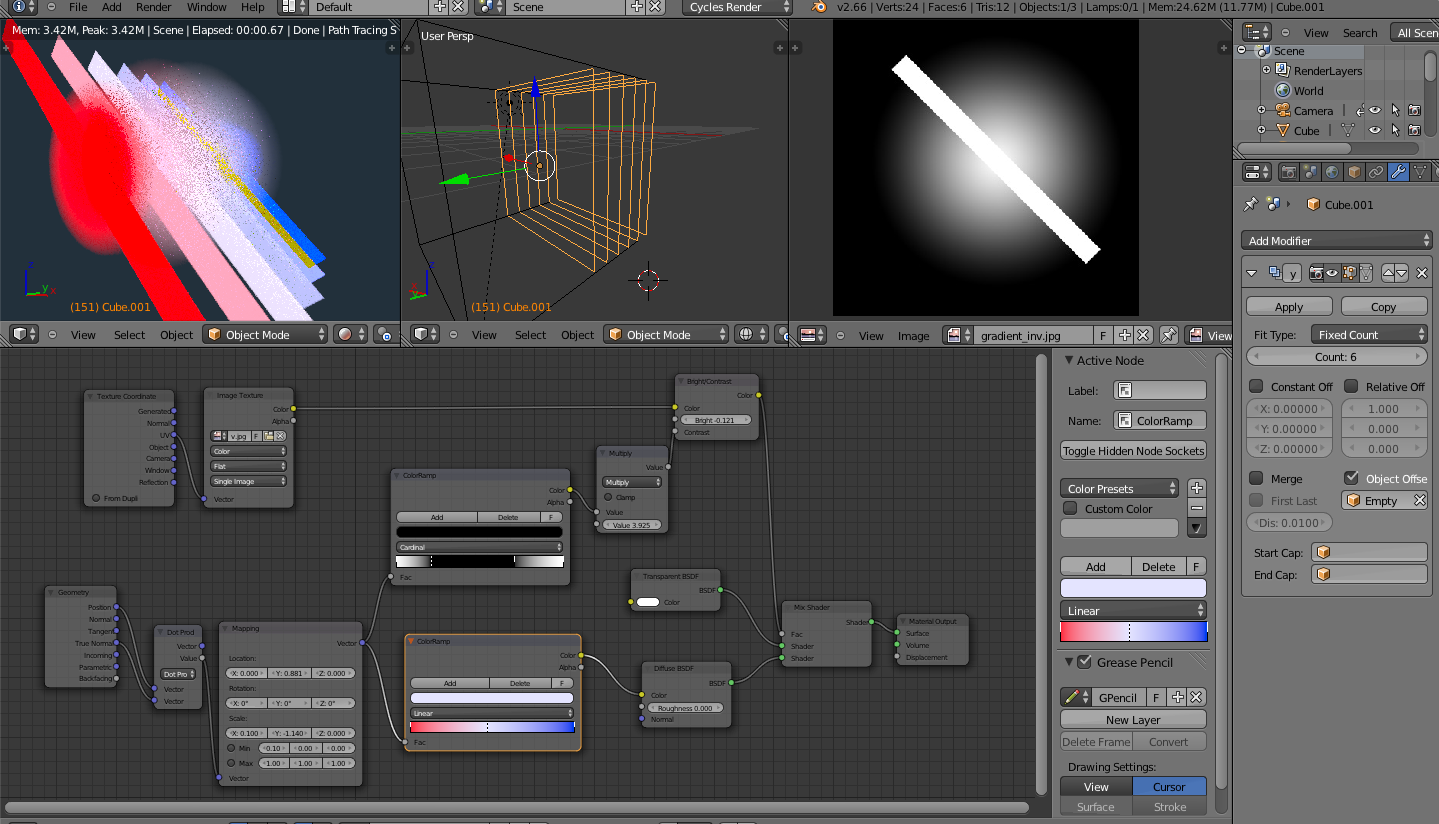
Volumetric clouds.
I didn’t succeed in using the volumetric shader from 2.4 (or whenever it existed), so I have created my own workaround. I have tried several methods with particles and displacement modifiers, but not with any good result. This is the best so far and will be sufficient for my angles and distance.
My setup is a sphere that is repeated with an array modifier. I have then put a material mapping node that scales the mapping in the normal direction. This gives me a factor change from the top cloud layer to the bottom one. Using this factor I could then add ramps for both color change (white at top and bluish in the bottom) and contrast. The contrast node kind of shrinks the cloud in a way that allows me to adjust its height shape. I think the result looks pretty good, and my setup is easily configurable so that I can increase the number of layers by just changing the number at the modifier. At the moment they are a bit spiky, so I might work some more on this.

Rayleigh scattering
Oh my I have searched the internet for an OSL solution to this. All I needed was the light vector. Since the “getAttribute”-node didn’t seem to work for this I have now just used a manual coordinate in the node system (by making it a group I only have one place insert the vector).
With the light vector I have created a ramp that shades from white to black via some orange and blue. Just adding this groupnode on my pseudo-volumetric-cloud-shader I got nice looking sunsets :).

Real displacements
To give the earth-sphere real displacement without doing subdivisions, giving it 2M faces, I decided to do partial subdivision for where the mountains where. The way I did this was to:

  1. start UV-mapping the sphere
  2. add a subdivision modifier, press show in edit. (don’t apply it)
  3. add displacement modifier with displacement texture (don’t apply it)
  4. go into edit mode and simply paint (C key) the polys that are displaced.
  5. When partially selected, subdivide from edit mode. (you can now lower the subdiv modifier)
  6. Now you can deselect all and paint again adding more detail where needed.
    rinse and repeat.
    After 3 times I could have subdiv set to only render 2 times (when rendering) without any change in the displacement modifier. (ended up with about 42 000 faces)

Halos
To be done. Will add same technique as with rayleight scatter to shift the color when near the terminator.

Stars
To be done. When I have tested this before (with my ship), the stars easily get blurry when you do close ups. Therefore my plan is to take a real star-texture as input to an OSL that will put a virtual star on each white dot in the real texture. This way I can get a controllable starmap that is “real”, and also easily add noise for increasing resolution. VarkenVarken has made some star-shader that I will look at for this. Another alternative might be possible with a particle system… I will look into whats easiest.

Optical Flare
This will be the hardest part I guess. I’m not sure how to implement this but I suspect I will need to code some phyton. I found a good setup for optical flares, but I want an automatic solution that will animate when partly covered etc. Any suggestions are welcome.

I can’t come up with anything more… but I sure have missed something.

Any suggestions/critique are welcome, especially if you have ideas that give faster/better result. (and, not buying a Pc… :slight_smile:

Cheers

4 Likes

Have done some updates. Still work in progress.
Now the reylegith-scatter works trought the atmosphere so that sun turns red when close to edge. (is atm not visible because my flare is in the way- will fix that so that the flare gets the color tint). The atmosphere also turns red when sun is behind earth, close to the edge. Avg rendering time was about 5 min on my macbook air (CPU).

Halo
Have added a green/yellow halo that can be seen when on the night side. (not seen below)

Flare
My first version of lens flare. Need to work alot more on this one. But wanted a generic setup that would work with any camera without rigging.

Color correction
I want the earth colors to be more bluish according to reference pictures from ISS etc. Working on that as well.


Very impressed by your volumetric clouds. I’ll have to give a try for that.
What size of texture did you use for earth surface ?

Thanks!
All textures are of the level 8K (highest possible from Nasa). Here is the principle behind the clouds.


When mapped on spheres its a fiddling with finding the right values on the mapping (Y.location & Y.scale)min order to make the different colour change just at the surface level. Since clouds are very thin compared to earth size its a bit tricky to get it right (adjusting the mapping). I used textured sprites as above with a color ramp to adjust everything, and then when it was right, I applied the real cloud texture. (you cant resize the spheres after this or you will screw it up again).

nice work up to now
but in cycles we still don’t really have volumetric right now but shuold be added later on!

happy cycles

I would really appreciate a node setup for your atmosphere. I can’t figure it out.

Hi,
I know that this hasn’t been updated in a while but I would like to say you have achieved some spectacular results. I am also interested in how you managed to achieve the atmospheric effects, if you could enlighten me that would be amazing! :smiley:

-George

did you do it in cycles yet
would be vey cool

can you five the NASA link for higher res earth map

thanks

Hi again!
I have been off 3D for a while doing film, but picked it up again just a week ago (is that why people suddenly have seen this?). And yes RickyBlender, I have done it in cycles. I downloaded latest blender version recently to see if some of the missing features for the scattering is now possible (the light vector was not working in the old version of blender I used to do the above).
I dont have the link to the NASA maps, but believe you can find it trough their website (was some kind of download page where you could chose all kinds of maps).

I really like the way your atmosphere looks and that it renders fast. could you give some details on your method of making the atmosphere? I could not quite follow your explanation.

Well, he never replied, Im interested in your setup too…

Wow, what a piece of art!

I didn’t understand your atmosphere you mind explain it? please

If people want NASA’s best earth texture maps just Google “Blue Marble Next Generation”. This will give you maps much bigger than 8k, up to 86,400 by 43,200 in fact (no, your system won’t be able to cope with those as textures, it’s just the maximum available). You can find textures for each month of the year separately, one for January, one for February etc. They should always be scaled down to the largest power of two that your system can use, so 8192x4096 is about it for most people. I used to have an edited version of the product that was better suited to 3D rendering, produced in PhotoShop at enormous cost in labour, which sold for less than $50 per 86k map, much less for some smaller versions. I withdrew it and will be selling it again once I have finished revising it. It may be cheaper than it used to be, and the 8k versions may even be free.

NASA’s data is the best for scientific accuracy, but they acknowledge some flaws in their maps for 3D purposes, that’s why I used to sell the “fixed” versions. My maps were better for 3D rendering but less accurate for scientific purposes.

I am very interested in this, as it is the most convincing Earth I have ever seen in any 3D render, made in Blender or any other package. The pseudo-Rayleigh scattering is not usually present in Hollywood movie productions, so it’s most impressive to see it done here.

Impressed with your result. wonder if there’d going to be some sort of tutorial for this?
I actually achived atmospheric light scattering in GLSL in my own program, but I don’t know how to do it in blender. but I hope the result will also be great.

Poromaa, if you could be persuaded to then a more detailed break down of how you achieved some of these techniques would be great. Any chance? The atmosphere and clouds are particularly nice.

Many thanks,

M

He is dead.

hopefully not in quite a while.

Do you still have access to the files? I’m currently working on a short and need to finish this Earth asap lol!