Principled covers most PBR cases great. But going this way, especially for students, is taking the shortcut and never really understand what it does and why, how it’s related to physics, and what it’s shortcomings are. There are many materials it doesn’t cover. And you may not be able to get expected results from downloaded texture maps if they are meant for other, maybe now obsolete, ways of defining materials.
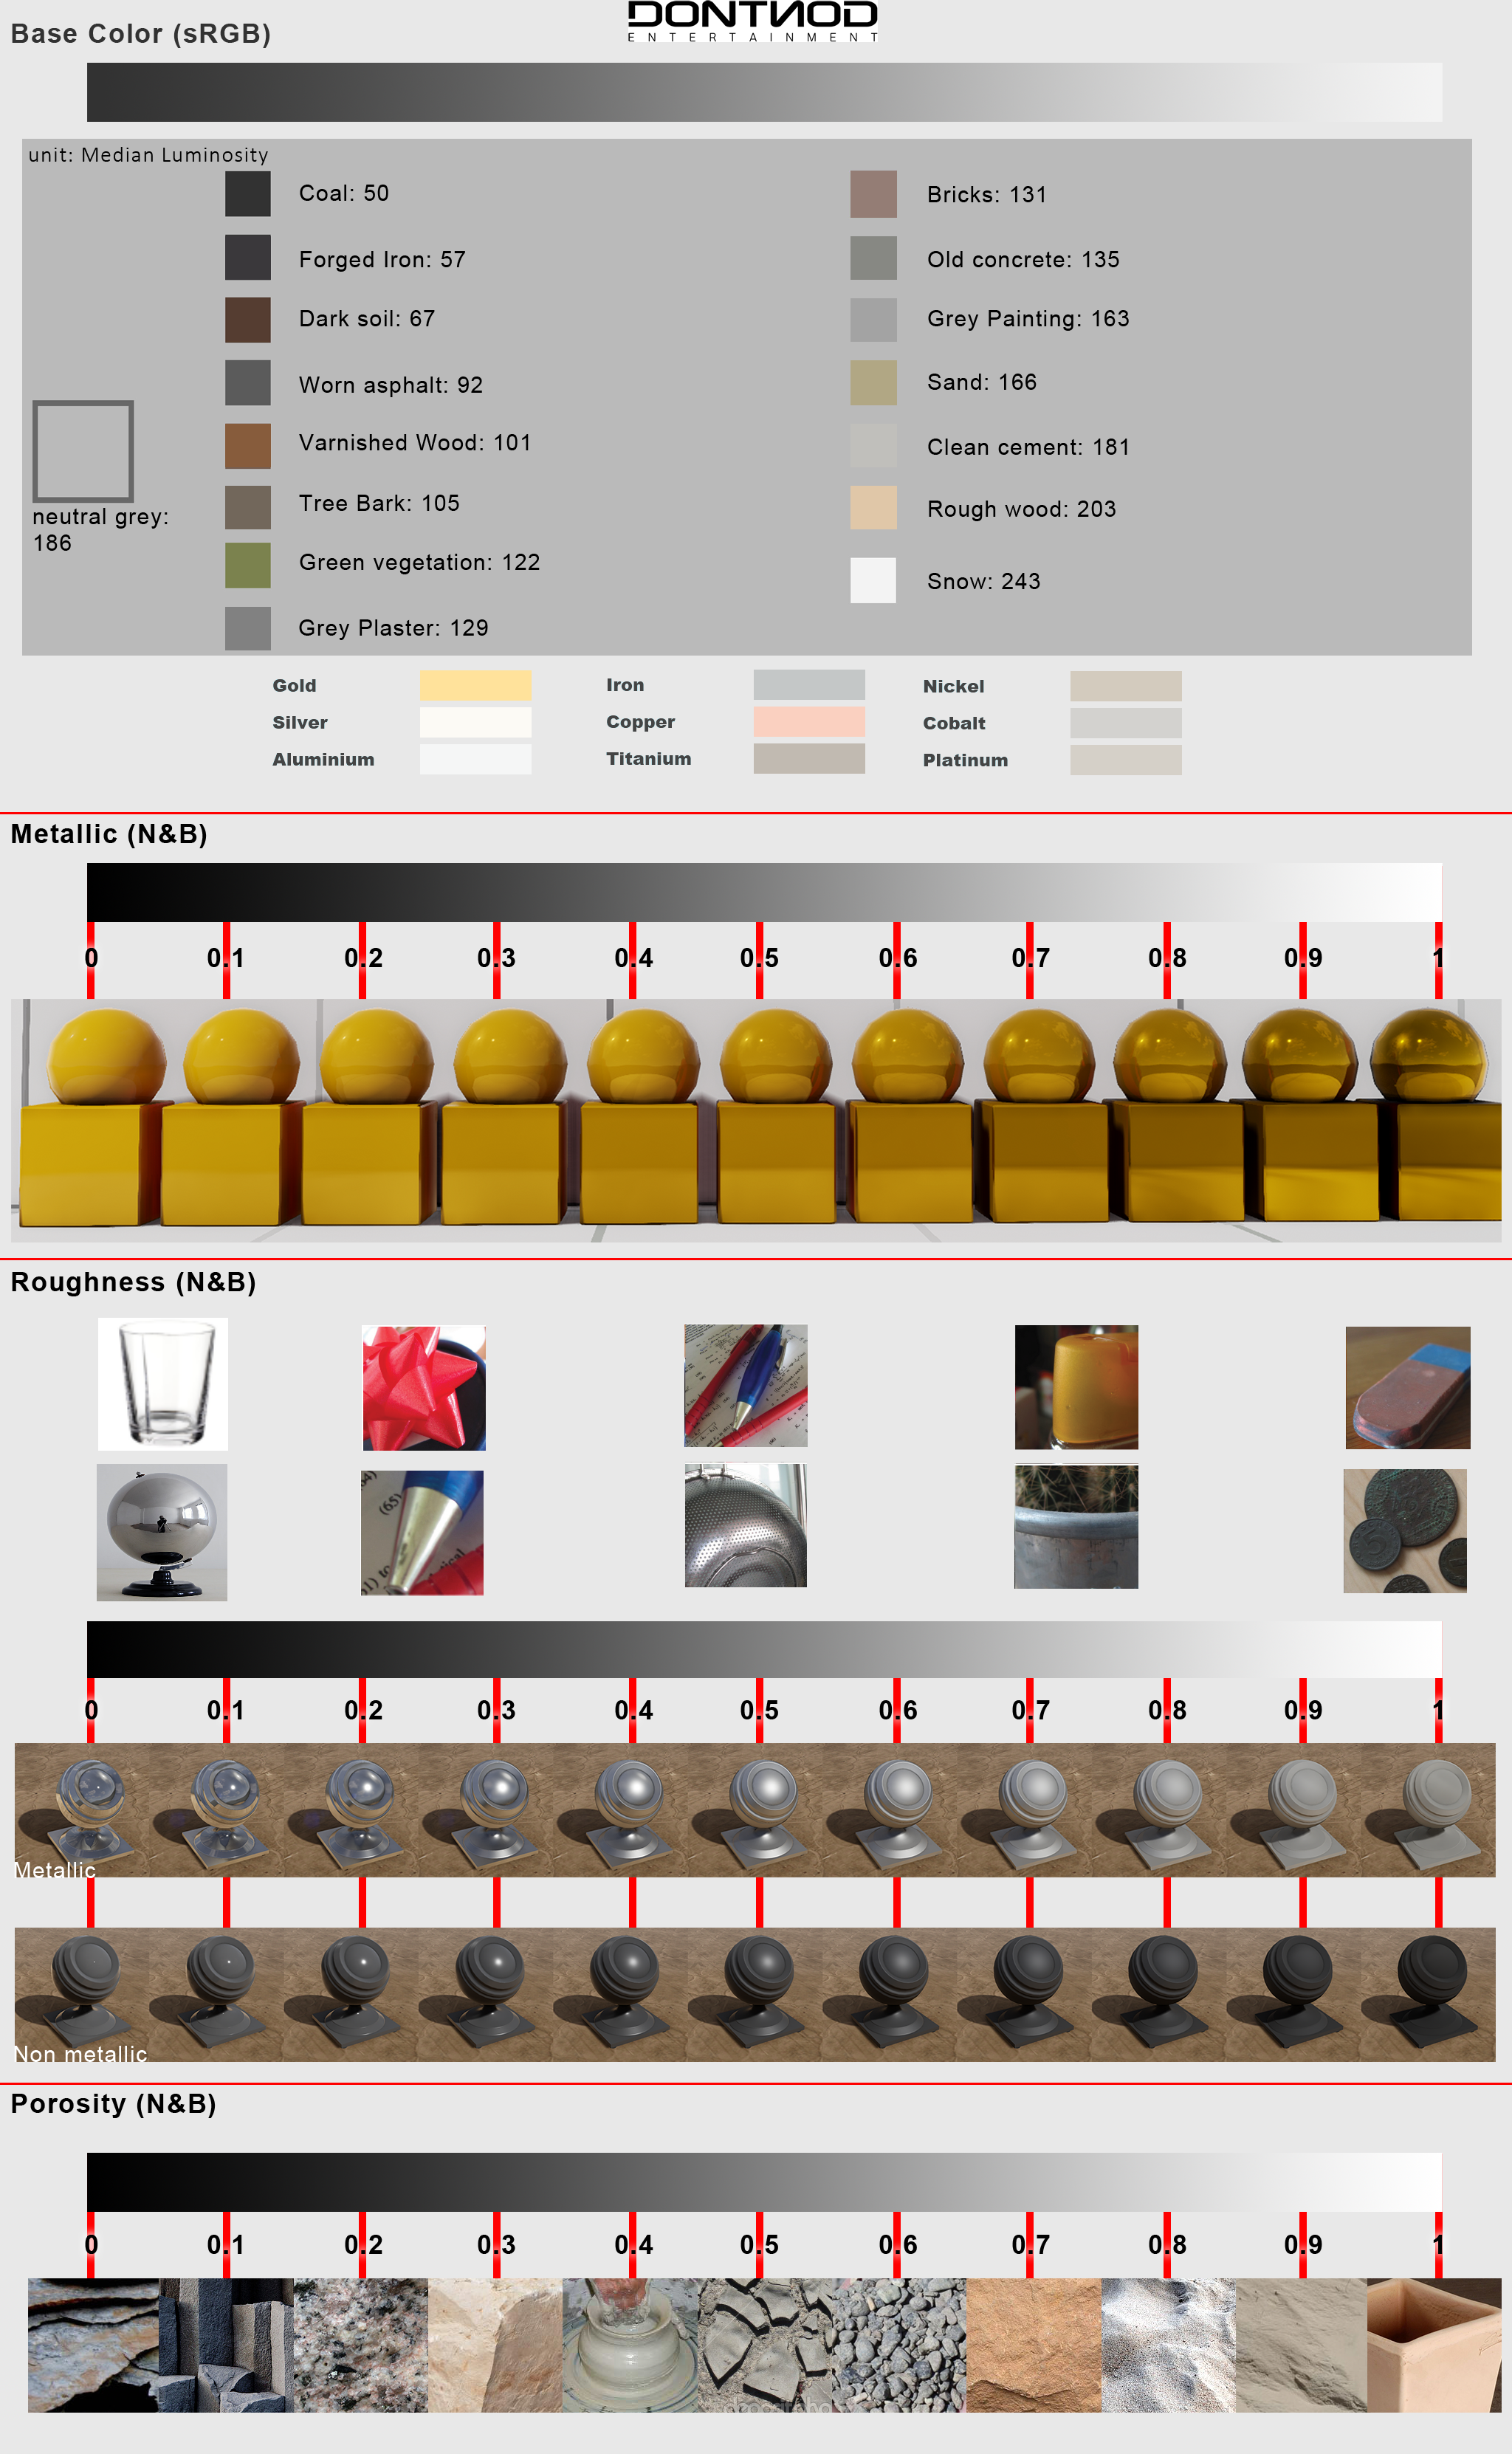
Look up PBR cheatsheet, something like this. But more so for albedo value/color than roughness. Roughness is how smooth or rough a surface is and isn’t really dictated by “material”, but material condition/cleanliness/polish level. One of the things Principled doesn’t cover is microroughness, the way many material will get more “polished” at glancing angles; very easy to setup as reusable node group, but you don’t “find values” for it “by material”, you basically have to observe what the real thing does and try to plug in values that mimics it.
For glass, I never use glass or principled. Since glass and principled both use refraction and light doesn’t penetrate refraction shader, how I make the glass shader depends on the given situation. Again, for students learning about materials and shading, I think it would be wise to learn these shortcomings and how to overcome it. Let glass and principled be a fallback for lazyness.
Chrome and other metals (polished) is probably good enough using principled. But keep in mind for a “major player” chrome in closeup, you need those micro dents bumpmaps and roughness maps. General purpose dirt maps are great for metals, scaled to appropriate values. There are cases when GGX based anisotrophy doesn’t work for me - it has a known limitation that GGX aniso is fully based on roughness, whereas some metals with a highly (yet not perfect) polish cannot be reproduced with GGX. For general purpose sheet metal parts which does have a rather high roughness, GGX is fine. Bechman aniso is such a special case I might mention it to students, but wouldn’t have them actually do it.
If you’re going lazy, and as lazy as me, then sure ![]() In some cases, especially if you want to save out on texture memory, deriving roughness and bump from albedo source is good enough - but not perfect. Perfect would be having separate maps for all of them, specifically tailored for the job at hand. Think about it, a polished wooden table wouldn’t have roughness and bump depending on the color of the wood, but rather specialty maps for scratches and wearing.
In some cases, especially if you want to save out on texture memory, deriving roughness and bump from albedo source is good enough - but not perfect. Perfect would be having separate maps for all of them, specifically tailored for the job at hand. Think about it, a polished wooden table wouldn’t have roughness and bump depending on the color of the wood, but rather specialty maps for scratches and wearing.
Couple of things though:
- Using linear color ramp is rarely a good idea due to the clipping it introduces. I’d rather use ease. Spline sounds good but it has some issues I won’t go into here.
- Bump map I always use strength 1 and distance set to how high those bumps would be on a real scale. For a wooden table, this would be smoothed out and I’d use a math node to get the values small enough, so i.e. 0.25/1000 (1/4 of a millimeter). For procedurals, distance can be driven by 1/scale * factor to automatically scale with the scale of the generator.
- If image texture is being used for bumps, always use cubic interpolation.
And also learn the pros and cons between bumpmaps and normal maps.