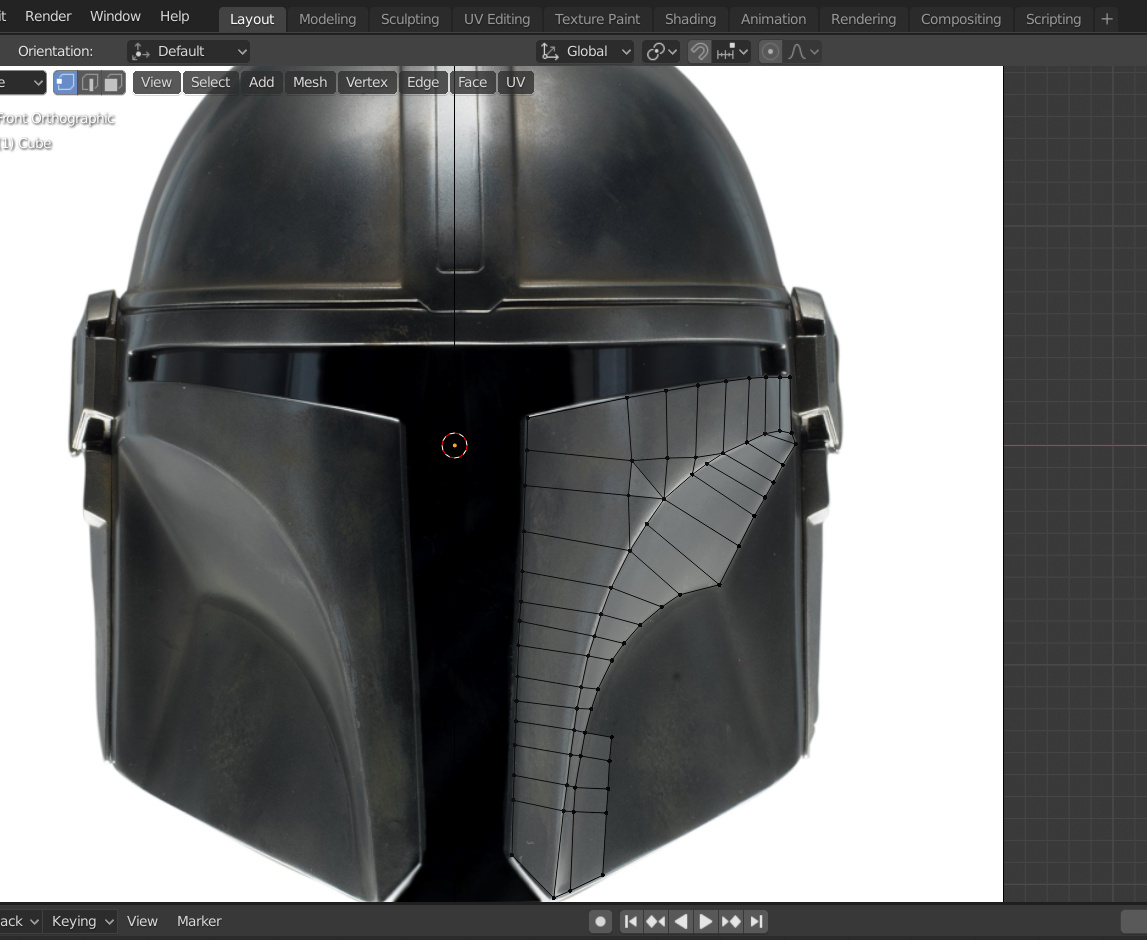
Hi, I have been working at modeling the helmet from the Disney+ show, the Mandalorian, and I’m afraid that I’ve begun to make mistakes that could mess me up in the long run. Attached is a screenshot of what I have so far. I was wondering if anyone would be willing to offer some advice as to what order I should model this in? Just simple things like where you’d start, how you’d continue, and any tips for the project as a whole. Thanks in advance!
Hi, I think you have a good start for the modeling of this helmet but I think you could use reference image from both sides, just in case. Here is the link to the artstation of the guy I’ve downloaded reference image from:
https://www.artstation.com/artwork/rRnZ9E
I remember when i was modeling mandalorian helmet and I did start the same as you. First I’ve modelled the front part in orthographic view switching between front and side of the helmet. Then I’ve quited orthographic view and adjusted curvines of it. I don’t remember exactly how I’ve modelled “chicks” part of helmet but I guess I’ve just extruded vertices in the right shape and then created faces.
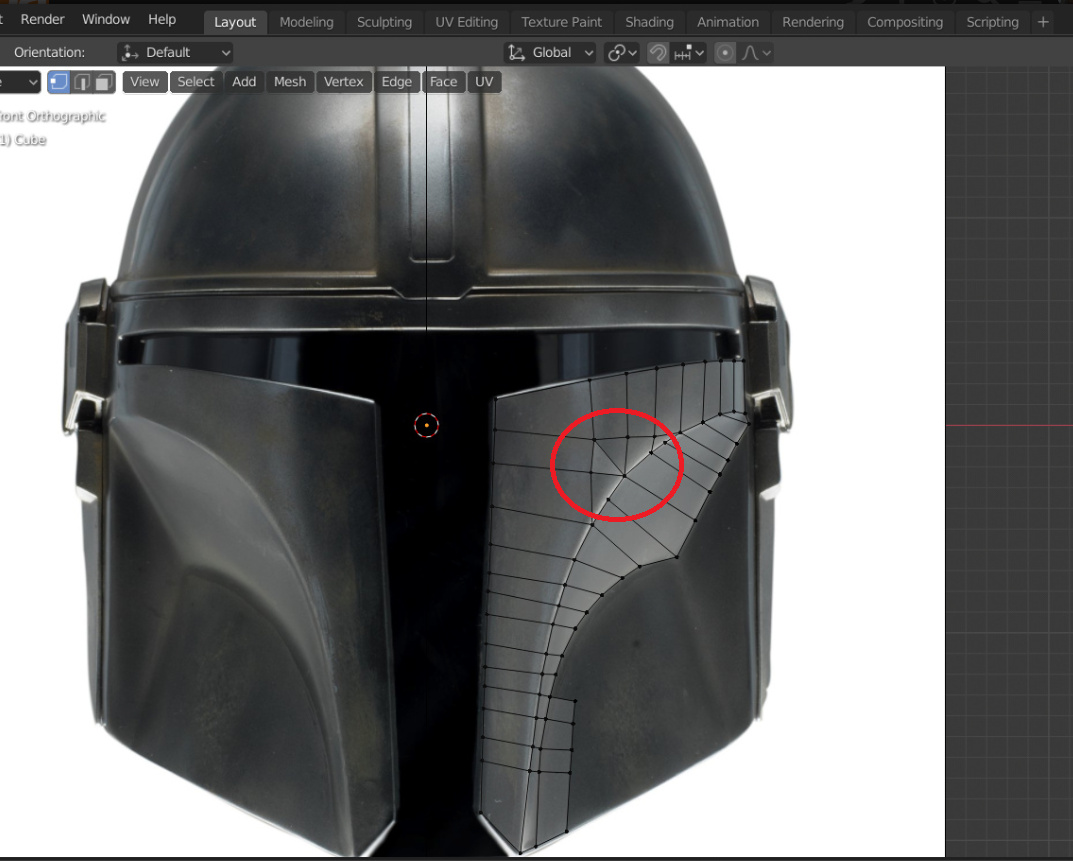
I don’t know if you want to just make a low-poly model of the helmet or high-poly. If you want to do the high-poly I think this triangle could cause some problem in case of adding subdivision later. You could easily make this model only with quads
I’ve posted my model on sketchfab and if that helps, you can download it for free and inpect it
I hope that helps you and wish you good luck with your project ![]()
Nice to see it here! Tip: to embed a Sketchfab model, put its URL on its own line.
2 Likes
Huge thing to consider is edge flow - with the topology how it is currently, you’re going to struggle with edge loops when you need them.
It also looks like you’re trying to model from front view only?
Something that might help is to block it all out first. Start with a cylinder, and get your very basic shape correct first. Don’t worry about details. Then you can add your dome on top, and again, get that looking roughly correct. Once you have a basic shape, you can start adding the details. You can try and maintain a good topology as you go, or you can get it looking right, and then re-topology it afterwards. Loads of ways to do it…
If you remove the details, it’s a very easy shape. Maybe watch some videos of similar builds, and see the techniques people use.
1 Like
Excellent tips, I agree with you.
Is it a school exercice? A lot of people have asked the same thing lately… 
Here is the same question on BSE, maybe it will help: https://blender.stackexchange.com/questions/179565/tricky-curved-hardsurface-suggestions-mandalorian-helmet
Check the date
oh ok sorry 
I would begin by modelling this from a polysphere. You have the right idea with how the cheak guards should be modelled, however there’s too little geometry to support the shape.
Create a polysphere.
Remove half of the polysphere.
Extend the bottom edge down to get the rough length of the helmet.
Create the shapes for the cutouts, try and keep the shapes roughly the same density as the polysphere.
Use a boolean operation to cut the segments from the helmet.
Cleanup the resulting mesh.
Note: If you find the resulting mesh too difficult to cleanup, it could be you need more geometry. In this case, increase the density of the polysphere before doing the boolean operation.
Alternatively, if you don’t like the boolean workflow. Create a polyshere and model the overall form of the helmet. Just the dome down to the bottom edge and then use snap to surface to model the form of the helmet using the best possible topology.
