alt click to select an edge. some times though the geometry stops the flow of an edge due to either triangles ngons or simply because the topology changes directions. like you can select a circle with no problems but if you turn it into a square then you can only select each side one at a time.
to select more of an edge simply hold the shift ket while holding alt and clicking. another way is to select a vertex or edge and hold ctrl and click further along the loop and it will select the shortest path between what you have selected and what you clcked. occasionally though this does result in some wierd selections where the shortest path is not the path you wanted! just click closer to the selected vert until you get a path ( 99% of the time though you will get a selection from start to finish in one click)
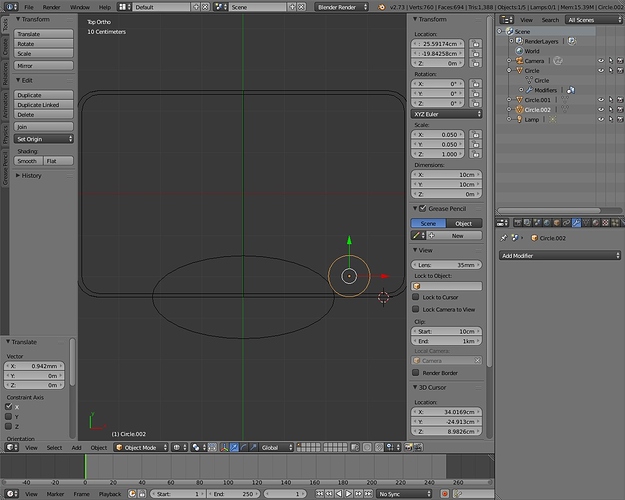
I’ve added two circles as guidelines as to where I want the curve.
The next bit is adding some loop cuts. The problem is, as a noob, I would add loads, but after watching videos and reading from other threads, that is a mistake as I don’t need to add too many. I still need to understand how this works in creating the finished curve.
Also, how DO I move a collection of ‘verts’ (if that’s the correct term) where the lines join, how do I select them at depth?
toggle the limit selection to visible icon to see through and select verts at the back of your model 
Change viewing mode to solid from wireframe (next to edit mode). In wireframe there is always everything visible, so there would be no point.
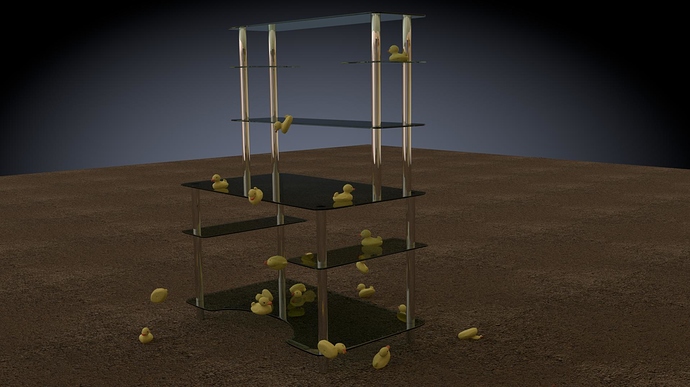
I’ve had a look at your .blend. I like how simple you’ve made it look, but I’m sorry, I still have no idea how you did it, I couldn’t be a pain and ask you do do a quick video explanation on how to do it please!
It’s that step and changing the texture to glass & chrome that I’m stuck on, otherwise I’d have finished them days ago…
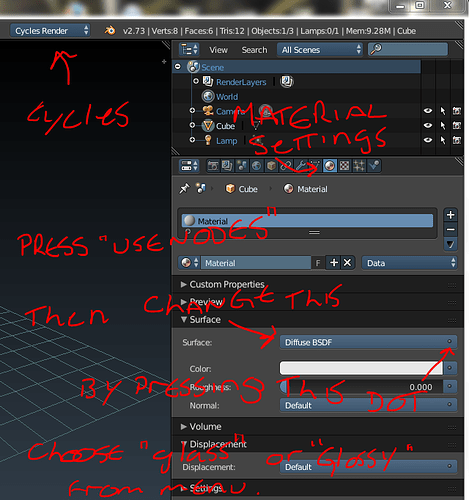
the big picture on the previous post is a step by step guide on how to do the cutout piece, click to download it and open it with any PDF reader such as adobe reader. cycles materials are just a glass material for the class and a glossy material for the crome. there is literally nothing to explain as you just add new material and change the default diffuse to a glossy or glass
I’m speechless, sorry I didn’t realise what it was. I can’t believe that someone - YOU, Small Troll, has gone to so much trouble to create a step-by-step PDF guide on how to create the indented table. I’m unbelievably grateful. I can’t thank you enough.
I’ve got this far but the bits aren’t connected like in your instructions and I’ve followed them the best I can and can’t figure out why!
[EDIT]
IGNORE POST AND READ NEXT ONE.
Attachments
Computer Table 08.blend (453 KB)
Still having problems.
I followed your instructions to separate the semi-circle then scale down one quarter, placing it in the bottom right corner.
Then, later with the last quarter, move it to the bottom middle. I tried this but the two quarters are still joined!
And I’m unsure which verts to delete, I understand one is the bottom right corner where the quarter circle is but I’m not sure of the other vert to delete. Is it the centre bottom of the big ‘box’?
Also, I’ve tried again to join the quarter circle to the corner so ignore the previous .blend in last post, as the latest one is here.
Attachments
Computer Table 08.blend (453 KB)
ah, see what you have done is add the circle as a seperate object, you should have added it while you were in edit mode so it was part of the same object. not to worry, you’ll find this step useful in future projects no doubt,
in object mode:
select the circle parts, then shift select the table plane.
hold CTRL and press J to join the two meshes.
if you select the table first then the circle, then the table will become part of the circle mesh and you will lose all the modifiers on the table plane
the corner piece on your mesh looks like it is in the right place so once you join the meshes it will connect nicely with the table, you just need to position the indent piece now then connect everything together. (in edit mode)
you’re welcome.
I’m actually just procrastinating because i don’t want to tackle the feet of my current model… ![]()
I’ve just thought, it may be another 'buntu quirk that the keys you use are not the same in 'buntu version of Blender.
I have done a search and found these…
Search Results
Blender Short cuts #1
Blender Short cuts #2
Blender Short cuts (Windows)
Blender Short cuts #3
I’ve wondered how that was done (joining separate objects) - That another one of the reasons I gave up with Blender back in 2012.
- Another <THANK YOU>

LOL… It must be a difficult one if you’re struggling! ![]()
cool, bear in mind though that none of those links are an exhaustive list of hot keys, for example none of them show edit mode: Y key is seperate selection, an incredibly useful shortcut, that allows you to remove a section of mesh from the main bulk of the model., wwithout having to duplicate the selection and delete the originals etc.
it can be quite annoying too as it is mapped to the Y key and you can often find yourself with loose vertices everywhere when you press Y G instead of G Y by mistake!
your best bet is to check the hotkeys in the user preferences under the input tab to see what tools are mapped to what keys. you can even change the keys in theis menu to something more convienient if you wish (not recomended unless you know what you’re doing!)
I’m concepting a model so i have no proper references to work with. it’s taken me almost a month just to do the stupid legs. my current work flow is build it>hate it>delete it!
the model is at 1.5M verts and i still have to do the arms… lol
It’s just;
Separate : P
Re your PDF tutorial, have a look at page #3. It looks like a bit of a picture hiccup, pictures overlayed on each other, doesn’t make sense!


