Im modelling an asteroid and have used BWF to produce a near perfect sphere (very little noise) with a number of protruding craters. The problem im having is that the ridge of the craters (where they stop rising and begin to fall) is very messy and blocky.
Ive selected a crater in edit mode and created a new object from this selection, applied subsurf on the new section then rejoined it to the main asteroid so that texturing looks right. But now im left with a messy join where the subsurfed section touches the normal asteroid.
I would subsurf the entire asteroid but this crashes my computer, the asteroid is already 90k vertices.
Ive tried selecting the offending area where subsurf and non subsurf meet and removing doubles but this doesnt help, ive tried recalculating normals- no luck. Also tried beauty fill. Also experimented subsurfing the whole crater as opposed to just the ridge, which helps a little!
Is there a way of gradating (is that even a word) subsurf so that at the top of my crater i have 100% subsurf and further towards the asteroid( further down one axis) theres less subsurf going on? Or perhaps im going about this completely the wrong way- this is the first proper thing ive modelled in Blender.
On the first crater i subsurfed i selected it by selecting its vertex’s, thats attached as jagged2,
The second crater i selected in face mode and made sure i the base around the crater was aperfect square, see jagged3.
This was much better but still its 4 corners went messy, see jagged4.
If using this method (face select) is the way forward-
-Is there a way to select a perfect square of faces other than dragging a box select then painstakingly deselecting tose outside of the square?
-And how to get rid of the messed corners?
Your modeling method is what is making the task difficult. To eliminate the jaggies have edge loops that follow the top of the craters – a quick example:
Wow greybeard, would be able to give tell me step by step how you made this model- I take it your not using BWF? Did you start with a sphere or a circle- ive tried extruding both then adding “edge loops” with Ctrl-R but my results aren’t nearly as clean and have loads more vertexs than yours. The sphere ive extruded doesnt look so bad but i havent a clue how you’d make craters at places that aren’t at the poles. Are you using subsurf or set smooth on your model? So many questions!
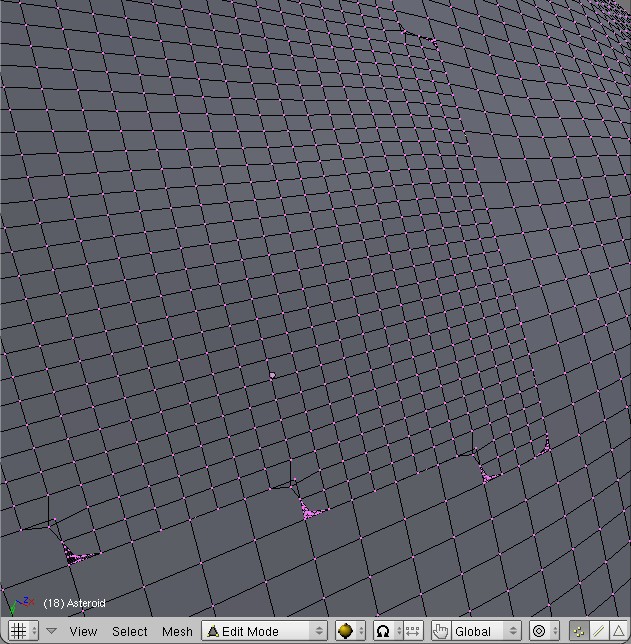
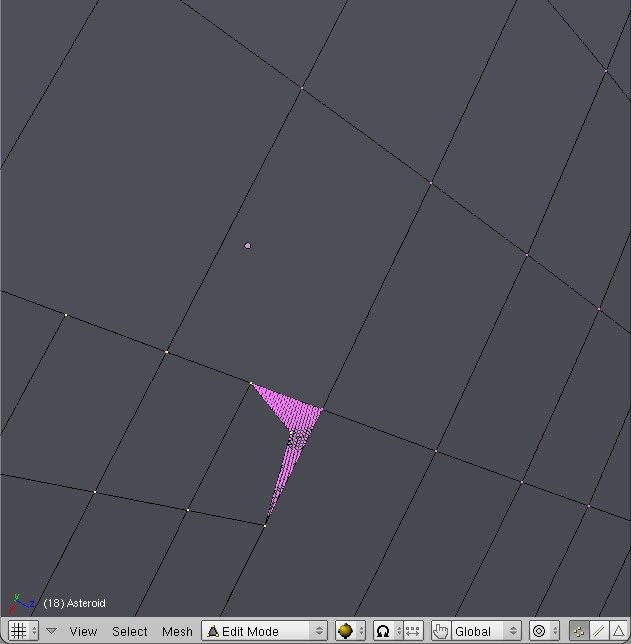
Thanks for the methods guys, im trying them both out now and am running into a problem when i get to the end of extruding my crater- how do i finish up leaving 1 vertex -or-how do i make the inner point at the base of the crater 1 point instead of the 16 i get when i keep extruding and scaling to make the circles smaller.
Ive included pictures in number one it looks fine but when you zoom in there are loads of vertexes not just 1.
Im just downloading your video now greybeard so if the answers in there dont worry about it and thanks!
I also wanted to ask if its possible to add constraints to objects whilst modelling? I really like the shape of my 90k vertex asteroid so if i could put it on another layer and model my new asteroid flush up to it if you like- so that when i move the new asteroids vertex’s around they wouldnt be allowed to go into the space that the 90k model exists in. This would be a useful way of modelling an almost exact copy of the high poly asteroid. Hope that makes sense.
GreyBeard: BWF is a script: Blender World Forge. Its for creating fractal terrain.
GlitchCORD~: Why not select the less complicated areas of your BWF created model (i.e. the ones that don’t need so many vertices) then use “remove doubles” with the limit set at a relatively high number? This will simplify those areas by removing vertices that are close to each other but it won’t affect areas you dont select. It will also automatically look after the recreation of quads/triangles for the surface.
That should work a treat. Then you could subsurface the whole thing, while retaining some of your fractal surface terrain detail.
Was trying my hand at modelling the craters last night and cant get anything that looks too decent- i guess that will just come with time.
Im going to have a go at what you say sewaig- i think i tried something like that and it looked pretty weird- i might even just select the craters and seperate them from the mesh, then add them to a low vert sphere using the techniques you’ve learnt me!
Thought it’d be rude not to post up the results so here you go, i ended up using sewalg’s method and it doesnt look too bad (150k vertices) - thanks for the help