I am totally lost with coloring my toy bear. I am intenting to make a plastic looking toy from this which would be easy to rig as separate objects later, but now I don’t know how to texture paint this successfully.
I managed to create individual UV’s to each piece in this bear and prepared them for painting according to a tutorial.
I have tried to be careful with always making sure that each spot marked with red on the picture has the right part selected. Regardless of that the UV’s go on the top of each other and sometimes when I change the part I am trying to paint the colors are no longer showing until I activate the previous part again.
Seriously the problem is that I am totally lost. Don’t know how to paint each part without the UV’s getting on the top of each other and actually see each part colored when I move back and forward painting the different objects.
I would appreciate help so much!
Sorry the question is as confusing as my problem is…
If you are using same image named “naama” for every part (head, body, hands…) you would get weird result. Try to unwrap all parts of bear in the one UV, or use new image for each part.
When unwrapping multiple objects to be used with the same image, select them all and enter Edit Mode. This way you’ll be able to see and edit UVs for all of them at the same time and avoid overlaps.
Thanks, I’ve created own UV:s for each part and “naama” is only the head. I’ve tried to change the UV’s according to which part I am trying to paint. The problem is that I cannot apparently change that correctly…
I am seriouslu a newbie with this… I don’t know how being in edit mode helps because I should be in texture paint mode when I paint… I have already unwrapped all the objects and they all have image textures created to them separately. The hard thing is to switch between these correctly and see all the colors regardless of the object being in painting process or not. Would you please be able to tell how I should “select them all and enter edit mode”? Sorry I am so dumb with this…
Thanks! I might well try to find out about what this is, but would I not face the same problem later if I tried to model and color something else in the scene…? Surely not all UV’s can be on the same page in the entire scene? Maybe I just don’t get this. Am a big newbie with this coloring stuff.
Oh that’s only for unwrapping process, not painting. Only in case if you use one image for several objects - then you’d need to make sure that their UVs don’t overlap.
But since you
…then unwrapping shouldn’t be a problem anymore? If you unwrapped everything correctly and assigned proper materials and images to the objects, you should be able to just forget the UV editor and paint without worries.
Like (for example): the object ‘Head’ would have Material called ‘mat_head’, and that material will have an Image called ‘texture_head’.
And the ‘Body’ object will have its own Material ‘mat_body’ and that will have its own Image ‘texture_body’… etc
But I see ‘naama’ material (and an image by the same name) has two users (a number next to the name in some places). That means it’s used by two objects
This I think is the problem. I don’t know how to stop that UV to be used by a lot of objects. Every time I try to paint one object the color appears in a wrong object or whatever. I think it must be some automatic thing because I don’t think I have attempted this.
…for example now I started over and painted the left nails brown. Then I switched the right nails on and the Blender changes all the names on each 4 places where it reads. Now in the UV editor the right nails seem to have no color but the color of the left nails is spread here and there on the top of the right nails nevertheless. And also I can only see color on the part that I am currently painting. Otherwise the bear turns back to default grey or black everywhere else that is not active…
I think you’re confusing the terms.
UV map is just a map that tells how a 3D object can be unwrapped in a 2D space. It’s the flat wireframe you see in the window to the left.
One object can have several UV maps, but one UV map cannot be used by several objects. It’s exclusive to the object, being part of the object’s geometry data.
So you must’ve meant something else. An image, I suspect.
Hmmm… how do you switch between them? You’re switching between objects in Object Mode, right?
Sorry. English is my second language and I probably sound confusing.
I know what the UV’s are. I just cannot paint my objects because those UV’s seem to go on the top of each other or do weird stuff. I just have no idea how to color one object and then another without making a mess.
I do go to the object mode and switch between objects I intend to paint. It just doesn’t work…
If your UVs are on top of each other, you need to unwrap differently. The easiest and fastest way is to select all your objects in Object Mode, switch to Edit Mode, press U, and choose Smart UV Unwrap. Then try painting again
heh, English is not my native either, so sorry if my attempts at explaining are even more confusing
In any case, painting several objects is not a complicated process in Blender - if everything is set up right, it should be a matter of just switching between the objects and painting.
Maybe you could attach your file and we could see the specifics. Might reduce the communication barrier problem a bit
That is SO kind of you… Nevertheless this platform says: “New users cannot upload files”. So I suppose this is not going to work.
I tried to create New UV:s to the bear like adviced above. Now those work better. Just have to find out how to see all colored bits at the same time anymore…
Thank you so much anyway. Trying to solve this somehow.
Thank you. I actually managed to put all bear parts on the same UV like you adviced. Thank you for that.
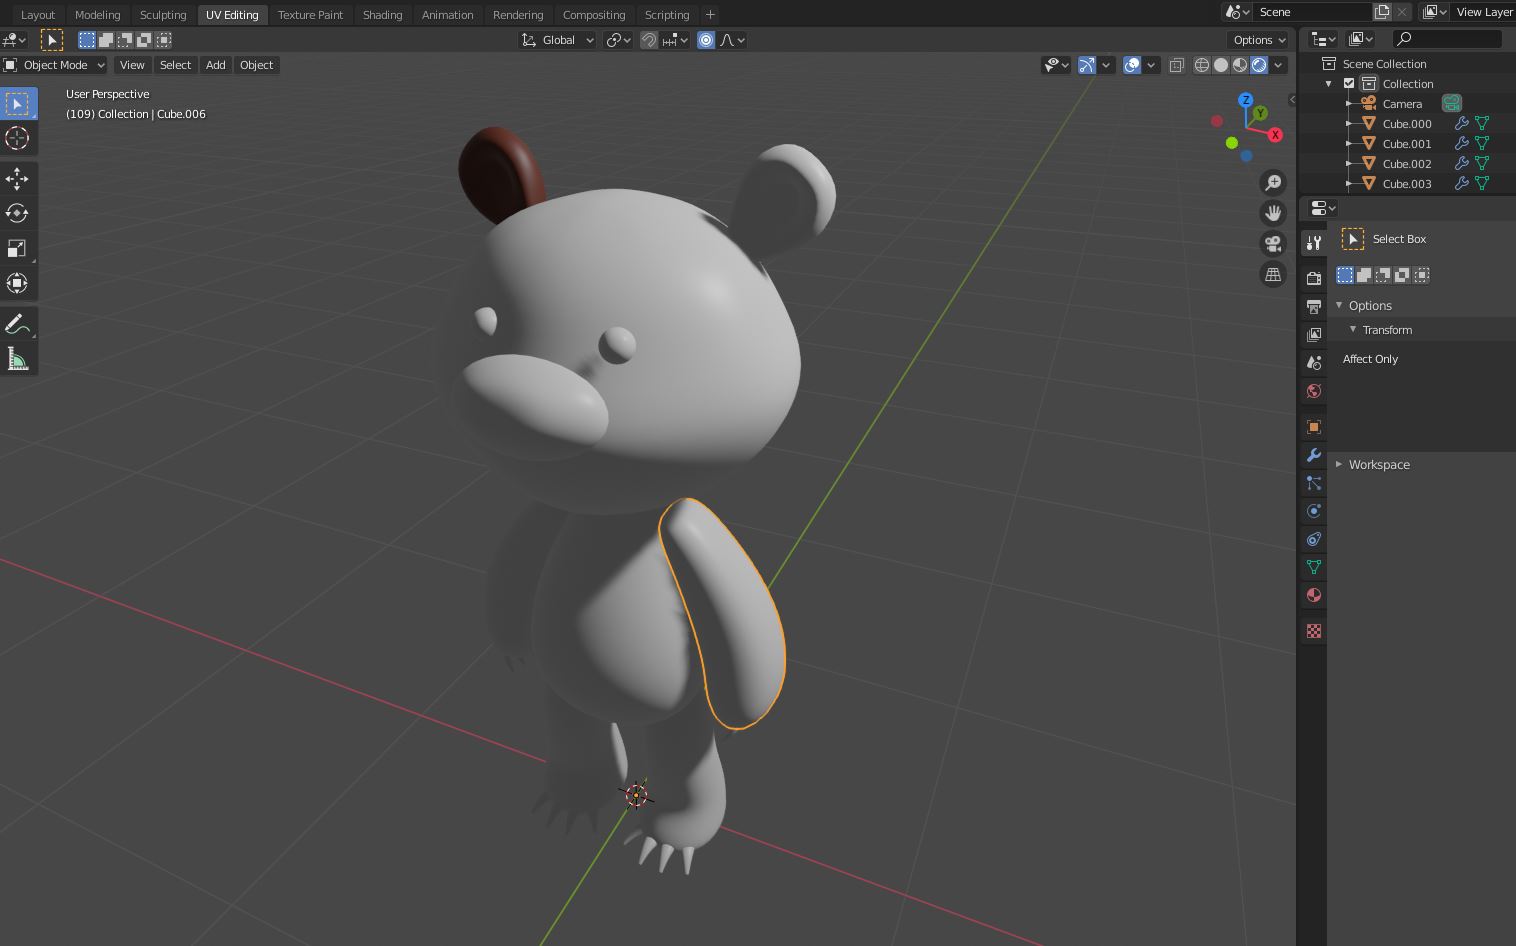
However, this problem still stays: I can only see one painted part at once like in the snip here. Would you be able to advice how to see the wholebear painted? I have now switched between the parts via object mode and then tried to paint them and the paint goes to place nicely, but just doesn’t show…
Thank you a lot!
You can only paint one object at a time. If you want to paint the whole bear, go to Object Mode, select all parts of the bear, and press Ctrl J to Join
I’m just worried I cannot rig it anymore if I join the mesh together. My purpose was to make a sort of a plastic toy that is easy to rig in parts like that later. That’s why I would like to keep the bear in parts if only it is possible…
Now, in the new UV’s I have managed to paint better, but a new problem is that sometimes I see color in different parts and sometimes not. This actually let me paint first the ear and then the face. Then suddenly Blender stopped allowing to use the brush and added the color on the paw itself when I tried to work in it. I don’t know what I am doing wrong here anymore, lol…