Long time since my last post here, apologies for that!
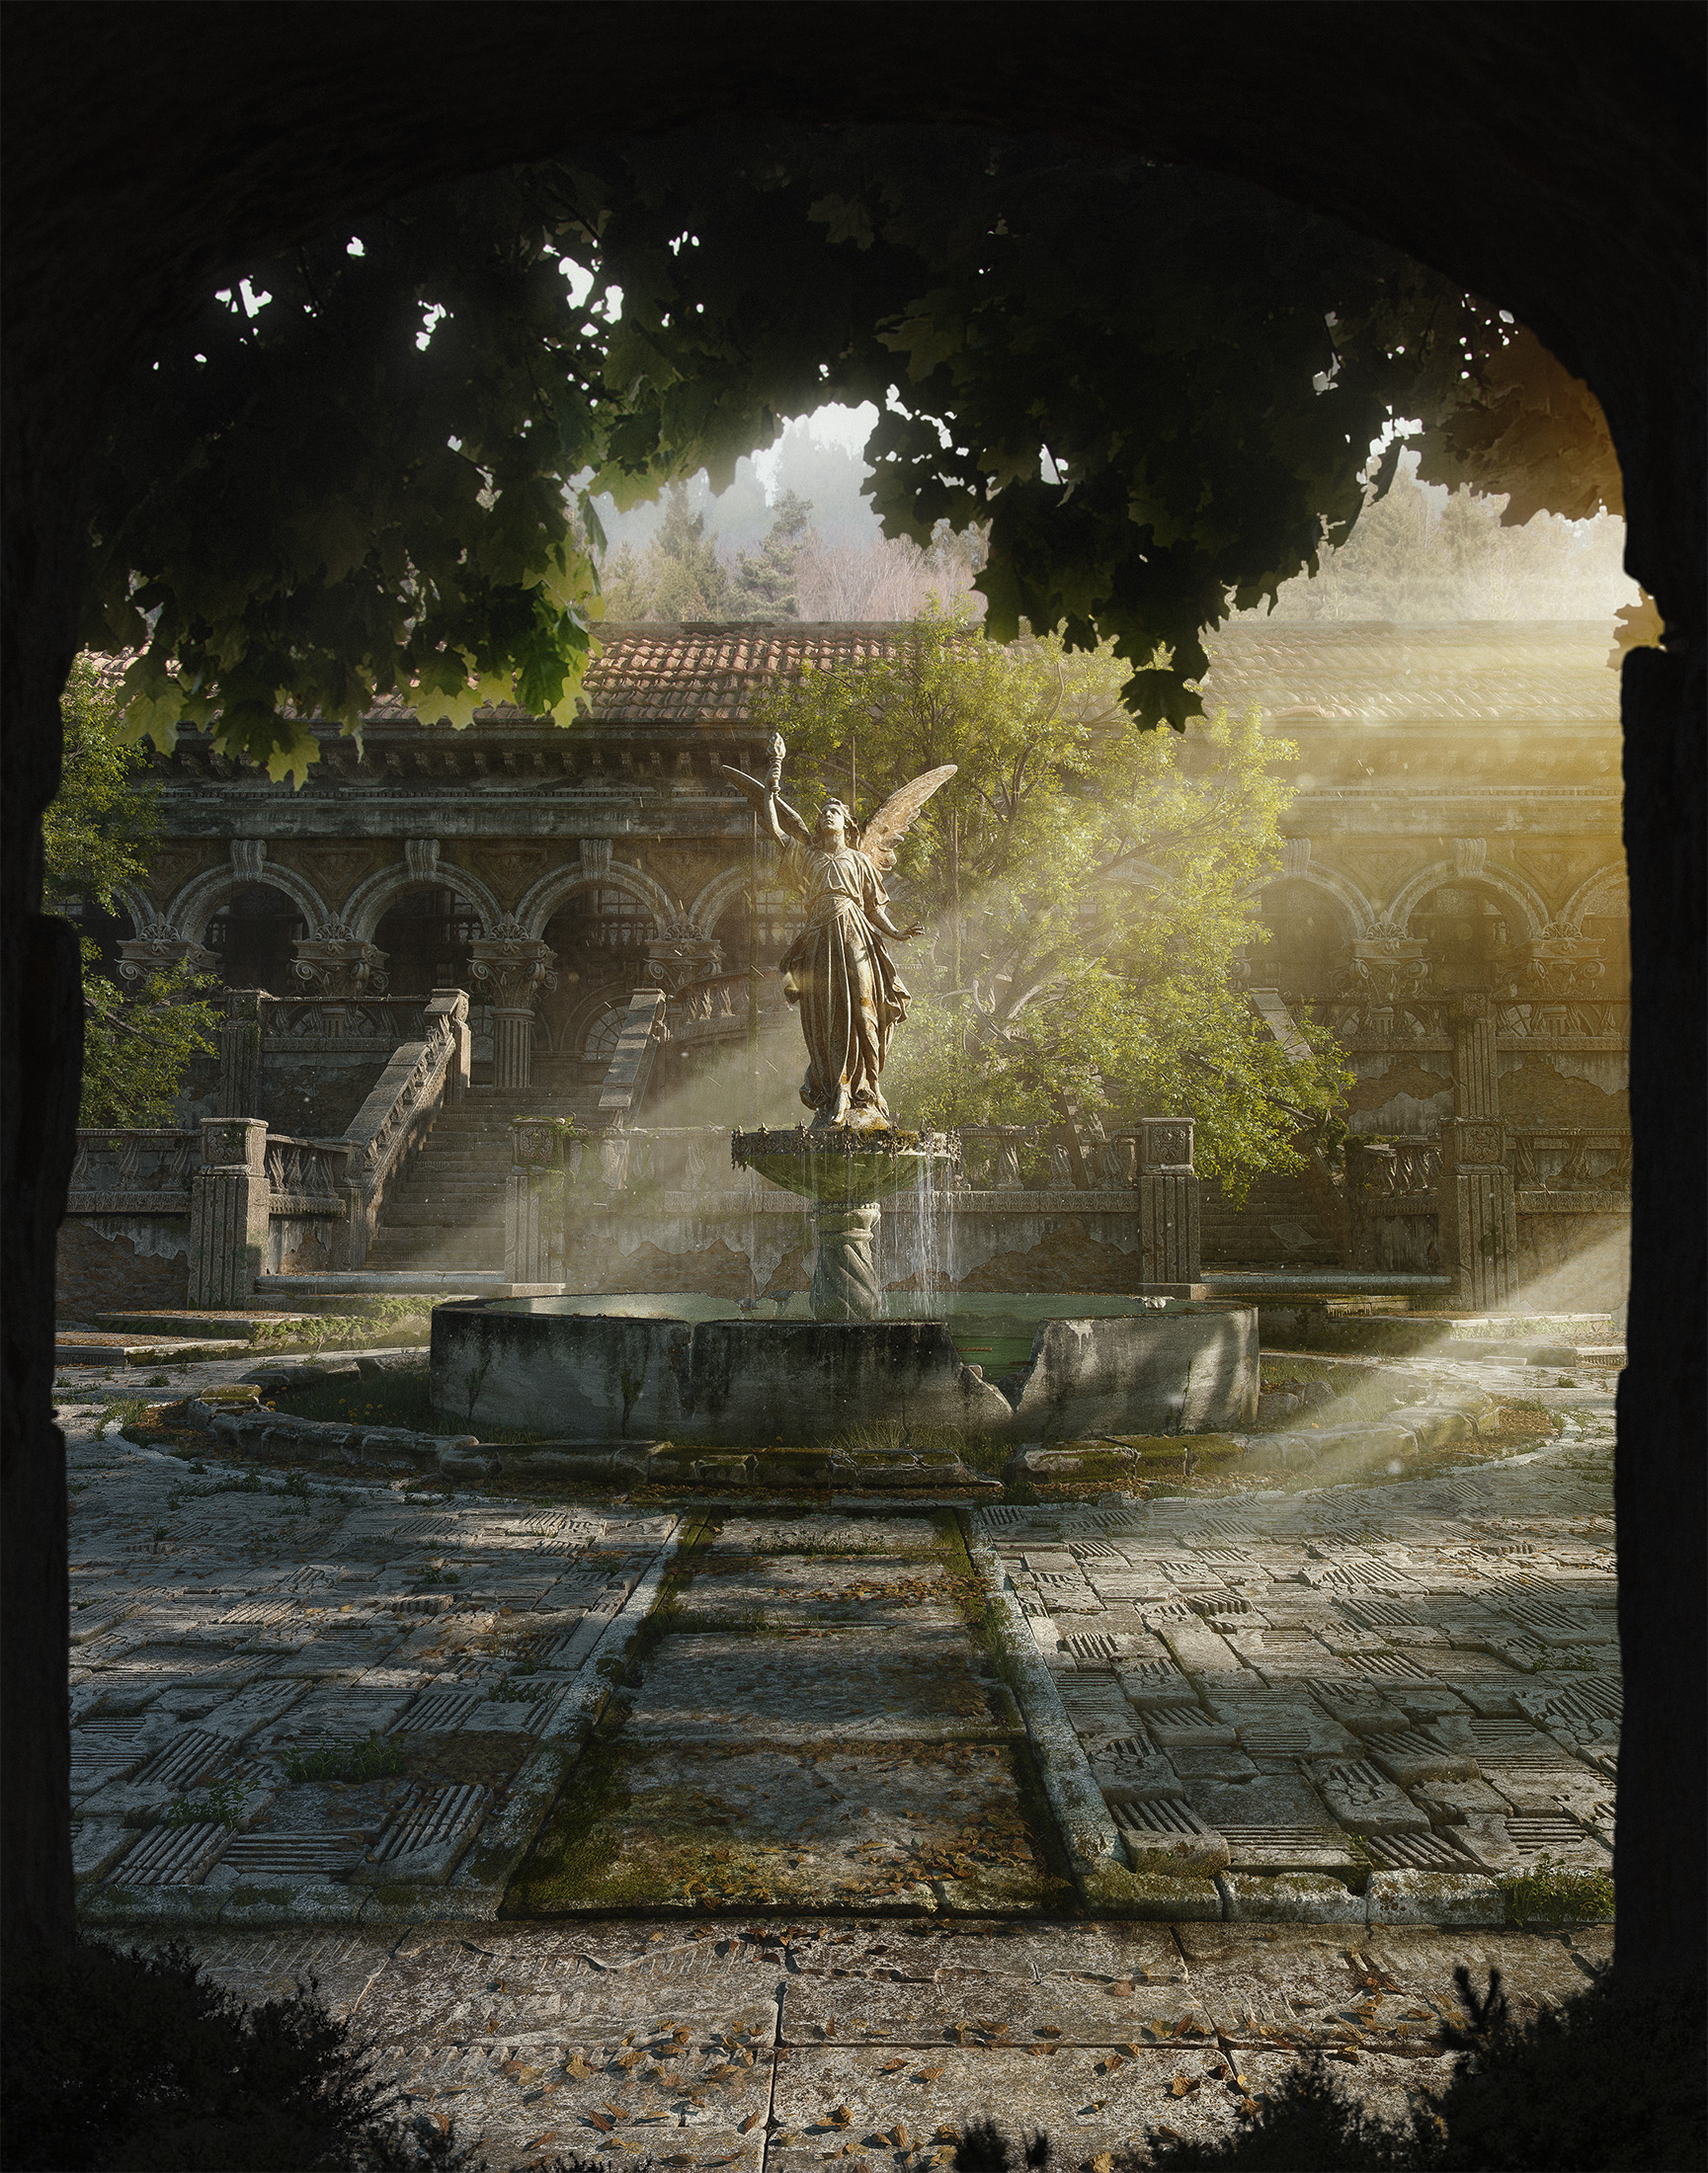
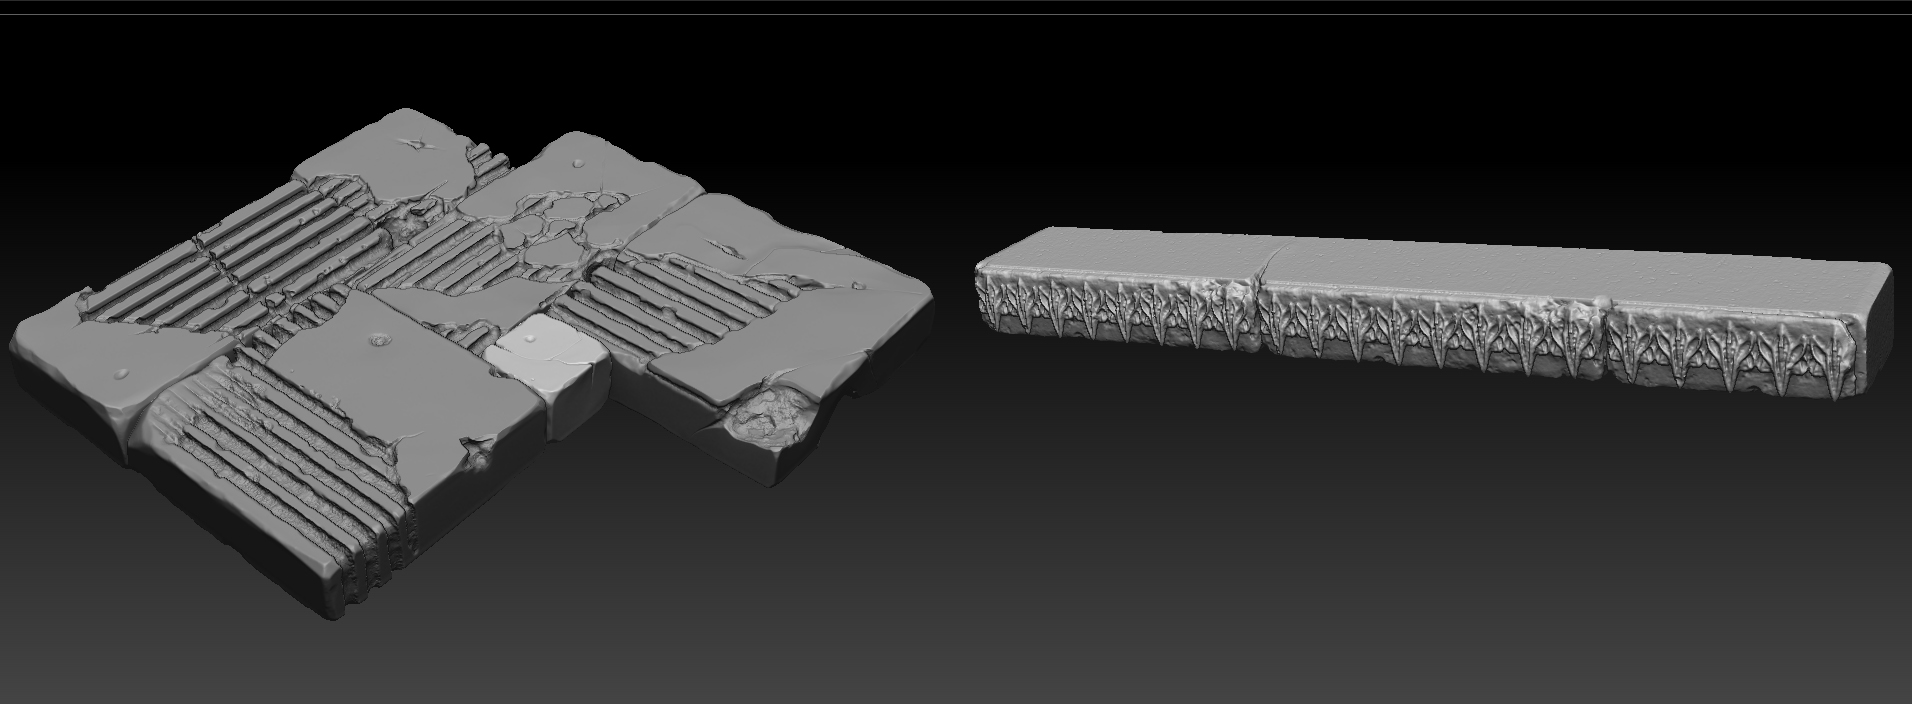
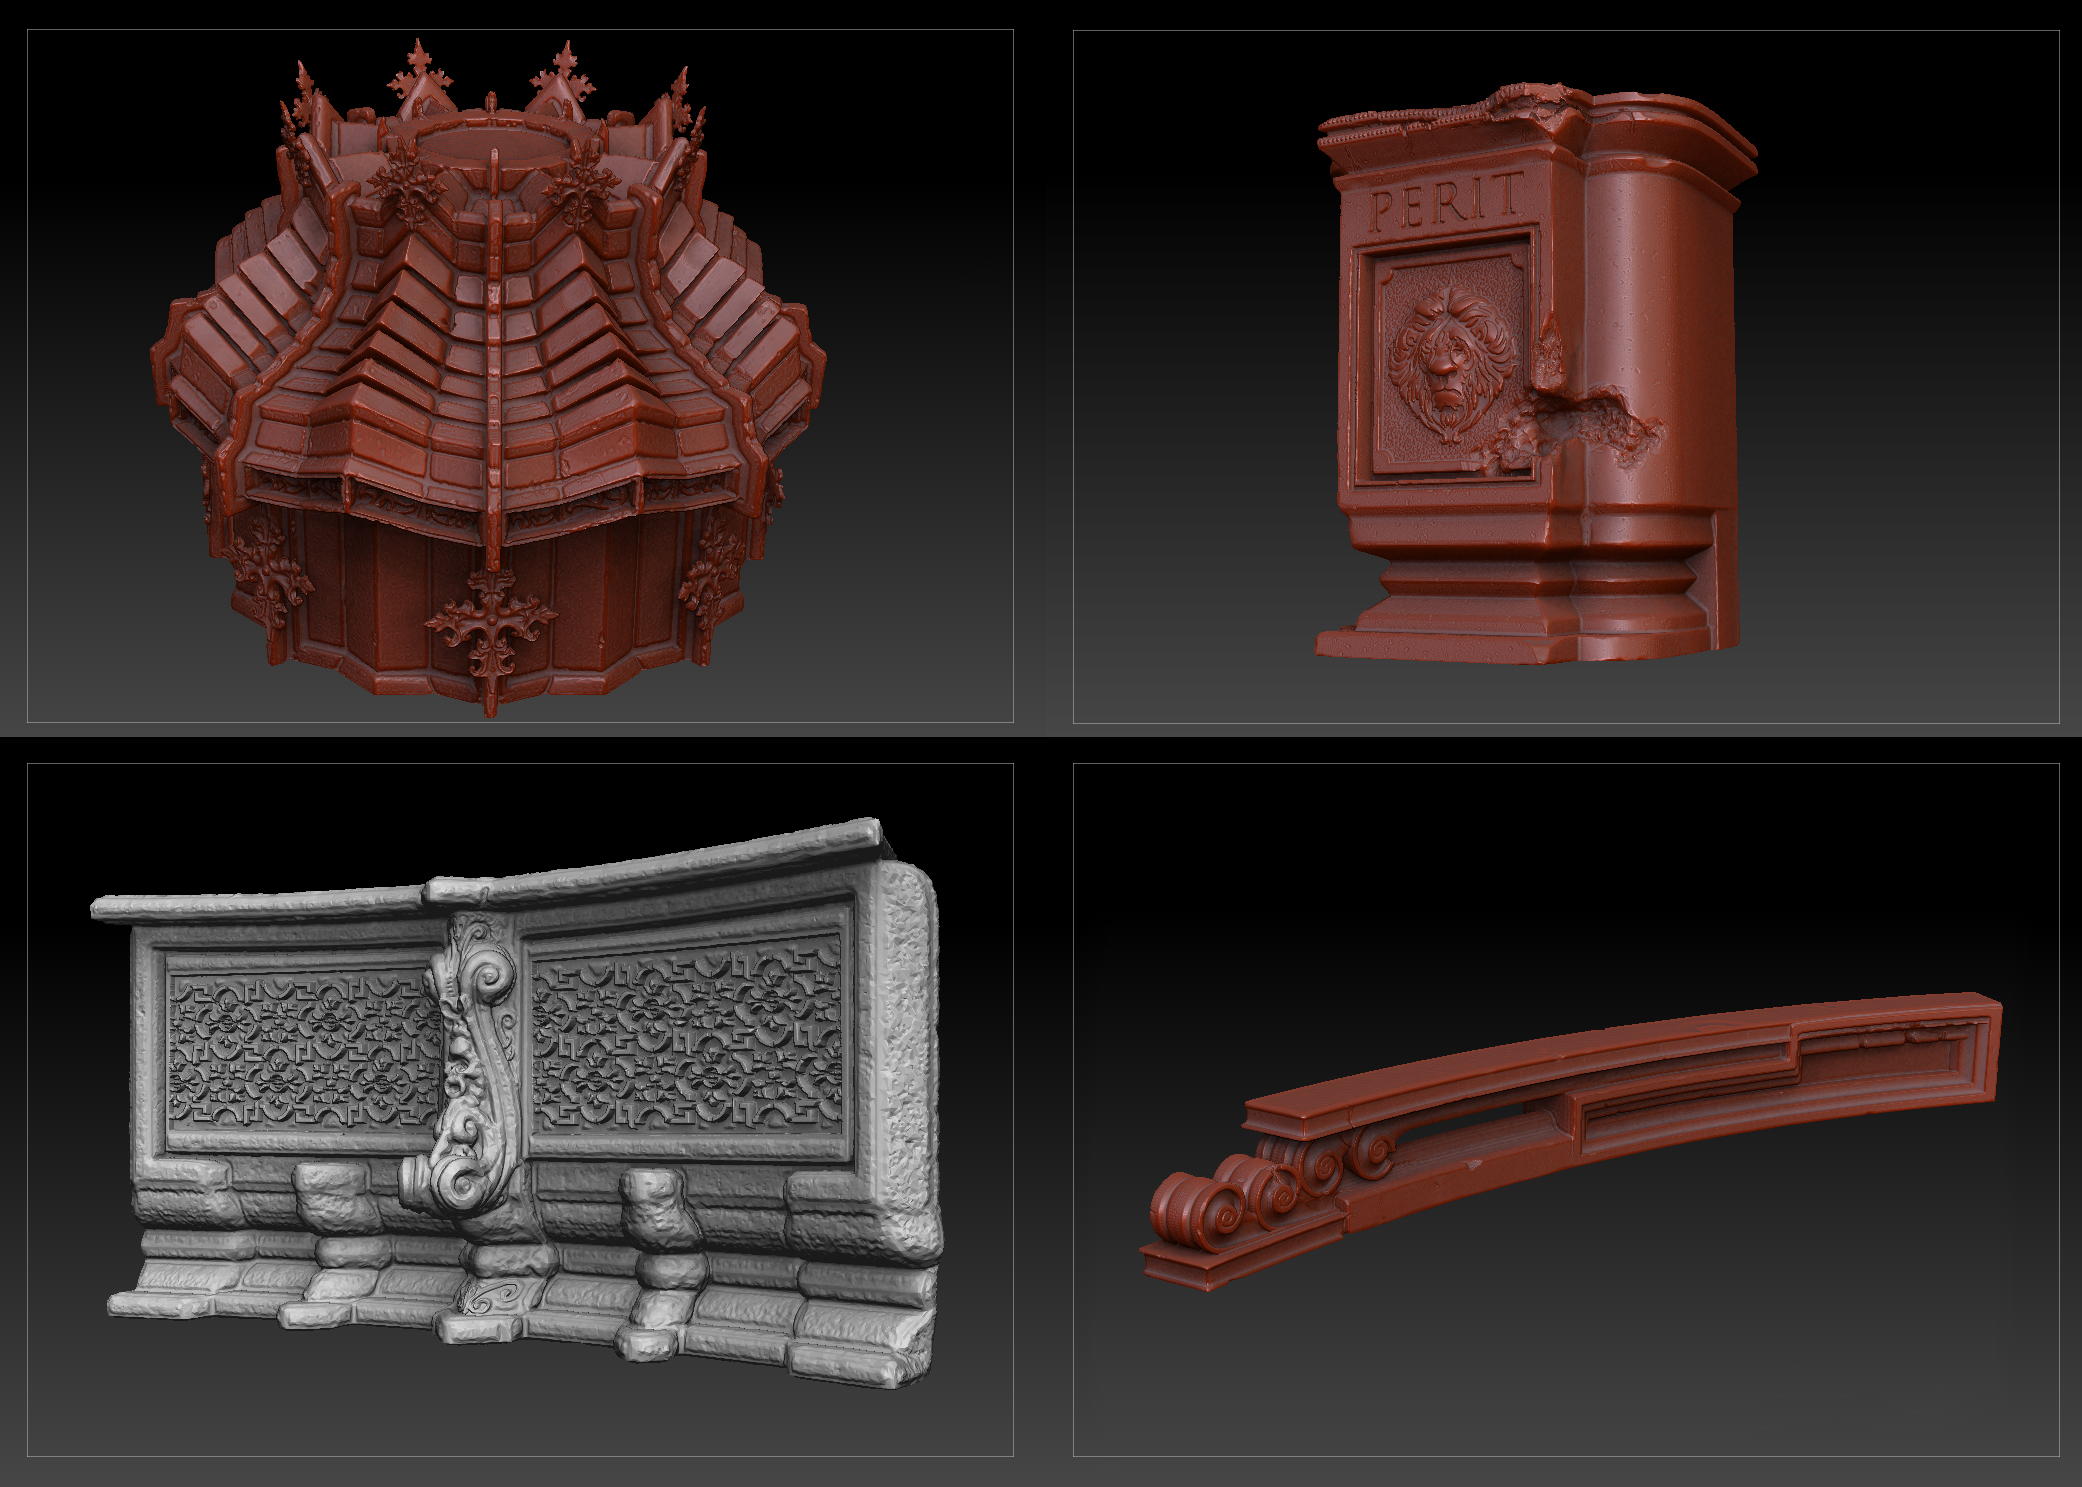
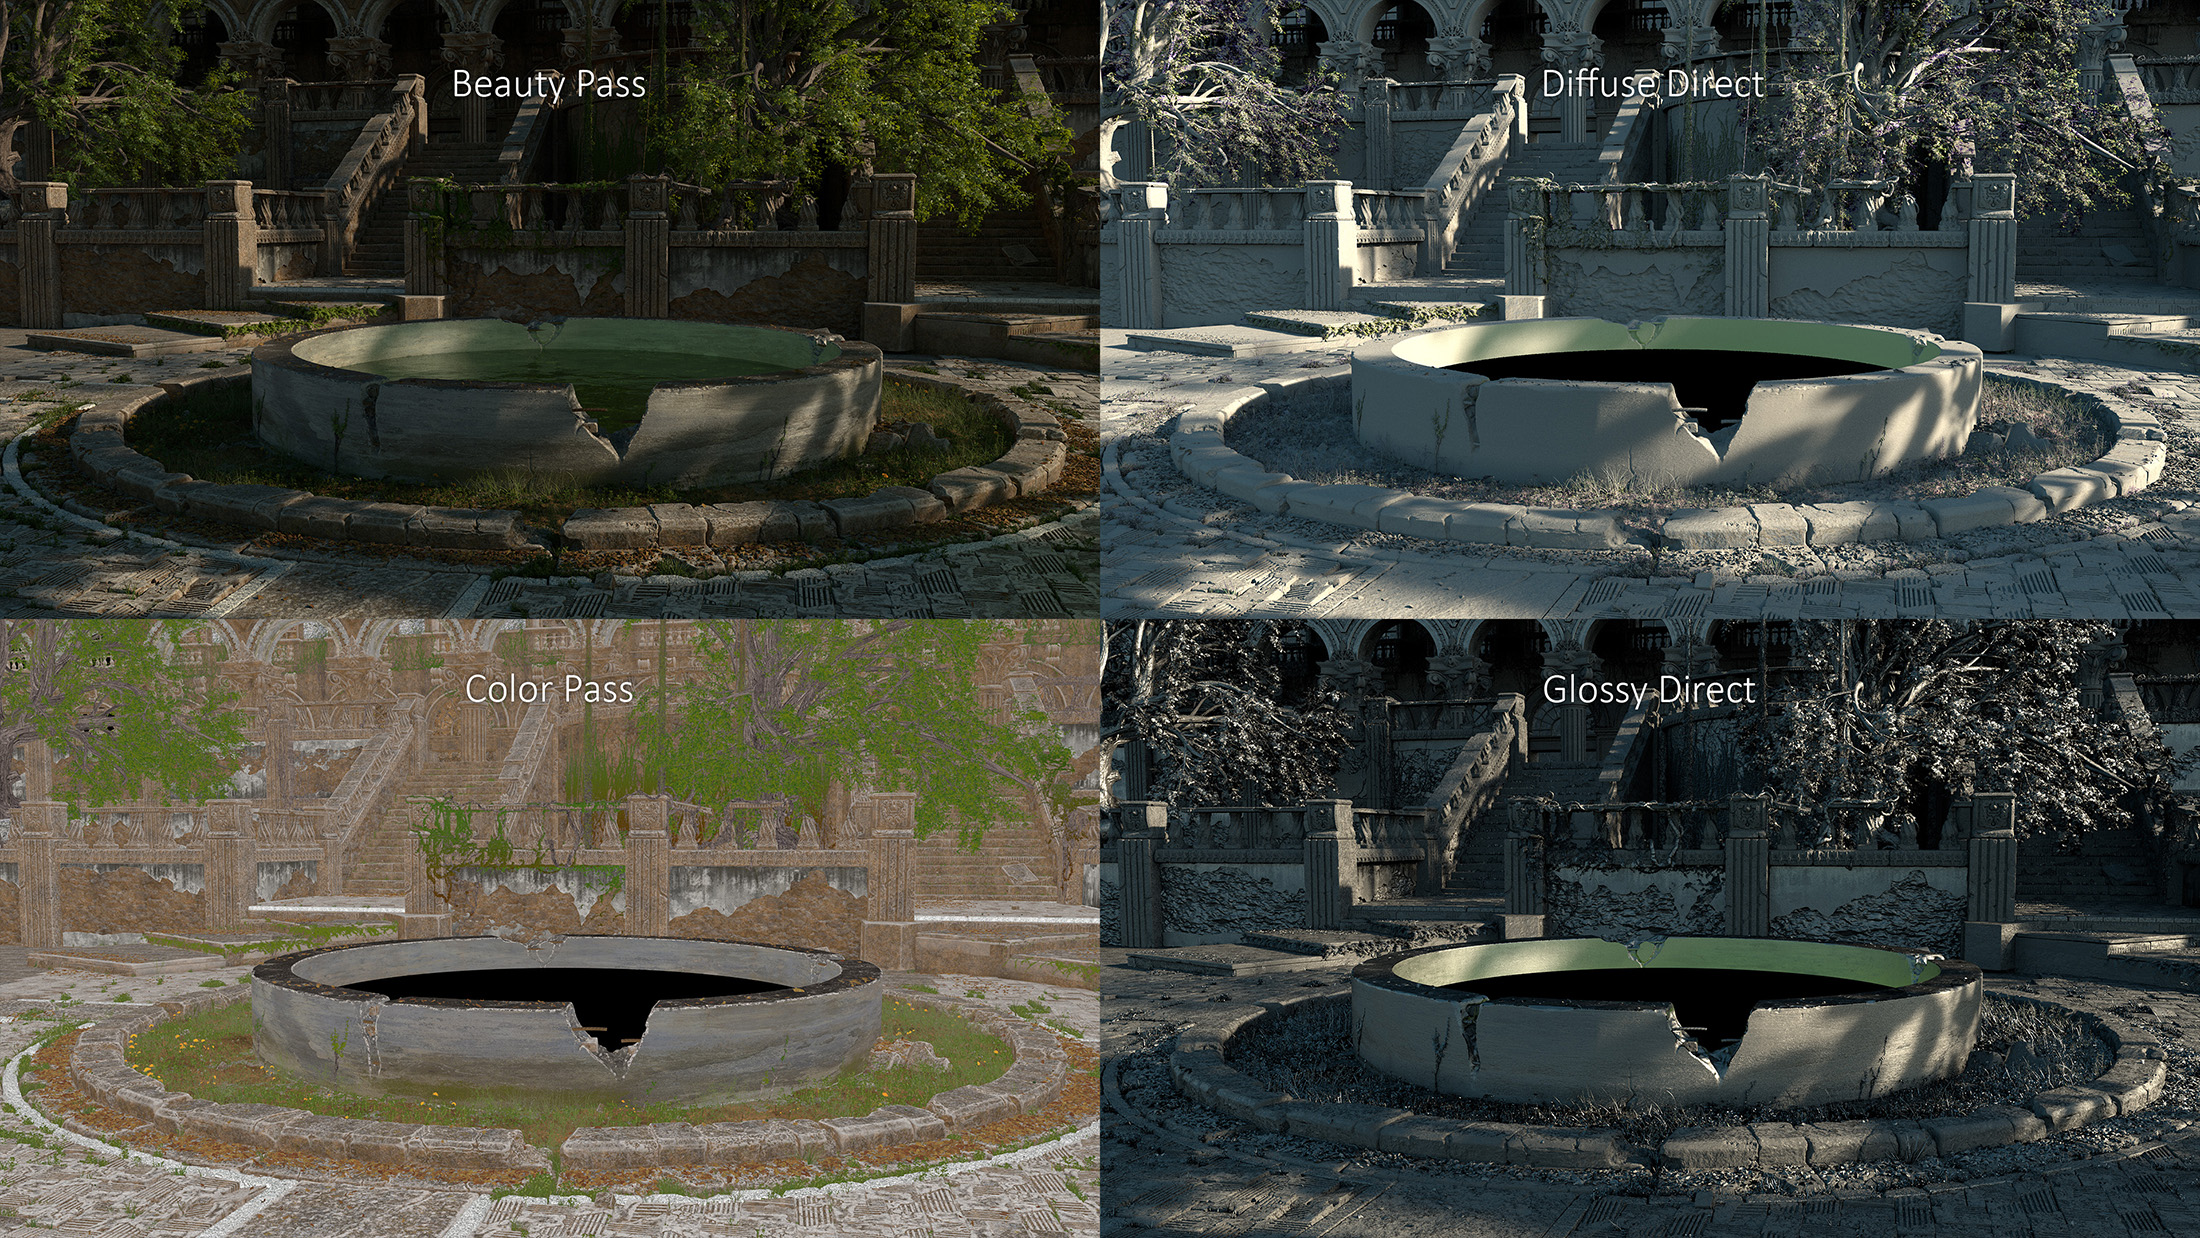
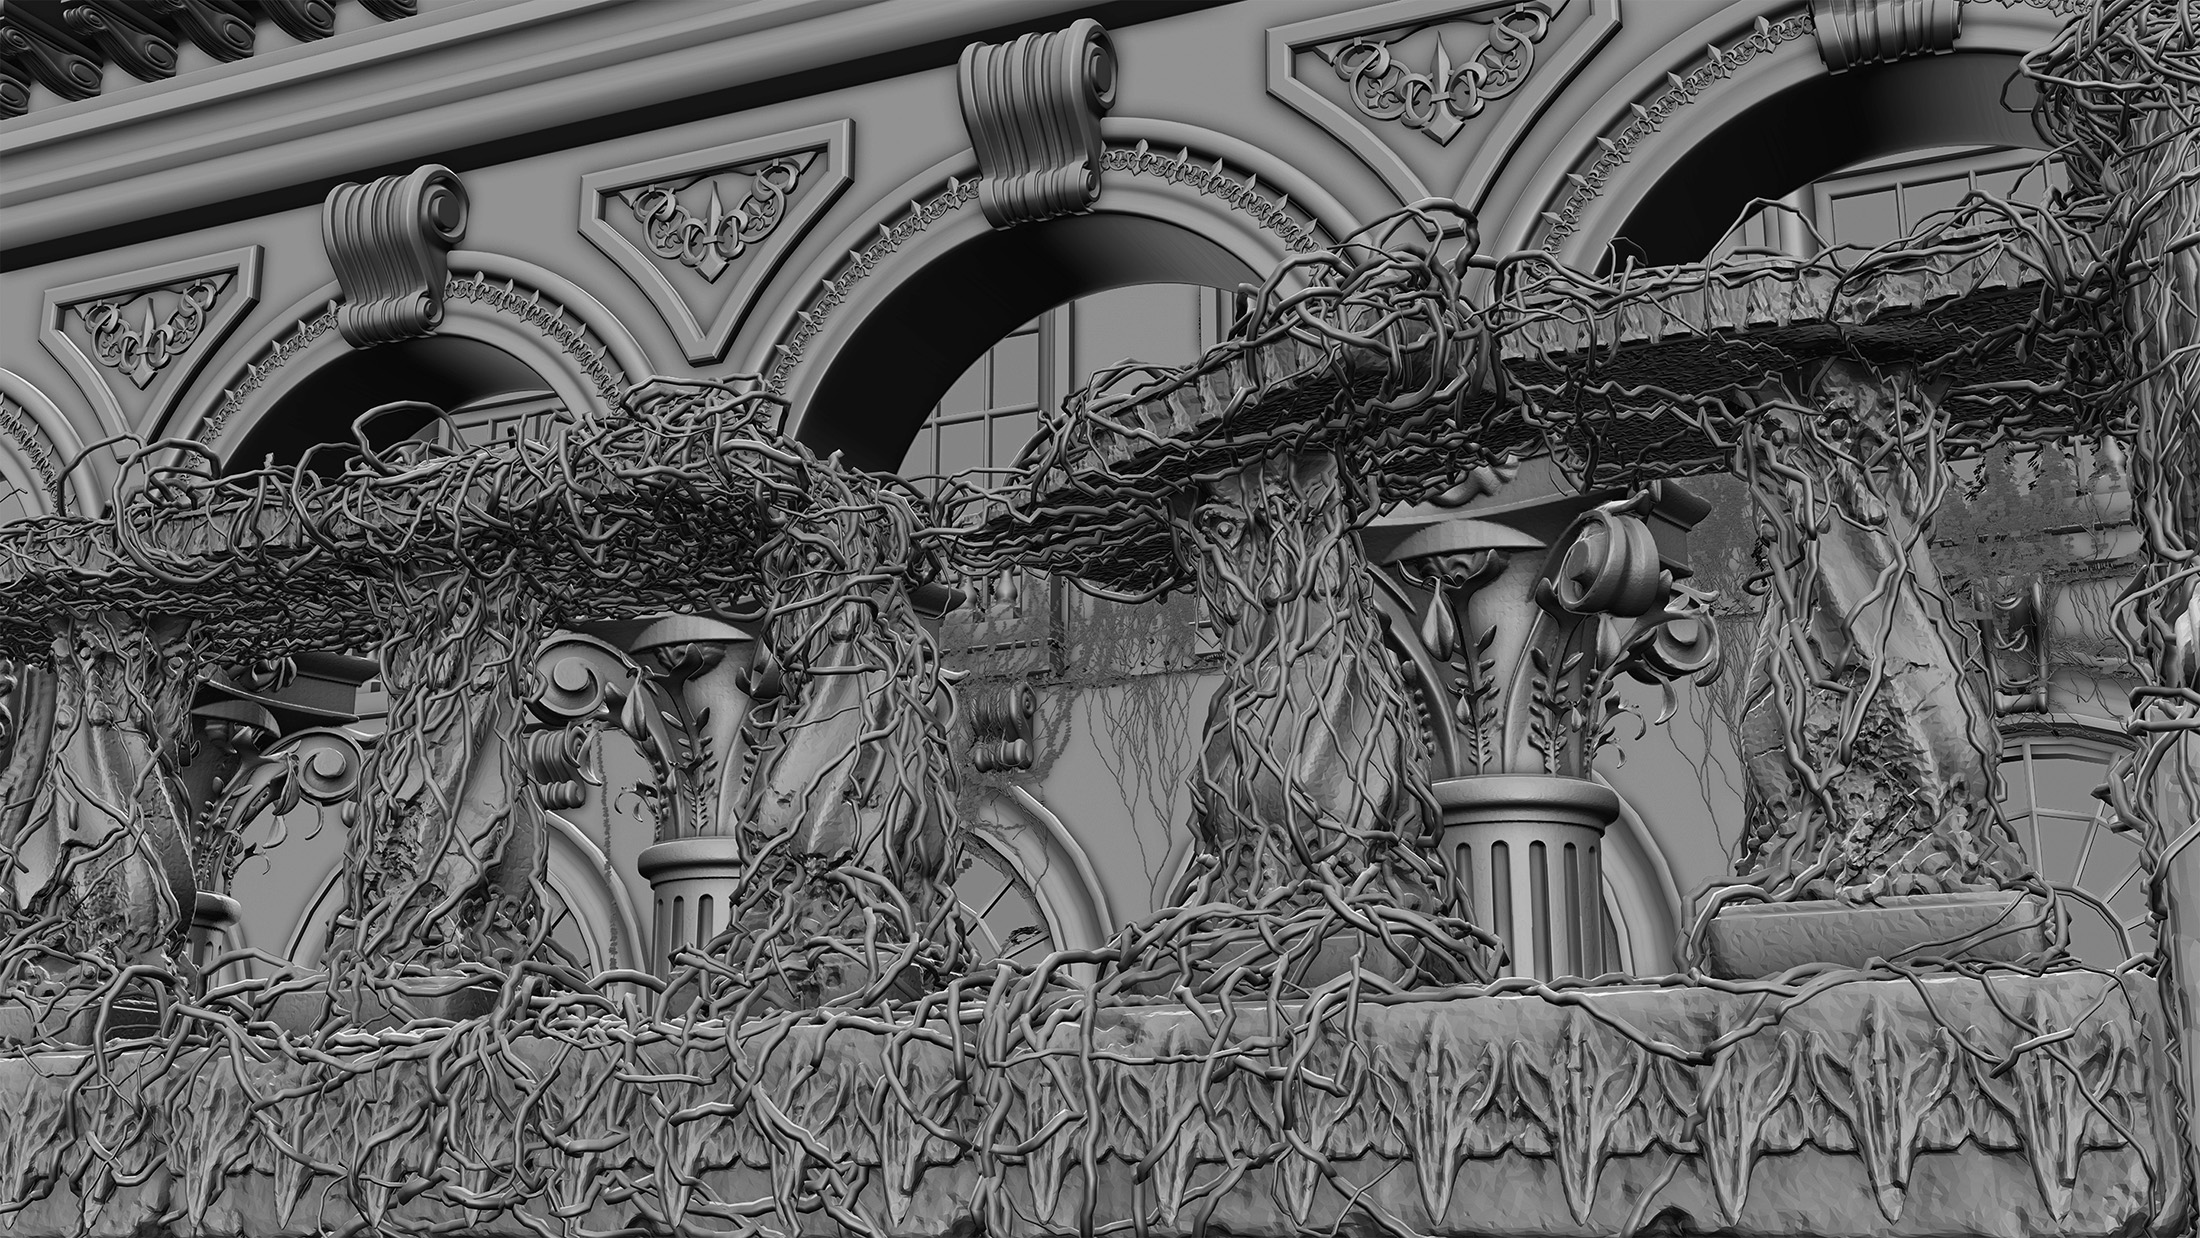
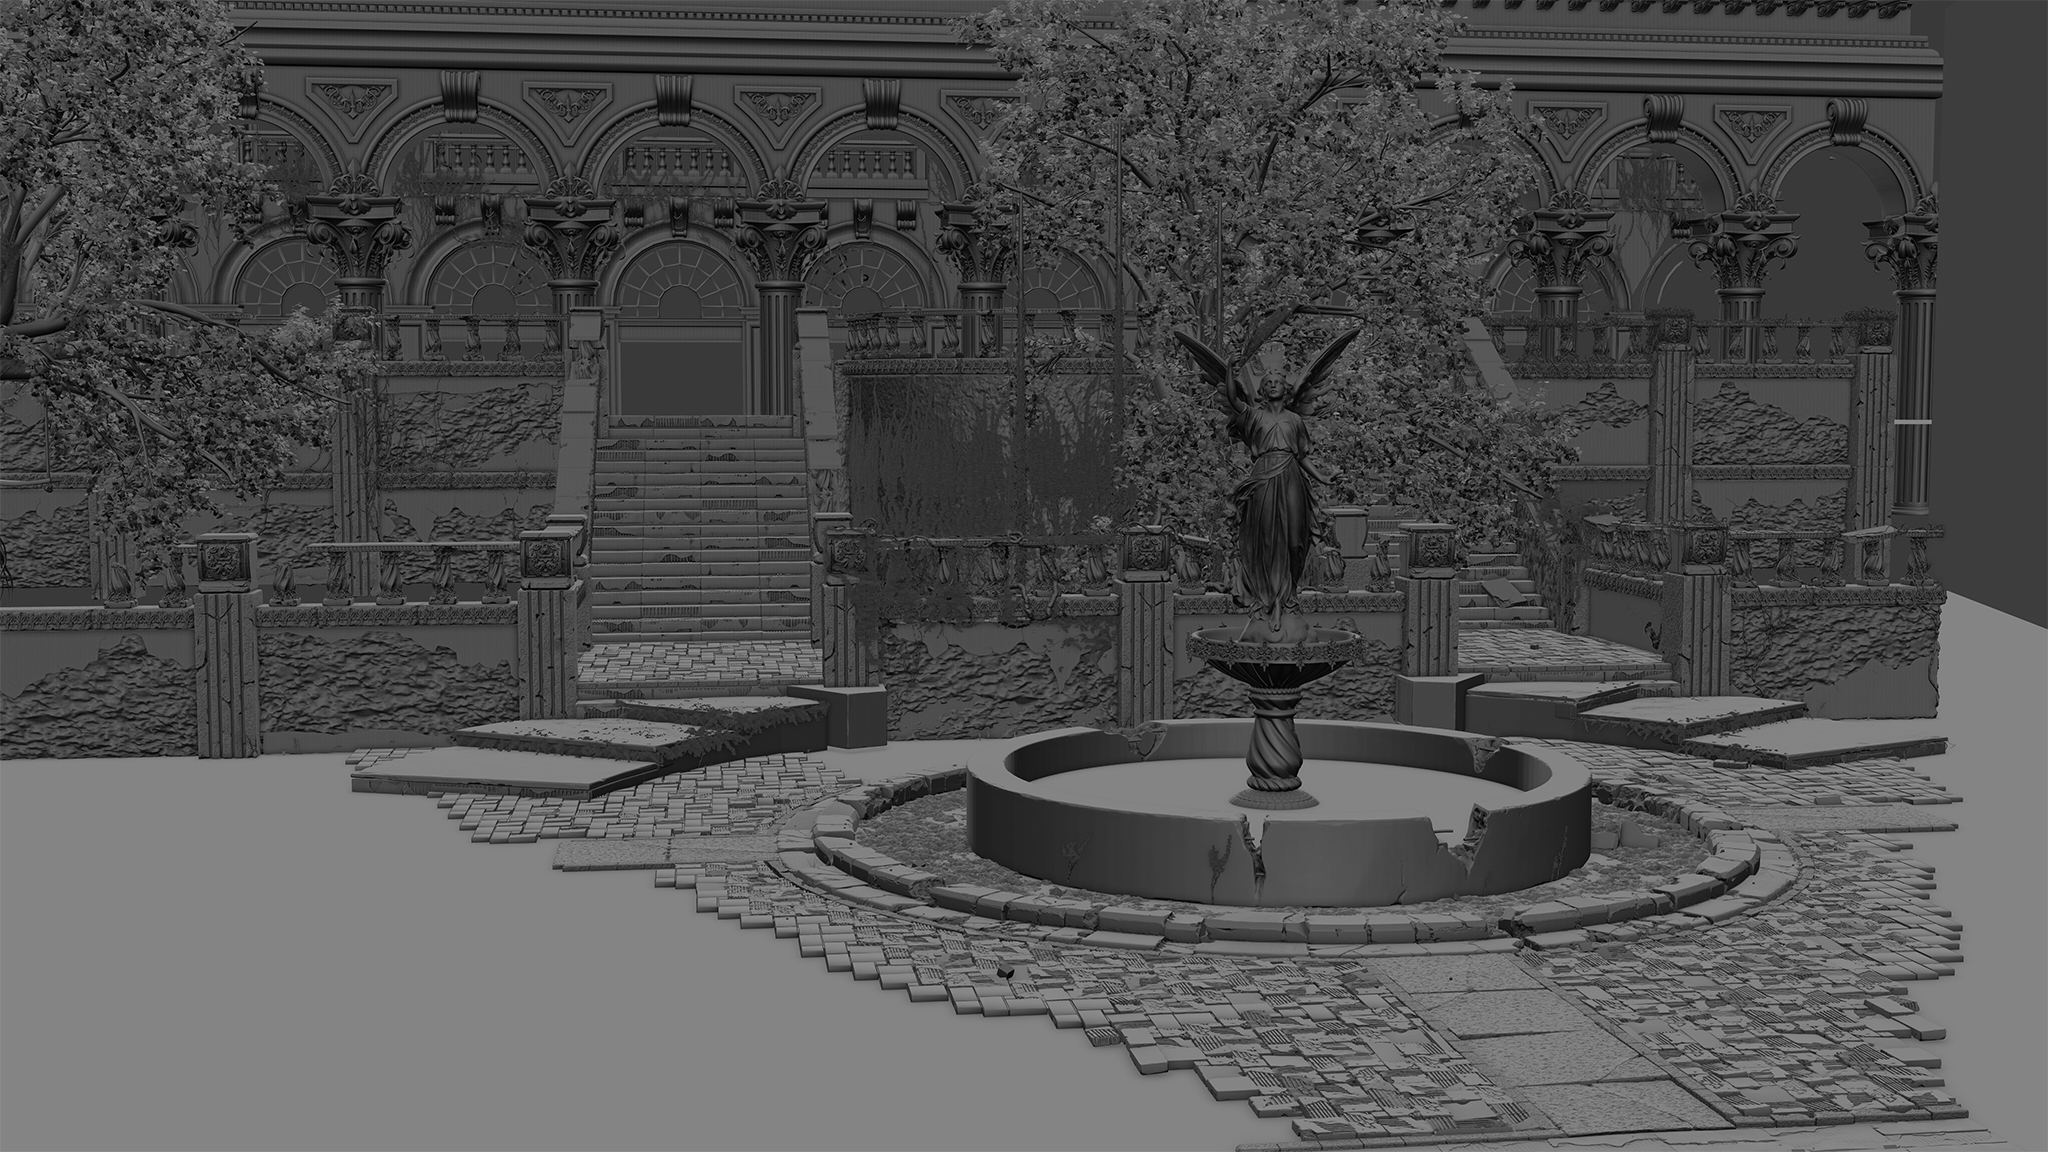
Here’s one of my latest works for Poliigon, a fully UV-less sculpted environment, with lots of polygons (by lots I mean something around 90-100 millions :)), some really high-res textures that put fear even on the system ram, and a old courtyard with a unknown background.
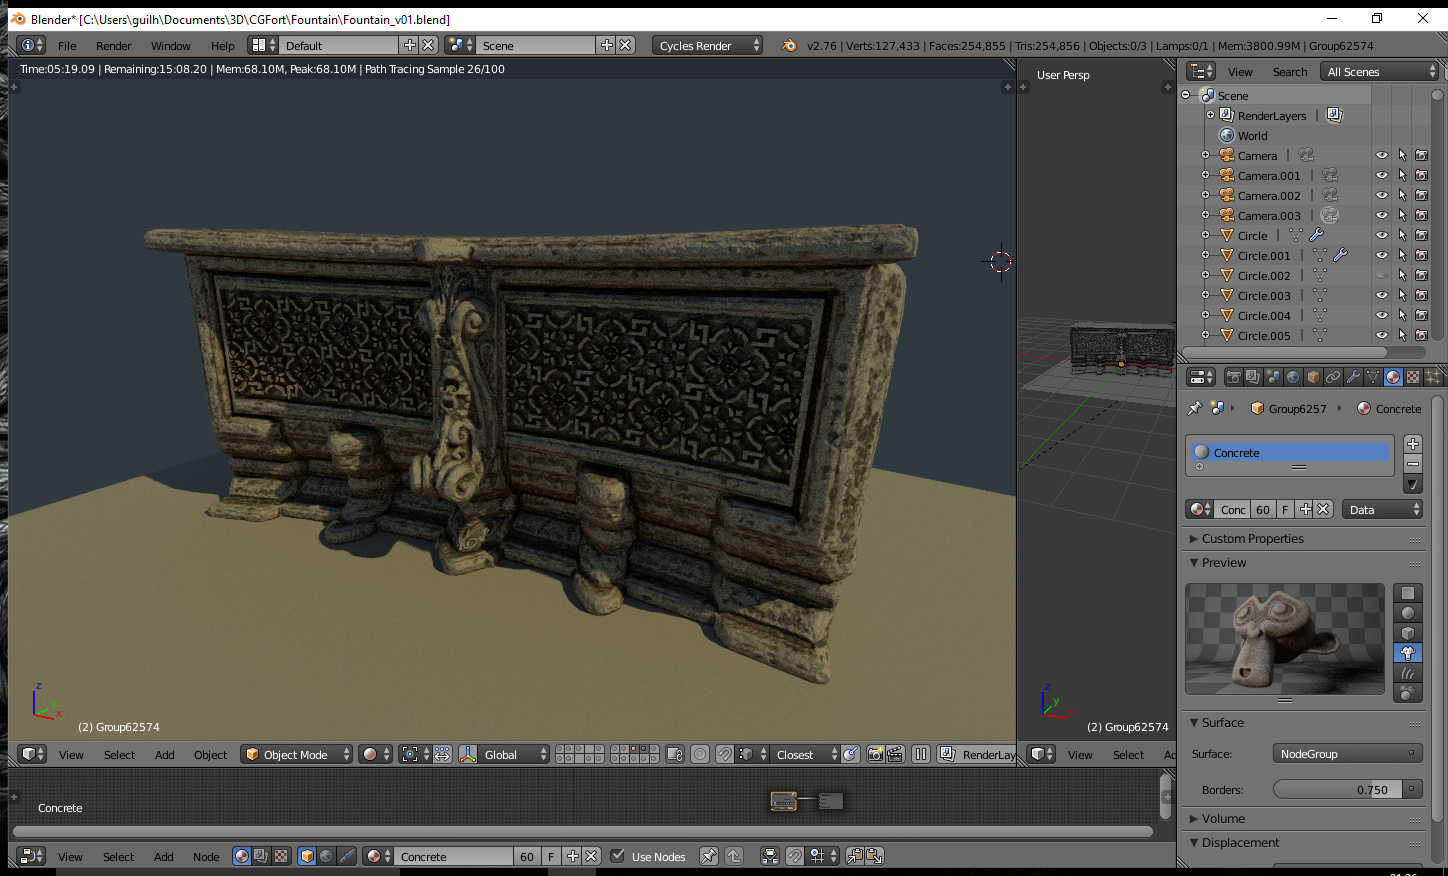
All textures were assigned following a set of rules (Curvature, Cavity, AO, Height, etc…), and box mapped to the meshes, so no UV’s used at all. And just one shader was responsible for the shading of more than 90% of the entire scene.
To speed up the detailing process, I used some textures with camera projections, using them as masks for the shader, or projecting the final texture (Like Moss and leaks, for example).
Hope you guys like it, there’s also a GIF breakdown that can be found on Artstation, with all the test renders from all the stages (more than 45 renders!), so take a look there if you want more!
Any questions be free to ask, it might take a while till I be able to answer, but… I always answer! :eyebrowlift2:
Also don’t forget to take a look at our textures on www.Poliigon.com, all the textures used here can be found there!
already saw this on art station… what can I say: amazing!!
I like every aspect of it, it must have been a lot of work… and it is quite amazing you managed to render 90 million polys! Ok, you have 24gb of ram, but with textures and so on… wow! I didn’t think it was possible!
From what I understand you used the raw hipoly sculputed models… correct? How was the viewport performance? Wasn’t it a pain working with that amount of polygons in the scene?
Regard your question, yea I took the decimated models from ZBrush, so it wasn’t “that” bad as it could be, but still really bad.
I have a workflow that I’ve already been using for some time with crazy high-poly scenes like that:
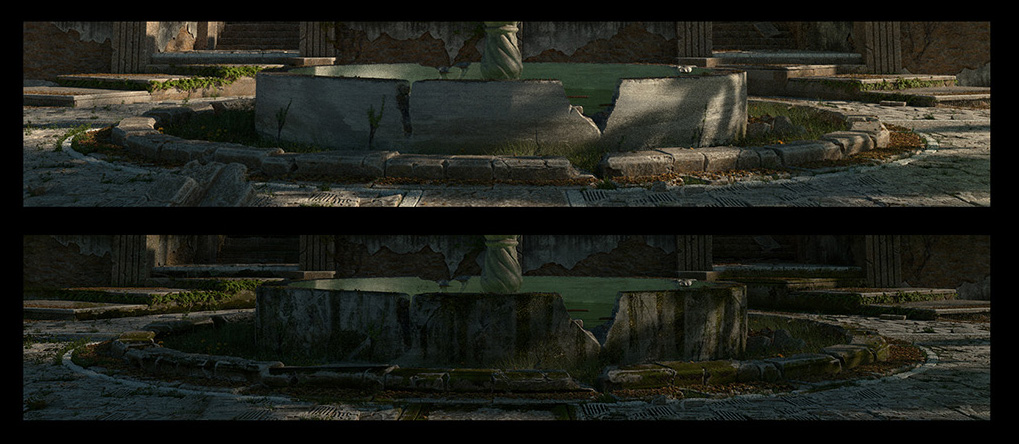
I always break down all the scene elements by type, “heavyness” and contribuition to the scene. So for all the “bells and whistles” there’s a layer for it, that’s usually off while I’m working, taking as example the ground bricks, I have two types of bricks there (that hopefully you guys won’t notice :P), one is the real deal, and the other is just boxes that looks somewhat like the high res ones; So I have each on a separate layer, and also another layer with only blocking geometry that I could use as well, if I need to previs something quick.
This way I can take the high res bricks, and work together with the background placeholder geo, so everything still fits into memory and the viewport is not that bad.
But talking about raw viewport performance, to be honest it could be worse!
I usually worked with around 50 million polygons on screen, 95% of all the meshes are instanced and the viewport felt like playing Crysis on a integrated graphics card (but one of these newer ones :P). So it was laggy, but not unusable. I used a GTX780TI on this project.
The problem with lots of geometry is when you have modifiers applied to them, and everything are unique objects. If you’re working with decimated meshes, and instanced geometry, I’m sure you would be impressed by the amount of geo your computer could handle
Thanks, I’m glad you liked it!
I’m a big fan of crepuscular rays (sometimes even more than expected heheh - Andrew is always making me tune it down :P)
The detail (and the quality the details have) is mindboggling, I can’t really anything wrong with the image.
One question, is there any reason why you used camera-mapped textures as masks for the detail (as opposed to just mapping them throughout the scene)? I ask because I would imagine it would lead to shading inconsistencies if a scene was to have reflective surfaces (which isn’t so much of an issue here, but that’s because the majority of materials are either dull or do not reflect much).
It’s rate to say “wow” and mean it these days but here I thought “wow” and meant it.
Awesome image and impressive technique all around. Thanks for also sharing the process screenshots.
5 stars.
This is absolutely amazing!! It’s insane the amount of details!! You deserve the gallery right now! I really love everything of this masterpiece…it’s look like a game level from a new title of Team Ico…and you know what!?
I really would like to play it right now! The atmosphere is absolutely stunning!
Ok now I should probably stop with this ass-kissing!! ahahahaha
No seriously,
Congrats man!!
What a great image – one of the best ones I’ve see in a while.
The only thing i can think to critique is that the image feels a little unbalanced with the black hood of leaves in the top. Simply cropping the image to remove the excess black area of the leaves, just leaving the translucent leaves and a few holes between them could improve it, I believe. This way, I don’t have to zoom in myself to crop out the black area, but when I open the image, everything I see is visually interesting.
Yeah, absolutely gorgeous, a true masterpiece. And loved the info and breakdown too. Care to share more info on the one shader, how the rules look? Because I have a hard time finding any repetitions and so on, and I utterly hate being “forced” to UV unwrap anything that wasn’t meant to be animated/shape modified.
The depth of field appears extremely wide though. An why was the character (from the breakdown gif) taken out in the end?
Sorry for the delay, I had answered all the posts yesterday one by one till be blessed with a electrical surge that made me lose everything
Ok ok, time to breath and do everything again:
Hey Ace, glad you liked it!
About the camera mapping, the whole process were done inside the shader, with a projection nodegroup at the end of each material, so the projected textures act just like any other texture on the mesh, being able to be reflected and everything else. I did this by using the window coordinate to map my textures to the camera angle, was the easiest way I could think to project textures on instanced objects (since they share UVs)
I like to do that way because I enjoy the freedom to be able to take a opengl screengrab from the viewport and paint all the details inside photoshop, rather than having to deal with UVs or vertex painting. So it’s quite easy to make things like drips falling from a window and getting in contact with a neighbor mesh, and still really quick and artistic!
It was a bit overboard, but it’s indeed really fun!
Hope that was your question, anything be free to ask!
Cheers!
Thank you, Guido!
Curious enough, Shadow of the Colossus was one of my favorite PS2 games back in the time, curious to see how these things can keep influencing us over the time
Cheers!
Thanks Eli!
And I agree with you, I was scratching my head for a while trying to figure out what to do with that part, but since this was a commercial work, with the deadline getting closer I had to “be happy” (and make others happy as well) and go ahead. But it’s a good suggestion, I’ll experiment with that later for my portfolio, thanks!
Oh, thanks Carl!
And yea for sure! to be honest I made it sound way more crazier and rocket science than what it really is
I hate to UV map as well, so I always try to go procedural/projections wherever I can
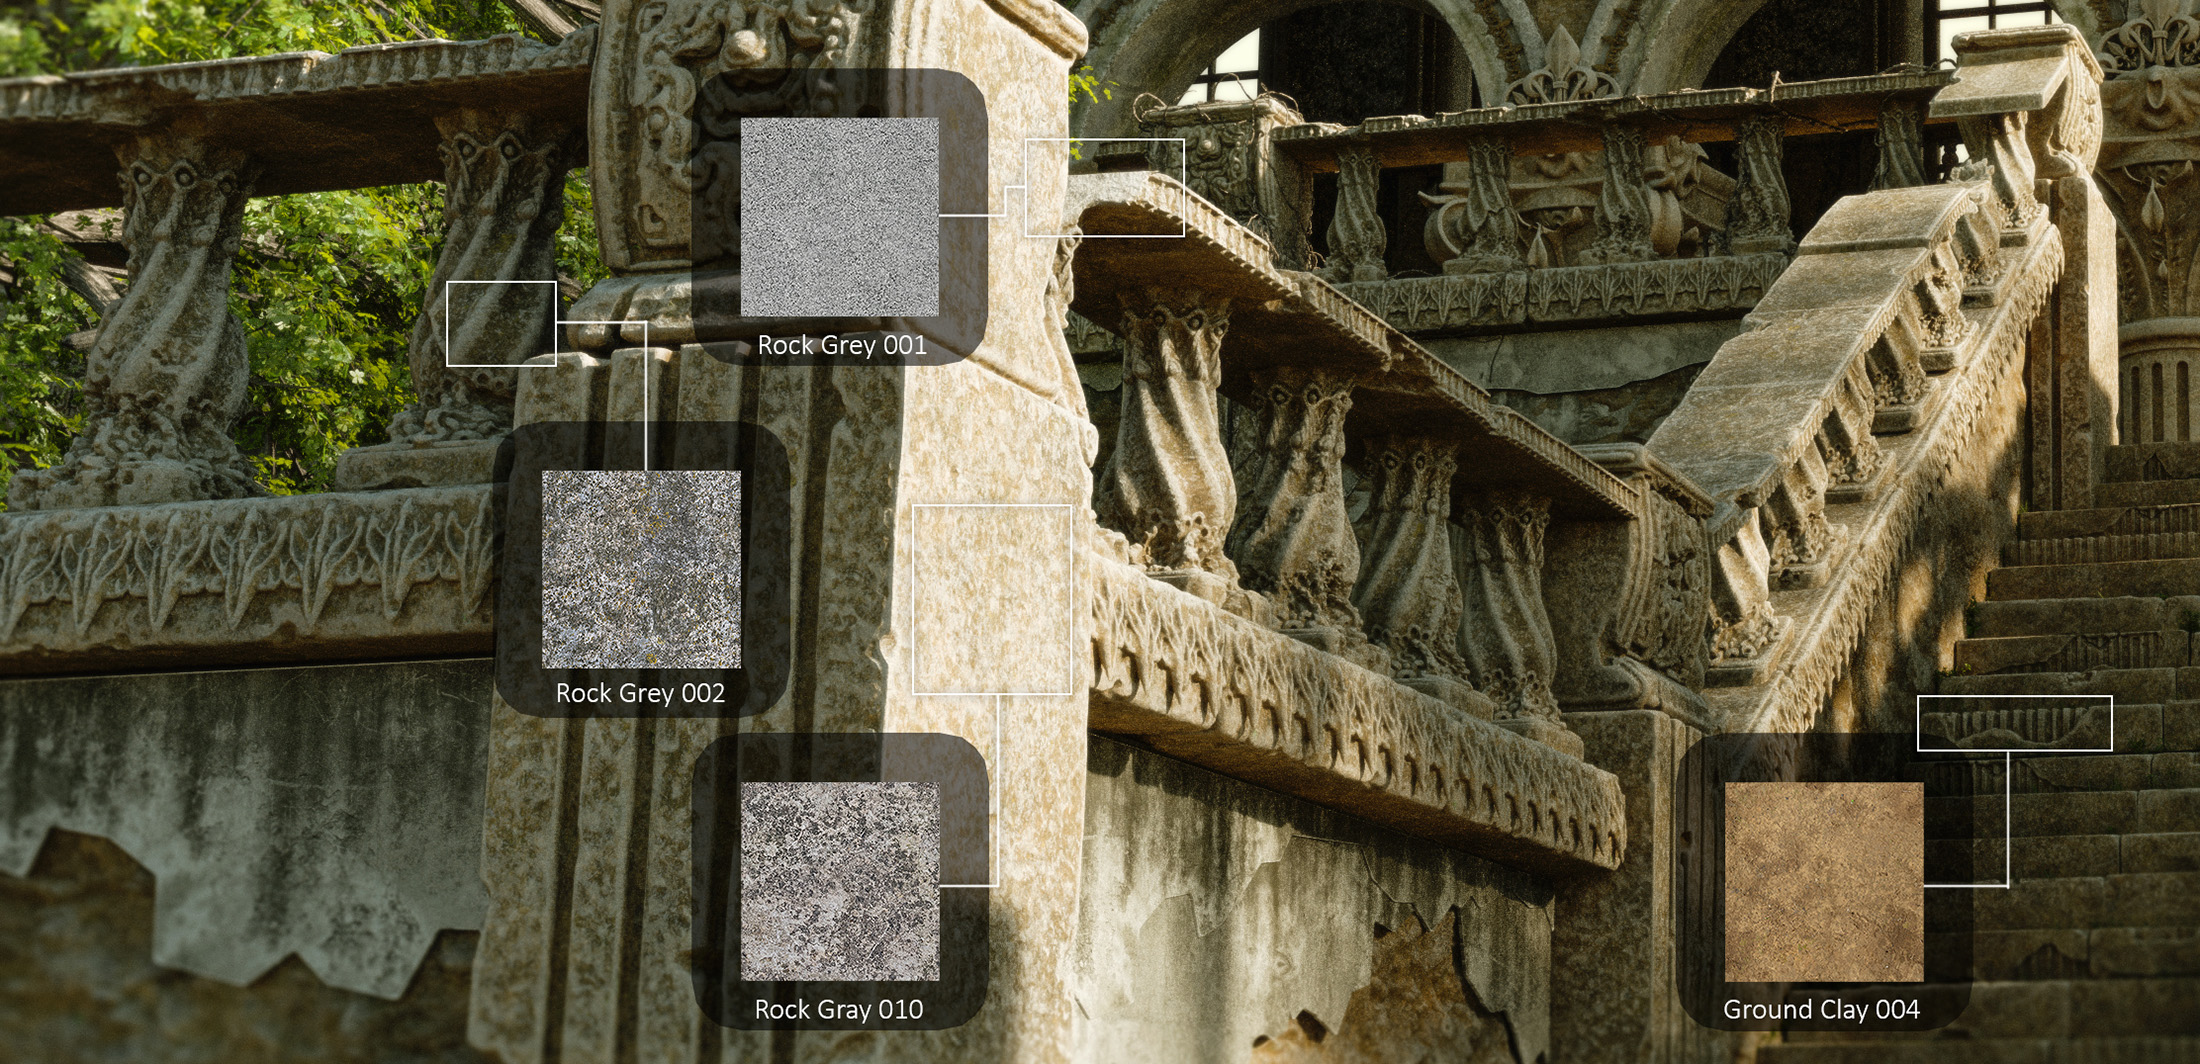
First you have the base texture that you will use as the base for everything, this texture as all the others are using box mapping, so they are projected from a orthogonal view, eliminating the need for a UV;
Then you need to define what sort of data do you want to use to blend your textures, the more polygons your mesh has the easier to create really nice UV-less shaders.
For this we have a infinite amount of options, we can use the mesh normal and split in a certain axis to use that channel as a mask, a gradient texture overlayed with a grunge texture to create dirt coming from the ground, the height map from the base texture to mask a second texture like sand with a procedural noise to break tilling, the awesome pointiness node driven by a color ramp or curves to tweak the profile, and the list goes on…
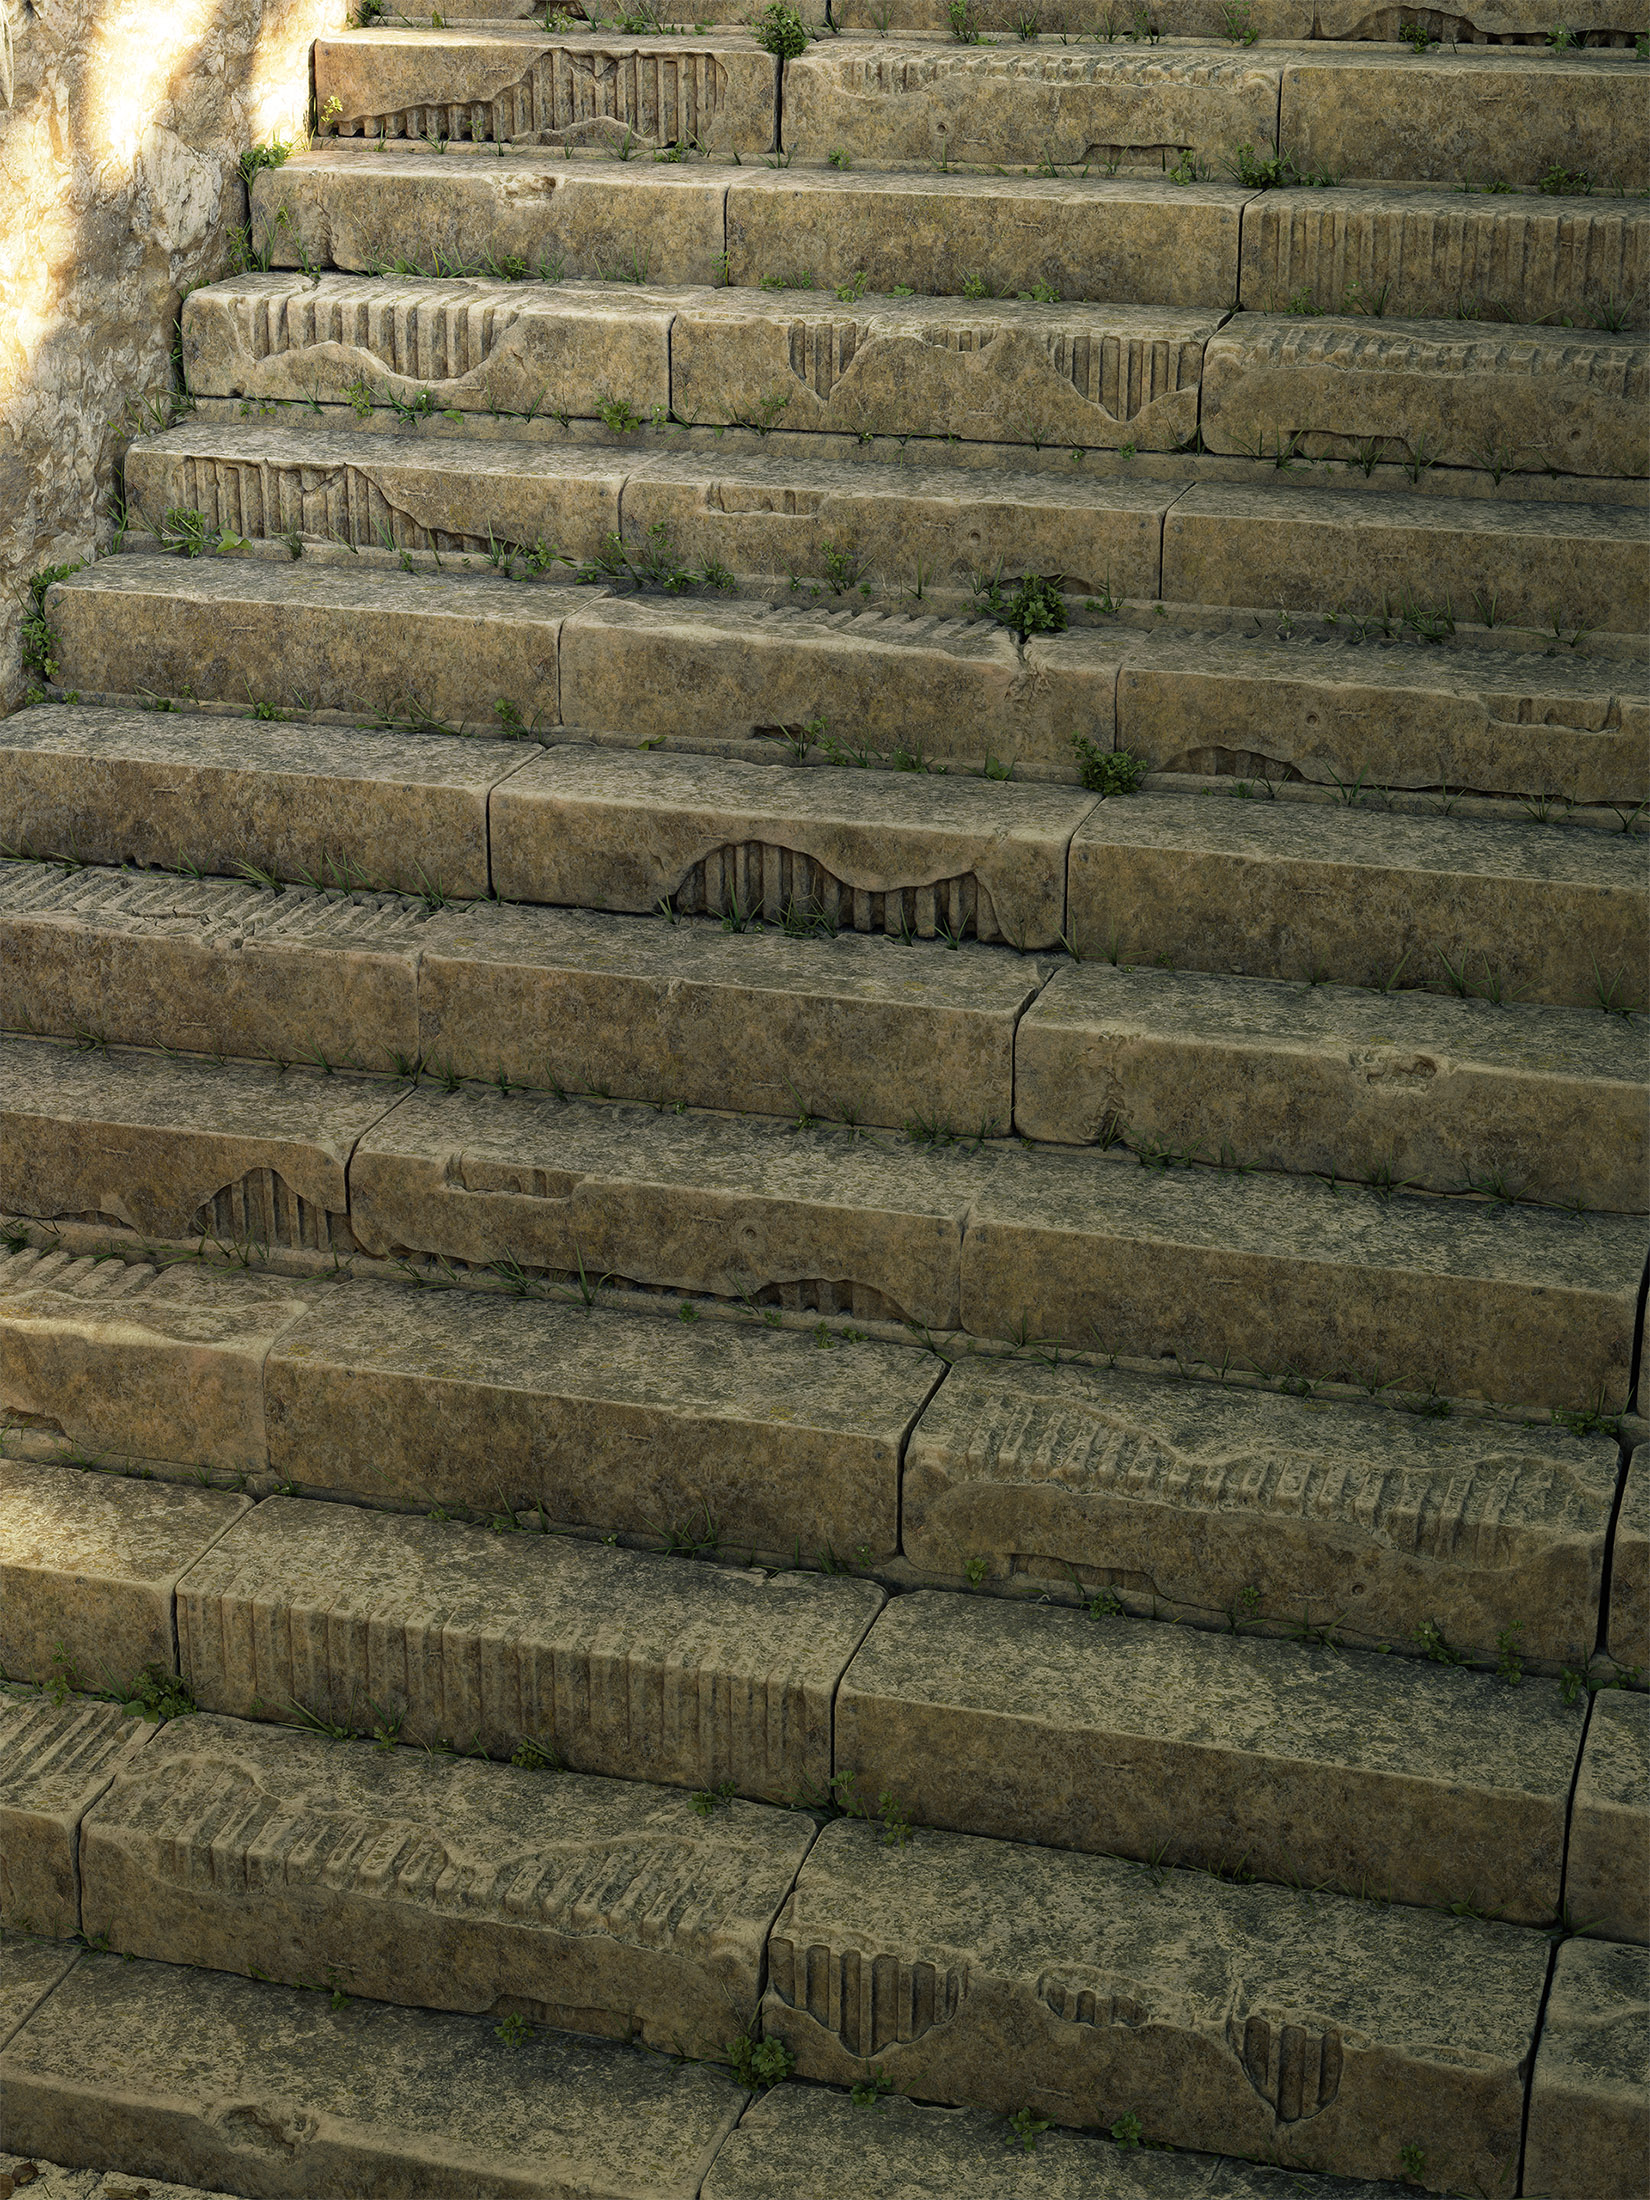
For this scene in particular, I used a lot of the pointiness to mask parts of the mesh, using curves to pick some random parts from the mesh (you can see on that crazy wavy curve there), and to add highlights to peaks, overlaying more textures with a procedural noise to break the tilling, and masking that texture with gradients or with a single channel from the normal (like the Z-Axis to highlight the top parts/slope), and also some dirt hacks I developed like projecting the ambient occlusion pass from the render to the camera, and using that overlayed with a grunge map to act as a mask for the dirt between crevices. It’s really a experimentation process, and really fun indeed!
Oh, and above everything I added some camera projections, with a mask and a texture, so you’re free to add all the extra detail needed to fix bad parts or add that extra layer of detail.
With enough textures, it will be really hard to spot any tilling this way, you just need to have a relatively high-res mesh to play with, that’s why decimated meshes rocks on that workflow!
I know it’s not greatly explained (I have to work quite soon!) but I’m planning to write a full in-depth breakdown/making-of for 3DTotal that describes the whole process in more detail, if I end up doing it, I let you know!
About the DoF and Character, well… when it’s not personal work you can’t have all the control you would like, -> and we need to make a bunch of people happy, but such is life!
Glad you liked it, hope it answers your questions!


 Ok, you have 24gb of ram, but with textures and so on… wow! I didn’t think it was possible!