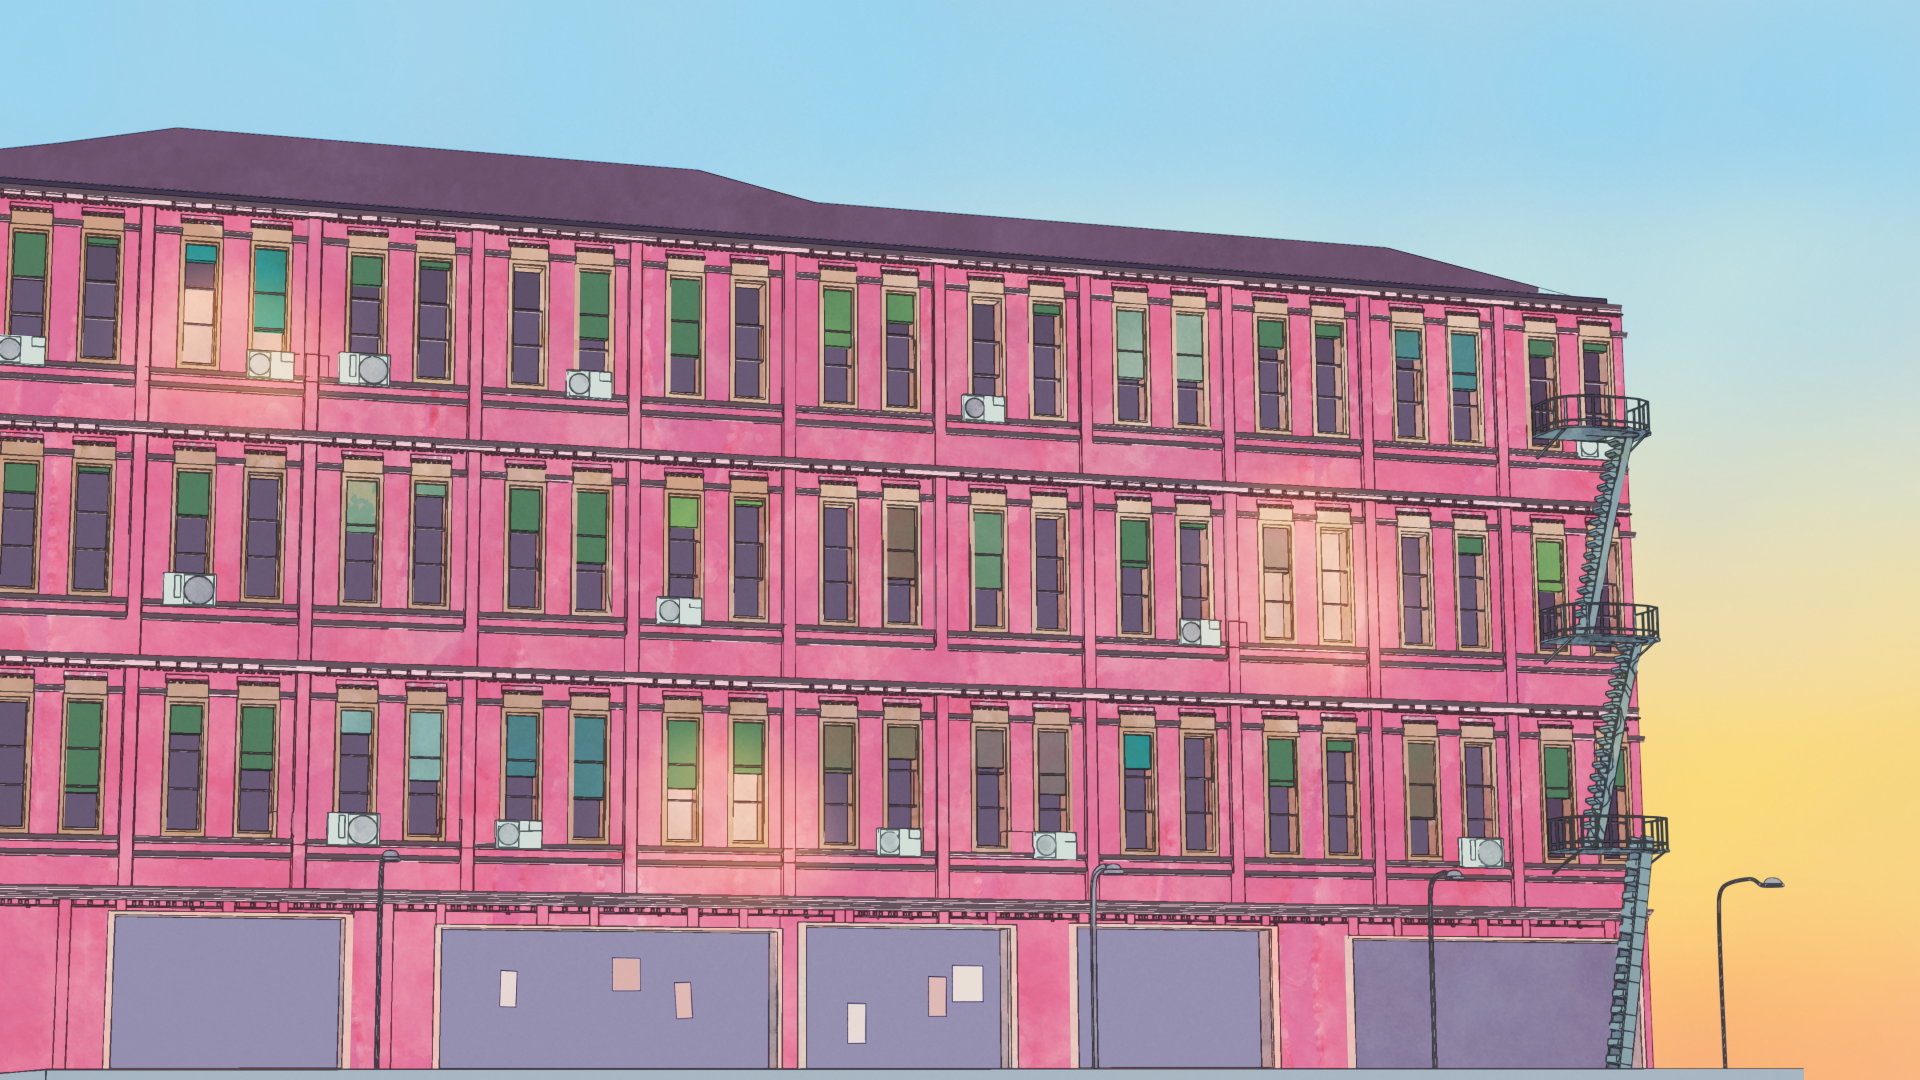
Everything is procedurally generated with geometry nodes, except the color.
Pre-color render

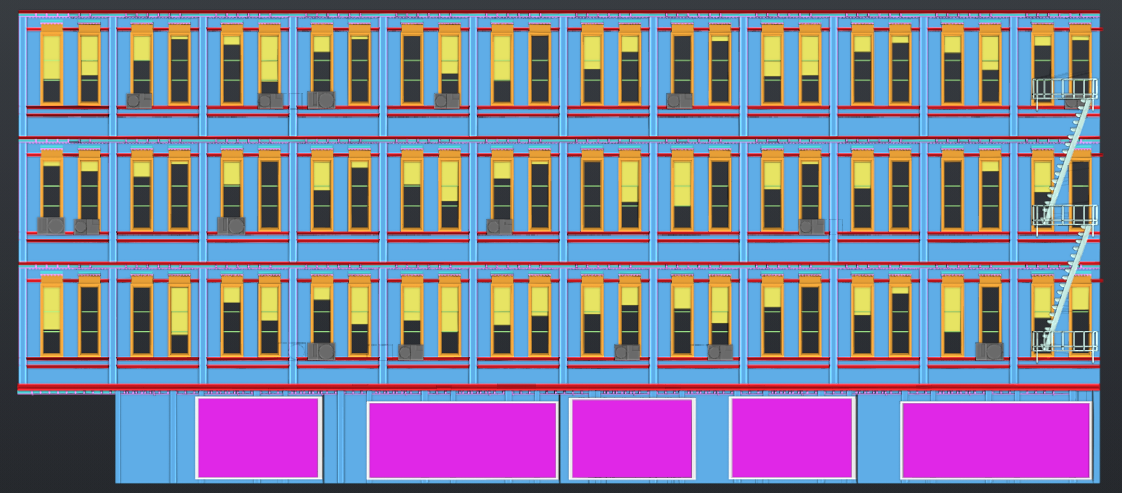
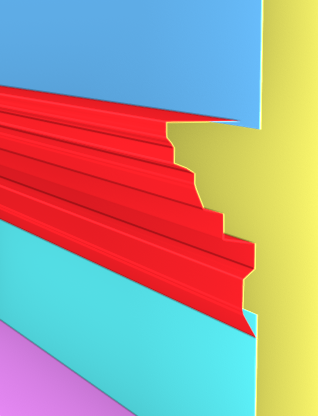
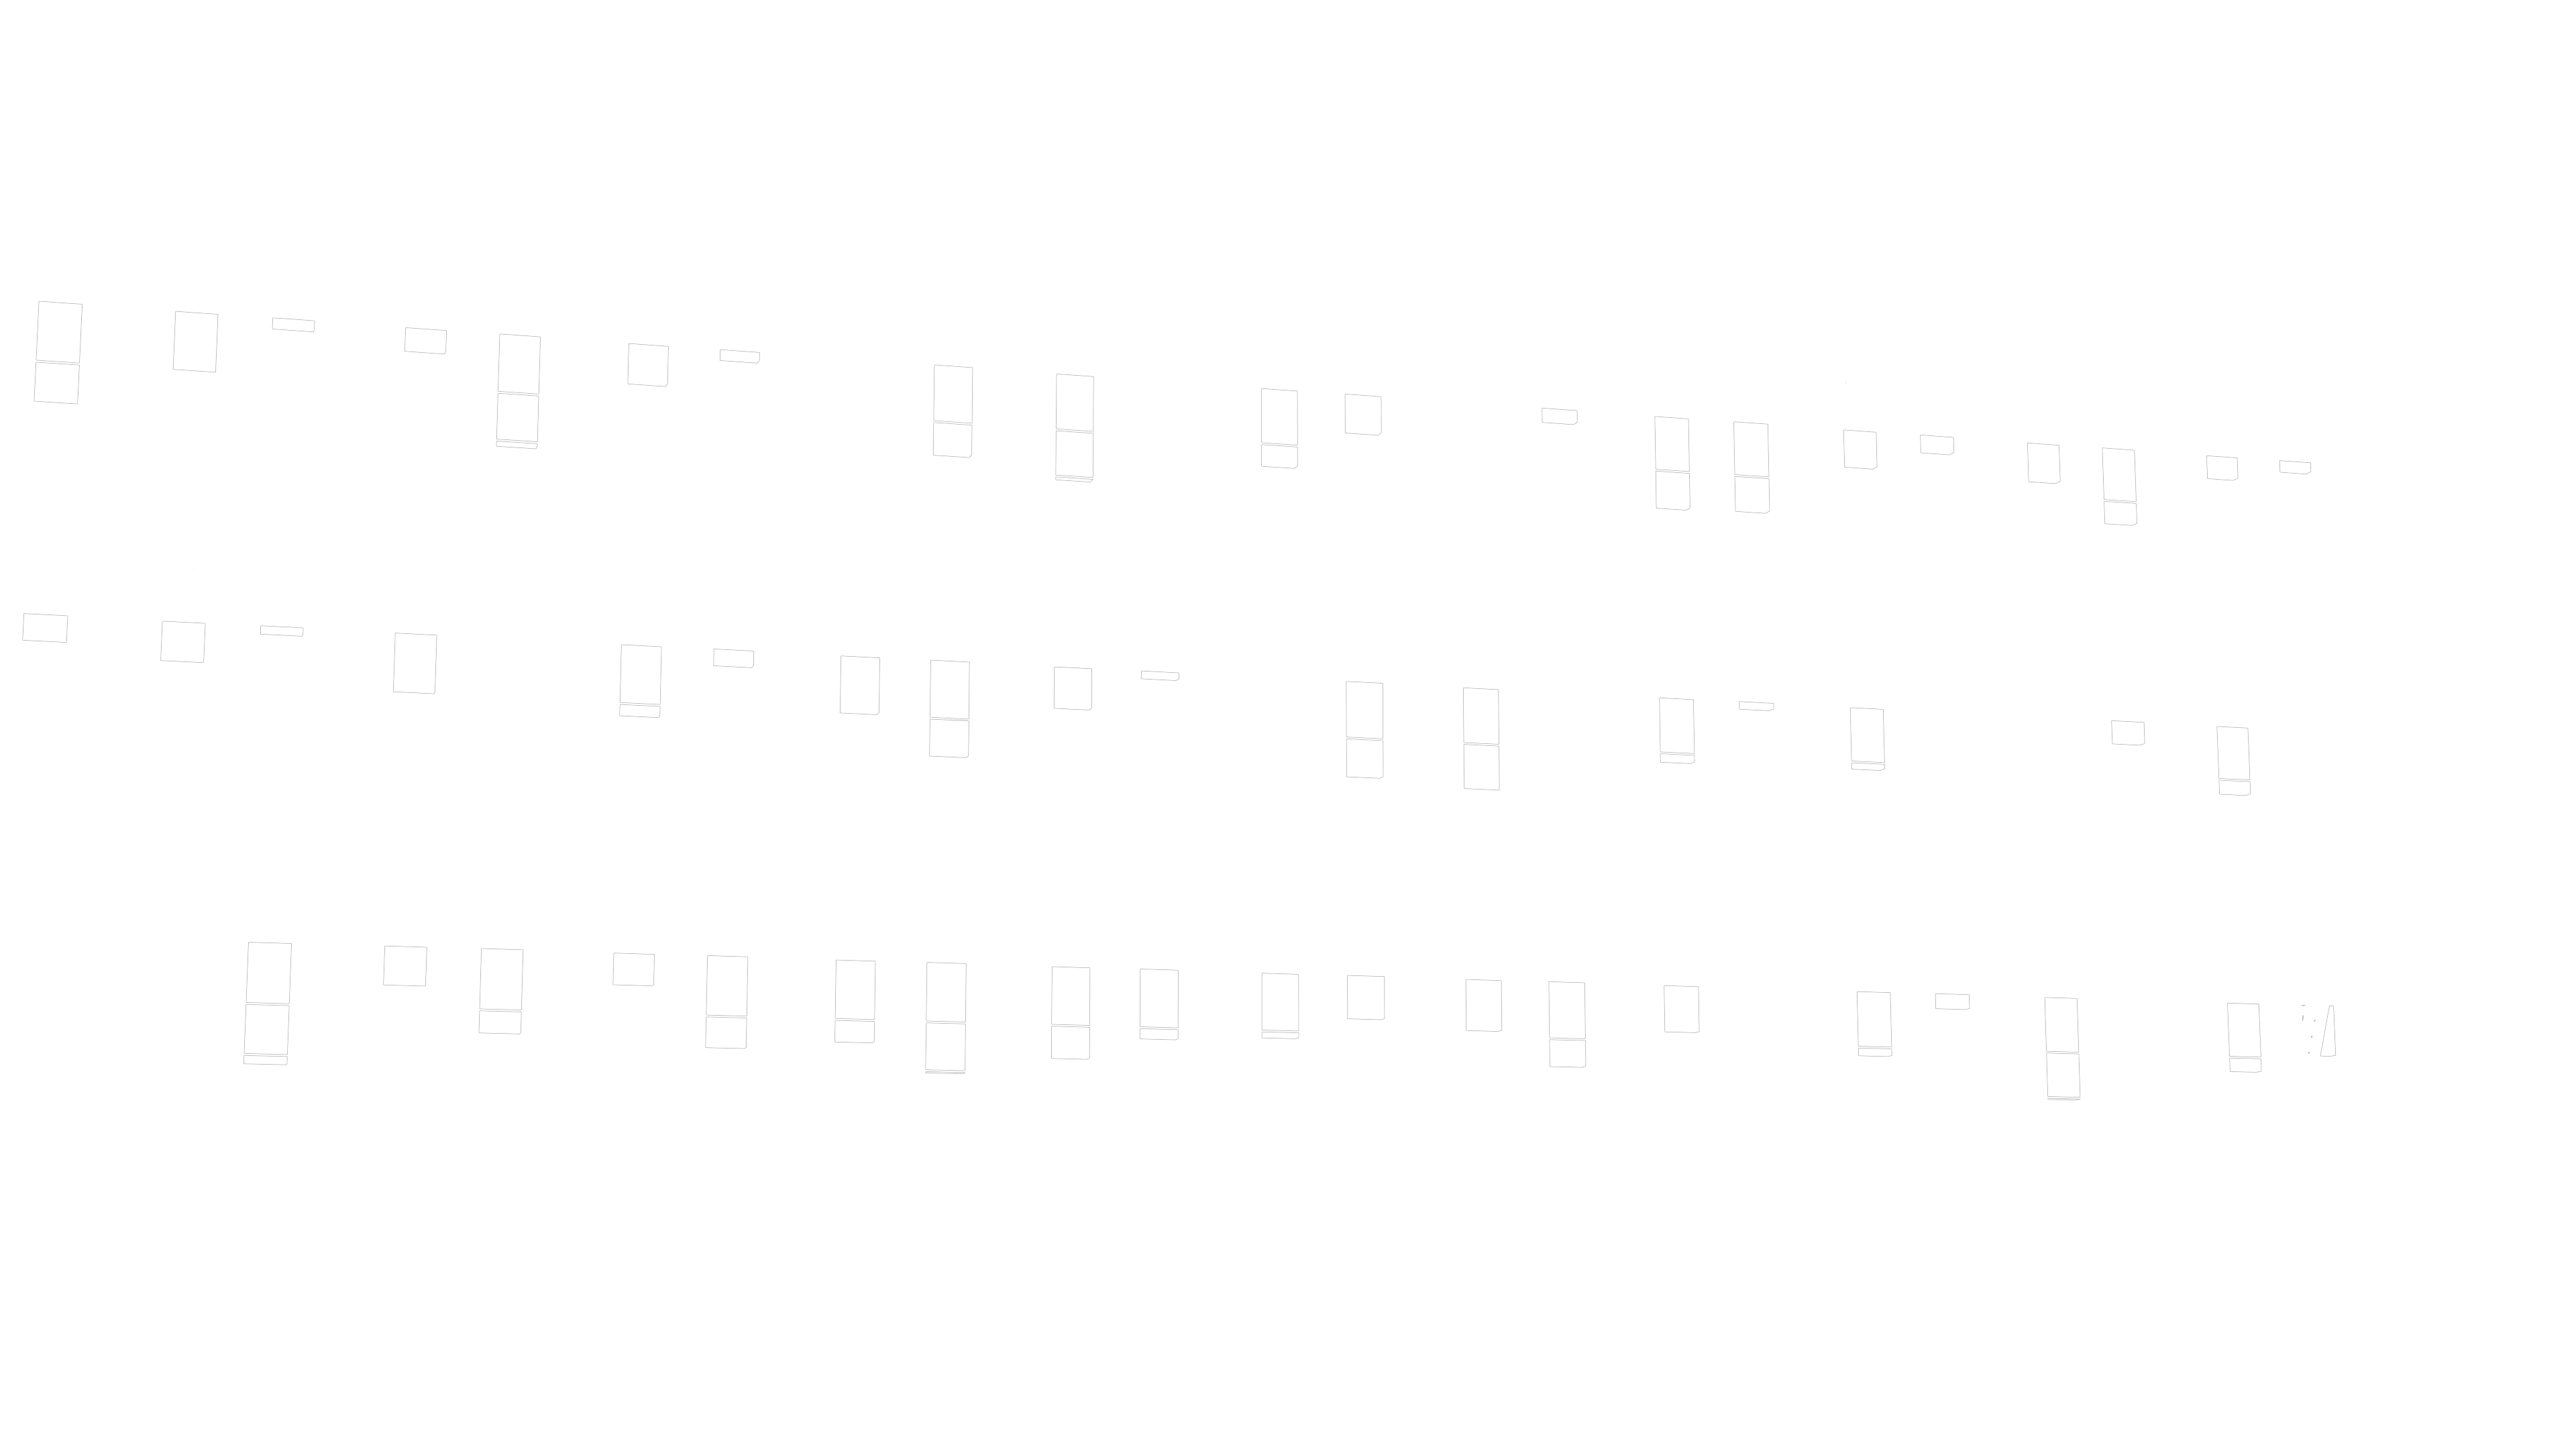
Viewport views, with color-separated materials
Inspiration
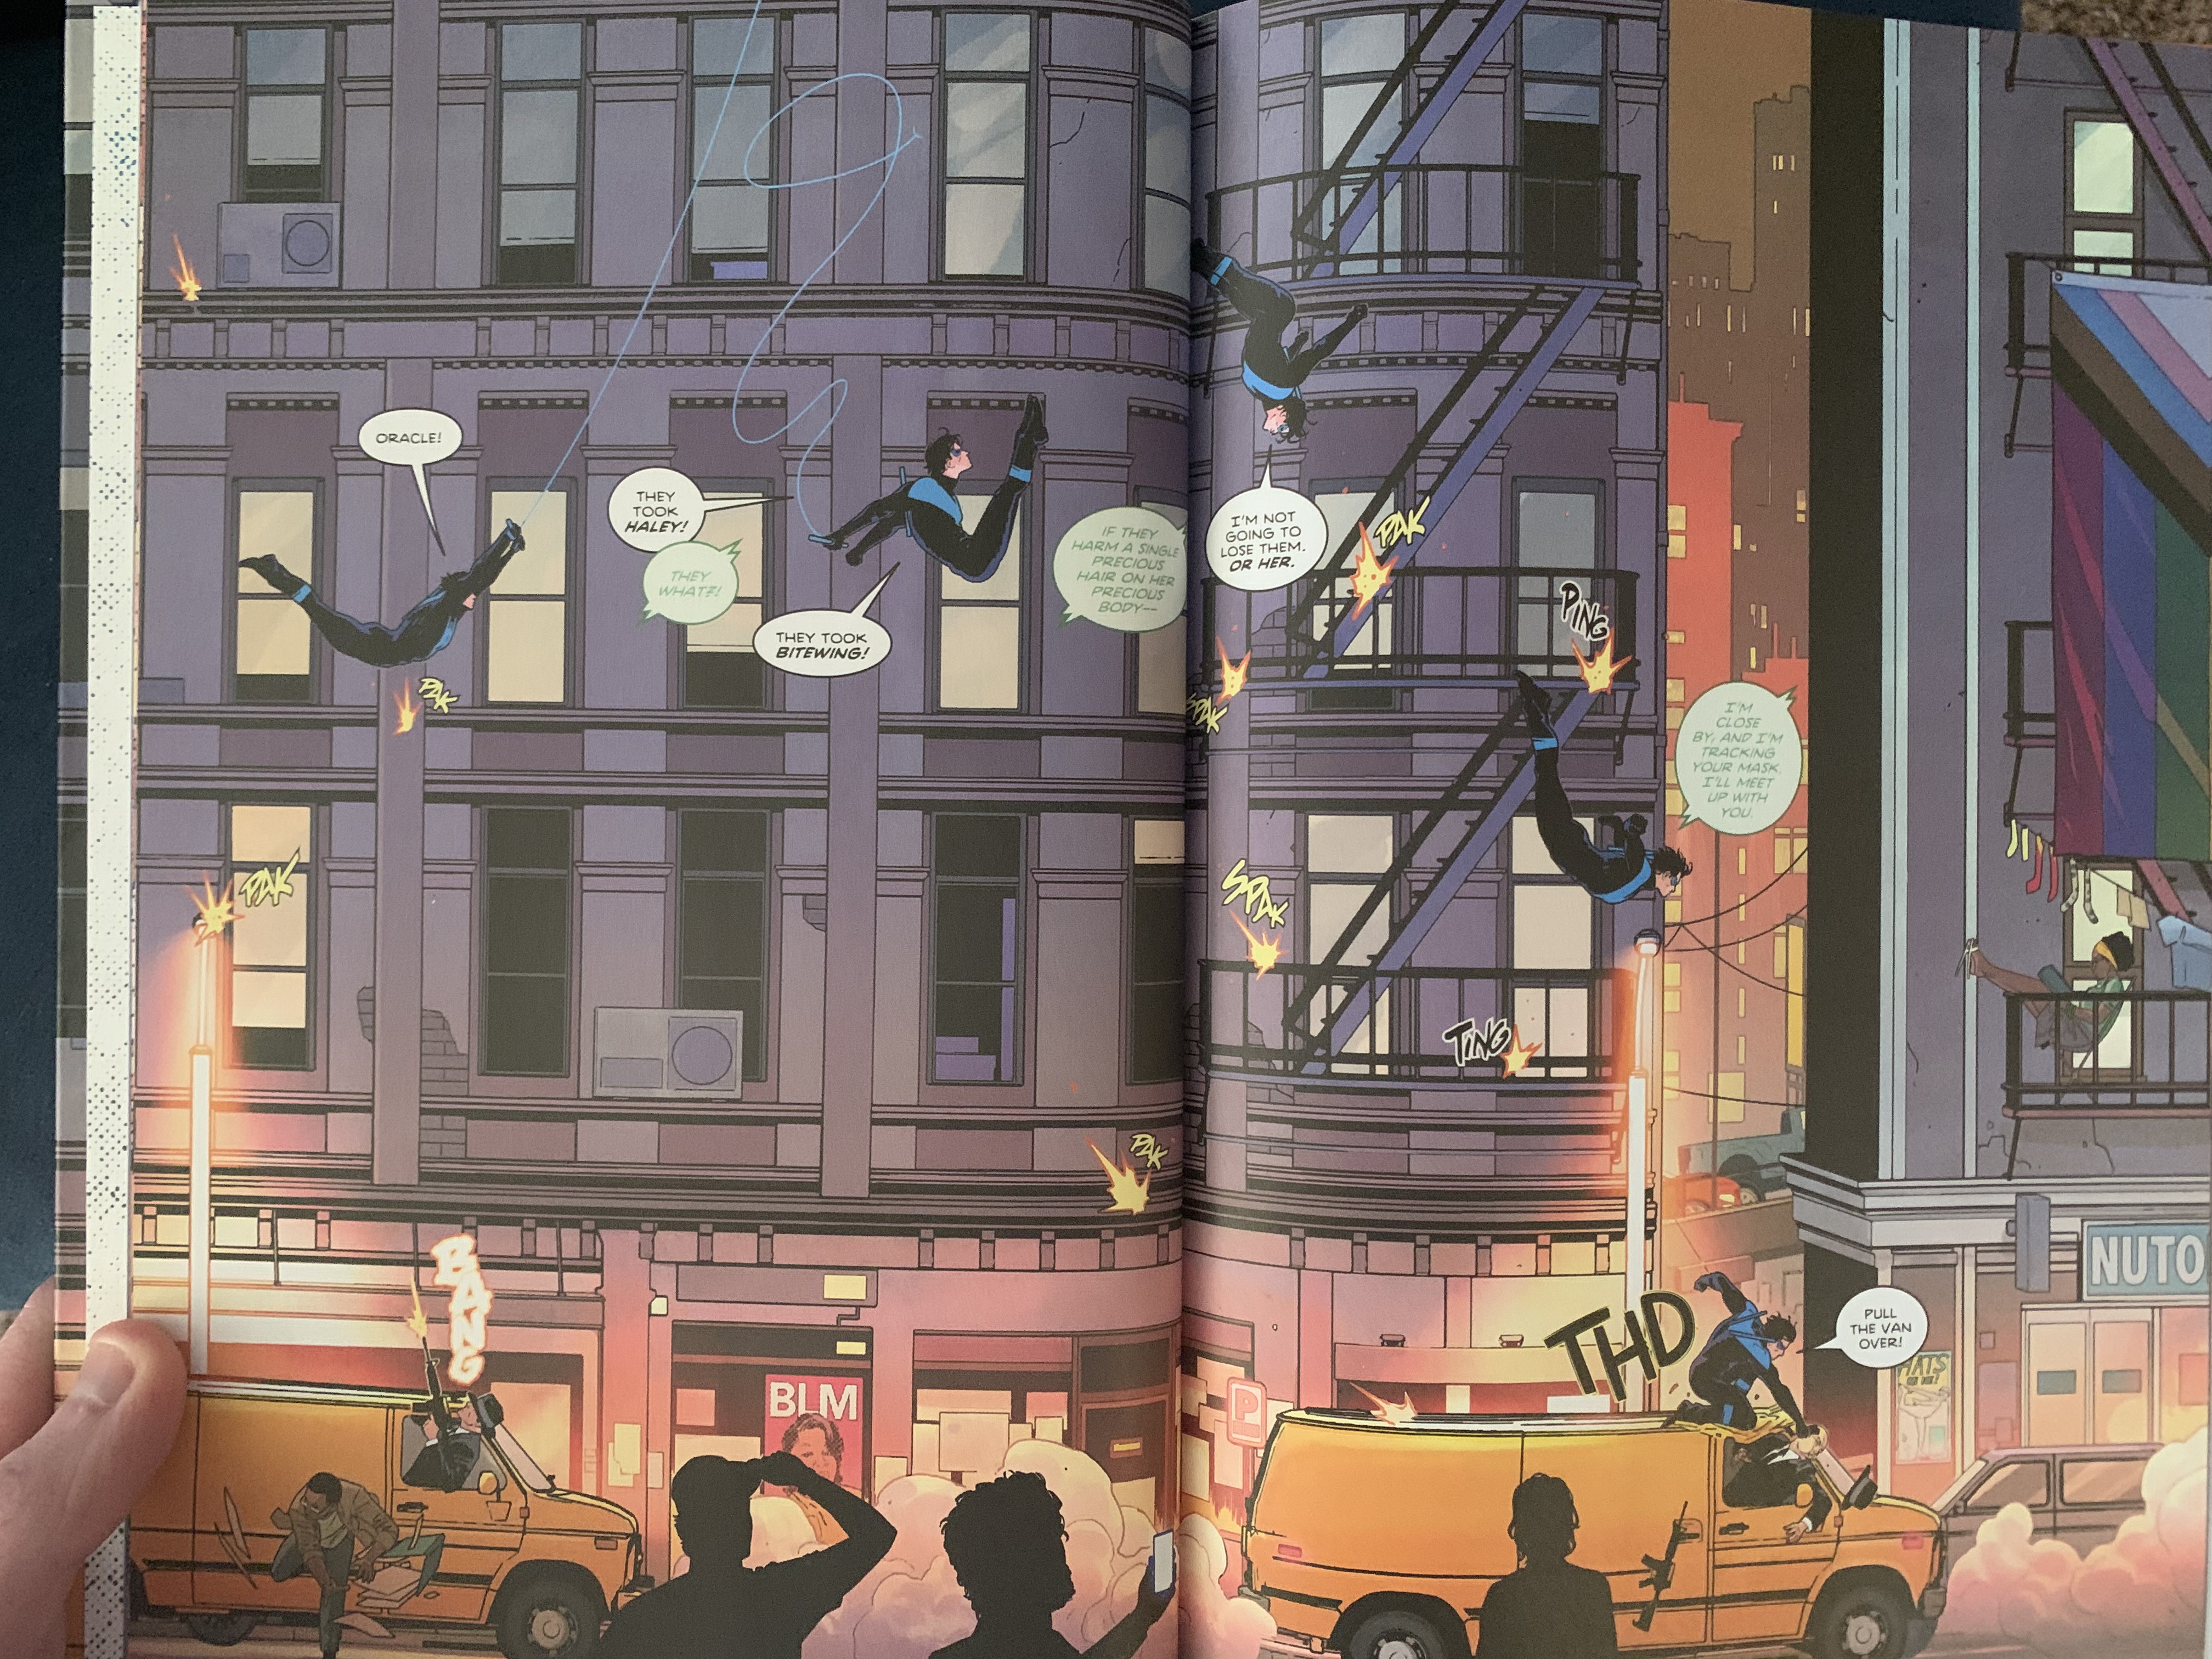
The opening pages of the most recent Nightwing volume, featuring incredible art from Bruno Redondo, inspired me to try creating something in the same style in Blender.
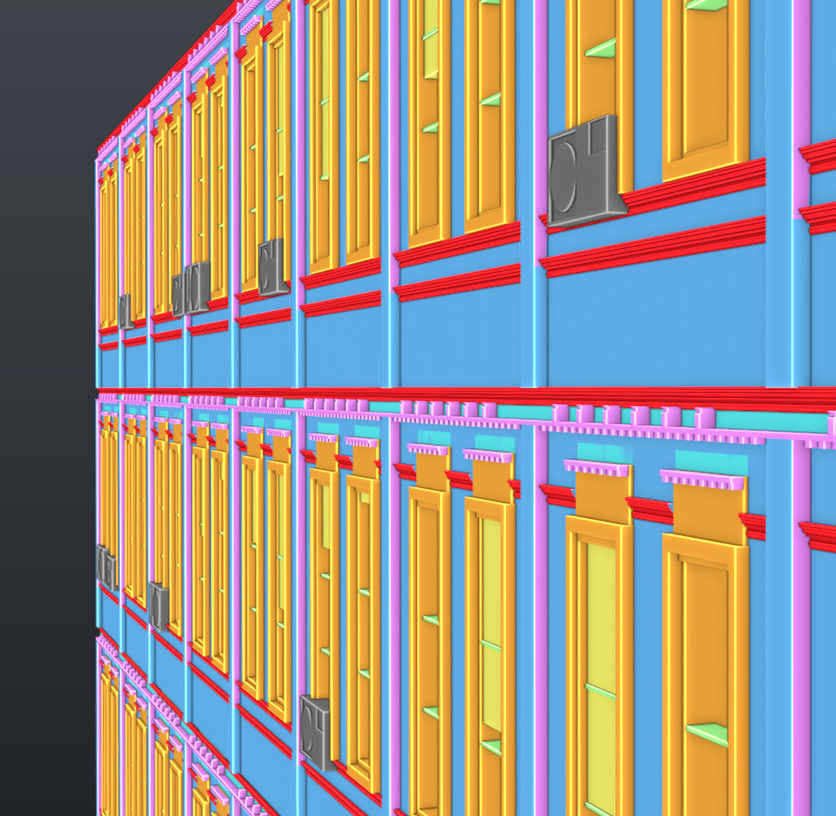
Geometry nodes
The only hand-modeled assets are the air conditioner units and the balcony- everything else exclusively created by geometry nodes. I used a modular approach, combining multiple building blocks into a panel, then turning that panel into a grid. Here’s just one panel:

Note that the ground floor uses a different set of rules, to provide variety.
Instanced to one direction of the grid:

Building block closer look - molding
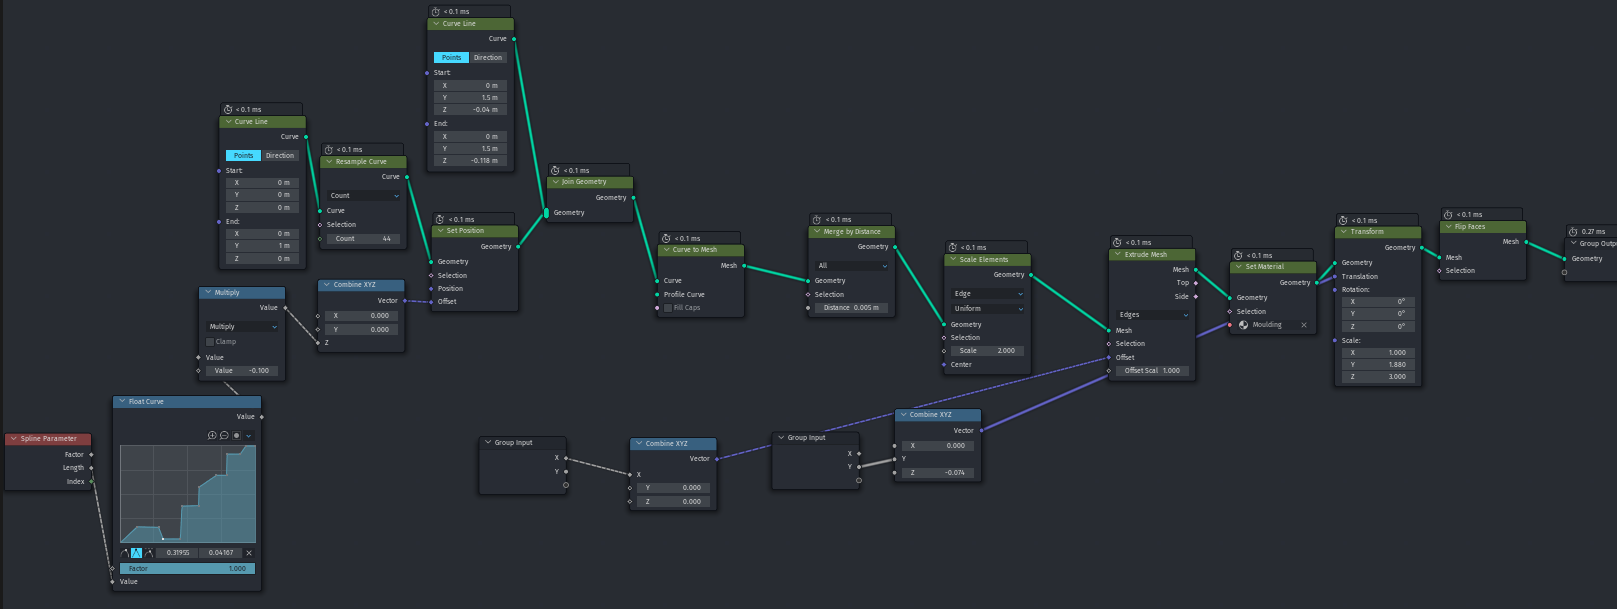
I used a float curve node to generate the profile of the molding from a curve line, then simply extruded it to form the molding building block.
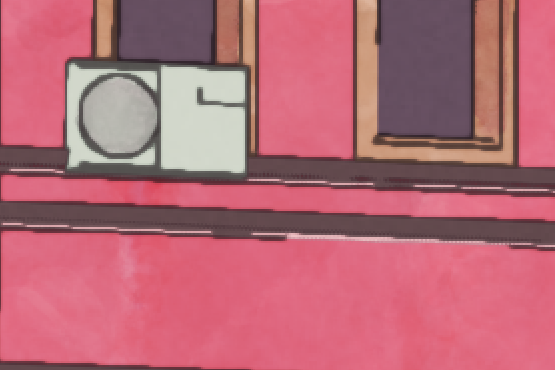
Air conditioner placement
I encountered an issue here- you can’t go “backward” in a geometry node tree; that is to say, you can’t randomize placement on instances after the instances have been instanced. (Say that ten times fast! ![]() ) To solve this, I used a hacky approach of setting a unique material to the window frames, converting each island into a reduced number of points, and using Boolean math to remove any instances of two AC units per window frame:
) To solve this, I used a hacky approach of setting a unique material to the window frames, converting each island into a reduced number of points, and using Boolean math to remove any instances of two AC units per window frame:

While this isn’t perhaps the best way to do this, it worked really well. And I’m not sure what the best way is
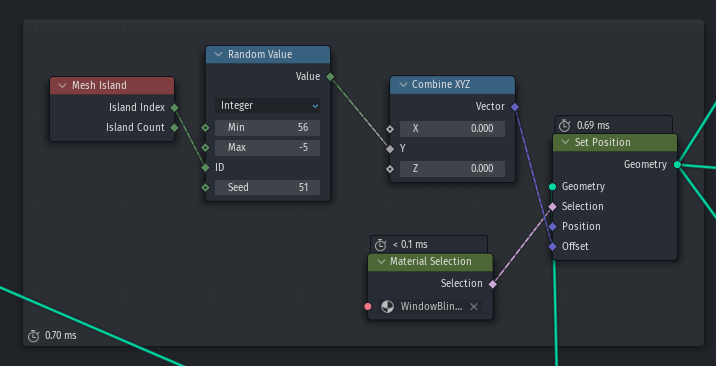
Window blinds randomization
Same as the AC units, I couldn’t naturally randomize this. Fortunately, a Select Material node and a Mesh Island node worked perfectly:
In an earlier screenshot, you can see that the window blinds move above the top of the window this way- I used a simple mesh boolean with a large cube to cut off any visible excess at the top of the building.
Complete geometry nodes tree

Line art
I used the grease pencil line art modifier to add line art. I also added an Edge Split modifier, set to 20 degrees, to increase the amounts of drawn lines to the desired amount. To get all the lines in high quality, I had to render at 17280x9720 and downscale.
Prep for painting
I used cryptomatte to prepare this work for coloring- I separated out each material into a unique matte:
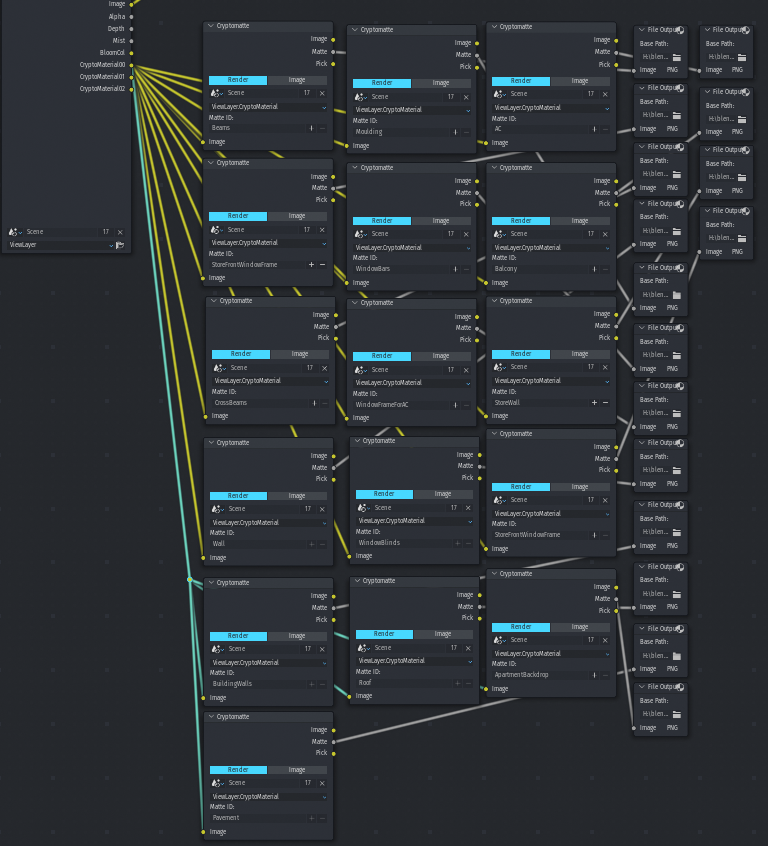
Doing this gave me a bunch of images like this:


Unlike the line art, these didn’t need to be super high resolution (and when I tried rendering with this compositor tree at high resolution, my computer immediately ran out of RAM and crashed)- instead, each of these images is 3840x2160.
I took these images into Affinity Photo and made each of them a mask for a new pixel layer, thus allowing me to paint each material on a unique layer while maintaining sharp boundaries:

You can see in my layers that each layer has a mask.
Painting
I hand-painted each layer, using a quick color fill first and then adding details with watercolor brushes. I then mixed the lines back over the top. Some pixelation is visible if you zoom in:
But even with this, I was still able to get the watercolor look I was going for from a reasonable zoom level.
Post-processing
Once the painting was done, I had this:

I then added in a slight warm Multiply layer, a slight grain overlay, a Curves adjustment, and painted some light effect to get the final result.
Thanks for looking! ![]()