For any issues, please report them on Github or here in the forum.
Happy holidays.
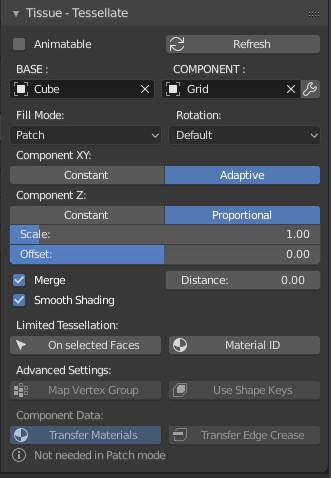
Known issue, currently Tessellate Patch doesn’t support Shape Keys.
Alessandro
[EDIT]
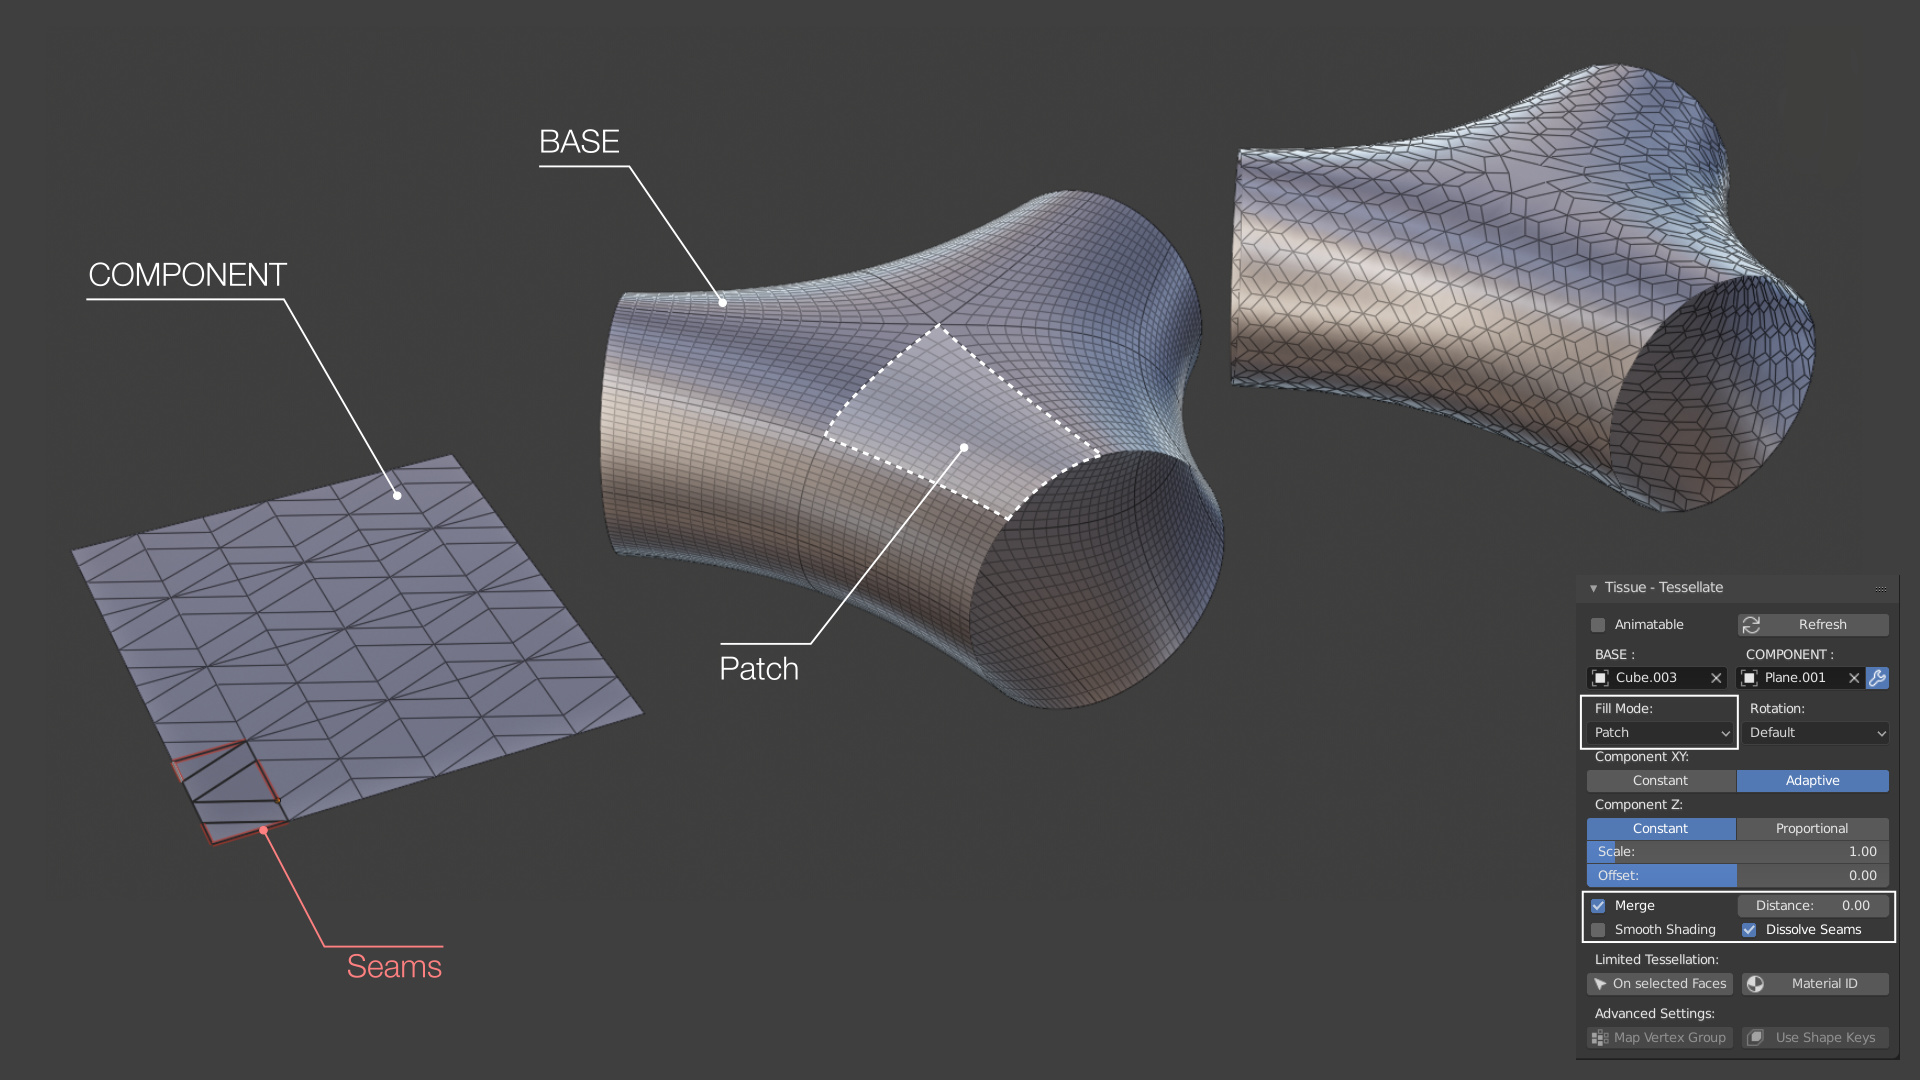
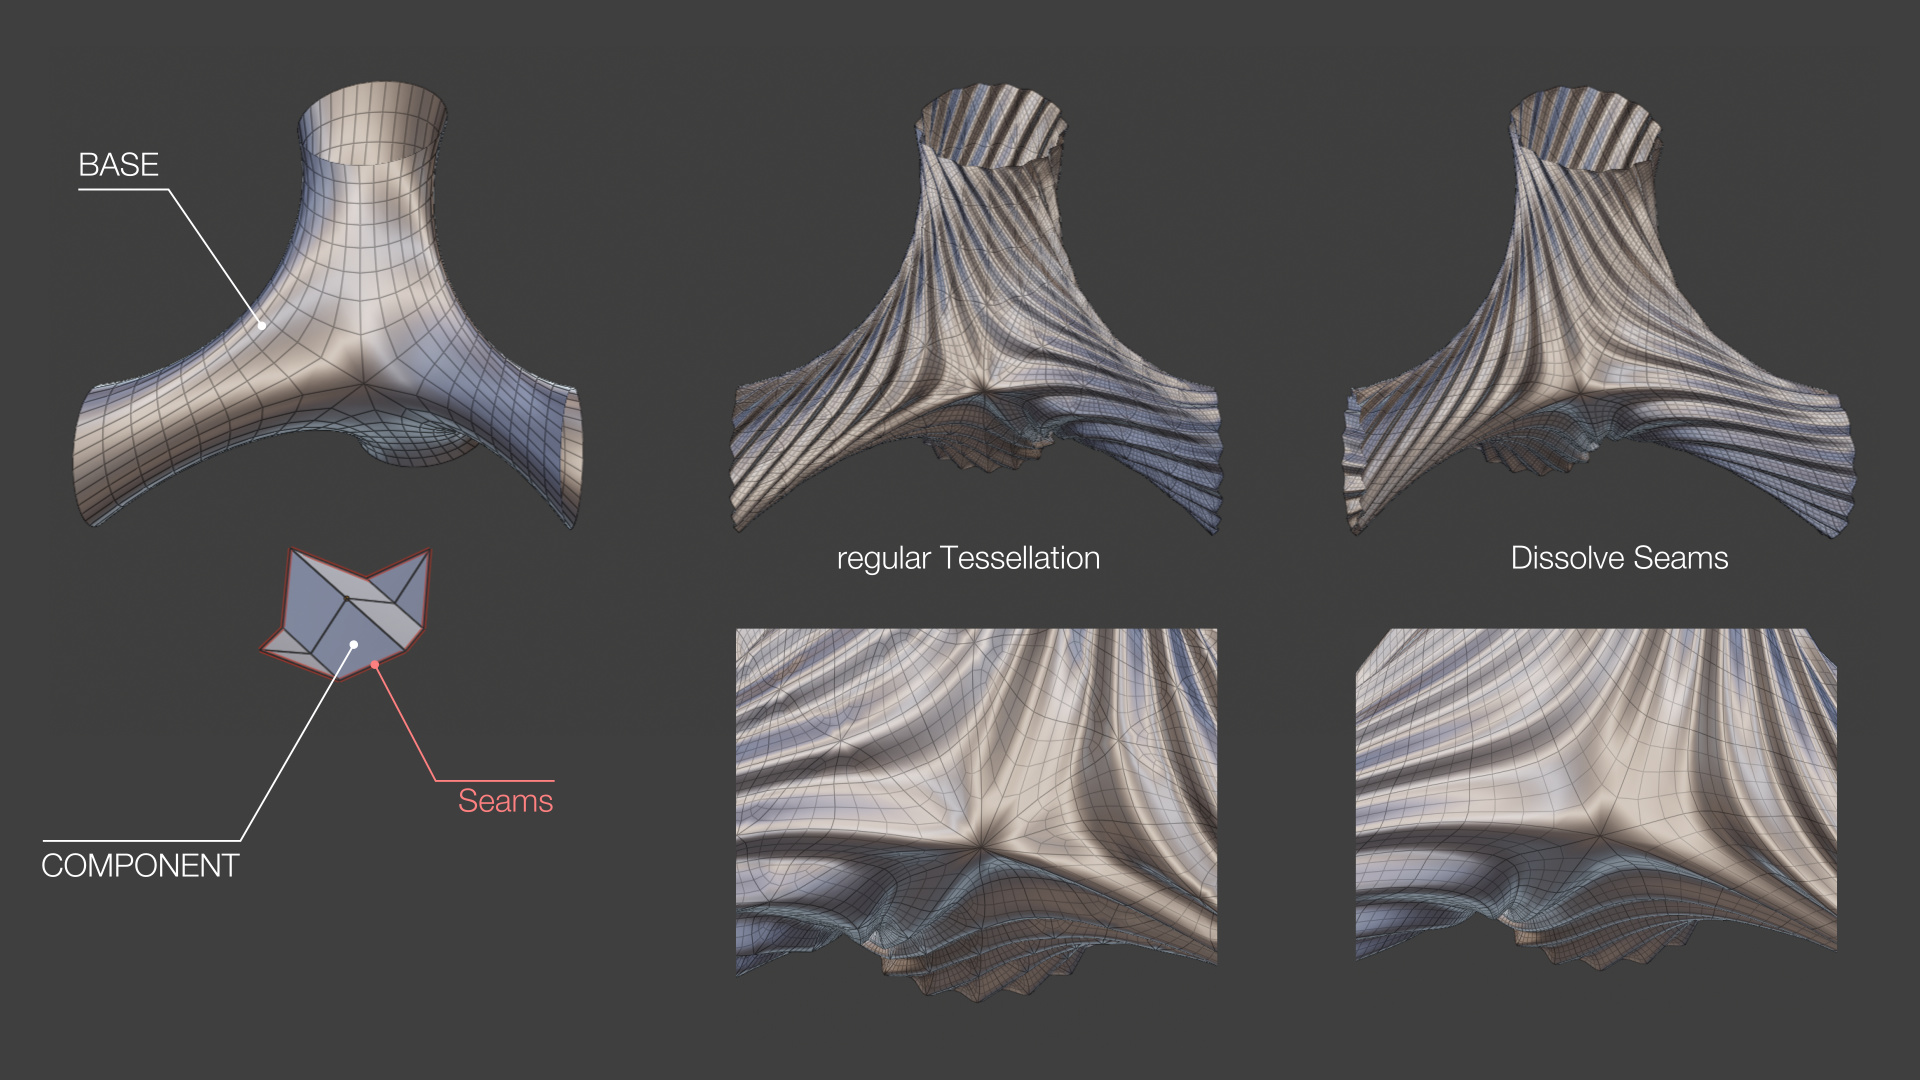
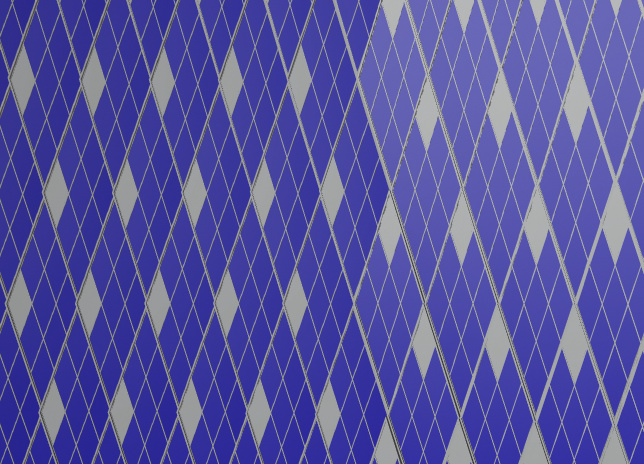
Added Dissolve Seams. Some examples of Dissolve Seams combined with Patch Tessellation. Now is more easy to avoid the grid effect and have nice smooth non orthogonal patterns. I hope that the images make it easy to understand:
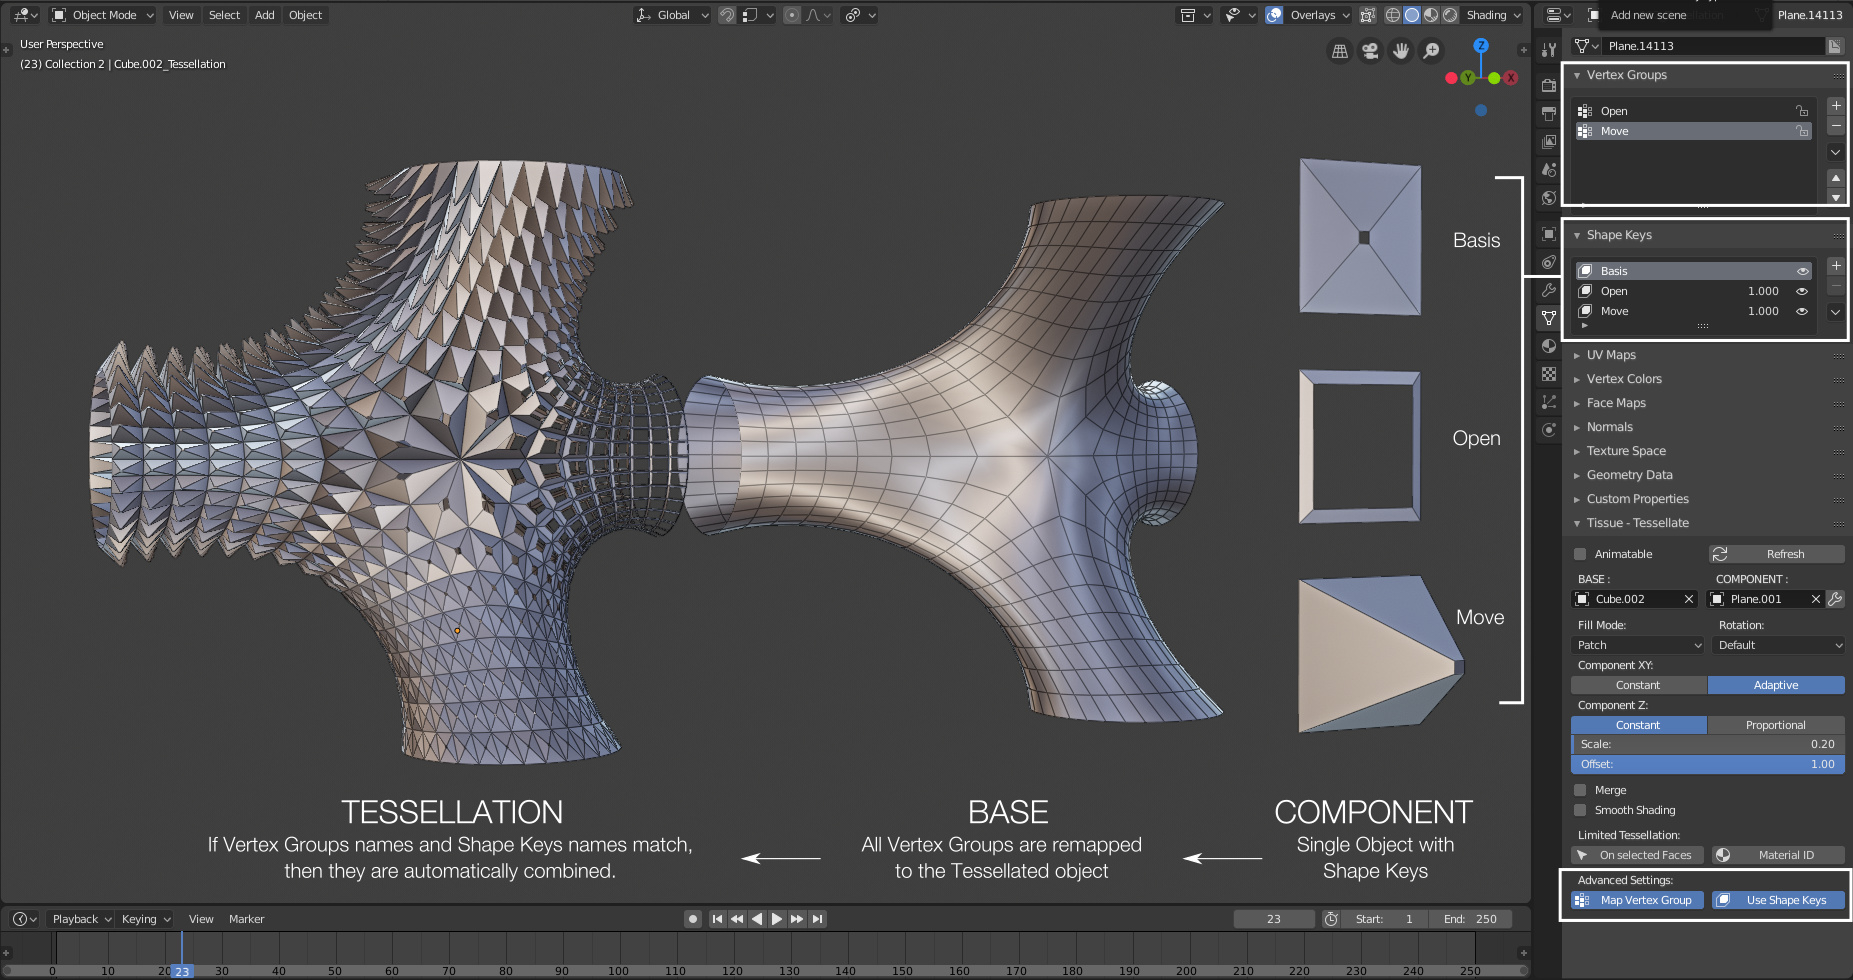
Also some improvements with Vertex Groups and Shape Keys. Now all Vertex Groups and Shape Keys are remapped to the generated geometry. If you use the same name for Base’s Vertex Groups and Component’s Shapoe Keys then they are automatically combined.
I posted this at the fb blender computational design group, but I thought it may be good to share this here as well
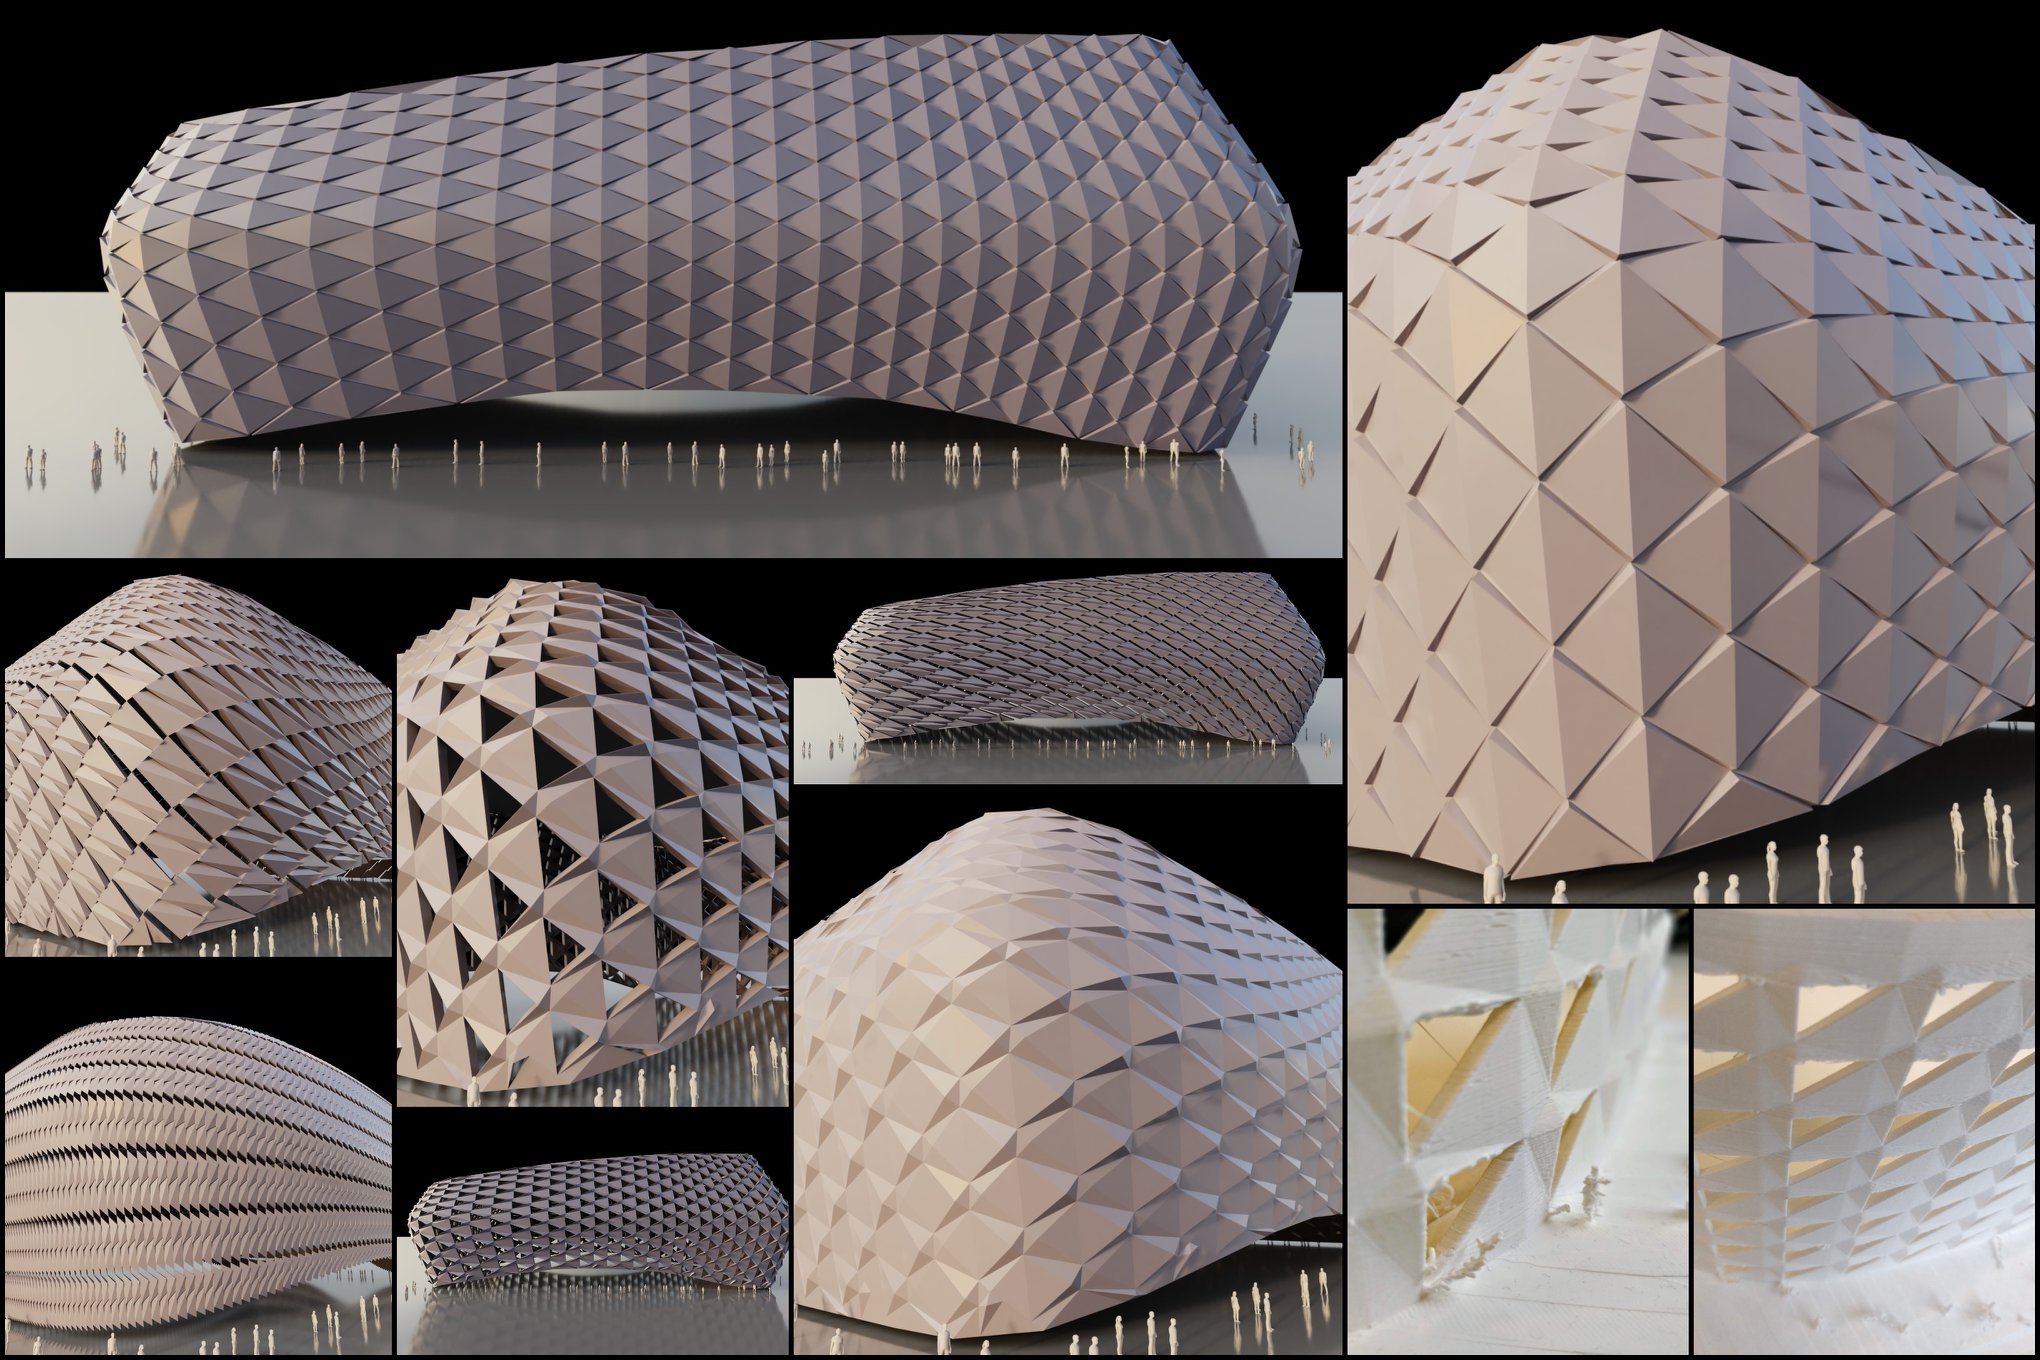
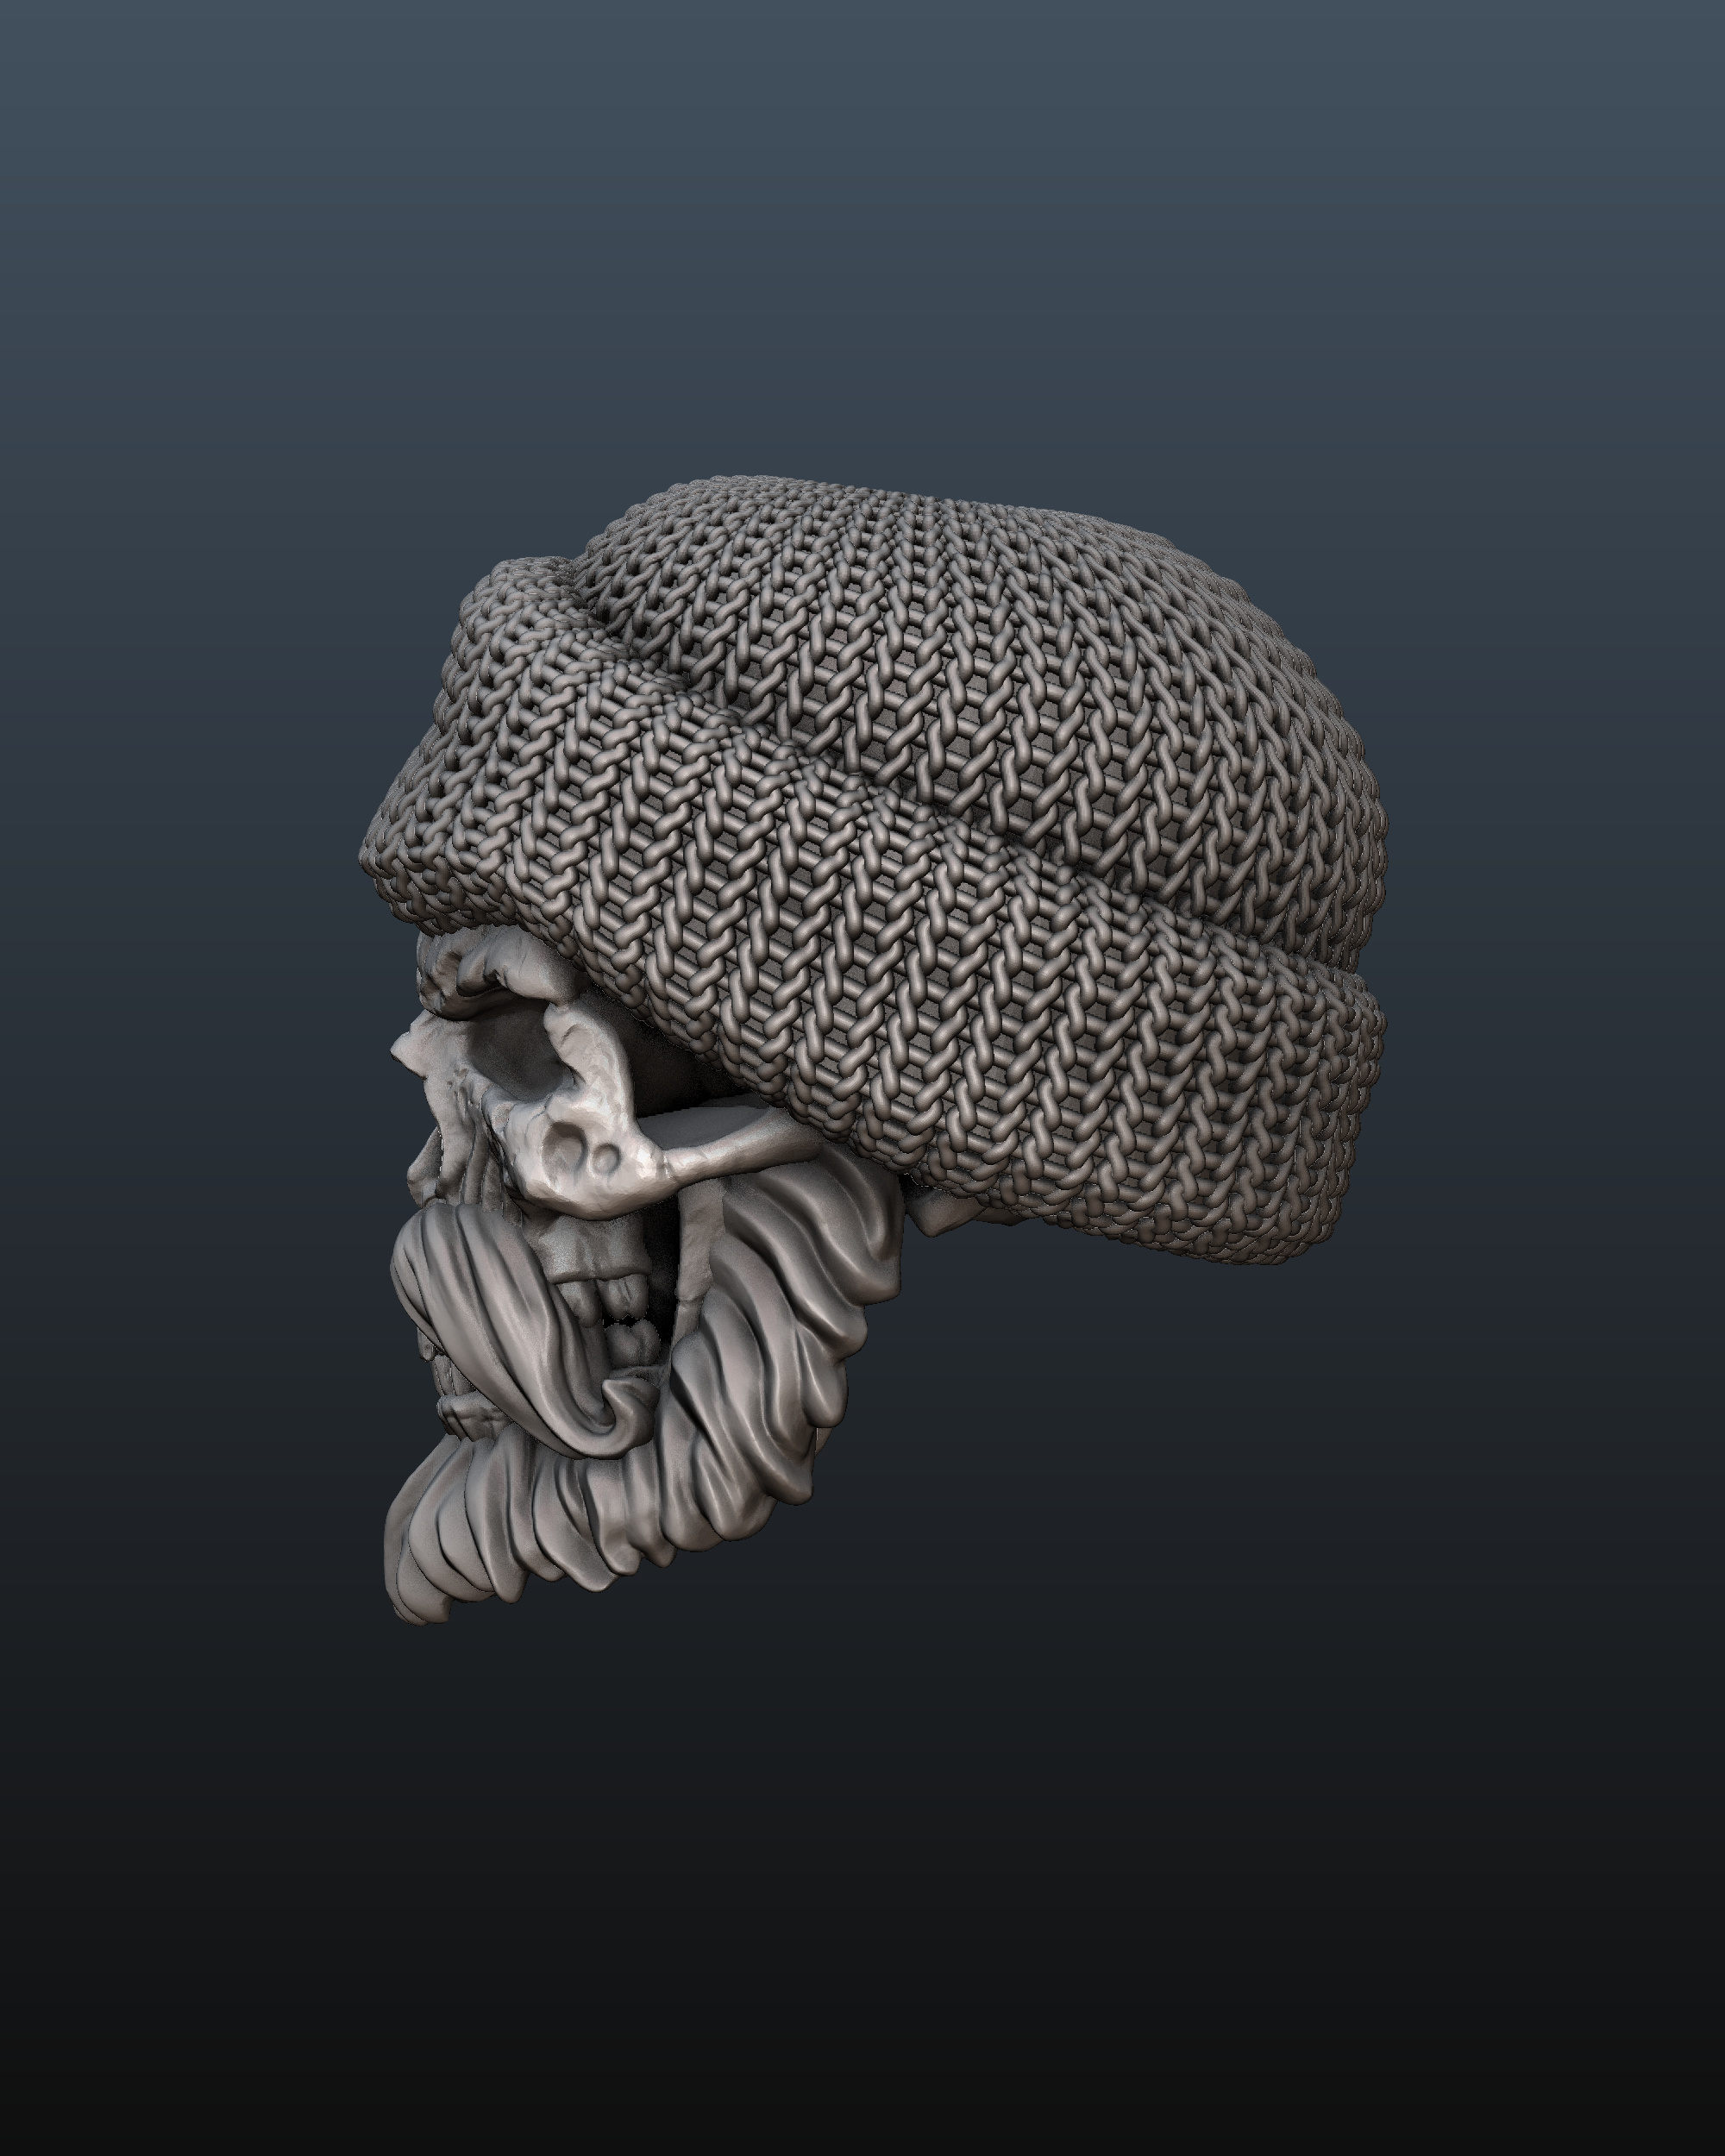
Here are some facade studies done with Tissue for a large building we’re currently investigation in early concept stages, including a bad 3d print. The print is a test printed on ultimaker without generating additional structural support to test whether it would work.
The beauty of tesselate is the creative speed at which we can iterate initial ideas, whilst remaining more focused on design rather than creating a script/gh definition to do something similar.
The biggest challenge has been to make sure all the panels go in the direction that I want, so I had to carefully unwrap the model and then used the UV coordinates to rotation alignment.
I’m quite excited about all the work @alessandrozompa is doing for the 2.8 update!
I’ve installed it from tissue-master.zip and do not see the Tesselate panel anywhere, only Dual Mesh and weight transfer option. Blender is 2.79 and the addon is activated in Preferences.
Hi @DeckardX08,
In your version of Tissue it should be splitted in two panels, one under Tools and the other under Create.
I suggest you to install the latest development version for Blender 2.79:
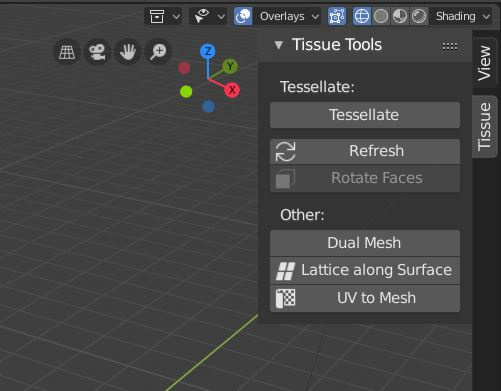
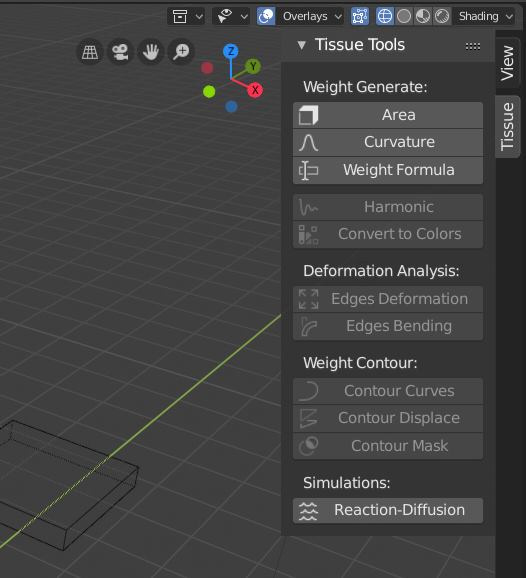
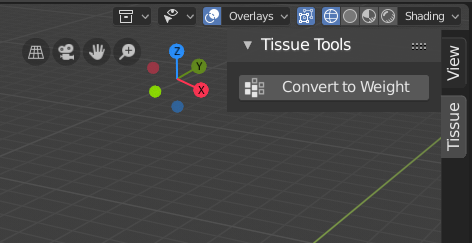
In this version everything is under Tools (you can see the weight tools only in Weight Paint mode)
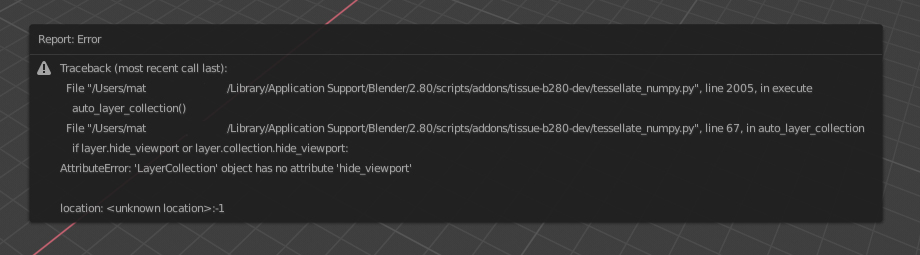
Hi Alessandro. Wow, awesome add-on for Blender. Installed Tissue for Blend 2.8…and I’m getting an error message when trying to tesselate. Using a Mac, OS 10.11.6
Selecting the component first…then base object…both selected one after the other…“tesselate”, then “ok”…error pops up.
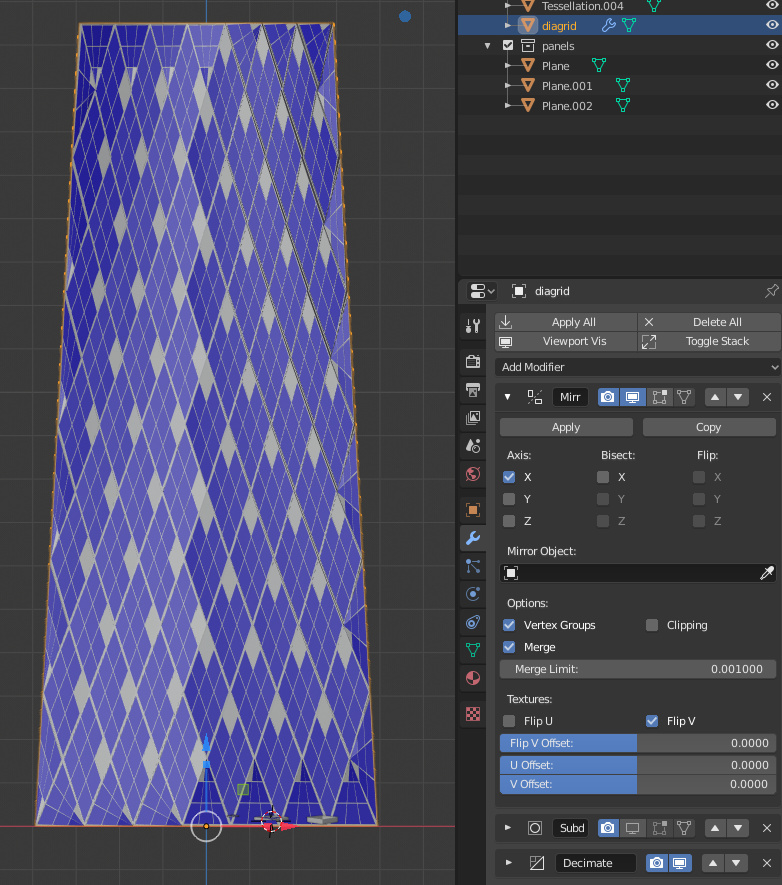
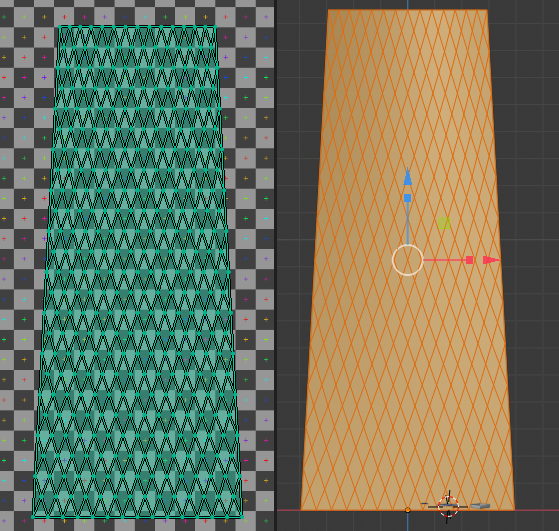
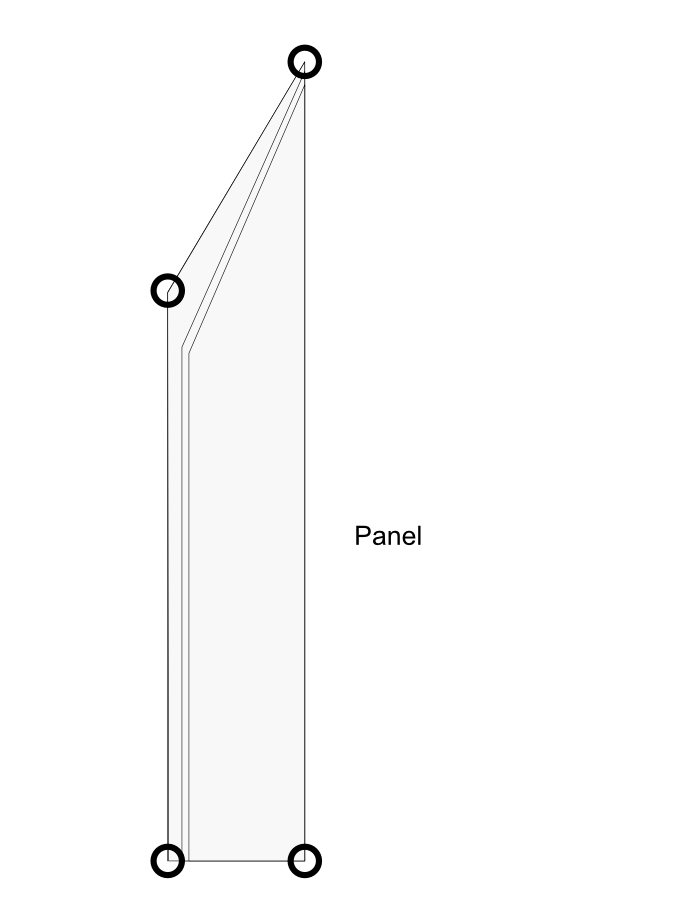
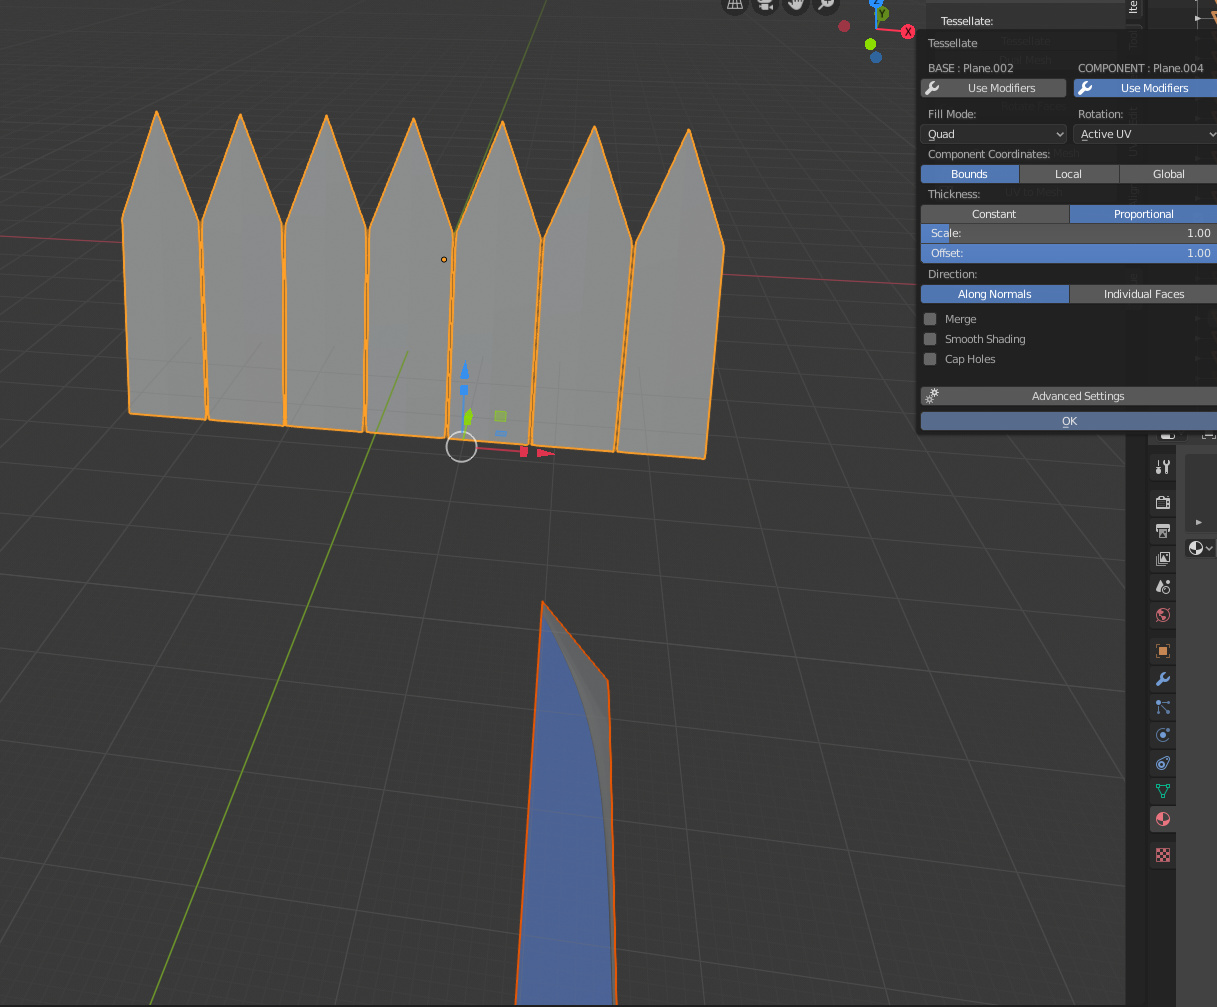
Hi, i am encountering an issue with tissue (nice rhyme actually ). When using the modifier stack option, with UVs, the mirrored section is not picking up the correct UV orientations. I’ve tested thecking the flip U, flip V, and both parameters in the mirror modifier, but I still can’t get the panels to face the same direction.
It’s a a bit more involded, as each panel is indpendent and has a seperate depth. But, by rotating at 45 degress, it works fine.
@alessandrozompa I do have a request. When using shapekeys and vertex groups as per your nice tutorial on youtube https://www.youtube.com/watch?v=XYbD9KaLT3Y, would it be possible to maintain a specified shapekeys vertex group and value whne refreshing the tesselation?
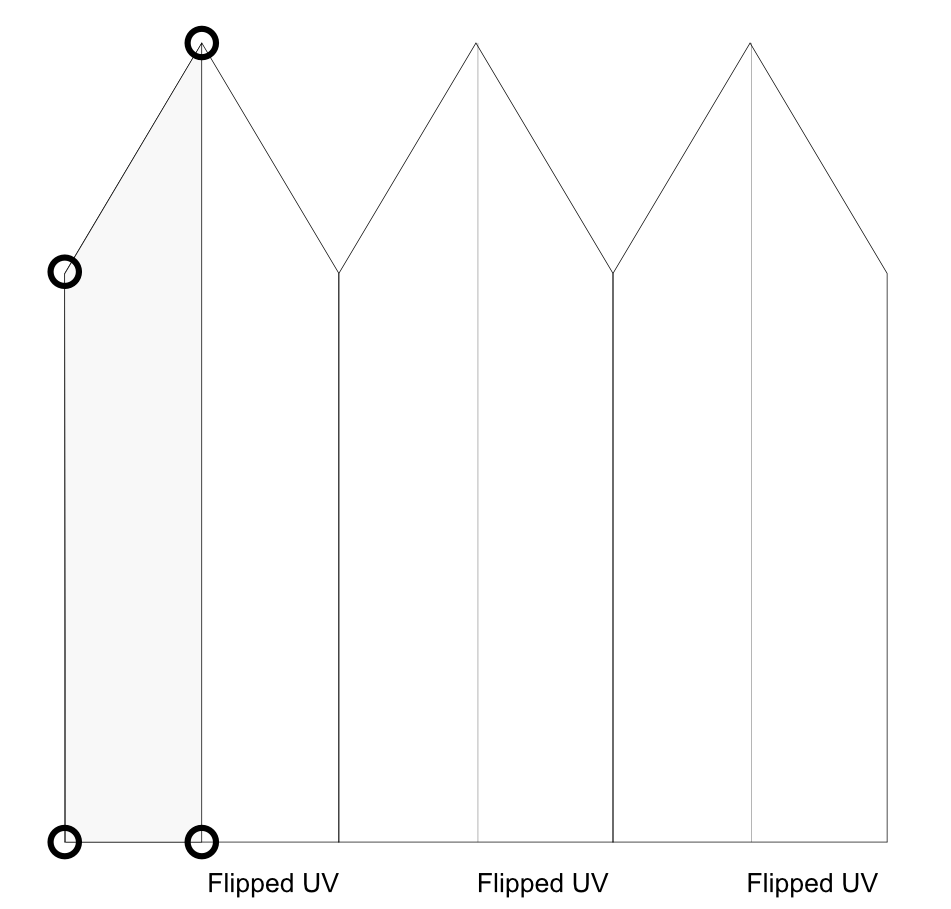
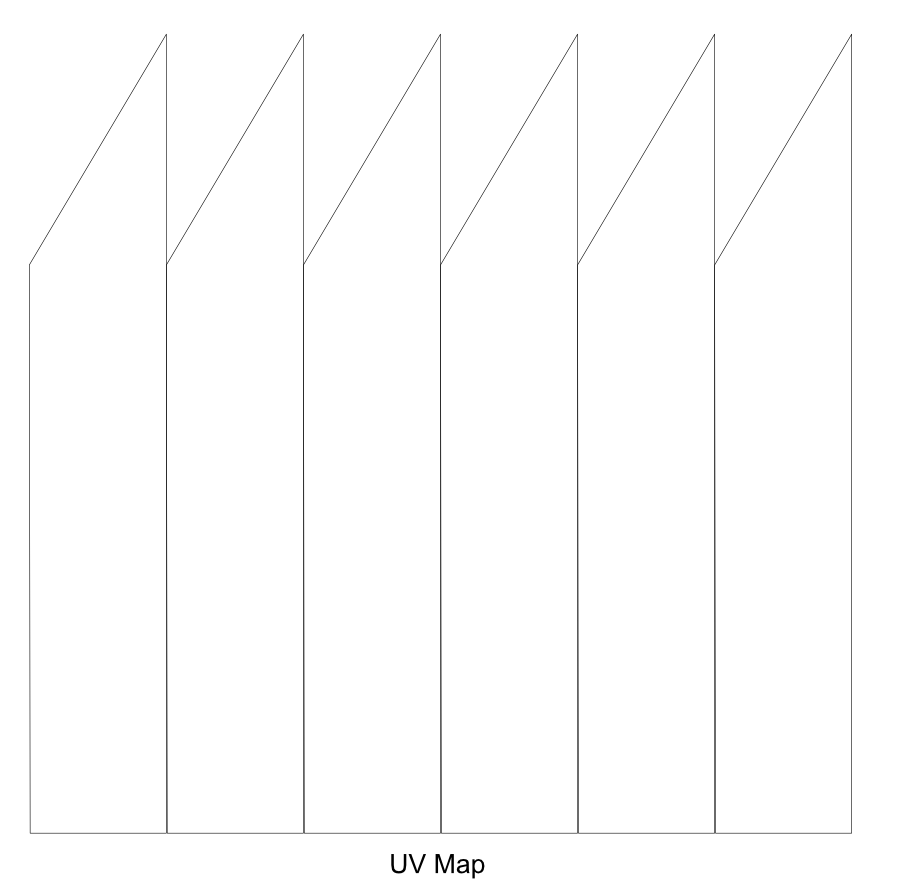
Sorry, I totally missed those posts. Regardin the UV try to keep them square instead of diamond, otherwise it will be tricky to detect the correct direction.
It should fit the orientation that you want for your component doesn’t really have nothing to do with the shape on the surface (in your case diamonds). It’s roughtly used for understanding which direction should be the U and which one should be the V.
I usually do that: reset UV for one random face, and then follow active quad for all the others.
Regarding the panel that you aren’t able to tessellate with Tissue, what exactly is the problem? Flipping the UV? Can’t you just mirror the component instead?