I find myself stuck with a mistery that is making me loose hours of work without any progress whatsoever figuring it out.
I’m making a modular environment and I’m making some trimsheet textures. In this specific case let’s take a door frame made of three pieces (two vertical, one horizontal on top. Everyting is cool and neat until I take a vertical face and rotate it in the UVs to match it to the horizontal trimsheet, and that’s when the normal map appears inverted in my scene. The trims were baked with substance painter, the modelling and unwrapping is done in Blender, the final result needs to go to Unreal. Funny thing, if I flip the face normal it appears correct (but then I have a flipped face obviously).
I don’t understand why this is happening nor how to fix it, I tried pretty much everything that came to my mind. If I rotate the UV island to be vertical the normals appear correct, but then it doesn’t match the trimsheet anymore.
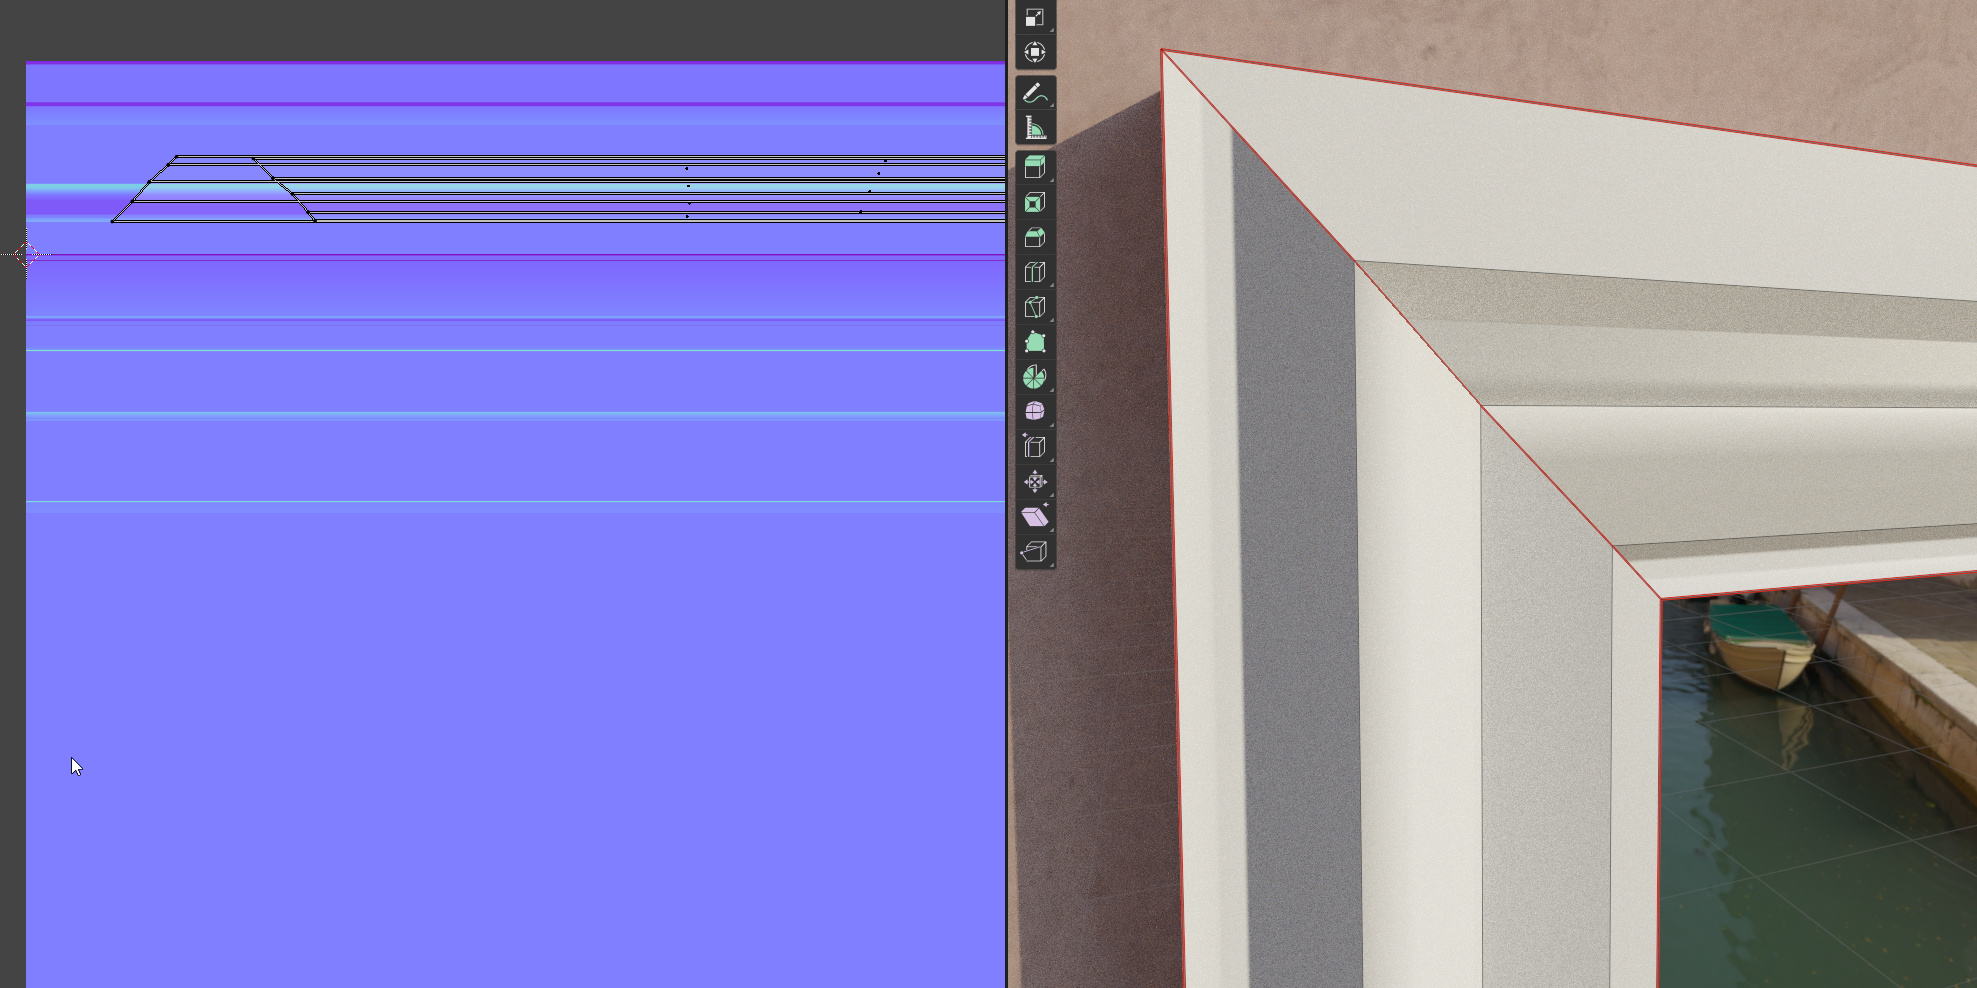
Here’s a pic to describe the problem:
Here you can see the UVs of the frame on the left (they are overlapped to match) and the actual result on the right. The seam is in corner and it’s evident that the normals don’t match. This happens in Blender, but in Unreal I get the same result.
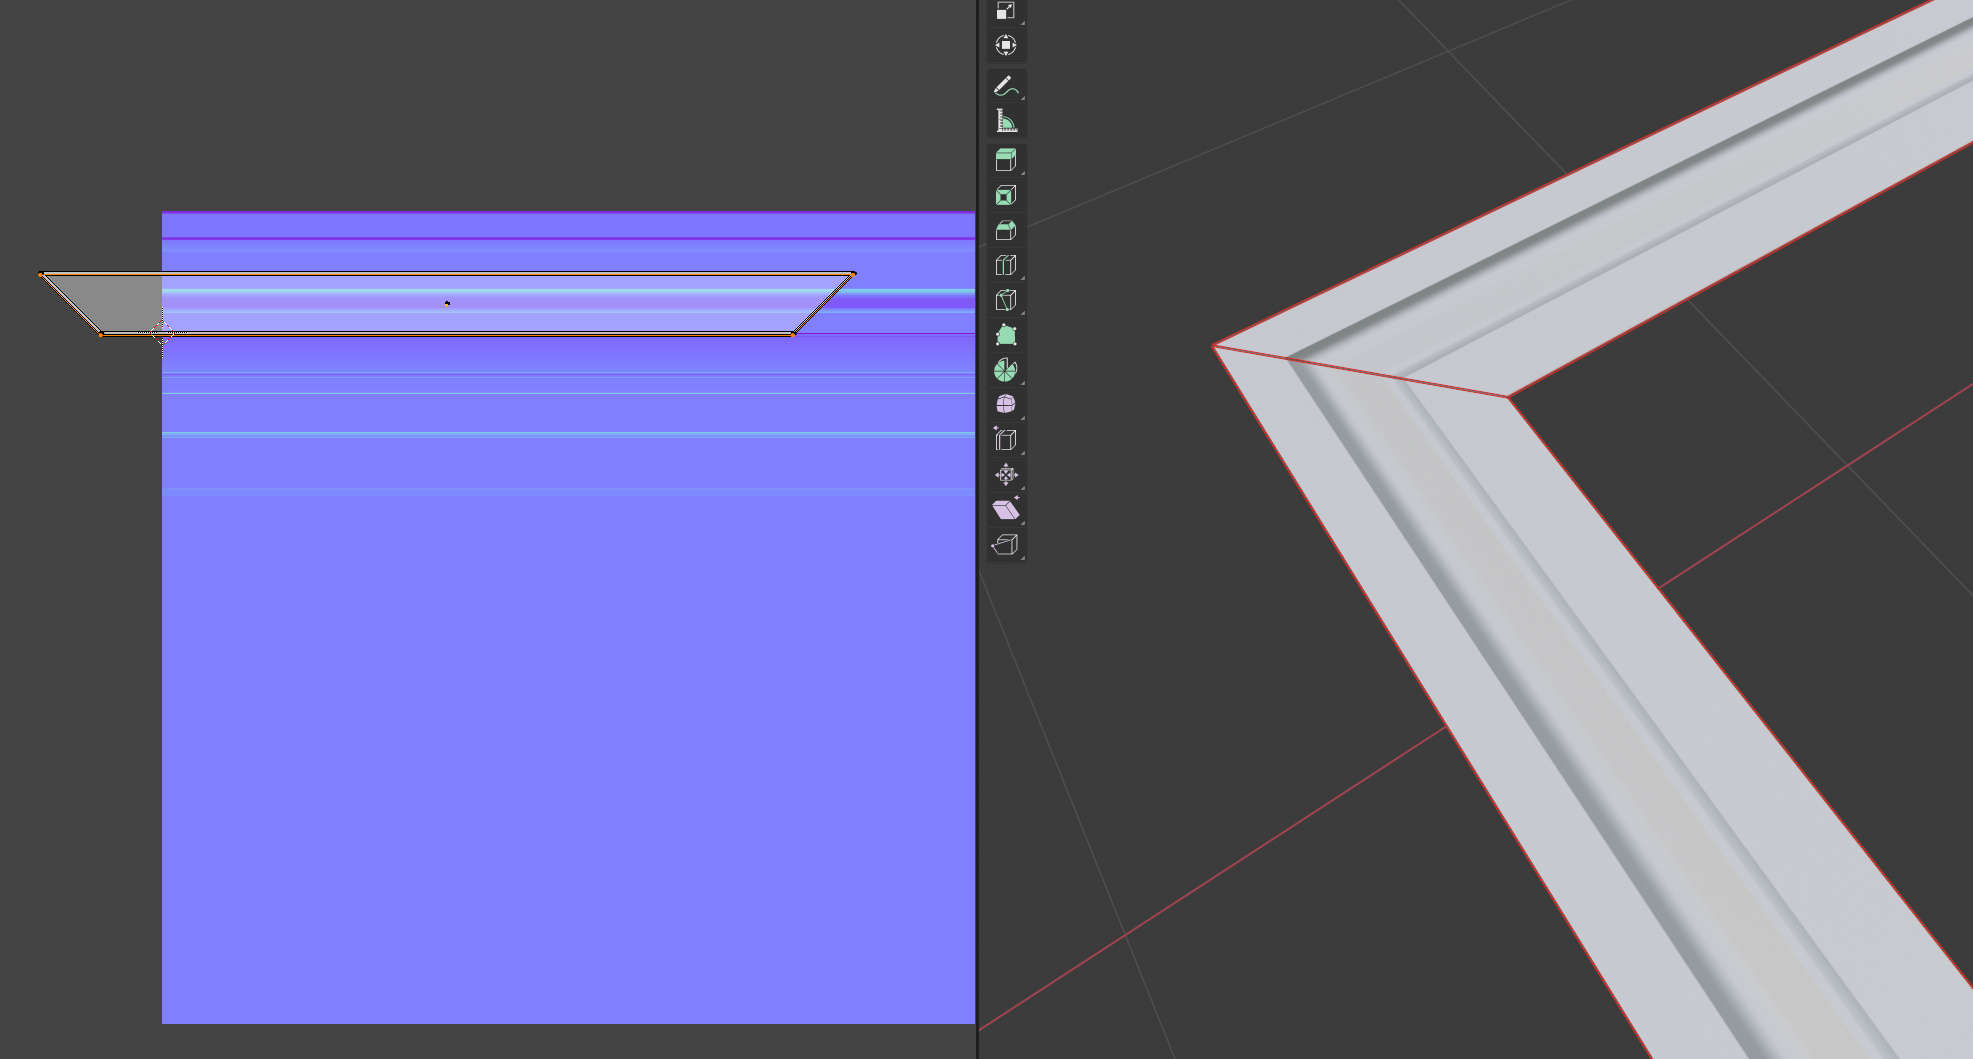
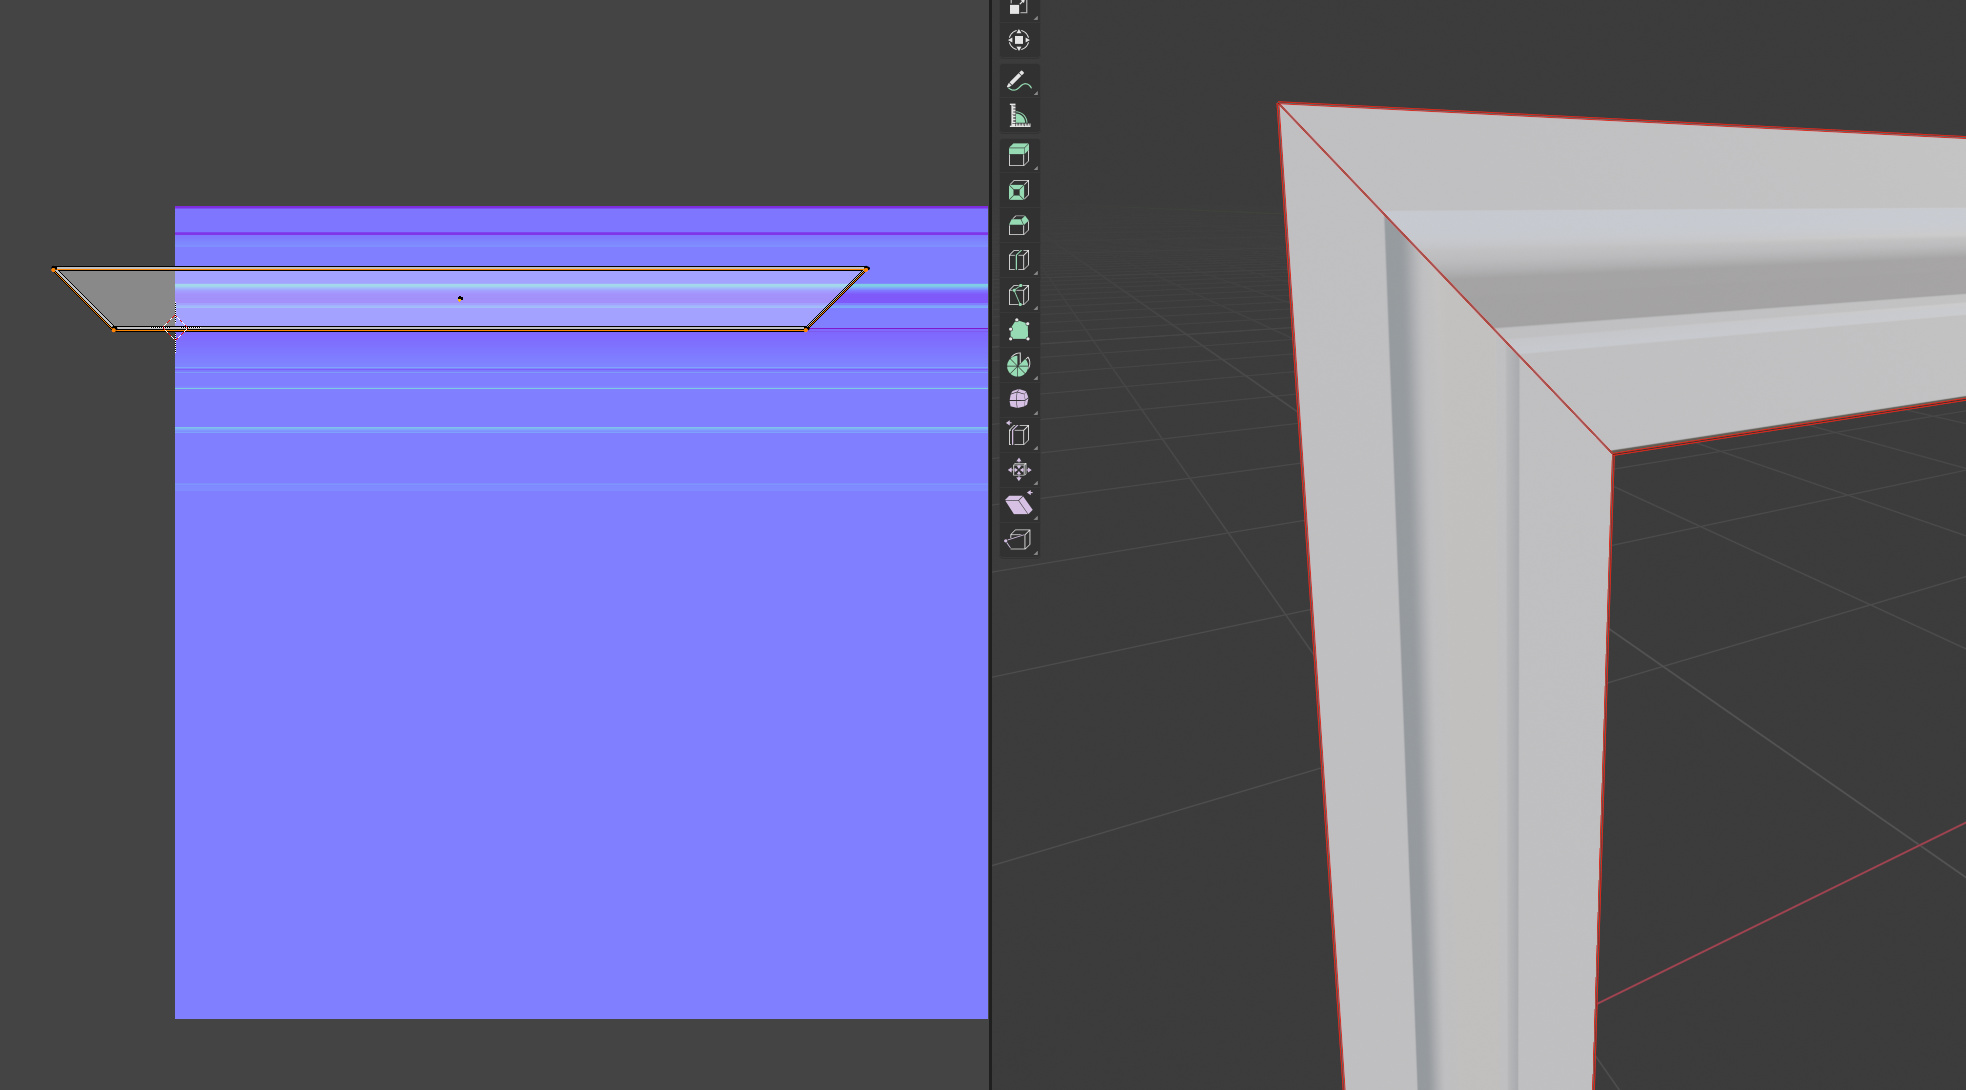
I also tried with a new geometry and this is the result:
Can we agree this doesn’t make any sense? Or am I missing something?
To be clear: there are no flipped normals, I also recalculated them multiple times, no split normals or custom normals of any kind, the normal map was baked for DirectX but doing it for OpenGL didn’t change anything, and as far as I know Painter bakes in Mikkt, in the material nothing is going on (I can confirm that because in Unreal I only plugged the normal map in the normal input at it gives the same result) and the color space is correct (no sRGB). The geometry is not the problem since as I showed I tried with a plane where I just insetted the only face it had and deleted the center. Maybe it’s something with Blender? I couldn’t try in other softwares like max or maya since I don’t own a license.
If you read all of that thank you, finding someone with more experience that can help me figure out the problem is the only card I’ve left.
You cannot rotate UV on a tangent space normal map. The “tangent” that is used to determine the space, that is used to interpret how colors map to directions, is determined from the UV map. When you rotate the UV, you’re telling it to rotate all the directions it’s pointing as well. (Same problems with using a mapping node to rotate, btw.)
Let’s give an example. Let’s say you have a default plane, and you give it a normal map that’s all, say, 0.8,0.5,0.8-- a rough number chosen to be about a 45 degree rotation from the normal, toward the tangent. What’s the tangent? It is the direction in which U (from UV) increases. So that normal map acts to rotate our default plane in the world Y axis by about 45 degrees.
But what happens when we rotate our plane’s UV by 90 degrees? Now its tangent points 90 degrees off from where it did before, and now that normal map acts to rotate our default plane in the world X axis by about 45 degrees. Just by rotating the UV, using the exact same normal map.
Note also that mirroring a UV map also changes the normals, because it flips the direction of increasing U-- the tangent.
It’s hard to judge this stuff from renders, because it’s subtle-- we’re likely to notice that something is normal mapped, but we’re unlikely to notice that it’s wrong outside of certain carefully designed tests. Because of that, it’s smart to work from a strong theoretical understanding.
That was exactly my fear! At first I thought about that, but then I thought it couldn’t have been since the normal map is later translated to world space, and the UV direction shouldn’t matter. But you say that’s actually the problem? And if that’s it, then I guess there’s no way to use an horizontal trim with a vertical face? I always saw mostly horizontal trimsheets, it sounds strange that they were never used on vertical planes.
I can’t say that’s what the problem is in this case. I know enough to be able to say, “When you rotate UVs and it screws up your normals, well, that’s not weird, that’s expected.” I don’t know enough to be able to tell you what you can get away with. There are things you can get away with.
Note that a lot of the time, it doesn’t really matter, because it’s subtle. Your normals don’t have to be physically accurate to give people the right impression. CG-- especially game CG-- is about verisimilitude, not reality.
I just made a test to see and I believe that’s exactly what’s happening for me. I guess I’ll have to open a new thread about vertical and horizontal trimsheets now
It’s true, there’a lot you can get away with in CG, but since these faces should be continuous the difference is quite noticeable. Besides, I wouldn’t be able to sleep at night knowing I just left that there I’ll have to find a way, I’ll fit a vertical trim in there if there’s no other solution.

 I’ll have to find a way, I’ll fit a vertical trim in there if there’s no other solution.