šŸš€ Turbo Tools V4 - including TURBO RENDER for MUCH FASTER Cycles renders!

yes, well two things. Itā€™s not tested with e-cycles, so try using normal cycles. Second, make sure the turbo tools render still image has been assigned the f12 shortcut. You can check by clicking the render menu. It should say f12 to the right of it. If not then another addon, probably e-cycles has beaten it to the draw. You can click it from the menu, or you can right click it and assign it the f`12 shortcut key.

Also make sure youā€™re using a blender version which is compatible with the addon. There are two zip files, oneā€™s for 3.0.1 and the other is for 3.1.0 (it says at the end of the zip file).

thereā€™s no need to manually set up a compositor, itā€™s done for you automatically. So it sounds like one of the issue above.

ps, itā€™s better to contact me via the support email. I donā€™t get notification on here, so Iā€™ll get back to you quicker on there.

Thanks, is there a way to get your beta build for testing?
(I have not problem buying, just curious testing)

28 Match 2022 :: 11:51pm

Just bought the add-on because I love me some 960 increase in render speed !
Jokes aside, I bought it because I need a clean volume renderer solution.
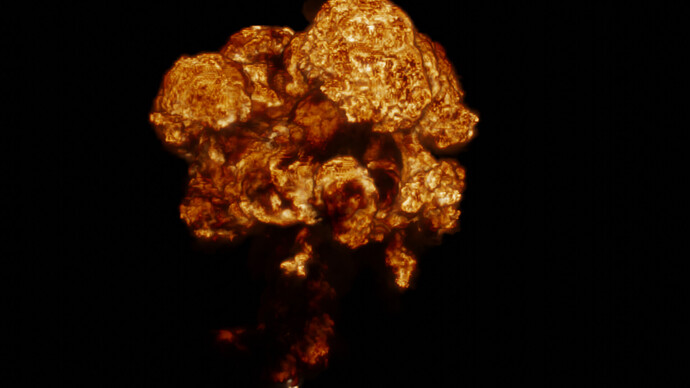
Hence, first thing I did was to test it out for explosions !

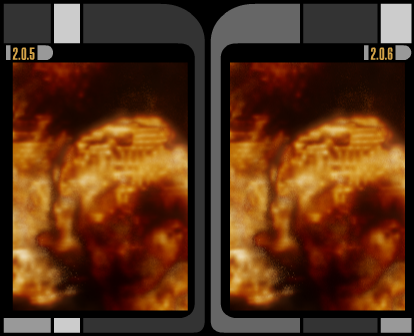
This is the overall:

This is the zoom in unto the ā€œproblemā€ areas:

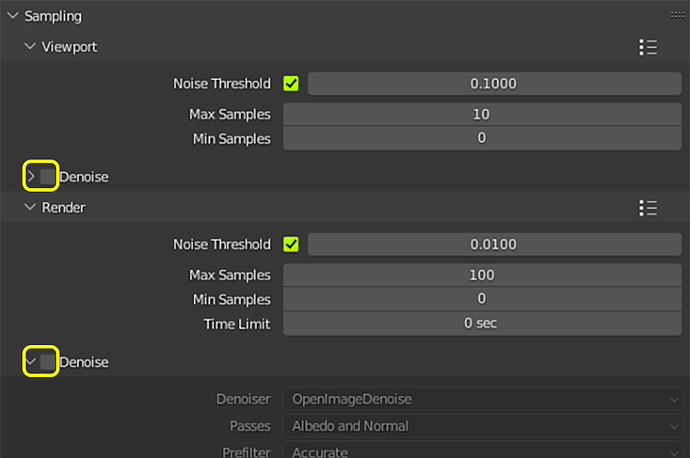
These are the settings I used:
sssss

Render Samples is at 100.
[But honestly though, I donā€™t buy this add-on just so that I have to render at 100 samples, I will go lower if this add-on holds up, as low as 10 samples if I have to.]

I only have ONE ONE ONE question:
Do I have to explicitly uncheck the Denoise checkboxes when I enable Turbo Render like what I am manually doing now to prevent ā€œdouble denoisingā€, or I can just safely ignore it and assume Turbo Render will turn it off internally ?

Hi, thanks for your purchase. You can leave the denoisers checked, turbo render will turn them off automatically. Regarding the volume render, there was a bug introduced in one of the recent updates. This is fixed in todays update, which you should have just received an email about :+1:

2 Likes

First of all thank you for the fast respond, considering I just purchased in less then one hour ago, I think I am using the latest ? Turbo boost v2.0.5 Blender 3.0.1.


What does the Render Preset do ? Should I Poke it ? Kick it ? Lick it ? What does it do ? ;p

1 Like

no the latest is 2.0.6. The volume bug was first brought to my attention in 2.0.5. Sorry about that.

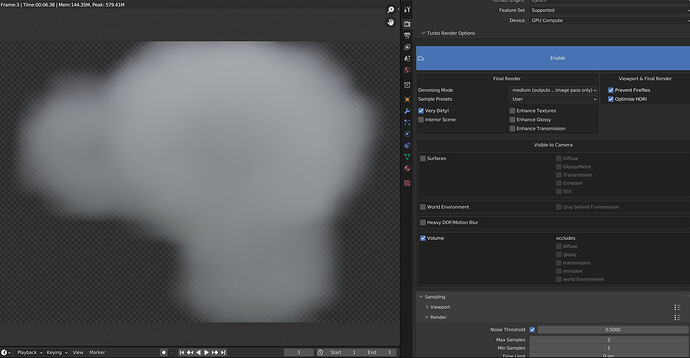
I think youā€™ll be happy with the volumes in 2.0.6. Check out the below test I did last night on my old gtx1070. 6.3 seconds! Thatā€™s with indirect volumes enabled in the light path settings too!

Oh regarding the sample presets, it was completely relying on noise levels for minimal animation artefacts. These have actually been updated now though as I thought it would be better to optimise for still images, the animation guys are likely to already know what theyā€™re doing.

It doesnā€™t change any turbo render settings, it overrides the samples at render time.

Thanks, I will download it now.
Okā€¦downloaded itā€¦testing it now with the same file:
eeeeee
I will chillax and look at the difference later on, I am hungry from all that explosions !

ā€œIt doesnā€™t change any turbo render settings, it overrides the samples at render time.ā€
Okā€¦so I am reading this and my mind is translating this into ā€œDONā€™T TOUCH THE SAMPLE PRESETS! It only changes the sample count ! Donā€™t TOUCH IT !!!ā€

May I suggest instead of labeling it with poetic text like this:
Crap
Medium
High
Ultra
Insane

Can the add-on just attach actual useful numbers next to it ?:
Crap :: 12
Medium :: 64
High :: 324
Ultra :: 3600
Insane :: 14400

Thanks, thatā€™s a great suggestion. Here are the presets values for now. I did spend quite an extensive amount of time testing for the best combination of speed and quality, but Iā€™d love to hear any suggestion you might have if you feel they donā€™t suit your particular needs. Drop me an email to support whenever you like and we can discuss.

Cycles_render_presets = {  
                    'Crap':{'Max_Samples':12,'Min_Samples' : 1, 'Noise_Threshold' : 0.5,'Time_Limit' : 0,'Use_Adaptive' : True},
                    'Medium':{'Max_Samples':64,'Min_Samples' : 1, 'Noise_Threshold' : 0.3,'Time_Limit' : 0, 'Use_Adaptive' : True},
                    'High':{'Max_Samples':324,'Min_Samples' : 1, 'Noise_Threshold' : 0.1,'Time_Limit' : 0, 'Use_Adaptive' : True},
                    'Ultra':{'Max_Samples':3600,'Min_Samples' : 1, 'Noise_Threshold' : 0.05,'Time_Limit' : 0, 'Use_Adaptive' : True},
                    'Insane':{'Max_Samples':14400,'Min_Samples' : 1, 'Noise_Threshold' : 0.01,'Time_Limit' : 0, 'Use_Adaptive' : True},
                 }

Cycles_render_presets_interior = {  
                    'Crap':{'Max_Samples':12,'Min_Samples' : 4, 'Noise_Threshold' : 0.5,'Time_Limit' : 0,'Use_Adaptive' : True},
                    'Medium':{'Max_Samples':64,'Min_Samples' : 16, 'Noise_Threshold' : 0.3,'Time_Limit' : 0, 'Use_Adaptive' : True},
                    'High':{'Max_Samples':324,'Min_Samples' : 128, 'Noise_Threshold' : 0.1,'Time_Limit' : 0, 'Use_Adaptive' : True},                    
                    'Ultra':{'Max_Samples':3600,'Min_Samples' : 256, 'Noise_Threshold' : 0.5,'Time_Limit' : 0, 'Use_Adaptive' : True},
                    'Insane':{'Max_Samples':14400,'Min_Samples' : 256, 'Noise_Threshold' : 0.01,'Time_Limit' : 0, 'Use_Adaptive' : True},
                 }```

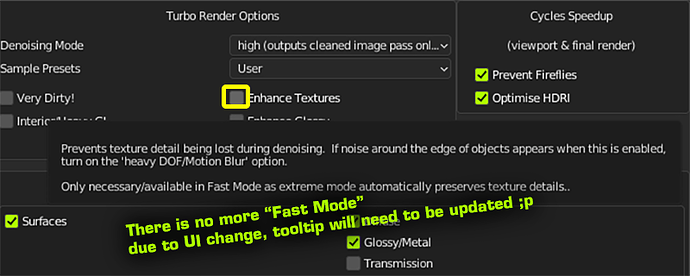
Just a tiny tiny heads up to an already a miracle of an add-on ;p

Darn it, thereā€™s always one tooltip that slips through the net. Thanks for letting me know :+1:

Just trying to make sure I know what I am saying when I share your add-ons with my tiny audience, I usually make straight to the point, short no nonsense videos like this that promote useful add-ons.
If I reached a point where I actually feel competent in your add-on to show its full glory, I will talk about it in the same manner as what I have done for this add-on:

1 Like

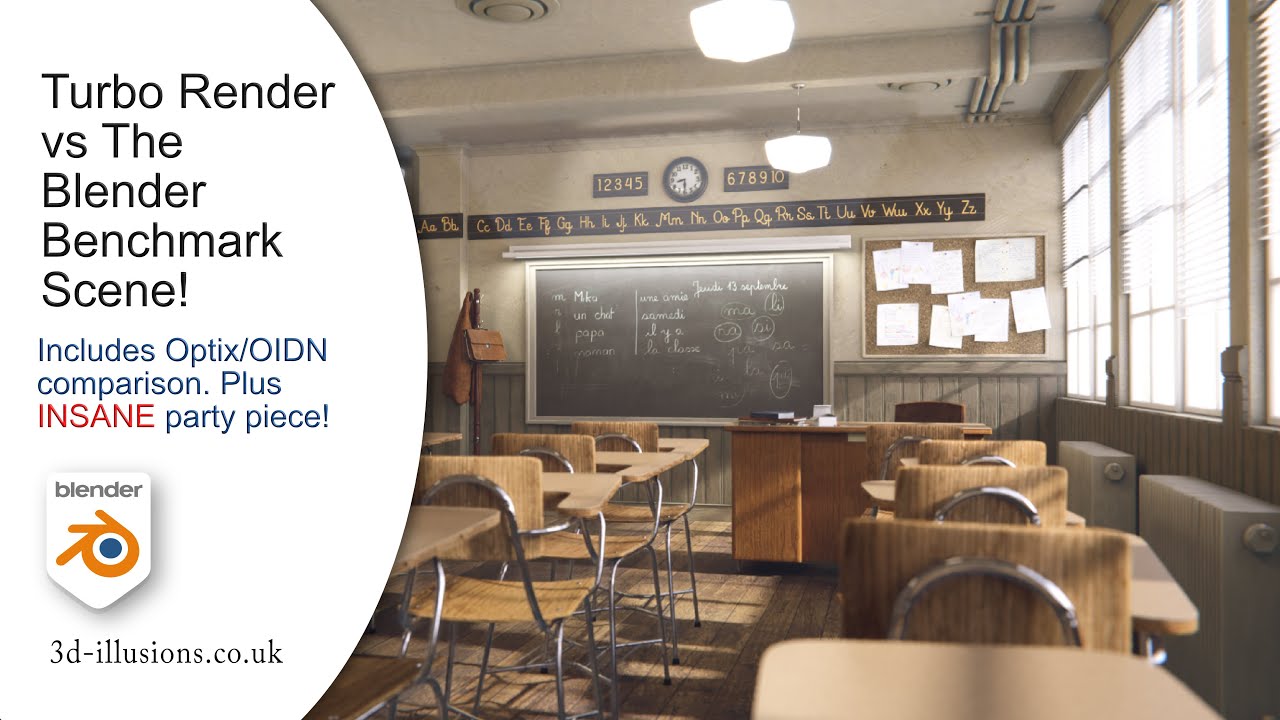
Ah cool, very professional video. I like it. If youā€™d like to see a full tour of the other features youā€™ve got with the addon, such as comp caching, real time compositing etc. Check out this video. Thereā€™s an affiliate application link on my youtube about page too if you want to make a few dollars from your video.

Oh, and itā€™s better to contact me directly at the support email on your receipt. I only check here once in a blue moon.

oh and at very low samples, make sure you turn on very dirty.

Writing an impromptu guide for myself to see if I understand what is going on using plain stupid level English.

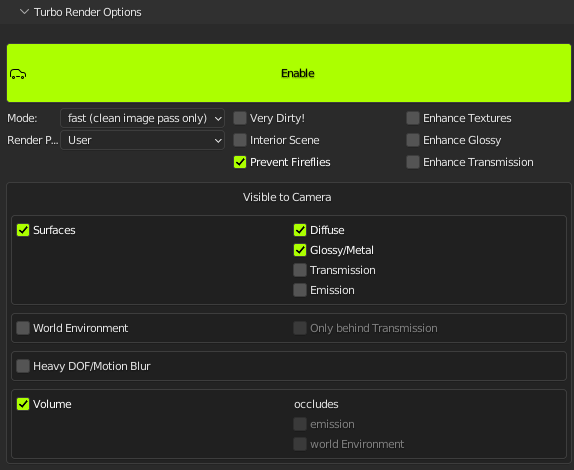
Turn on Enable.

Denoising Mode: High for Normal Render, Ultra if you will be doing composition, ignore the restā€¦too much drama, ha ha ha
Sample Presets: Donā€™t Touch it !

Very Dirty: Check this if your image still looks noisy [Low Sample?]
Interior/Heavy GI: Check this for voodoo magic if rendering interior. [Low Sample ?]
Enhance Textures: Check this to enhance detail [Low Sample ?]
Enhnce Glossy: Check this to enhance Gloss [Low Sample ?]
Enhnce Transmission: Check this to enhance glass [Low Sample ?]

Soā€¦now the question isā€¦because life is complicated and all ;p
Is there a number of samples that would make us not have to ā€œthinkā€ about whether
to check these checkboxes or not ?
Like for example if add-on detects Sampling->Render->Max Samples > 100, all five check boxes disappear to make life easier.
Or there is a button that says ā€œLife is complicated, make this one easierā€ and it will set the bare minimum settings that will, through your already established experiments, make those checkboxes disappear ;p
Why do I suggest this ?
because you have already done the work !
ā€œI did spend quite an extensive amount of time testing for the best combination of speed and qualityā€
Use this research of yours to its ultimate conclusion ! he he he Honor your time and research ;p

I will be watching your 19 minutes video soon.
In any case, this add-on of yours is a dream come true for many as it is, thank you.

1 Like

Untitled-1
And as for the world Environment option just below itā€¦I think if volume were ever to be checkedā€¦then it is almost certainly always going to be onā€¦right ? I am so stupid sorry.

Thanks, yes the samples settings are there for the average user to ensure they can get the quality they need without the necessary knowledge of how samples work, noise levels, min samples vs max samples etc. Although even an advanced user may find the preset samples settings are able to get them good results faster. Thereā€™s over 25 years of experience behind them :slight_smile:

Very Dirty - This ensures the best possible result at very low samples. For example samples so low that even the normals pass has noise in it. Itā€™s not really possible to tell with 100% certainty what the number of samples will be, as some scenes may still have noise at high samples settings, whereas other scenes may have no noise even at ā€˜crapā€™ sample preset. So for this reason, I made it an option. One thing I would like to do is implement a ā€˜analyze buttonā€™ which would do a quick render and then analyze the result to give the addon enough information to automatically choose the appropriate setting based on the userā€™s desired quality level.

Interior/Heavy GI - This raises the minimum samples to a number suited to the current sample setting. This is necessary to alleviate the potential for shading artefacts in high GI scenarios.

The below enhancements are purely personal preference:

Enhance Textures - This will make your textures much more prominent and also avoid blurring. In Draft mode it will ensure the best possible quality geometry even at very low samples (see the classroom scene on the email you should have received regarding the update).

Enhance glossy - Will increase the presence of glossy materials such as chromes.

Enhance Transmission - Will make transmission stand out a bit more, but I may depreciate this, as Iā€™m not really a fan of the effect.

The ā€˜Automatically Choose Best Settingsā€™ idea, that goes back to the analyze idea I mentioned above. It will be nice, but there are so many variations, it will be extremely difficult to implement. Iā€™ll definitely investigate it though.

Cheers
Michael.

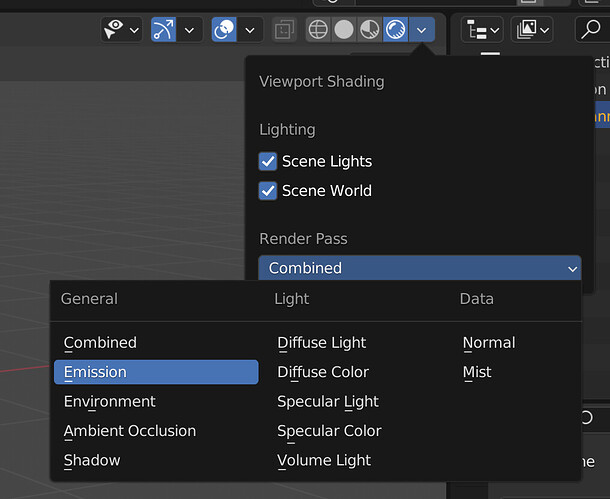
emission is anything that would appear in the emission pass. So it should be checked if there is anything in that pass. You can check during viewport rendering here:

If thereā€™s a volume infront of it, then you would also need to check the ā€˜emission behind volumeā€™ option. This ensure the emission will be denoised. Basically this is what makes it so fast, it only denoises whatā€™s neccesary. So for example if you say thereā€™s emission in the scene, it wonā€™t necessarily be denoised, only if thereā€™s some factor in the scene that makes it neccesary. For example it being behind a volume, or there being heavy dof, or motion blur. Thereā€™s quite a lot of logic behind it all, in total there are over 6000 lines of code (although not all of it for the turbo render portion of the addon). Itā€™s even smart enough to take into consideration light passes and various other render settings. Of course Iā€™m only human, so if you do find situations where something is not producing the expected results, let me know and Iā€™ll investigate and resolve immediately, if not faster :slight_smile: