Pls don’t post yet until i post the entire tutorial
We will see in this guide how to create a stylized texture of professional quality for a video game. We will need to combine four types of texture that will allow us to obtain a greyscale image as a basis to add color. The technique that I presented you will have a stylize texture (a 3D cartoon side) similar to the game Overwatch . I created a tool to generate your gaming style and textures in one click here: linko.projects.free.fr/gametools.zip
often the textures used in video games
The four textures we will need are:
- Ambient Occlusion: ambient occlusion will create shade on nearby areas and leave the rest blank permetre this will have a shadow on the model that fits all types of lighting and improve the visual the model.
- Bent map: Bent map is not mandatory, it is used to simulate a directional light, generally from above like that emitted by the sun. We will see how to create.
- Normal map: the normal map will record the depth information of your detailed modeling on a version with few polygons will be exported in the game it will be used to simulate the relief and recover a maximum of detail while improving performance…
- Cavity map: the cavity map is not essential, but provides a design effect hand to your model so to be in themed games such as Overwatch and Dota. This map also allows to highlight small details in contrasting.
Preparation for baking
Before placing your baking you need:
- a high poly model, a detailed version which is not used in the game engine, but only in Blender)
- a low poly model is the optimized version of the game engine, you must have unfolded its UVs
The margin of UVs
When you unfold UVs U> Unwrap a Margin option will be visible in the menu of left t ask you to indicate a margin is the space between the islands UVs. Open the UV / Image Editor to see the changes on your UVs.
 UV Margin The space between the UVs will overflow the baker outside texture UVs for the seams are not visible.
Enable GPU baking
We will use baking cycles to achieve its textures, because it allows the use of graphics and ambient occlusion is good. To use Cycles Render Cycles put up the interface instead of Blender Render. To enable the GPU rendering done File> User Preferences … in System enable CUDA. Then the options to the right of the rendering engine change CPU to GPU Device line.
Cycles options baking
baking options that is at the bottom of Cycles options menu.
Option: Selected to Active
An essential parameter is Selected to Active need to project check the details on the current selection so the poly high on the low active poly (light orange).
For a selection is active it must be selected in second. Right click on your high poly then shift + right click to select your low poly.
Option: the margin / padding edge
Margin in the baking options defines the number of overflow pixels. I advise you to use 10 pixels for a texture 2048x2048 pixels and 20 for a map in 4096.
Option: the cage
The cage will perform extrusion of your low poly to encompass your entire poly high without which intersections will not Baké correctly. We must ensure that the cage barely bigger than the high poly to prevent warping. To indicate what value, I advise you to apply a Solidify change, to offset 1 and adjust the thinkness in now shift to change the value accurately. Copy the value for the cage and remove the change.
the Baking
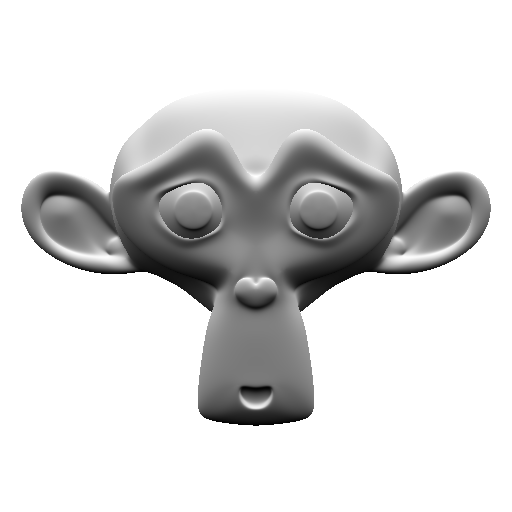
For this demonstration I’ll add Suzanne (the Blender monkey) for poly high and a plan for the low poly like that you can follow the tutorial and do the same as me. As it is a plan which I have placed as to have no intersection with Suzanne I can leave the cage and the margin to 0 to 0. Set the samples for baking in Render, the default value is 128. for the normal map and the map bent you do not need a high value, 5 samples is sufficient. For ambient occlusion you can leave 128, even if you still have the noise I will show you a low technique to remove.
Make a habit of saving your images into .tga (targa), they compress too without degrading the image and allow access to the alpha channel (transparency) separately unlike .png.
You must create an image on which baker then attach the image in a material. Open lme UV / Image Editor, click New. Whatever the color of the image or is transparant or not Tnat that Clear is checked in the baking options. The most important parameter is the resolution, in this tutorial I will show 4096x4096. I’ll call “4K”.
By unchecking Clear in the baking options the old image is deleted, it is useful to create a sprite on a map and plan several animated versions and different angles of your low poly.
Create a new material for the low poly and made Shift + a, Texture Image and specify the path of your image on which Baké. Do not tie the other node. If you have multiple node Texture Image Cycles baker is on the active node, the last selected.
If the nodes do not show is that you are compositing node in the bottom menu you View, Select, and Add Node right and just three icons to move the nodes of the materials as compositing.
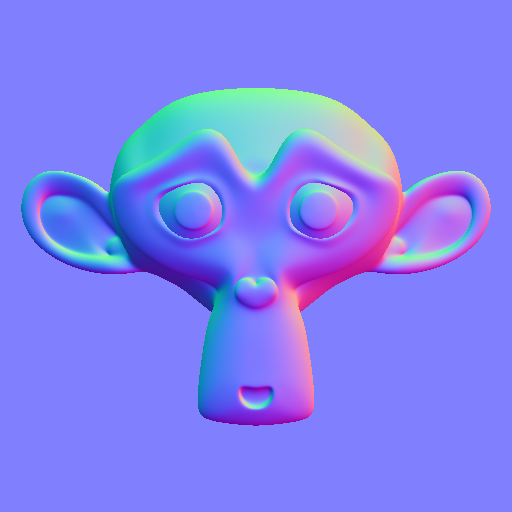
Baking: normal map
Select the high and low poly maintaining shift. In baking options he wrote Combined line Bake Type, set Normal, verify that either Tangent Space and axes + X + Y and + Z.
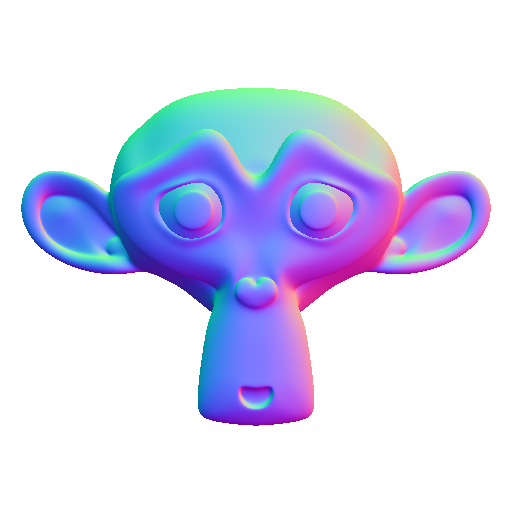
Bent map for baking stay in Normal mode, turn on Space Object instead of Tangent. For the axes in order to use the same as in other 3D software set + X, + Z, -Y.
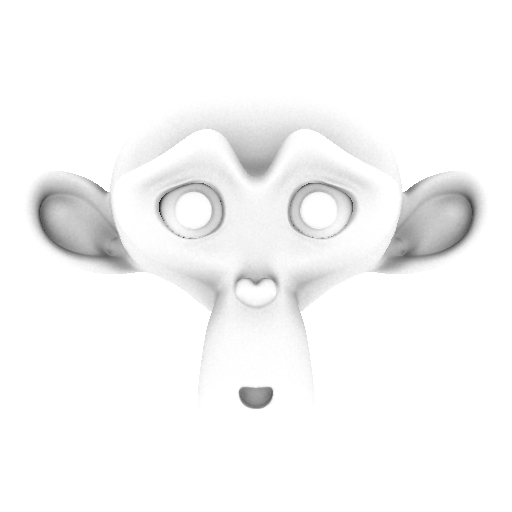
Check out the map of lighting from above
To generate a map of the lighting of the above, we must separate the colors and keep only the Green channel for lighting from above. The Red channel gives a lighting of the right and the Blue Front.
In the node editor go in compositing mode, activated the backdrop to see the result in the background. Create a node by Image Shift + a then Input> Image, attach the node to a Converter> Seperate RGBA, connect the output G (Green) to Output> Viewer. You can also connect the Separate RGBA alpha to alpha of the viewer node for transparency supported, but will not change the 3D model.
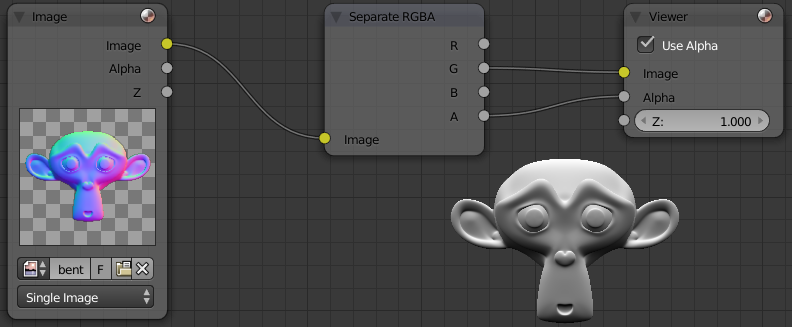
Lighting from above with the green channel of the bent map Baking: ambient occlusion (AO)
Bake in the Combined type switch, adjust the number of baking the samples based on the noise. I’ll let 128.
Here is the map that I get:

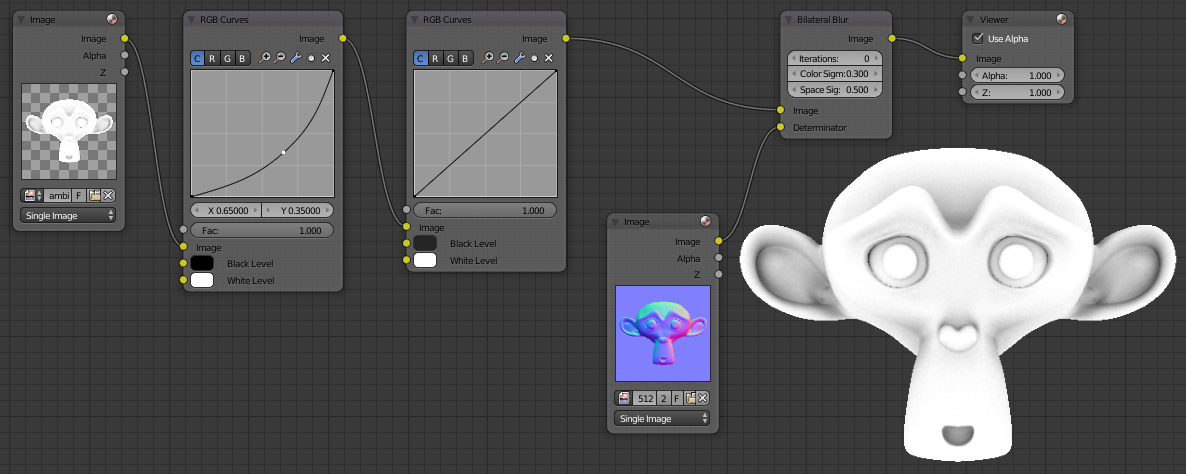
Default Cycles ambient occlusion is not quite contrasting and often the noise (grain). Create a node and Image viewer node as earlier. Add two Color> RGB Curves between. On the first left click to add a point and set it coordinated X: Y and 0.65: 0.35 That will contrast the ambient occlusion. For the second RGB Curves click Black Level, switch to HSV fashion (Hue Saturation Value Hue Saturation Brightness in French) and 0.145 V put this allows to make dark parts darker gray contrasting to the edges of the map. Here is what it looks like for now the map, it remains to remove the noise:

Nodes to improve ambient occlusion map The technique of bilateral noise can be used for lighting by putting baking the bake-type combined. Since it will be possible to map normal baker if Selected to Active is not enabled you can instead use a bent map.
Here’s what looks like the final version of our ambient occlusion map: