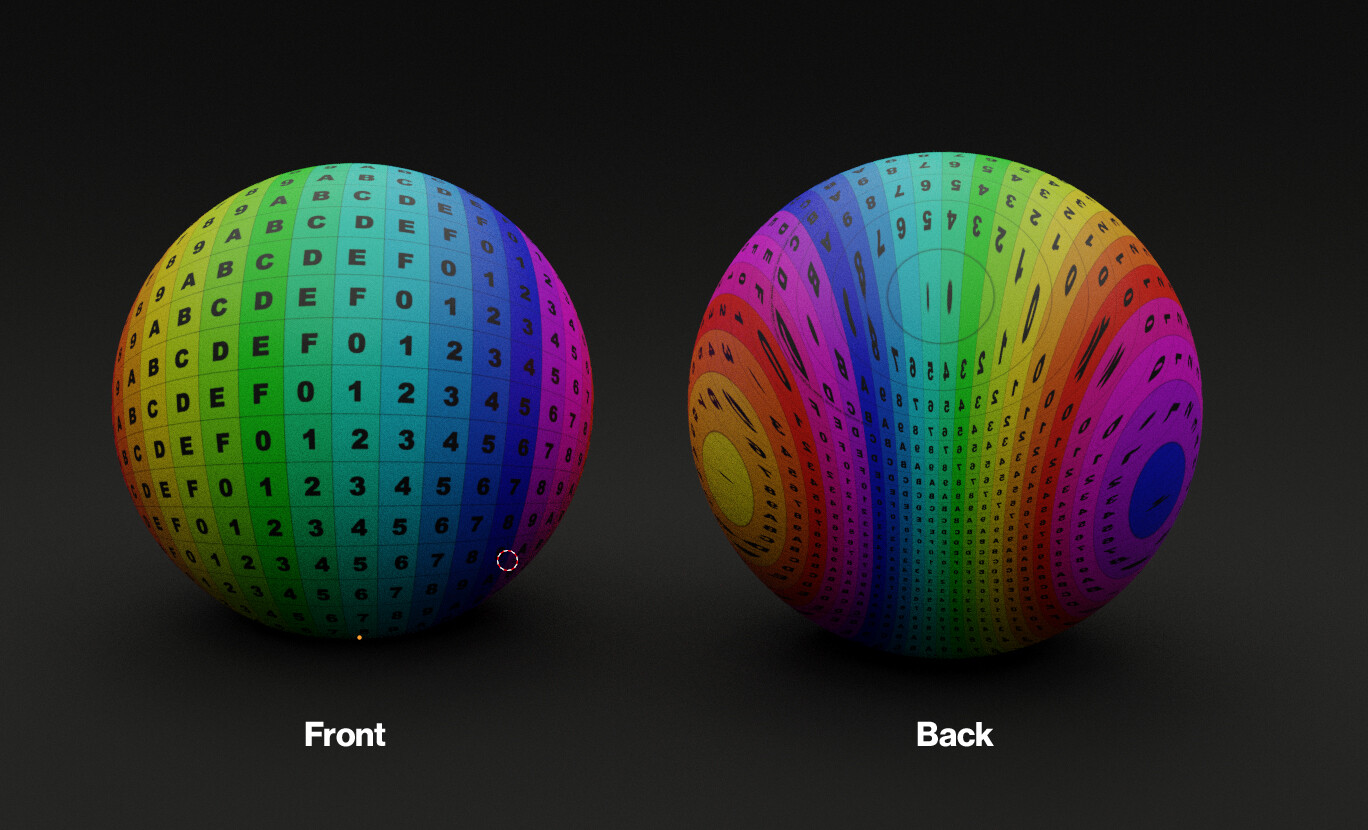
I am creating a displacement thumbnailer and need to UV map a Sphere in such a way that it looks perfect on one side without poles. I could care less how the backside looks since the mesh will only be rendered from one angle. Example image: https://i.imgur.com/lPHuxKJ.png
I have what I need but the mesh is triangulated and I’d like to find a way to accomplish this myself.
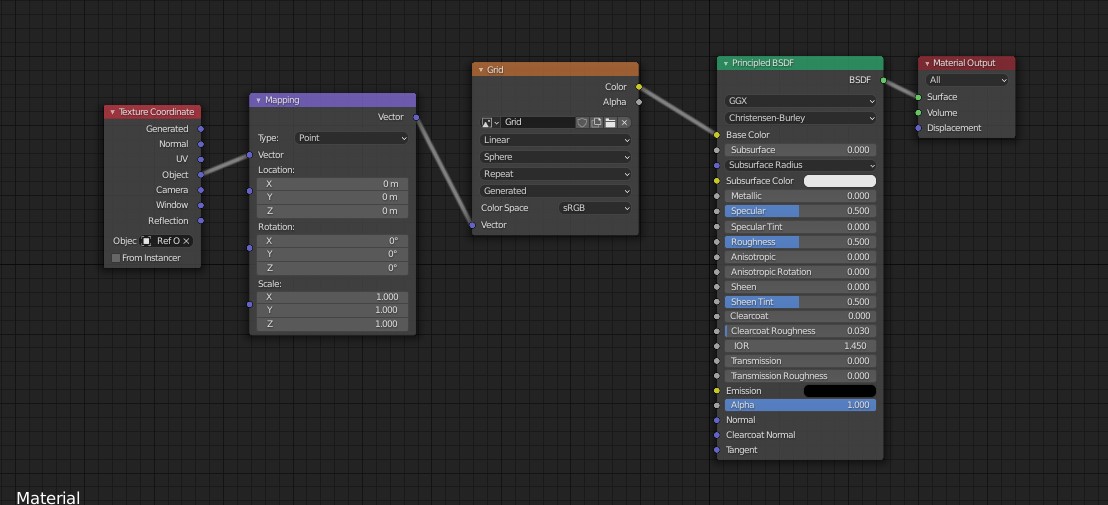
I am not sure if this is exactly what you are looking for, but by using mapping/texture coordinate nodes and using an object as a reference, by scaling and moving the reference object around I have been able to get something similar.
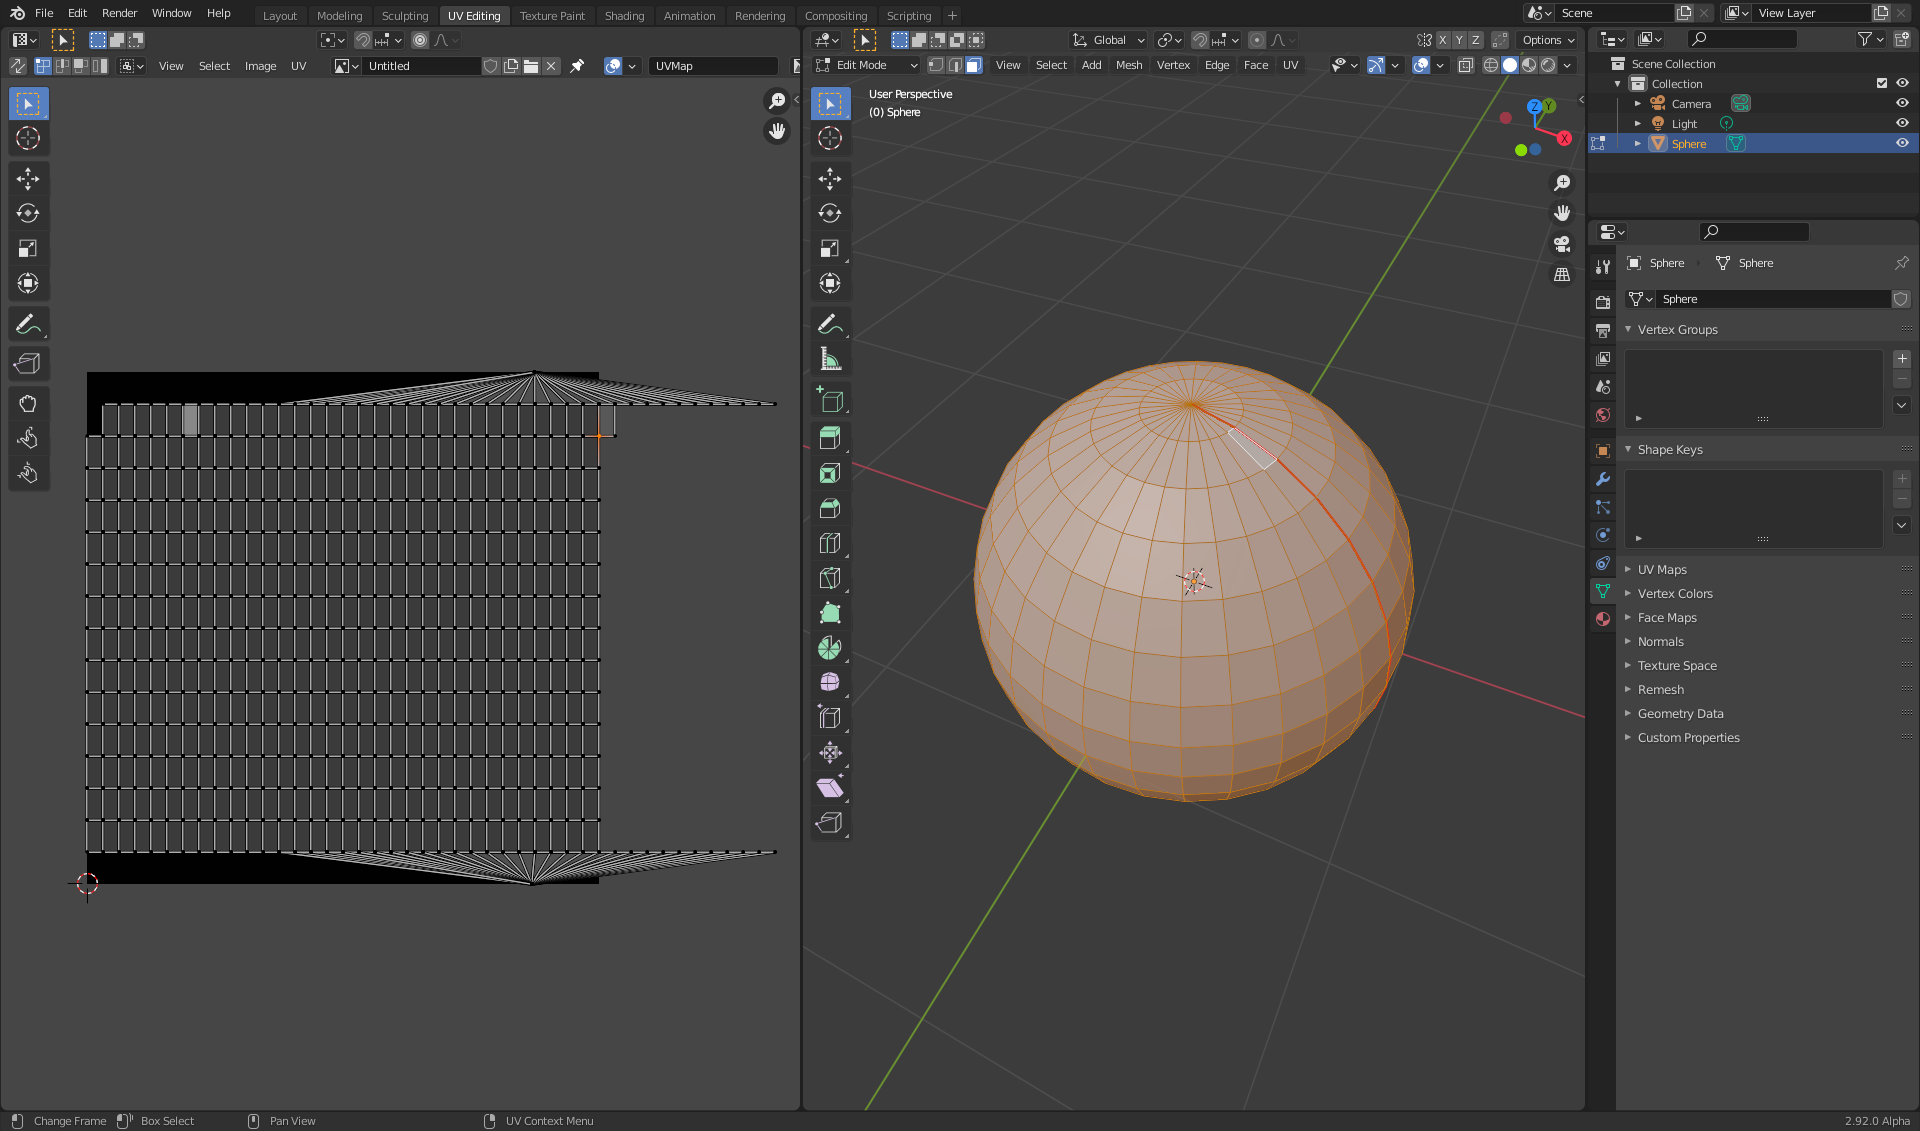
On this subject however - does anyone know why the UV sphere doesn’t unwrap correctly.
Seams are (I believe) supposed to represent cut marks on the UV map, however if you mark a seam on a UV sphere, then do a sphere projection, the resulting UV map is all over the place.
Why are the triangular faces offset to the right - and why does one of the square faces also get placed on it’s own over to the right - leaving a gap where it should be on the left? Why aren’t the faces adjacent to the seam at the edge of the UV map (e.g. the selected face highlighted).
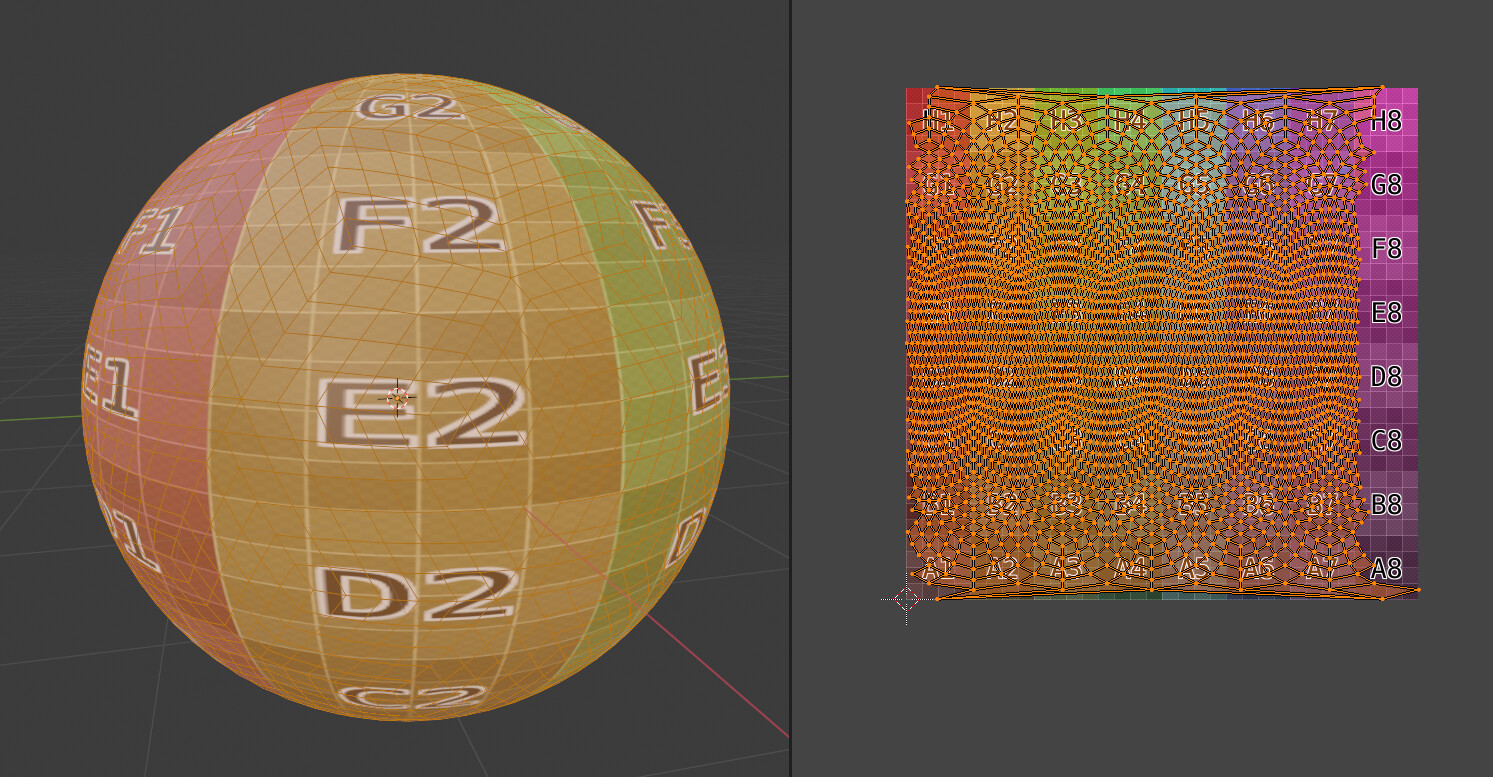
Try a rounded Cube instead…Here I worked up a quick example…rounded Cube 5 subdivisions. Face> Tri to Quads…UV= Spherical Projection.Align to object.Polar z-y> correct=Clip+scale. Constrain to image Bounds…
It involves distorting a sphere, projecting a new UV map from the camera to the distorted sphere, and then transferring the UVs from the distorted sphere to the clean one.
It’s a great way to make “Thumbnail Preview” images since you can avoid the typical stretching and ugliness from UV poles.