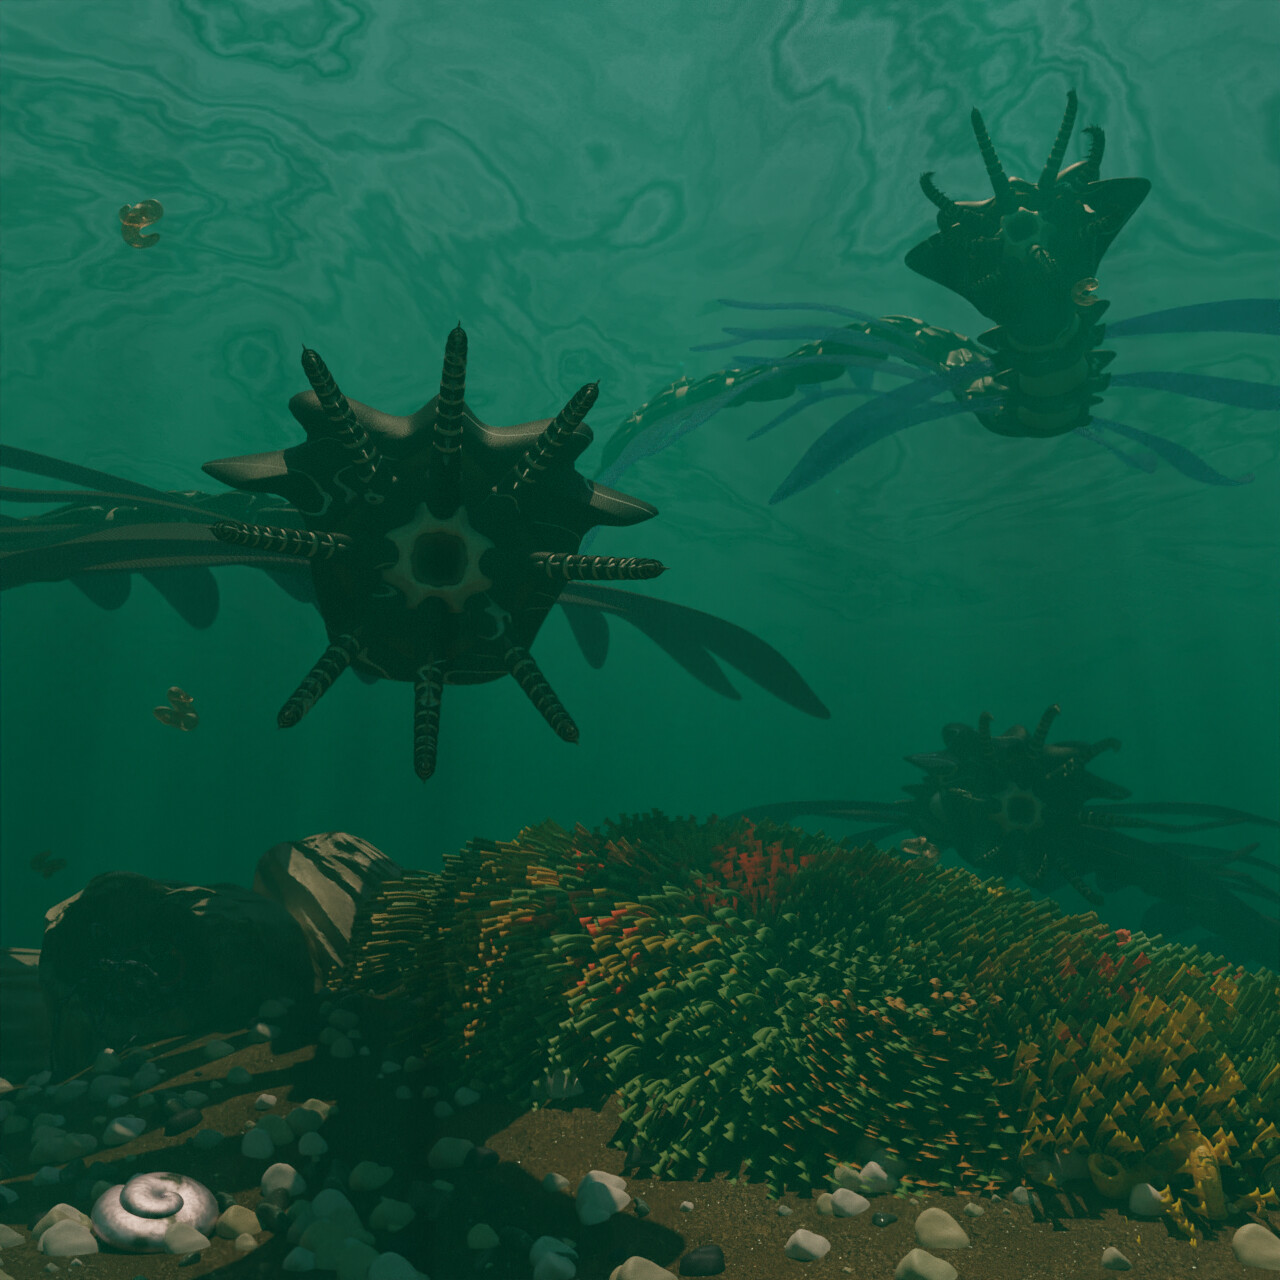
This is an image I have been working on for a few days. It’s been quite difficult, mostly as my desired camera angle requires quite a large volume space and so it can be quite hard on my old PC.
I tried many ways of making the water, ultimately settling on quite a simple method using noise textures controlling alpha with shadow rays. I’m relatively happy with it, although I’d prefer to be able to see more of the sky above the waves. I’d also like to improve the “grass” but perhaps modelling it in 3d would be better than using hair emitters.
However, I feel the image is a bit “birdemic”. I’m not sure what to focus on to improve the realism of the image. I’ve seen some fantastic renders that seem to use very simple HDRI and sun lighting (and low poly models, etc.), but my attempts seem to maintain a sort of “90’s CGI” look to them. The lighting is also a bit flat which seems to be a recurring issue for me. But really the creatures look a bit pasted on top of the image rather seated into it. But I’m not sure why.
To start I’d put a very strong area light above the water as a main light source, then an HDRI for indirect lighting but with low emission, then work on the fog. And adjust these tree elements first then look for adding extra stuff like caustic or some lights to make things pop a little more.
Another thing that is a bit missing is a good sense of scale, if we look only at the top of the image, given the size of the little fish/floating elements we can deduce that the creatures are huge.
But looking at the bottom little rocks and plant induce the idea that the creatures are somewhat half the size of an human.
Thanks - very helpful suggestions there. I think i underestimated just how bright many of these images are, and side by side mine do seem very dark.
I never thought about “dust” but this is another great suggestion/observation. I’ll need to have a google for ideas on how to approach that.
Also, re: scale - it’s amazing how looking at this I never really noticed it, but now it’s been pointed out I totally see the confusion. I kind of imagined everything as being quite big, even the shell remains (and of course, how is the viewer supposed to know this?). I think I see now why a lot of those old sci-fi paintings had astronauts and such in them.
You can add very little particles in the scene and use depth of field, another way that is often used is to composite these kind of elements : https://www.youtube.com/watch?v=O8_nw_ZWztA on top of the render. I think it should be subtle and small if you want to convey the idea that the creatures are massive.
Yes exactly ! this help a lot in a image to have good clues on how big things are, that help also to get a sense of depth (how far away things are from each other) . This is especially needed in sci-fi as we
are looking at things we don’t know.
Good luck with your image, the elements are cool ! with proper lighting and little tweaks it will be awesome !
Might have to rethink this one. I keep trying new lighting but adding lights seems to do very little (even at huge values like 750,000W!).
For some reason I also can’t get good shadows even with spot lamps and the like (and often these simply crash blender). In tutorials it seems people add a volume and then a light, and light rays appear very easily with good definition. Here when I try to implement these approaches it doesn’t seem to work (or crashes). I think for now I’ll try something else and come back with fresh eyes/mind at a later point.
I see !
Maybe the water surface block light, or something else. You can disable everything that goes in the way and add them back once you start to get some good light direction.
It’s ok to use very high values for lamps, I think the W metric only makes sense when your scene is at the right scale and you try to match reality. I personally take it as an arbritrary value, I end up sometime at 5 MW or more, that’s generally not an issue for artistic work.
You mean to get some godrays through the water ? you can always cheat them using a texture on a plane . Something similar to this , it can be even simpler : https://www.youtube.com/watch?v=uLLCP6XYKrs
You are right, maybe with a fresh mind it will be easier to fix all these little issues.
Hi I think your missing edge highlight.
Notice the white ring around the fish. You can recreate this by putting a light source behind your object and cranking it to around 1000.
Anotther good observation - many thanks. I’ll try to experiment with this next time I have a go at this file. I might need to find a way of optimising the file as anything to do with lighting really taxes my PC for this particular scene.
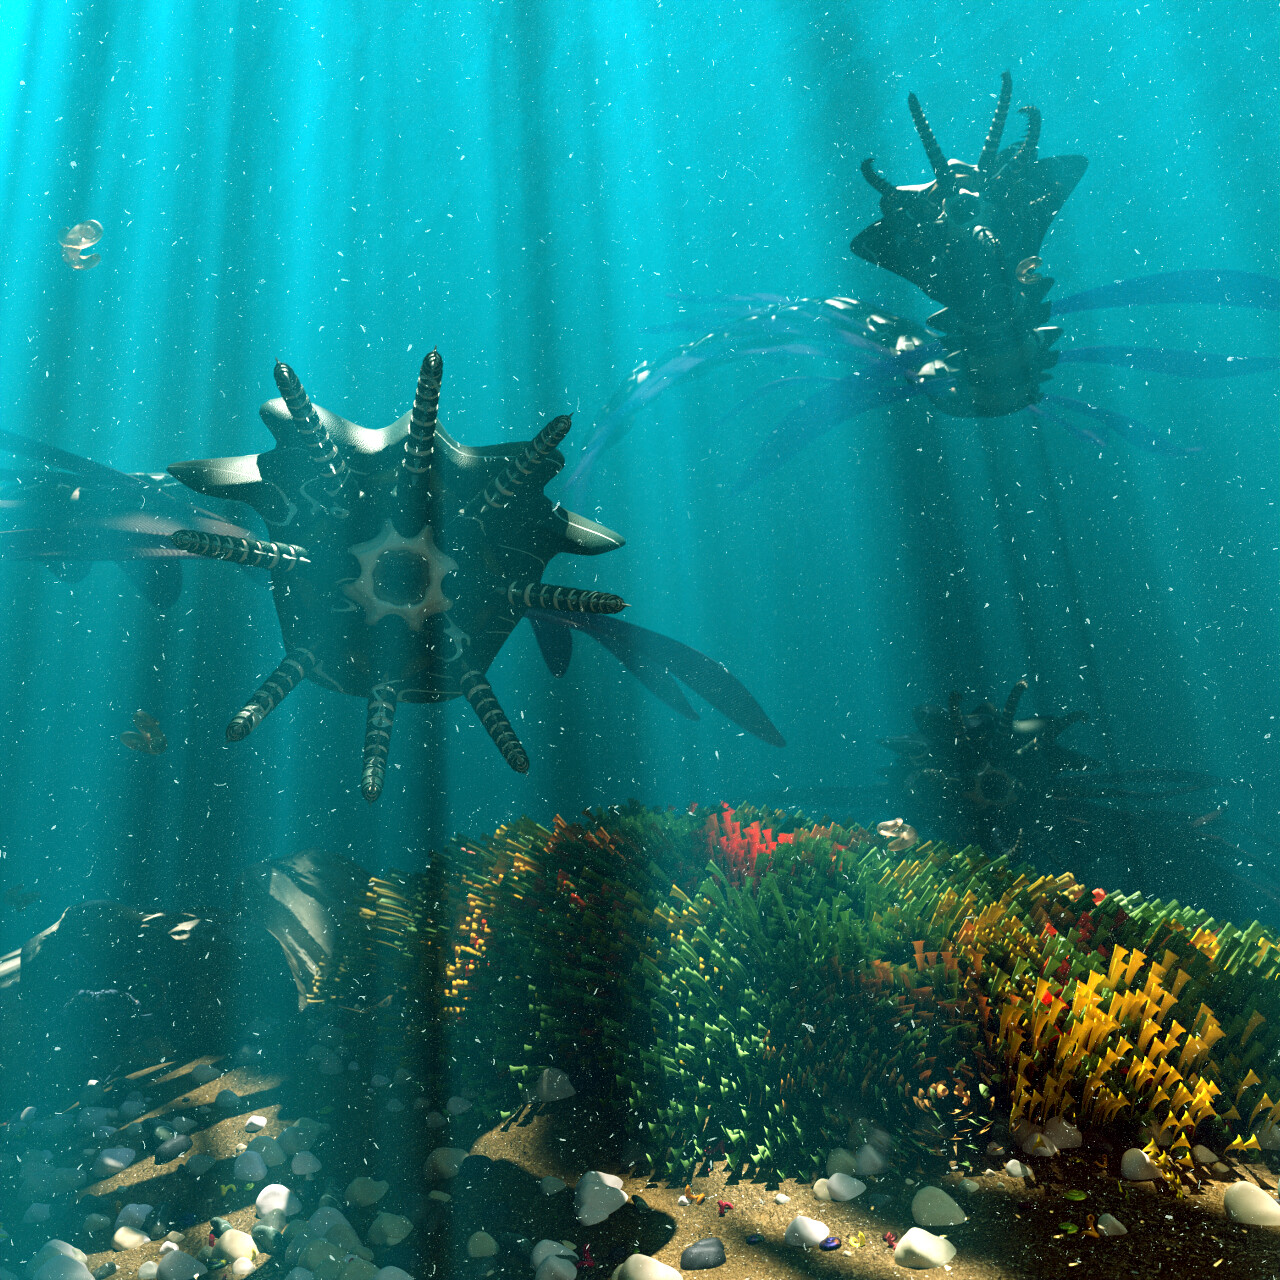
Another go here, with a slightly different way of making water/fog. Still need to figure out best way to add caustics on the floor (perhaps a projector?), and I might think of a way to solidify the scale of objects. I also added blur, defocus, and some dust speckles using the compositor. I might have a go making my own dust texture as I realised this would be a great way to convey plankton swimming around as well as detritus.
I also played around with the levels in paint(.net) just to bring out the colours. Presumably you can do this in Blender, but to be honest I tend to use the automatic balancing and then make tiny changes from there.
Yes! Much better.
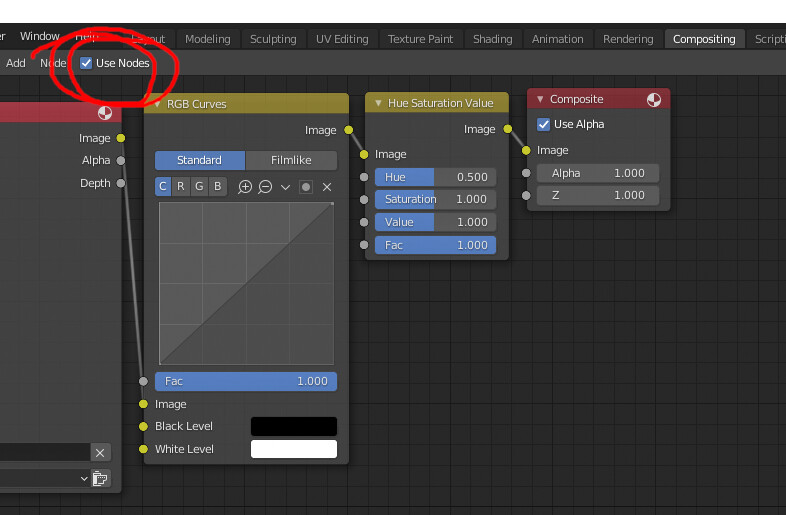
You can adjust the levels in the compositor. I like to use RGB curves, but there are lots of nodes available. Just don’t forget to click the “Use Nodes” checkbox!
You still need some global illumination to soften the shadows, even adding some light with an AO pass would help.
The other thing I’d do is blur everything. Add a bit of animation to the creatures and crank up the motion blur. Then add some volume scatter to blur out the distant objects. If you don’t want to go full volume scatter (which can be pretty costly) you can cheat it by putting some DOF on the camera with a near focus.
I probably should have posted this here, but I remade the image and called it “finished” for now (here).
I added some blur in the compositor, and DOF was set using the camera. It’s still not perfect but I wanted to move on for a little while and work on some other stuff. I think some of the problem is due to how I modelled these, with the large volume and caustics etc., the render time was going up and up. I think once I get bettter I might revisit this image and perhaps even remake it from the ground up more efficiently.