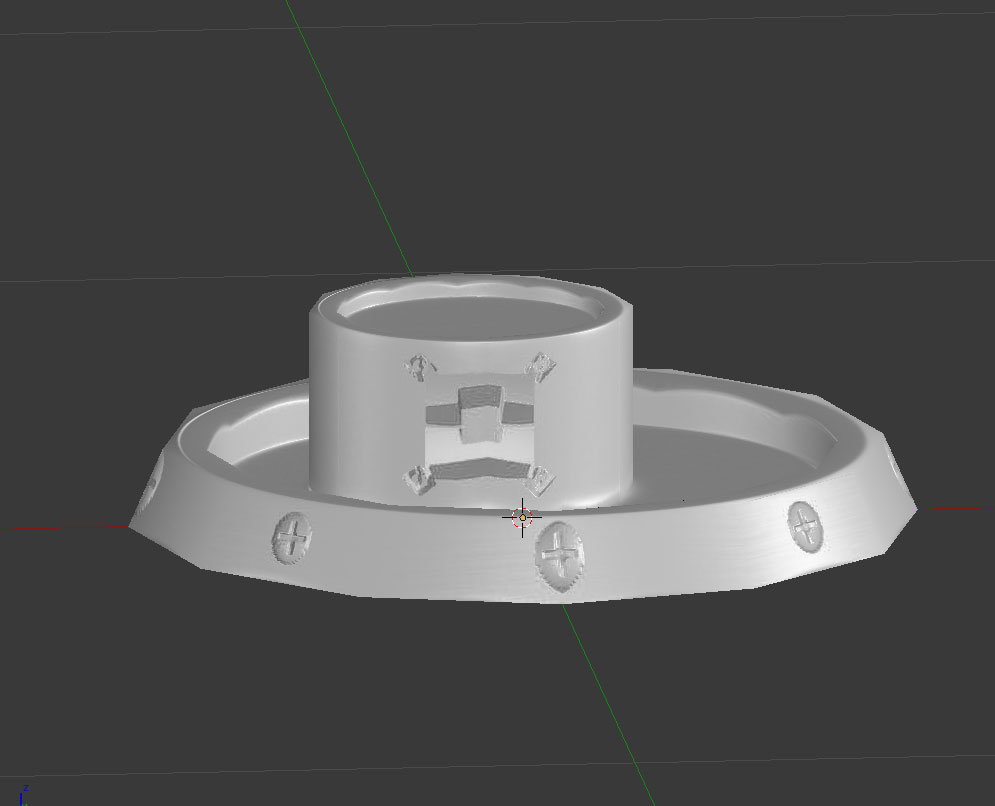
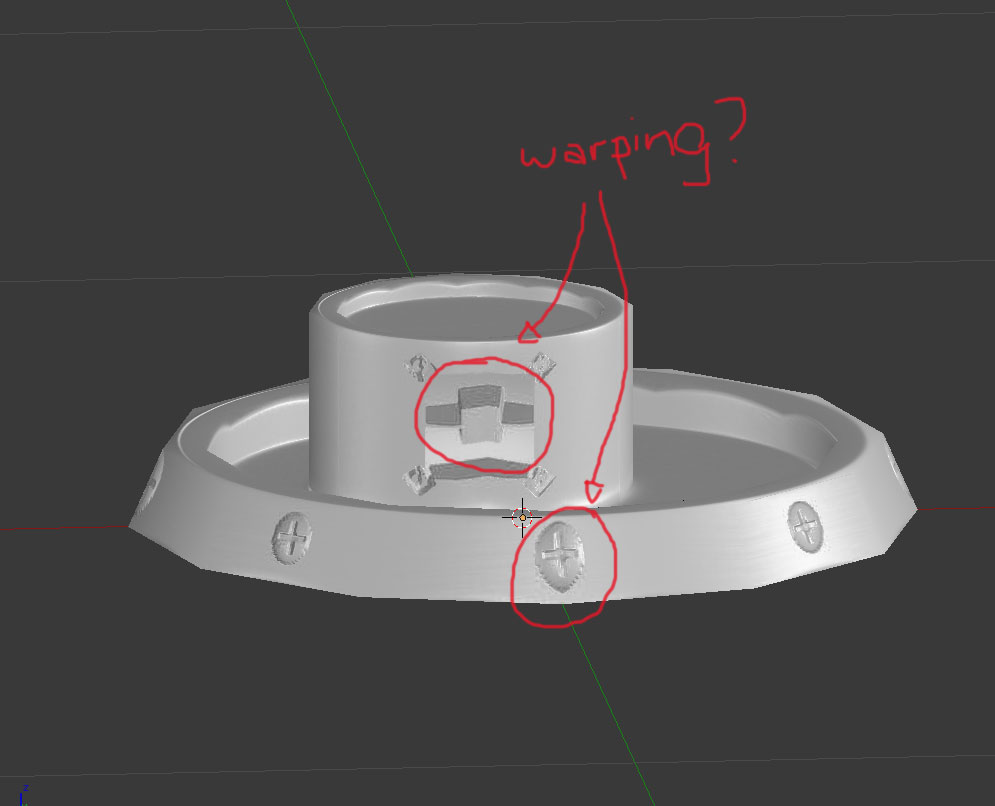
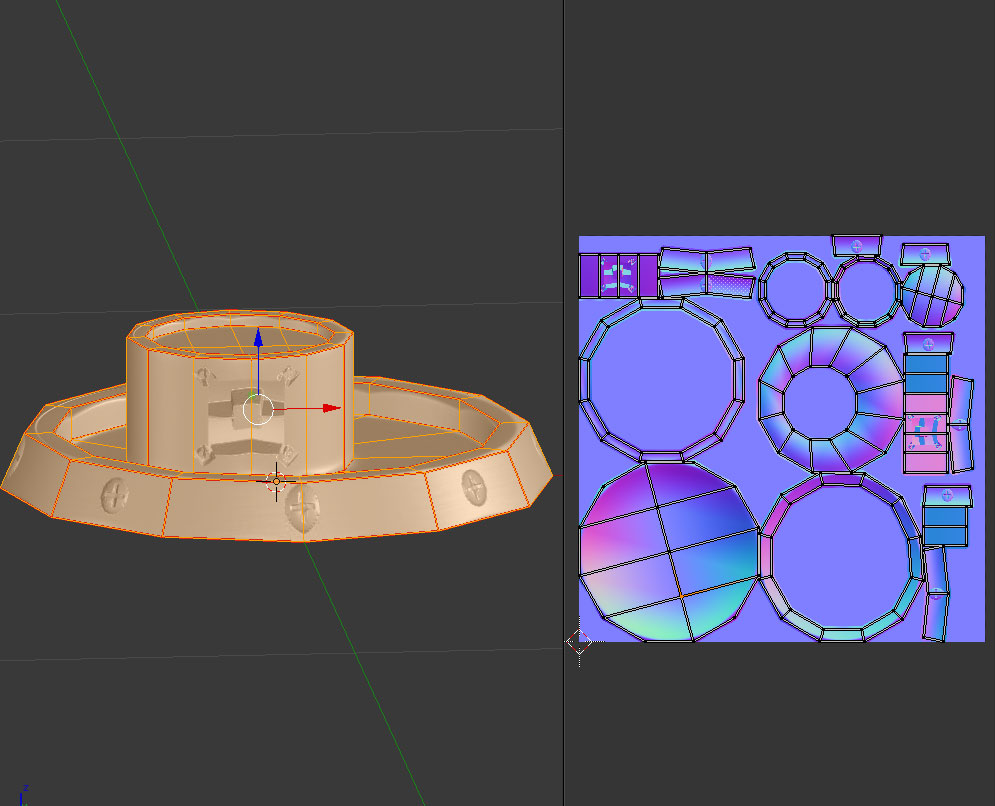
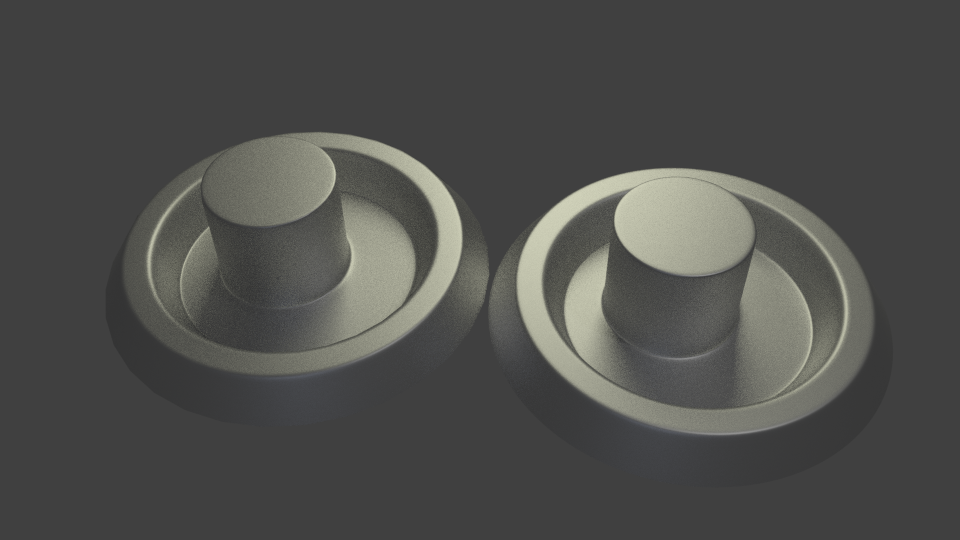
I’ve tried many different combination of UV seams and the warping always shows up. Is it just because the way the low poly topology’s loops intersects with the high poly details? Or is it because of something else I’m not seeing/don’t know? Here’s the latest uv unwrap I did…
i think that u have to smooth shade the high poly too , bevel the hard edge on it a litlle more ! i usualy bake the normal to a lightmap uv first. i found that it works better in hard surface when using blender !
i bake in blender internal , btw
sorry mate , i ll try to make it clear !
for the high-poly : smooth shade it and bevel a little every sharp edge !
for the low poly : smooth shade it , unwrap using lightmap ( an option when u press U ) ,assign this to a uvmap ( ex; uvmap 1 ) use this map to bake the normal map !
may be ur lowpoly is to low poly .? try to put a subsurf on ur lowpoly to see ! if u r steel having problem u may use a cage , and BTW make sure that ur normals r facing outside !
I’m no expert when it comes to normal mapping. I’ve had plenty of headaches with the process myself. But it would certainly help if you upped the complexity of the low poly. A smoothed cage might make it more accurate coupled with sharp edges along your seams. Baking is capturing angles rather than actual depth. If there’s a significant difference between the source and target meshes it’s not unusual to see warping and waviness.
Besides that the normal map won’t affect the silhouette. So the low poly nature of something can’t be hidden from every angle. What I mean is, don’t rely completely on the normal map to describe the shape.
Some elements could be drawn in something like GIMP and then converted to a normal map. Especially if they aren’t going to be represented by actual geometry. Like those screws. Or even the indentations. Maybe not exactly what you want. But you would have more control over it. You could then confine baking to the basic shape. The “cylinder” and “tray”. Combining the results at the end.
Cycles is just as quick as internal for this kind of thing. And you gain the ability to use a cage if you feel it’s needed.
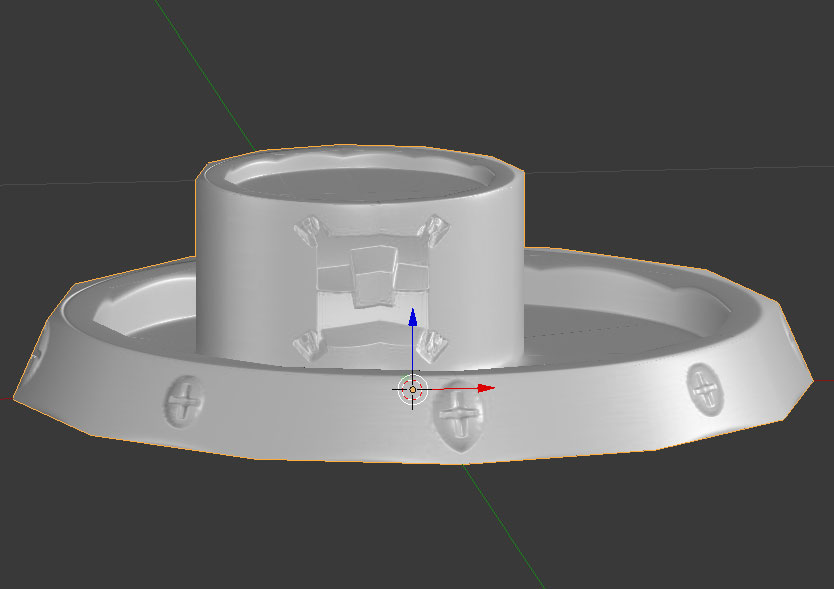
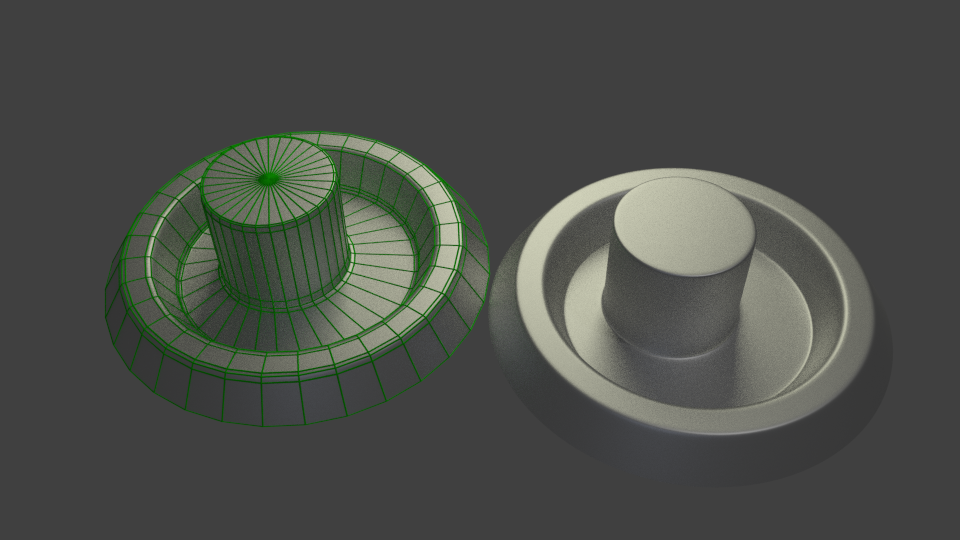
Here’s a quick render of the base with a normal map baked with Cyles. Both the cage and the low poly are smoothed. No sharp edges.
The low poly has 480 faces and 481 verts. I wouldn’t consider that excessive. I did also leave in some support loops. They help with shading and don’t really add so much that it’s overly complex. Being efficient is good. But only until it starts to detract from the end result.
The high is 9,216 faces with 9,281 verts.
If at some point you feel the need to change anything in the low poly topology, then re-bake. Because you’re changing the normals. I’ve heard of people baking then removing loops, thinking they’re not modifying the end result of the normal map. But they are. Also, changes in the low mesh must be duplicated to a new cage. It’s essential that they match exactly. You can pull verts around in the cage once it’s created.
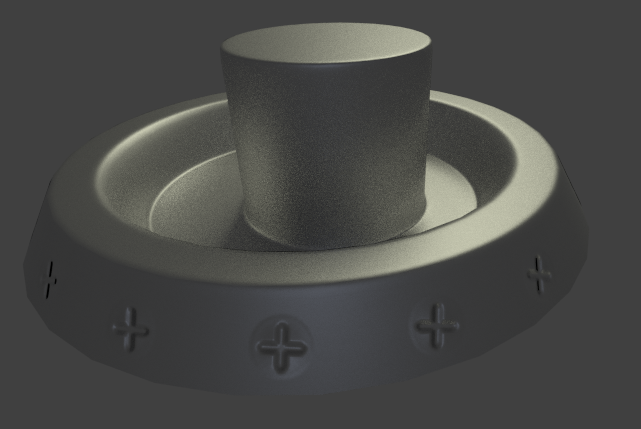
In the last image I added in some screw heads. I could probably have made them a little more pronounced. But you can at least see that it’s possible to combine elements. That’s the original bake, with the screw elements added in Photoshop by creating the part in black and white, then converting it to a normal map with the Nvidia filter. Nothing fancy. It was overlayed onto the original layer and then the resulting image passed back through the filter using the “normalised only” option. I think the only way to make something really “pop” is to have some geometry to bake to. But failing that this is a decent solution.
One other thing I’ve read about quite a bit and seen through observation, is creating the high version with a view to baking. So for the indentation in the tray I deliberately kept a slight incline, rather than going with a sharp 90 degree drop. I’m not saying that you can’t do that. Just that it seems to be less problematic when it comes time to bake. That makes some sense to me when I think of it in terms of capturing angles, versus depth.
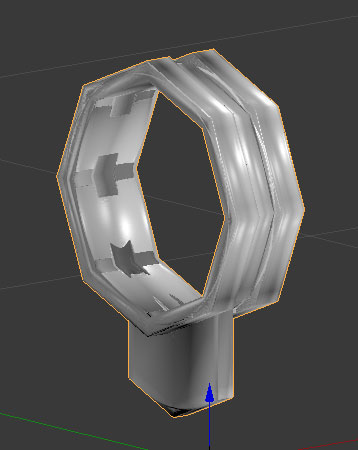
I actually found a solution. You guys were both right in terms of my lowpoly being way too low poly, so what I did is UV unwrapped the low poly, duplicated it, then did a simple subdivide on the duplicated low poly so I can get more faces. I’m not sure if using catmull-clark would have made a difference, but I do know that I wanted to keep the shape of the low poly, hence why I subdivided it as simple. Funny enough, I remember watching someone do a video saying “what is the need for the simple subdivide.” I wish I can remember who it was that said it so now I can tell him that the simple subdivide does have it’s uses.
Anyways, no more warping (well, there are still some issues, but I can totally live with this result);
But if you’re going to add more faces anyway, then why not make it conform to the high poly version?
Why create a high poly mesh if it’s not the shape you wanted in the first place?
Are you taking the normal map from the sub-divided low and using it on the original low? The normals for those meshes wouldn’t be the same. Even if the Uvs layouts are identical.
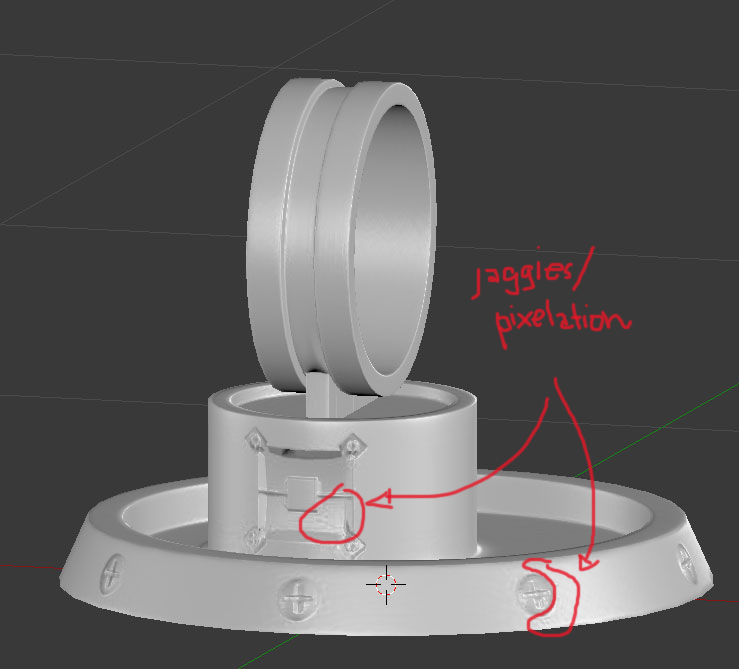
The two objects above just have 200 extra faces each and it’s looking much better already. I do have one more question though. The normal maps above shows some sort of jaggies/pixelation:
The best thing to do is try it out. But be careful. It could very well end up creating what look like smooth raised or indented areas.
So do it sparingly. Bear in mind it’s not a diffuse map.
If it’s possible it would be better to actually colour it channel by channel.
Padding/margin only makes a difference at the bounds of your UV islands. Large margins are good if you’re intending to downsample your image after the textures are complete, for example.
What you’ve got there looks like jpg compression, but that’s just a guess, since I can’t see your setup. If you’re unfamiliar, you may want to look up lossy compression and why you should never use jpgs for your working/source files. PNG is a common loss-less alternative.
If it’s not jpg compression, no idea. Simply not enough info to go on.
They could be aberrations caused by compression as DerekWatts mentions. Combined with low resolution. I’m sure either of those would make baking errors more pronounced. And yes, edge padding just extends the map past the boundary of the uv islands. Without that you might get dark areas around seams.
16 pixels is the default in Cycles and xnormal. Some people like to go with 20-24. In any case it’s a good idea to leave enough space around your uv islands to allow for this. It might be more efficient use of space to pack everything very tightly. But you’ll get pixels from one island running into another. That would cause artifacts too.
I bake at the resolution I want for the finished product. There’s no direct facility for anti-aliasing (aliasing=jaggies) bakes in Blender. So people often bake higher res and scale down afterwards. If you use Xnormal it can run an anti-aliasing pass after the bake completes.
Fair enough. Jpegs are still lossy though. Have you tried PNG, or TGA? Uncompressed? Just to see if there’s a difference.
It may simply be artifacts from the bake. In which case you have 2 options. Re-bake with a cage. Or do what you were going to do earlier. Paint them out.