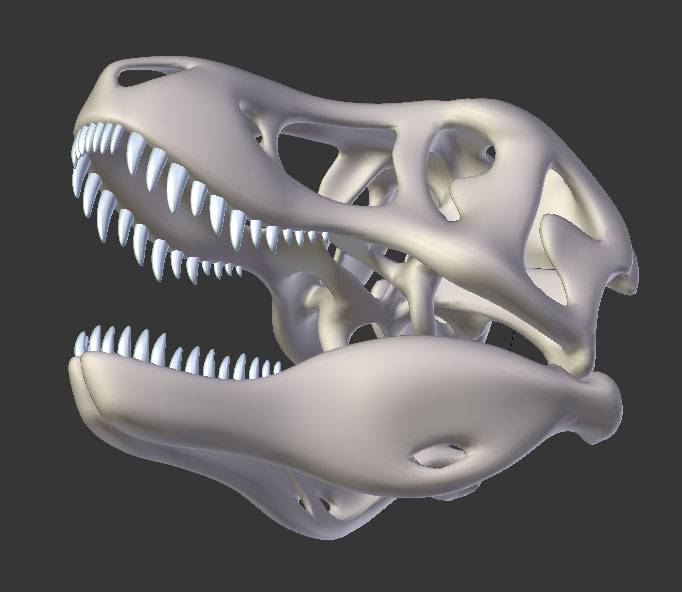
That’s actually the point, there is currently debate between experts about what is happening on theropod faces. No palaeontologist claims to know the absolute truth which is not the purpose of science anyway.
For example the study mentioned in the image presented evidence that tyrannosaurs have no lips and had crocodile-like facial skin. Some researchers refute this and claim there is evidence for lips.
However some texture is not speculation, fossil skin impressions have been found on tyrannosaur specimens and show small scales, none for the face area unfortunately. Also the rough textured bosses and knobs on the top of the skull are typical of what you see on animals which sport keratin horns.
I simply want to represent this debate as well as I can, that’s why I’ll be producing multiple versions, anyone who wants to buy the 3D print can pick their preferred choice.
do you do some simple rig or add muscles too ?
There is research on tyrannosaur head and neck muscles but would be outside the purpose of the 3D print.
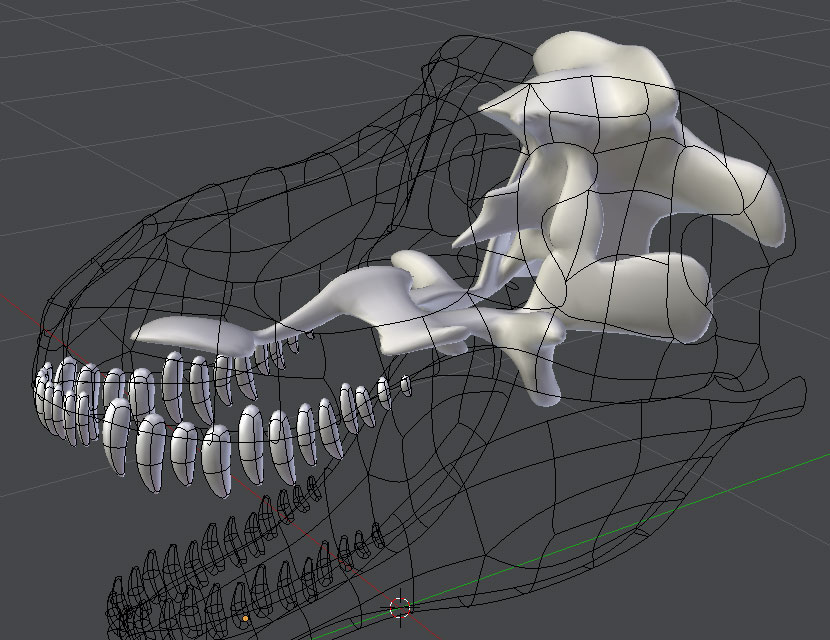
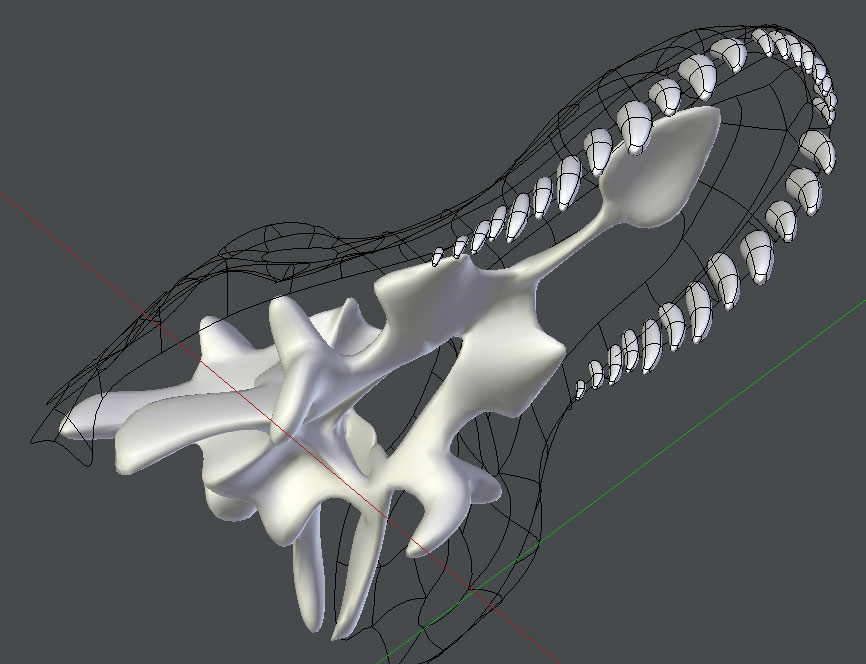
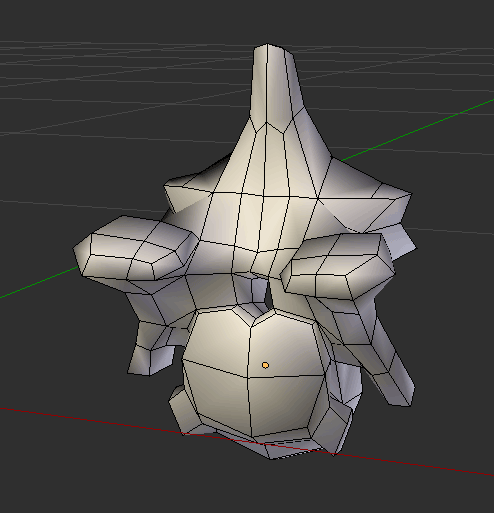
Base model for the palette bones and brain-case. Also formed the brain-case wings and transverse crest at the back of the skull.
Once I’ve added thickness to the outer skull I’ll connect and merge the interior to form a single poly mesh. When that’s done there’s a few interior details that are probably better modelled at this stage rather than sculpted in later, mostly in the inside skull roof above the orbits.
There’a a palette roof that projects inward like a shelf from each maxilla and sandwiches the spoon shaped end of the vomer. When all conected I’ll probably merge the area into a slab to simplify poly structure and put the detail back in at the sculpt stage.
After much pushing and pulling of vertices I’m making some progress on the skull base-mesh.
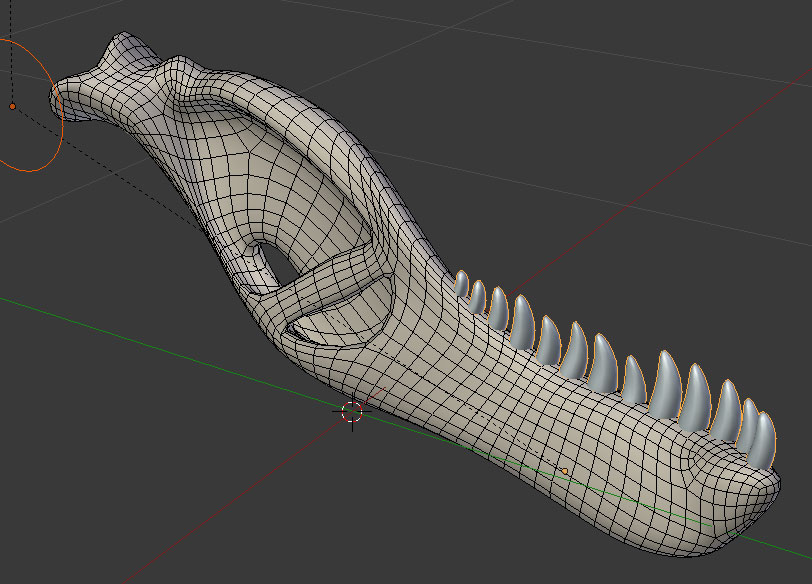
Lower jaw just about done, more twiddling to do on cranium but it’s getting to a state where it can be sculpted.
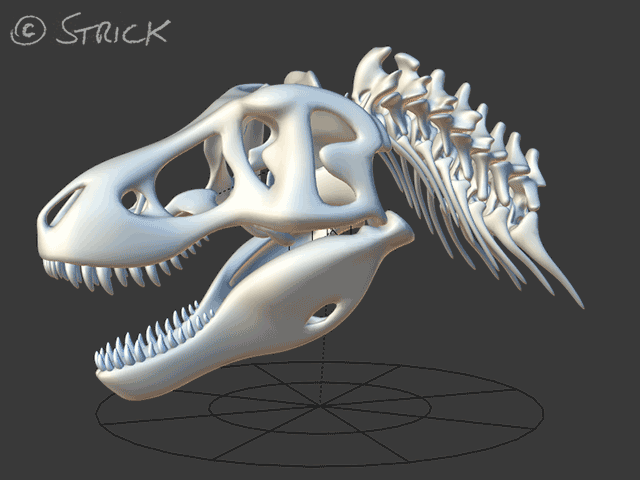
Probably need to make a few tweaks when I hit the detail sculpt stage but otherwise I’m done with the skull base mesh. I’ll make a UV map next to help with some render shots, for which I will temporarily join the separate parts into one poly mesh. The orange circle is a placeholder for the jaw pivot point just to make it easy to re-set the centre of rotation when I later separate the meshes.
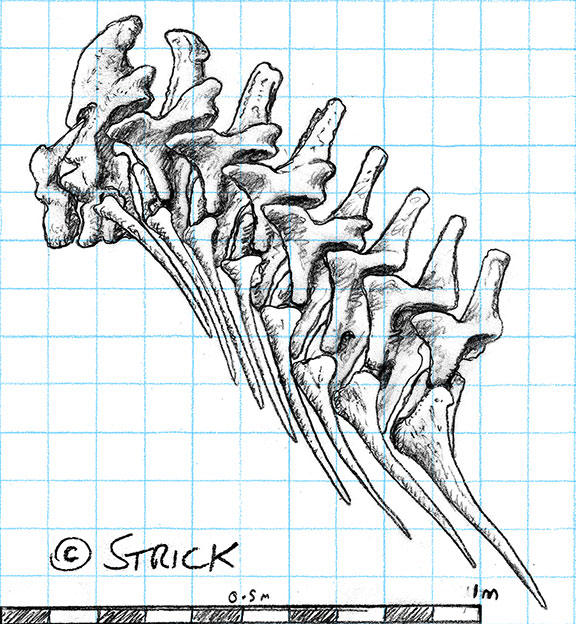
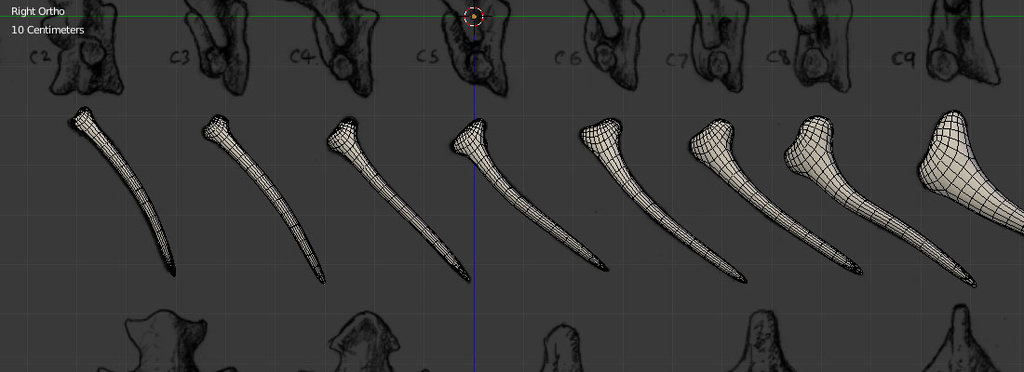
Assembled the vertebrae drawings into a cervical sequence. I’ve basically copied the photographed layout from the Brochu 2003 paper so I think it’s pretty complaint with the science. The articulating surfaces of the cervicals are angled so that the neck forms a gentle s-curve. This image will work as a template to place the neck bones against, gonna start them this weekend.
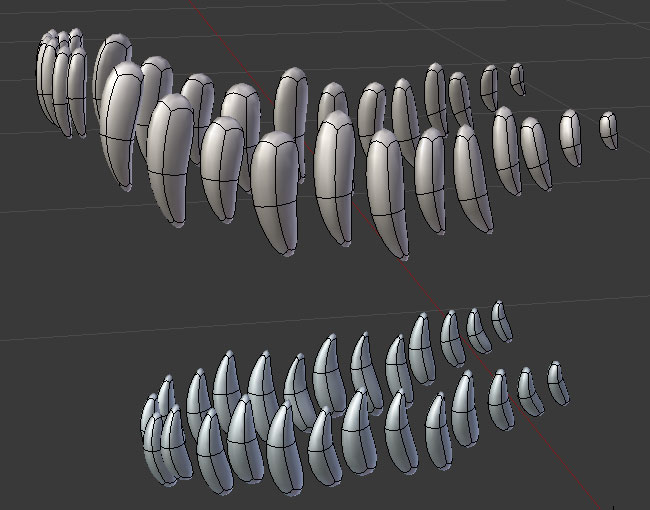
OK finally got some time to get back to it, this is the bones of the right pes in 4 views. The standard system is to use roman numerals to indicate the digit number so I’ve done the same, grid lines at 10cm apart as usual.
Checking the Brochu paper confirms that Sue is missing a few toe bones (only the claw of the hallux is present) but these have been studied from other rexes. A lateral view might be overkill as I think I can use the other views to lock in enough of the detail in 3D.
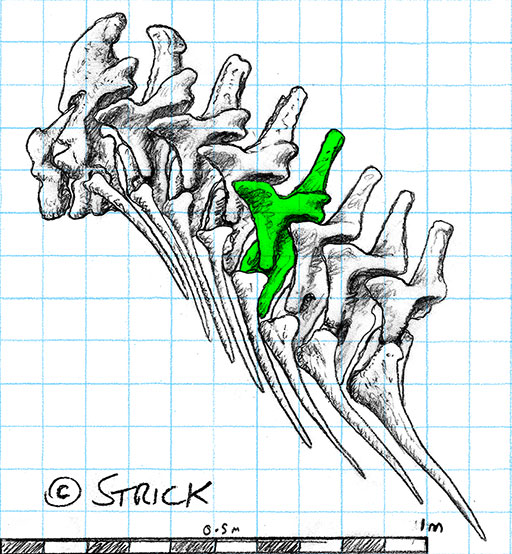
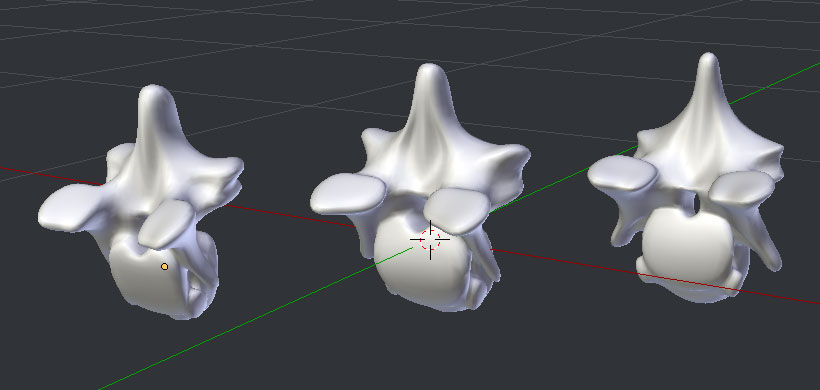
Started the 3D work on the neck so I had another thorough study of the cervicals in the Brochu paper and the Sketchfab Trix 3D display to prepare for this. C1 (atlas) is a very individual structure and c2 (axis) is different enough to probably need its own mesh too. C3-c9 however are broadly homologous each one being a variation on the one before.
Should be able to take advantage of this in that I can model an initial vertebrae, then duplicate and modify for the next and so on. So the decision I’ve made is to start at the mid point (c6) and work both forwards and backwards along the sequence. Working from the middle means I start with an ‘average’ cervical that will change minimally in each direction.
With complex shapes like cervical vertebrae there’s a bit of fiddling required to get a decent low-poly mesh that represents the structure in a broad way but will subdivide fairly evenly for sculpting later.
The amount of time I’ve spent on this is getting a bit crazy now, I really want it finished.
I’m just about there with the base meshes for the neck bones, should be done with this part in an hour or so. Going to push to make progress this weekend, get it fitting together then get some detail sculpting started.
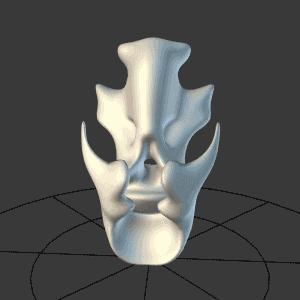
Here’s a quick lo-res turntable of c1 and c2 in relative position.
Just leaves c9 to add which is a fairly simple derivation of c8. No doubt there’ll be (hopefully minor) tweaks and adjustments to enable an articulated sequence without intersections in the individual meshes.
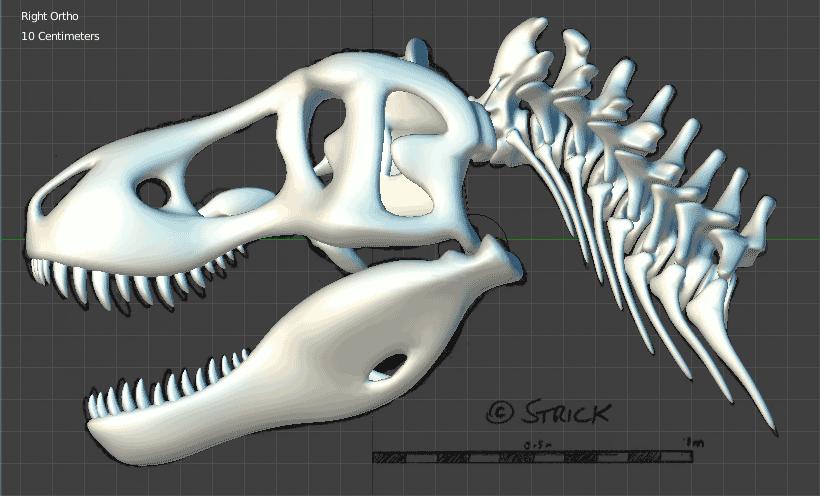
Wahey It fits! With only a few minor adjusts, guess that’s the benefit of planning. Still a few tweaks here and there but this is just about ready for detailing.
Had to make a UV map from the low poly 3D skull and neck bones. This always takes ages, really time consuming. It’s of no use for the 3D print but will help me when I do some preview renders of the final model.
Basically what I will do is bake the fine bump details into an image texture once the high poly model has been sculpted. This way I can render a medium resolution version of the sculpt and still show fine details. This is necessary as my PC is old and under powered and would take ages to render the finely sculpted model at the highest level of detail.
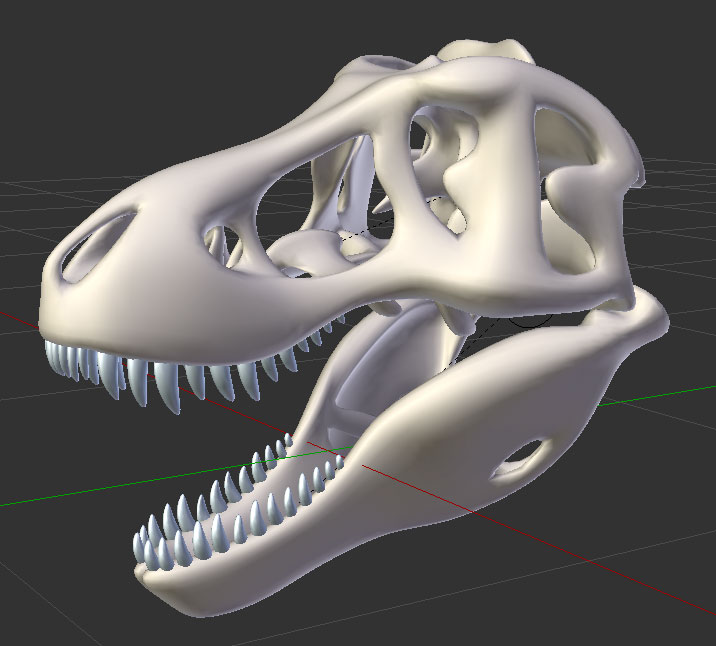
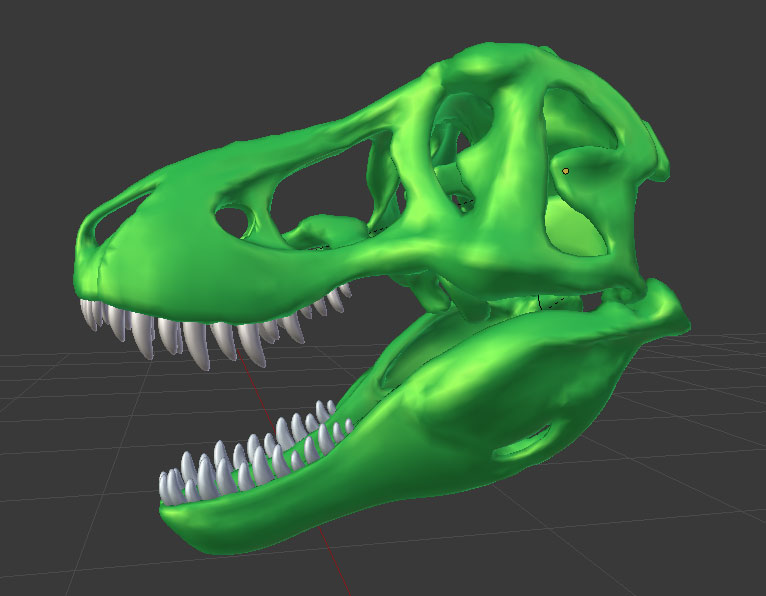
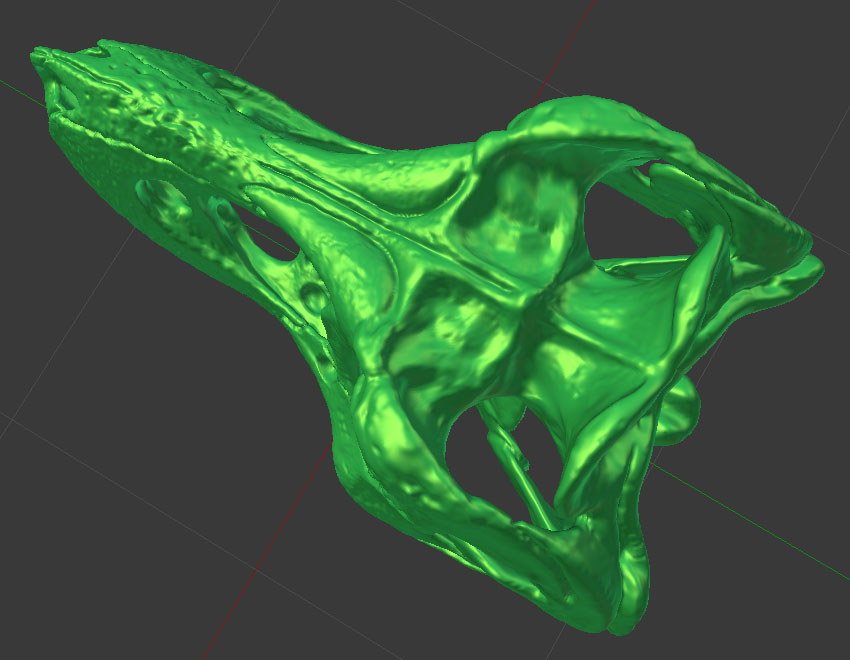
Got back to this after another break and I’ve started blocking in the major forms of the skull. For the detail sculpting nothing suits my workflow better than Blender’s multi-resolution modifier. It gives me a few advantages over the other sculpting methods. I’ll increase the subdivision when I can’t get any more detailed at this level.
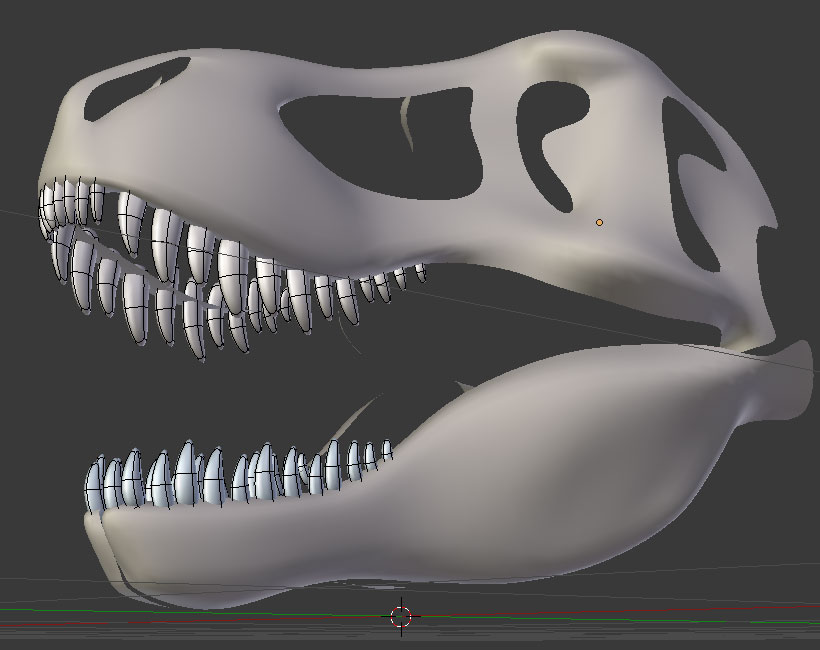
Although the cranium and jaw are seperate meshes I work on them together alternating between each part to ensure they fit together correctly. Because of the amount of planning and accuracy in the base meshes this is proving a trouble free process but I still test the fit periodically by rotating the jaw into the closed position.
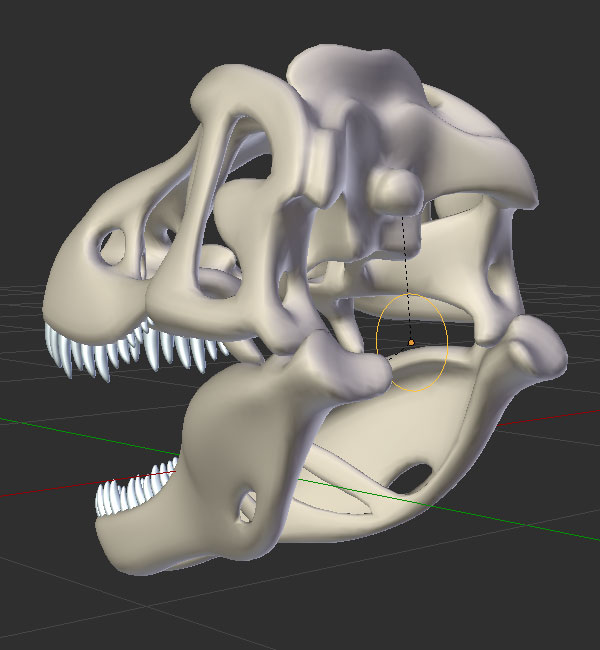
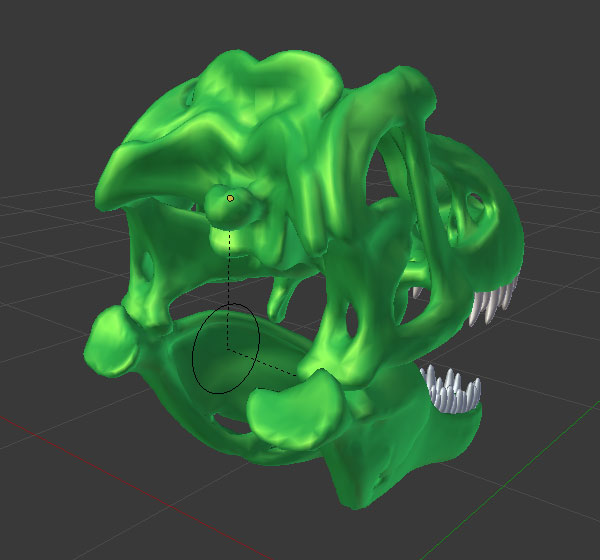
Introducing high-level details now that the mid-level forms are defined. There’s no point into going into too fine detail as it won’t register well in the 3D print.
In a similar vein I’ve cut the sutures (seams between the bones) quite broad and deep so they will show clearly in the final model. I’m learning got to keep this sort of thing in mind when working for scale reduction.
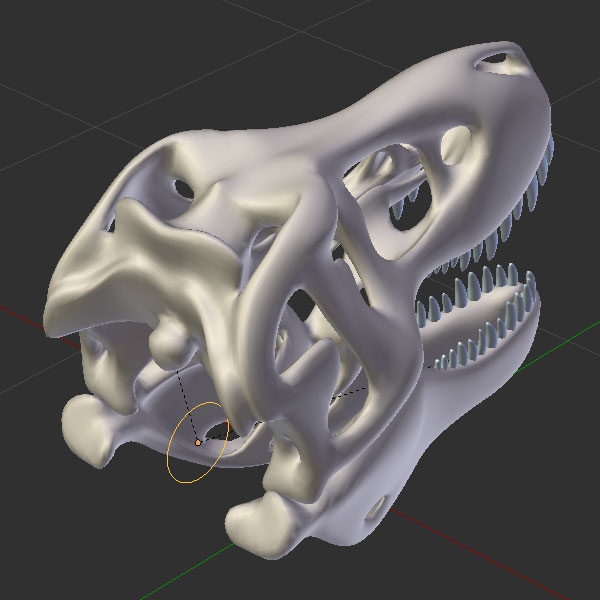
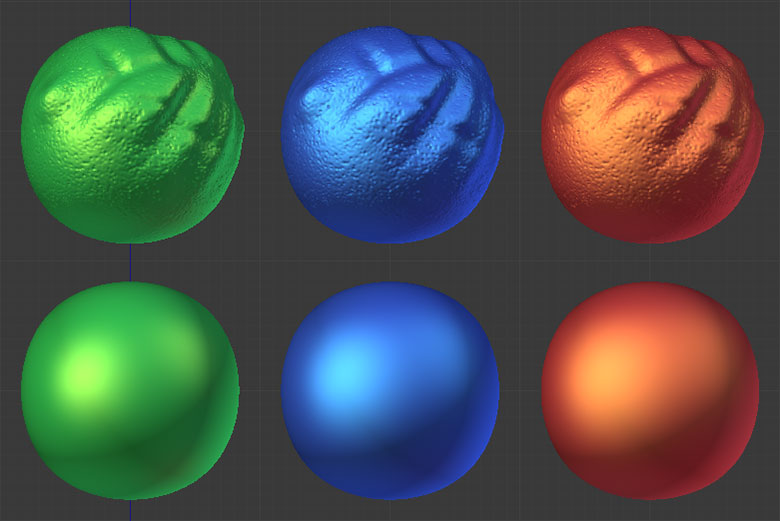
The weird bright green is just to help me gauge the forms in 3D. For sculpting detail I find it useful to have a broad specular highlight that is shifted chromatically from the diffuse colour. In addition to the green with yellow highlight I often use blue/cyan and red/orange. Don’t know if anyone else does this but it works for me.
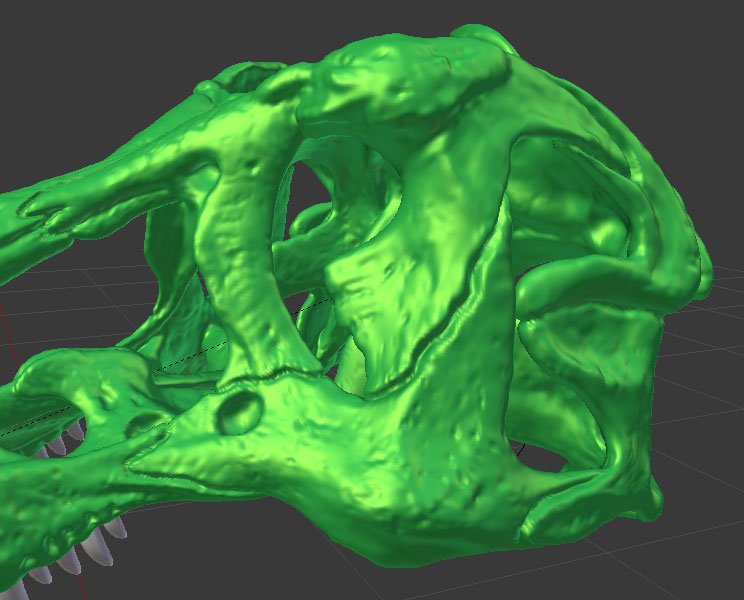
This dorsal view shows the latest parts I worked on at the back of the head. Pretty much done on the cranium now, Probably need a final pass after the jaw is done, maybe a few adjusts in he joint area.