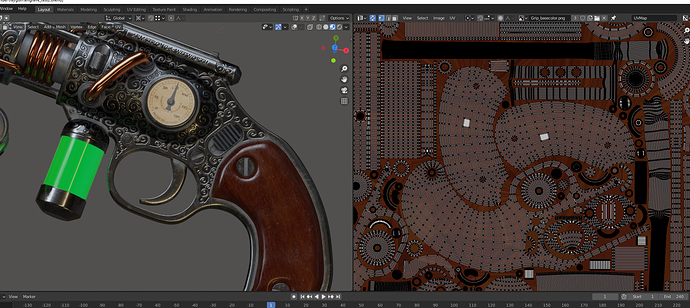
There’s a lot you have to consider. In one of my first projects completed using Blender and Substance Painter, I created one UV map for all objects. Those objects in turn had something like 4 or 5 materials assigned in Blender. That meant that what I got output from Substance Painter in the end was 4 or 5 sets of texture maps each with up to 4 images each (colour, roughness, metallic, normal). If you look at the image below though you might notice a problem.
The texture for the diffuse colour of the wooden grips is shown. The UV islands for the grips only take up a very small area of the whole map. All of the space around them (where the UV islands for other objects are) is kinda wasted in this particular image. At the same time, the area of the UV map where they grips are will be wasted space on the images which deal only with the metal.
Ways round this include:
Output all the maps per material as above, but combine them afterwards into a single set of images.
Use only one material in Blender and use masking and layering in SP to apply different materials to different areas of the model in SP and output only a single set of images.
Use UDIMs. This option wasn’t available at the time I made the above but it would have allowed me to store the UV layout for the wooden parts on their own, smaller and more efficient, tile.
For a simple project I’d consider using one UV layout per material, if that material is shared by several objects. This makes it far simpler to texture in SP with consistency in scale.
