I have an ANT landscape.
I have a particle system applied to it that is distributing mesh a cone across the surface.
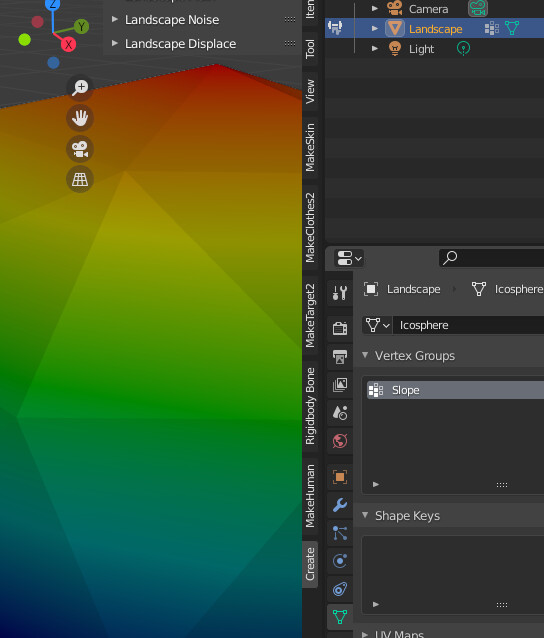
I put the landscape into Weight Paint mode and select Slope from the Weight menu.
I see some parameters appear in the Tool window but I leave them alone, I will accept the defaults.
Now I have a Group under vertex groups for the landscape.
I switch back to the particle system and choose that group for my density.
All my particles jump to one corner of the ANT landscape.
What actually makes this AddOn work?
Is my workflow wrong?
Thank you so much for this! I’m a Blender novice, who has been tearing his hair out trying to texture, and distribute trees on a terrain. I just discovered vertex painting to blend textures just last night. Your script looks like what I need!
Please, I have no experience with installing and using scripts. How would I go about adding/using this add-on?
Edit: Disregard above. I did it! I figured it out all by myself!
Thanks so much for this script! I was able to use the Vertex Paint, and the Weight Paint feature to quickly apply texture blending of two materials, and use the weight painting to distribute trees. Finally, it’s easy now!
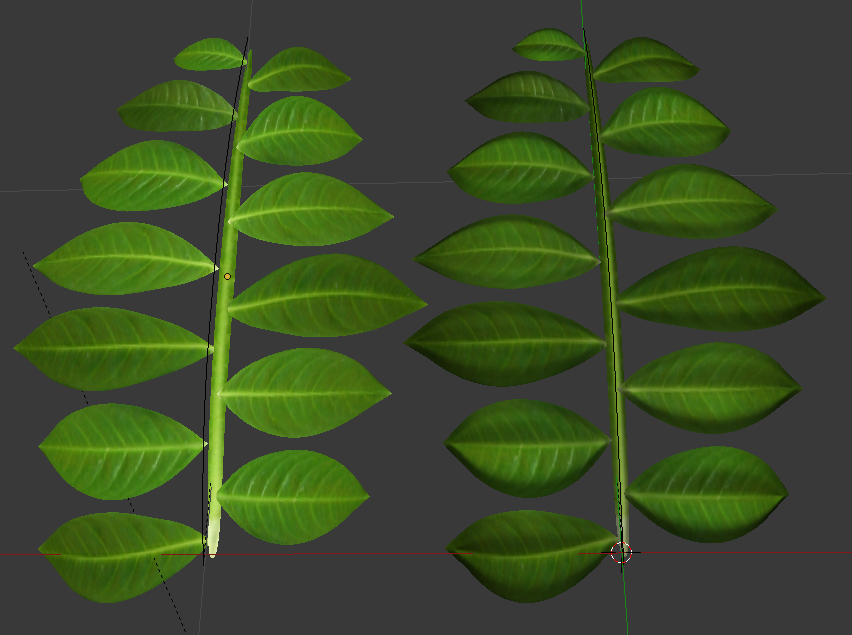
Here’s a pretty good use for this script I think. Both models have the same Materials and are being displayed as Shadeless. They both have the same texture applied but the one on the right has been run through this Addon. Slope Vertex adds a lot of depth.
I purchased your addon from cgcookie. Easy to use! I am having a strange problem though. When I try to use the slope function, the vertex paint, and weights are mapped to the negative z axis instead of from top down. I work around the problem by flipping the object over, apply the rotation, then use the addon to paint the slope. Then I have to flip the object back over and apply the rotation again. Only then can I use the vertex paint, or weight paint to do texture blending, or particle density. Can you help me figure out why the addon paints reverse z axis? Thanks.
@triggerfish: (for some reason my reply doesn’t show up on BlenderMarket (yet) so here a short recap, Please PM me if my answer is not clear)
Mapping to the -Z axis (or any axis in the commercial version) is by design but the resulting weights (or colors) depend on whether the mirror option is checked. With the mirror option checked and the lower limit at 0 degrees and the upper limit to 90 degrees (the defaults) any face with either an upward or downward pointing normal will receive zero weight while faces pointing in any horizontal direction will receive maximum weight. This means for example that the default uv-sphere will receive zero weight near the poles and maximum weight around the equator. These defaults were chosen to ease the workflow for landscape modelers.
Without the mirror option checked (and low limit=0, high limit=180) flat faces pointing upward (north pole) will receive maximum weight while flat faces point downward will receive zero weight (and faces near the equator will get about half).
Giving maximum weight to upward point flat faces was a bit of an arbitrary choice, but the thinking was to let it correspond more with the height operation.
Of course this doesn’t suit every situation but in vertex paint mode you can alter the colors which are assigned to the weights (and when using de node editor you can of course invert the output of the attribute node before connecting it to a mix node) and in weight paint mode you can add a weight modifier (either by selecting one in the modifier tab or by checking the ‘modifier’ option. You could then for example invert the custom weight curve (from the default / to \ )
Thanks Varkenvarken, Playing around with the upper, and lower limits did the trick! I was trying to map textures on to a very organic rock tower (riddled with caves) like the karst towers you see in Asia. I was able to get a setting that actually mapped one color on the upward facing faces, the middle color on the cliff faces, and another on the underside faces (overhangs, and ceiling of the caves). I think if I play around with the nodes a bit I could blend three textures! Thanks for the tip, and of course for the addon.
Hello, @spiraloid Would you please repost this addon?
Your 2.80 branch was pruned and other branches don’t bear this fruit of time.
Thanks!
EDIT (for the future seeker, maybe in 2023):
I found a hack for this: Install ANT Landscape addon, create a landscape, change its mesh to another mesh (your landscape not created with ANT) then N > Landscape Tools > Weight from slope