This cannon is less than 1k tris, intended to be a normal mapped game asset though it’s just a practice to get comfortable with the workflow.
About workflow btw, plan is to UV unwrap this piece by piece, some parts are mirrored those should occupy the same uv space. Then create high poly (manually insert edgeloops, crease edges, subdivide, sculpt small details).
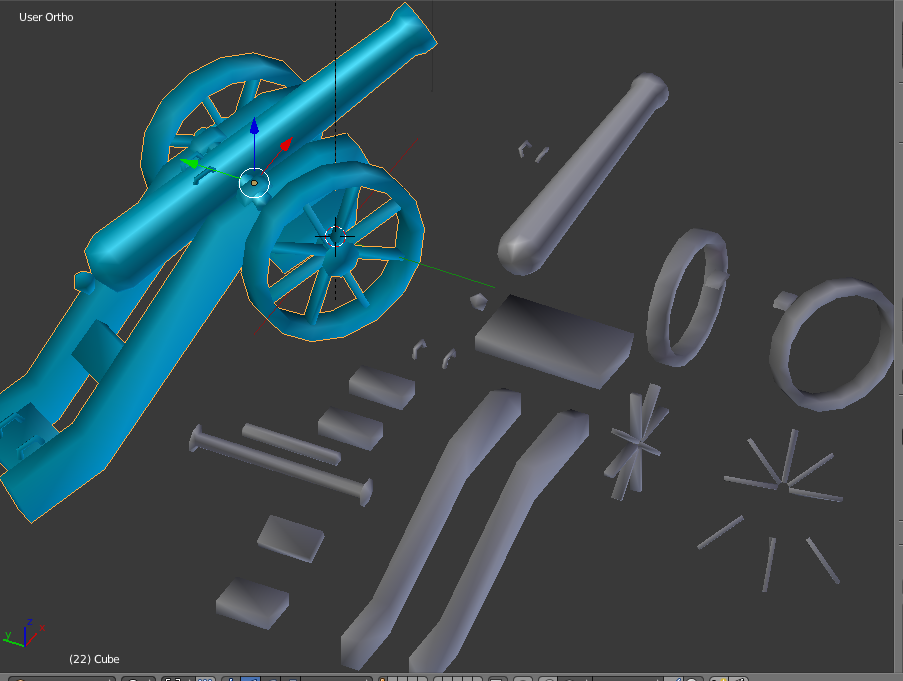
Then “expose” the mesh, push the different parts away from each other both in high and low poly so I won’t get artifacts at intersections when baking normal map. (BTW Isn’t there a good method in blender to do this step automaticly so I don’t need to move the parts back and forth?)
I’m quite new to modelling so i1m asking if this modelling method and workflow is good or i should be careful with it.
Loose parts should be fine, and you plan seems good, but I don’t know if you really need to do the “expose” step. Don’t be surprised if I am wrong though. I don’t do much normal map baking. Play around and see.
In my opinion this workflow pretty common in Blender many people do that. It does indeed make the UV unwrap process easier. But you think about animating it will be good to joint them and apply location and location.
On the question you are asking try to use layers since objects will not change their places.
For the low poly you should remove all faces you won’t be able to see, like the ones where one wood part touches another.
You don’t need to explode them, just move them to separate layers.
I removed the faces we can’t see.
About baking: I thought I’d bake it in xnormal. My plan was merge them into one object, make 2-4 vertex groups, move them around so there are no intersecting geometry (I don’t inted to separate it as much as it on the picture, just 2-3 groups really). make the same with high poly and cage, export and do the baking, then reconstruct low poly. The reason I’d do this because I notice artifacts in the normal map where the loose parts meet.
I don’t think I would animate this, but in any case there would be no stretching.
It’s a good workflow. Just delete the faces which come under another geometry to save polygon budget.
Explode model AO and normal is a very good practice and it gives better results.
I suggest using Blenders all purpose animation tools.
Move High Poly Model in layer1 and Low Poly in Layer2.
Apply all Rotation, Location & Scale.
Ensure that “TIMELINE” greenbar is at layer1.
Now on layer 1, select every highpoly piece separately and Press “I” to get “Insert Key Frame Menu” and Select Location. Do the same for Layer2 LowPoly pieces.
After this, move your “TIMELINE” greenbar to layer2 marker. explode all your pieces and Insert key frames.
You are ok to work with model in exploded view. when you are finished with your maps. move the timeline to layer1 and you have your intact model