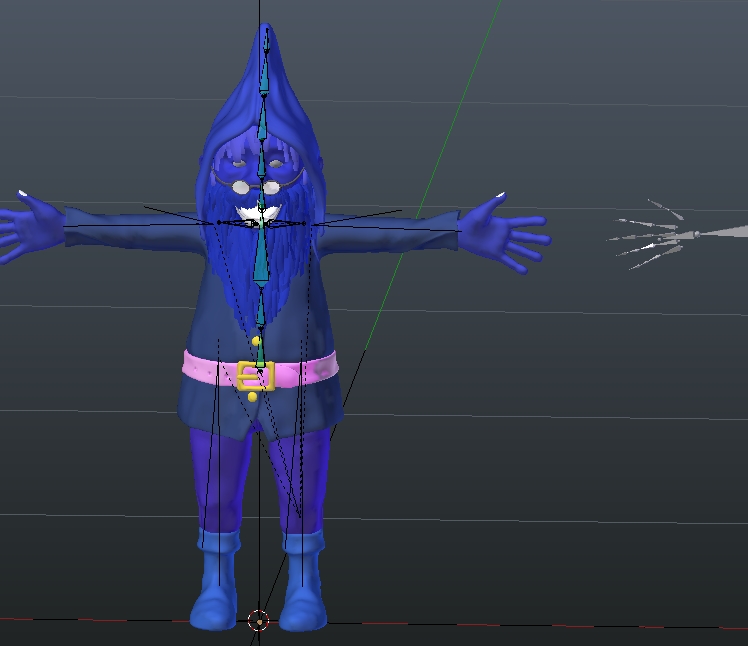
I have painstakingly set the armature of my character twice now and still can’t get it to generate properly. The latest attempt has my rig far outsizing my model. (see attached) And other times not all the rigged bones show - but I’ll address that later.
So looking at the image you can see the rig is much larger. What am I doing wrong? I’ve gone through three rigging tutorials and use rigify. The scale of my model is set to 0. My blend file is attached as well. Help!!!
Your rig is larger than your mesh because the scale for the meta-rig is less than 1.000 (its something like 0.4). Delete the rigify rig, put the meta-rig back in position, apply its scale (Object>>Apply>>scale) (should be 1.000 in all three axes) then generate the rigify rig.
(the scale of your model is set to 1.000, as it should be, not zero. but the model and the rig must both be 1.000, or size differences happen. Rigify is multiplying the dimensions for the generated rig by the reciprocal of your meta-rig scale.)
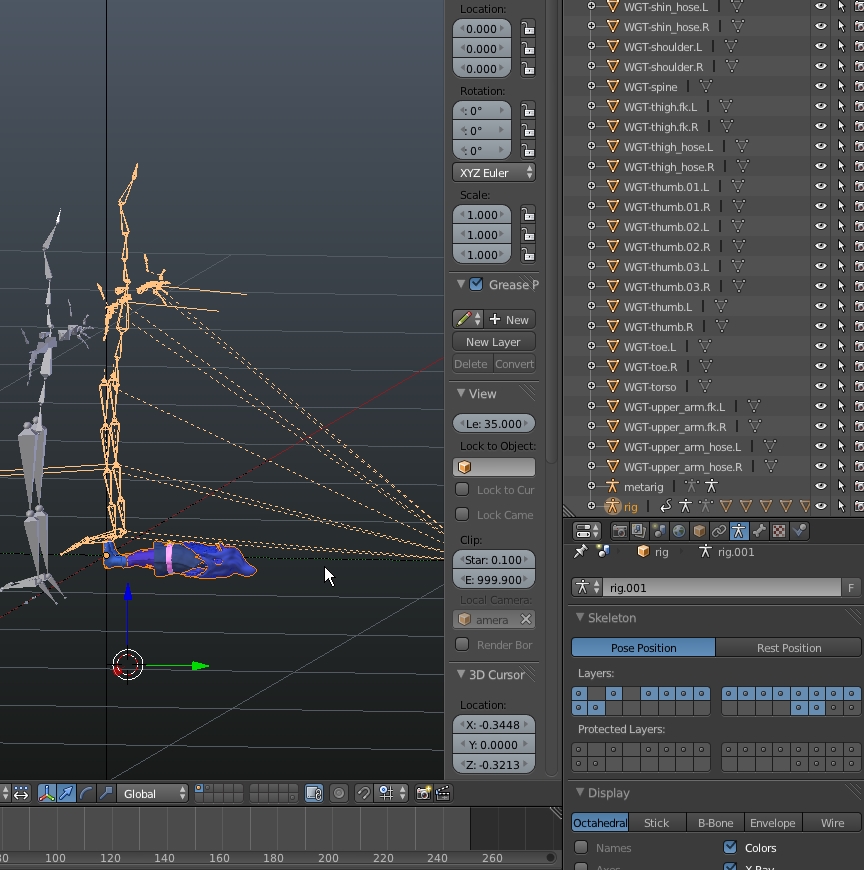
Now I keep getting this problem (at least I think it’s a problem) where after generating I then click on the layer to show the deformation bones and only a few vertical bones are showing. Where are the arms, hands fingers and legs? Is not seeing them a problem?
There is more than one deformation layer. not sure which layer they are on, but they are different.
i guess so it is easier to just use the bones you need.
Likely the same basic reason for the original problem, but in this case unapplied rotation rather than scaling. Back up to before you parented and check your blue dude’s object rotation. Where scale should be 1, 1, 1, rotation should be 0, 0, 0. Ctrl-A to apply rotation. Make sure the armature and character and any other relevant pieces are all set this way before parenting.
Not sure what to do with this. I’ve gone over everything again, even started with a previous non-generated rig and applied location, space and rotation to the armature and the ‘blue dude’ and when ctrl p with automatic weights, blue guy falls flat.
Sounds like time for a .blend file. www.pasteall.org/blend/ and share the link here. It’ll be much easier to diagnose without guessing. Remember to pack any textures into the .blend file first with File>External Data, because a bunch of bright pink objects gets annoying fast.
Thanks K Horseman. I packed the textures. Link: http://www.pasteall.org/blend/24959
It’s a big file. Not sure why. The blue guy is an imported (.dae) Poser character.
The size comes from the packed image textures and the large number of widget objects Rigify generates. But mostly from the image textures.
There’s all kinds of weirdness going on here, and I think it’s basically because it’s usually better to back up and start over than to move forward and try to fix. I think when you applied the rotation on the character, he was parented to something that was influencing his rotation. Get rid of the whole rig you’ve made, both the generated rig and the metarig, and clear out all of his vertex groups for good measure (probably unnecessary, but I like to start clean).
Then rotate him back up to where he ought to be and apply his rotations again (ctrl-A on all his various objects. Even the glasses). Then make yourself a fresh new meta-rig and set it up properly (again making sure its rotations and scales are all cleared before proceeding). Then generate the Rigify armature. When I did it that way it worked perfectly. Or perfectly enough; I wasn’t very precise about bone placement. His hands were rubbish in my quick test.
Afraid of that, but thank you, K Horseman. Glad it worked for you so it should work for me. I’ll get to work on it. “Oh the pain of rigging!” Thanks again. I’ll post my results.
all he needs to do is rotate his model around the origin point in edit mode so it stands up. his main problem comes from parenting the rig to the model before he scaled it. delete the rig you have and all associated bones. go into vertex groups, and delete all the vertex groups for each item of clothing and the body and face.
now re add a new meta rig. scale it to fit your model IN EDIT MODE. then STILL IN EDIT MODE move the individual bones into position in the mesh, finger bones into fingers leg bones into legs etc. now once that is complete go into object mode.
press space , type rigify into the space bar and select generate rig. once the rig is on the model move the human meta rig to a deserted layer and then select all the body parts, then select your rigify rig ( the one made of circles and stuff thats in the same layer as your model, and should be the same size as your model) press control P select from the menu " with automatic weights" check that it deforms nicely by selecting the rig and going into pose mode and moving bits around. if it deforms badly (it will deform badly) go into vertex paint mode and adjust the paint weights for the bits that deform wrongly.
rigging will take you about 5-10 minutes. weight painting will have you back here on the forum scratching your head after an hour.
still need weight painting a little bit.
no you cant have the . blend
not til you’ve made a good effoort at following the instructions any way :eyebrowlift2:
yes, but the implicaton from your statement is that it could be done in object mode, and i am not sure it can properly as it is n imported poser model, an i think they have a messed up x/y/z. doing it in edit mode negates the need to apply the rotation so any import confusion there may be is eliminated. at least until he tries to do anything complex… like moving…
OK, yeah, your way saves a step. I figured since we’d already established the value of applying scales and rotations we could just run with that, but perhaps best to discourage non-animated object rotations & scales in the first place.