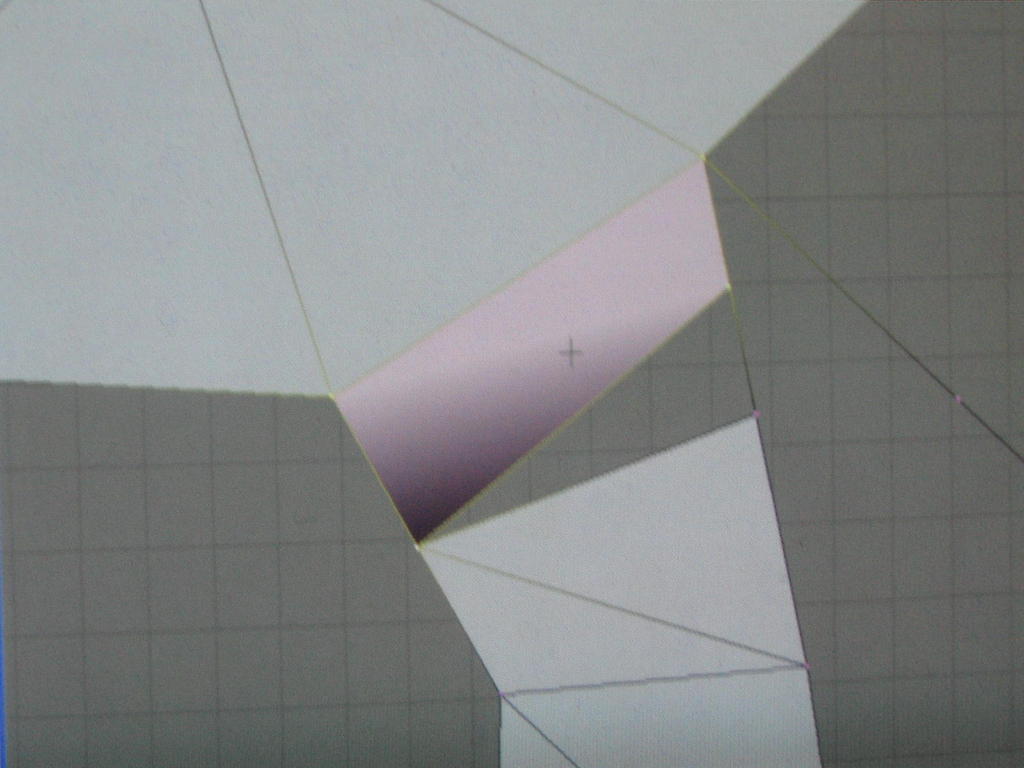
when i try to make a face in this area this keeps happening. its happened in a couple of other places but if i rearange the edges it flattens back out. but thats not working here. what is this from

If your talking about the dark area, you need to recalculate normals for that face. Ctrl n or ctrl/shift n.
that doesnt seem to do anything. is that all there is to it?
What exactly are expecting to happen/what are you trying to do?
well i want it to all look flat. currently that face looks like it has a shadow which doesnt make sence to me becase it IS flat
I want that face to look like the rest of them
man im frustrated i cant figure out why its doing this!!


the last pic is in object mode and you can see how it throws things off. this is a plane though so i dont understand how im getting shadows
My guess is that there is an overlap
provide the blend file
The black face is smoothed. You can probably “hide” the problem by setting it to solid.
But the reason the smoothing is causing the black shading is because the normal is pointing the wrong way. Sometimes with non-manifold objects as this, blender doesn’t manage to recalculate the normals properly. You can manually flip the normal by selecting the face and pressing ‘w’ -> ‘flip normals’.
Also you can turn on ‘Draw normals’ in the editing panel (F9), to see which way they are pointing
Ps. There is a button on your keyboard with the text ‘PrtScn’ which makes it a lot easier to take a screenshot
You need remove double or flip normal faces
Why did you make fotoshot instead of screenshot.
Try to select ALL faces and then recalculate normals. If it doesn’t help, turn on normals display and find out what’s wrong. For single face do not use automatic in/out recalculation - use FLIP instead ( W-key > Flip normals ).
EDIT: I was toooo slow 
there could be a vertex missing and the face that should be a quad is a triangle and will cause when overlapping and “smooth shaded” this ugly effect.
either flat shade or add the vertex;D
there are two spots that are doing it. both at the top ive left them open her but all i did was select the verts and hit F
TAT.blend1.blend (243 KB)
i got it. i was selecting just the individual face when i recalculated norms. i selected ALL and it cleared right up. thanks. in case yoiure wondering i did this to join to my mesh because i couldnt figure out uv mapping. it kept changing my chars skin all over to white and its only supposed to be a back peice not a full body tat:)
i just selected the 4 verts hit f then 2xa to select all and ctrl+n to recalculate the normals and the problem was gone;D
edit: ah to late
The two faces that are causing the problems are the two faces connecting the top and bottom parts (I’m referring to the Y-axis pointing up). The normals of the top part are inverted as compared to the normals of the bottom part. Select everything and press ‘Ctrl + n’ to recalculate the normals and the problem goes away
thanks guys. do you think this is an insane way to do the tatoo thing since i am an idiot with UV mapping
Yes, it is insane. Either you’re trying to overlay faces so that one can have your tattoo… which won’t work because each face is going to try to cast shadows on its neighbour which causes rendering artifacts or you’re trying to get down to the microscopic level of modeling to position all your edges to form the tattoo from shaped faces… this won’t work either because it kills any idea of topology and shaped coloured faces, no matter how small, are only going to look retro.
Get a UV mapping tutorial. Spend a day dedicated to reading through it. Two days if necessary to make sure you learn it well. Don’t do anything else in Blender until you have UV mapping sorted. It’s not that hard a skill once you get the idea and your work will thank you for it.
Alright ill try another tutorial or 2. Just getting frustrated with it
It’s a little bit ahead (you need to learn unwrapping first) but Blender’s projection painting tools are awesome. You can literally paint directly onto your mesh with a wacom tablet. You can even project in front of photos and have their texture map near-perfectly to your model (this is how many of the Blending Life entries were textured).
Unwrapping itself is simple. You draw unwrap seams (where the cuts will be) by marking the edges with [CTRL][E] “mark seam”. Then, with a new image loaded into the UV editor, you hit [U] in 3D window (all faces must be selected for this) and provided you have seamed so that it can lay flat, the whole mesh auto unwraps in the UV window. From here it’s mainly a matter of making sure you save the UV image regularly (it is separate from the actual .blend file) and then add changes to the teture file in Gimp/Photoshop or Blender UV paint tools once you know how to use them.