Okay, I’m close to done with the first character of the story. Rigging is shady but I’m going to push forward instead of sweating the small stuff.
Notes: I’m trying to design characters based on my doodles - turning 2D scribbles into 3D characters - at least picking up some of the stuff.
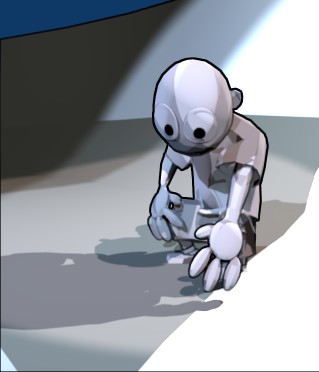
Also, because I’m going to be animating it, I’m trying to keep the polys low, but I’m running into problems with low poly and toon shading… the low polys take away some of the roundness of it all.
Not so happy with the nonsense going on with the hand. Damn lo-poly madness.
You might try putting in a color ramp set to “normal” on the material to maybe break up that sharp shadow outline you don’t like. I haven’t tried it, but it might work. I think your cartoon guy will look fine once he’s got some color to him. Don’t sweat it, beau, it’s small stuff. Nice work.
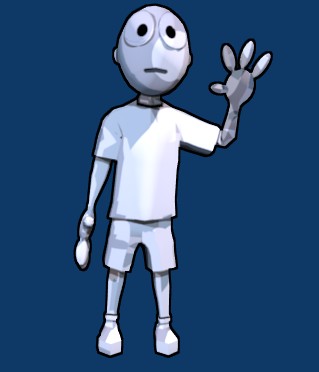
Yeah - well - see - there’s the challenge. I’m going for a Calvin and Hobbes, black-and-white comic strip look. At least for now. Trying to keep everything black and white with maybe two shades of gray mixed in for depth.
it might work. might not.
Here’s a pose test. I’ll upload the blend file in a bit. I’m putting out fires here at work right now.
hey - is there any way I can import the ludwig armature/rig into my blender file? I’ve tried but I’m just punching in the dark with guesses on what I’m doing.
my armature is dodgy - the arms flail in unnatural positions etc.
AND, I’m learning that my mesh ain’t as good as I thought. How can I set it up so the shorts and the shirt dont go through each other?
augh… first there is a mountain, and next, there is no mountain, and then, there a mountain again.
You have to append from the OBJECTS tree, not the ARMATURE tree (as you might have been doing).
Also if you select all the Ludwig Objects (main armature, mesh, face armature, controls, eyeballs) … or just the elements you want (main armature, face armature) and then group them with CTRL-G, (You can rename the group under the F7-Objects buttons), then when you append, you can just pick the group from the Group tree.
As for the “clothing collision”, take a look at Calvin’s AJ rig, I think he has rigged the pants/jacket as seperate objects.
For shadows, (I think Spot lights only work) select your light, then under Shadows&Spot (F5) enable Buf Shadow. You might need to increase the ClipEnd value (the line in the middle of the light in the 3d view indicates the clipEnd). Also change the Bias value to something under .1 for better results. Then just make sure the Shadow button in the (F10) Scene buttons is on (RAY is not necessary and has no effect for Buf Shadows).
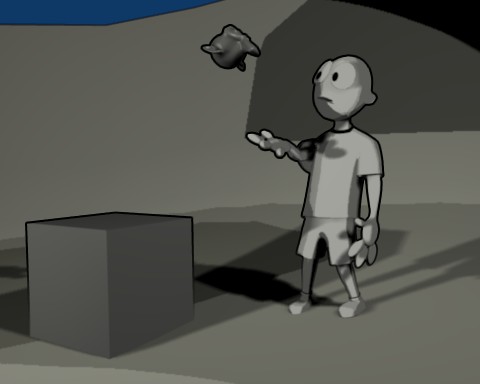
I modified your rig a bit and uploaded it with a rough animation:
Mike - I finally opened up the file you created (two weeks later – hey I bought a new guitar!!)
I have just a few thousand questions:
The armature is now half as busy, which is awesome, but is a skip in knowledge for me. Without the shoulder/hand/thigh/finger bones, how can I move them?
If you just want to point me to a tutorial that explains your magic, that would be awesome, thanks!
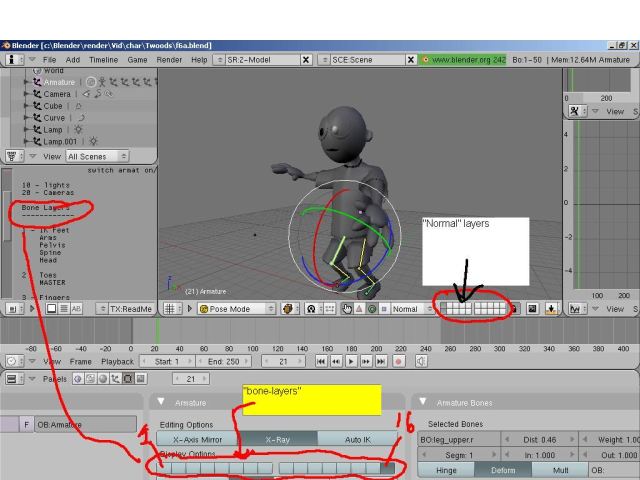
No real magic, I just moved the bones around to different “bone layers”. You can move one more bones to a bone-layer by selecting them in POSE mode, then press ‘m’, and you’ll get a similar layer panel popup that you get when you select an object and press ‘m’.
The entire armature OBJECT is on “normal-layer” (1-20) … layer 11. I put it there because you can then quickly toggle the whole armature visibility by pressing ALT-SH-1. Or if you want to do something with just the armature, just ALT-1 (“1” on the TOP number keys, not the NUMPAD). You can move the entire armature to a different layer by switching to OBJECT mode and presssing “m”.
Bone layers are on the (F9) Armature / Editing Options panel. They just control bone visibility. You can select one bone layer … or multiple layers with SH-LMB. (You really don’t need … normally to animate the thigh bones, usually you’d use the knee.l/r bones, but the thigh bones are on bone-layer 16 if you really want to animate them.
I added notes in the text file, but I guess you didn’t realize what “bone-layers” meant
The rig is from the Bsod - Intro to Character Animation tutorial on the wiki (link in my signature).
The arms do have IK, the IK is just turned off in the file I uploaded. The thigh bones (leg_upper.r/l.) also have IK with the knee.l/r. bones as targets, and the legs/feet are all IK with leg.l/r as the IK targets.
ha, sorry man, the controls and bones were just set up kind of strange…
Im sure you followe it great, i jsut dont bother with all the stuff you had, so mine are really simple(albeit, asy for animation). No offense meant man <:)


 … (check out my Best of Blender thread to links to other character rigs you may not be aware of).