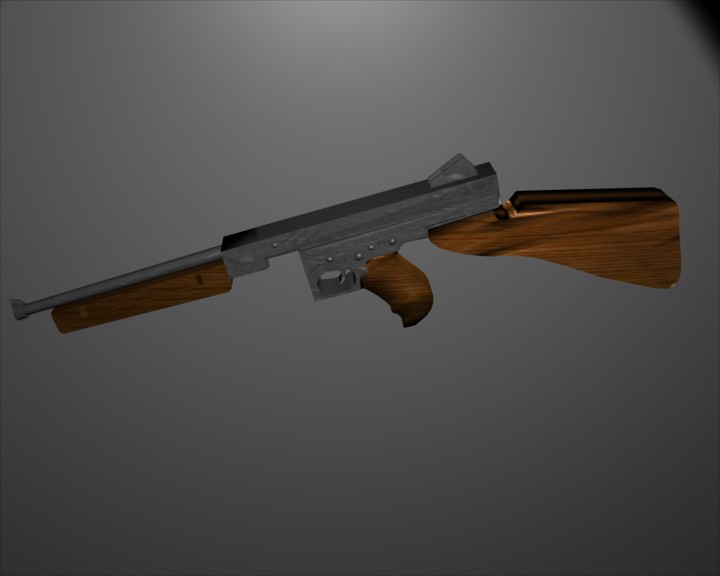
Here ya go, a WW2 Tompson.
SirMikey
I think it’s a good start, but you need better lighting.
Put it on a plane and use some buffer spots, area lights and AO.
Dont forget the magazine! 
Looks goods, the wood texture looks a little messed on the stock though.
-JM
Thompsons were not used on planes lol, They were widely inacurate a large distances!
edit
oh a plane as a flat blender surface…hehe…Call of Duty 2 hehe
As I told you in the WIP thread, you should round the edges of the wood.
Lol, yeah I totaly forgot the magizine!
Yeah I guess I should round it some more.
Very funny Slèpnyrl 
The wood texture on the stock is b/c of the smoothing. Blender smoothing is mean to me 
No update sorry, I got lazy over the Holidays. Well I beveled the wood and that helped the black blotches on the wood from Blenders’ evil smoothing. I added a couple German Mk9 stick grenades. C&c welcomed.

SirMikey
I didn’t mean just bevel. Here, from Google image search. Look at the wood.
Thinking about it though, you’re going low-poly, so I guess you don’t need to round it.
wire please.
Uhhh…lol…how do I do a wire?
Yeah I see what you mean, thelonesoldier. This was kinda a crappy gun. I might remake it all over again. My wire is sloppy, I have quite a view triangles.
SirMikey
Ah, yes, the Thompson Machine gun, put fear into the Nazi’s, not to sure but did America use a arm extension with a garnade ? I thought it was more like a metal pineapple
You can post a wire by taking a screenshot of the 3D window with the Prt Scrn (printscreen) key (which copies the screen as an image) and then loading an image editor such as Paint or GIMP or Photoshop and pasting the image, and then saving it.
The Americans indeed used the “pineapple” grenade, while the Germans used the “potato masher” shown in the render.
I’ve never seen a gun with a square butt stock. The butt stock and handle should be basically an elongated egg shape extrusion.
The easiest way to handle the recesses is to use a displacement map. Just UV map it and then use a guid to tell you where you need to put them. Actually the UV editing system in blender let’s you modify in real time now. So you can just see where the black (or white) spots are going to lie before you bring it up as a texture and map to UV >> DISP.
You don’t have to do the same thing again, but I think you could show a good gun if you wanted with less work, so a little reading and experimentation is all you need.
Peace!