As you can see it can be used to make pretty much every car-paint except for those that change color based on the angle and chrome paints. I’ll see if I can add those to it later though.
I decided to test compatibility with the general workflow, and in the process
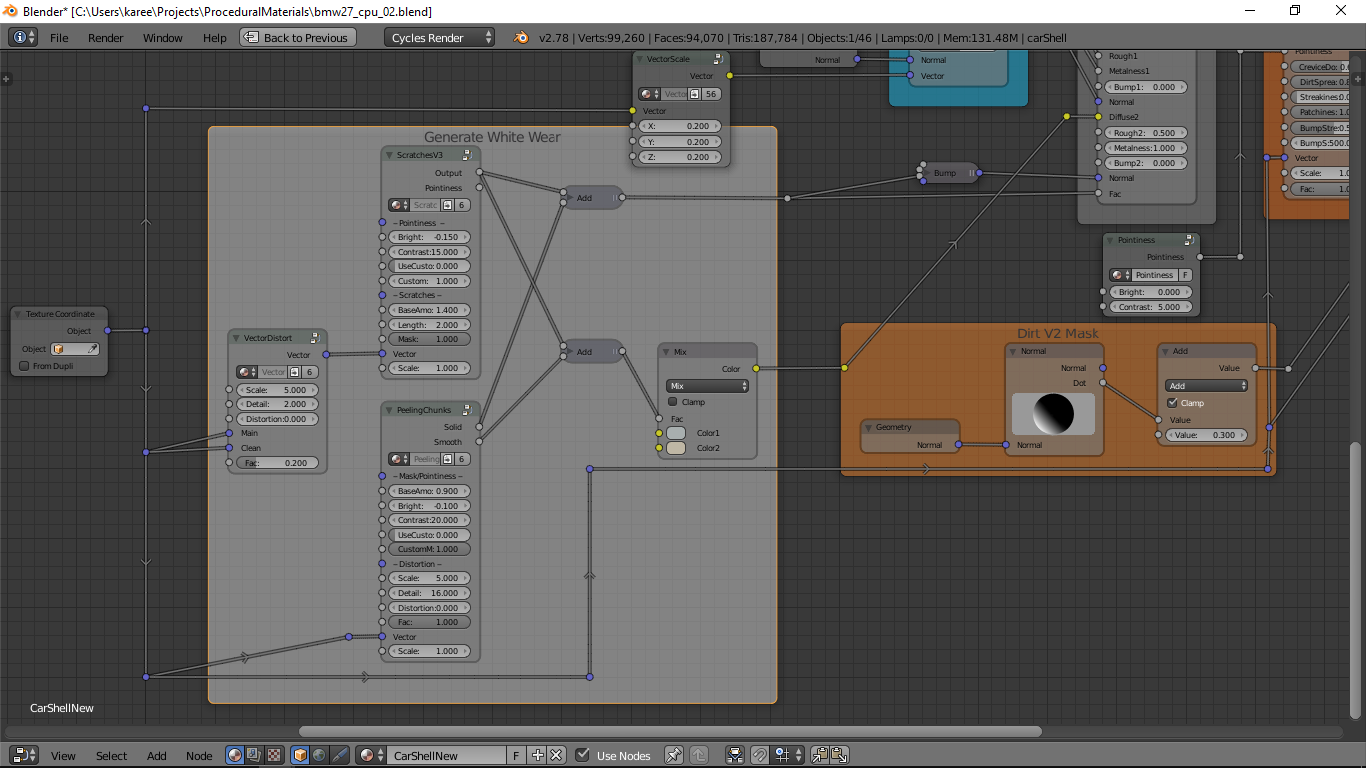
> Rebuilt my procedural scratches group. Version 3 is much faster than the old V2.
> Built two new “wear” generators: ‘EdgeWear’ and ‘PeelingChunks.’
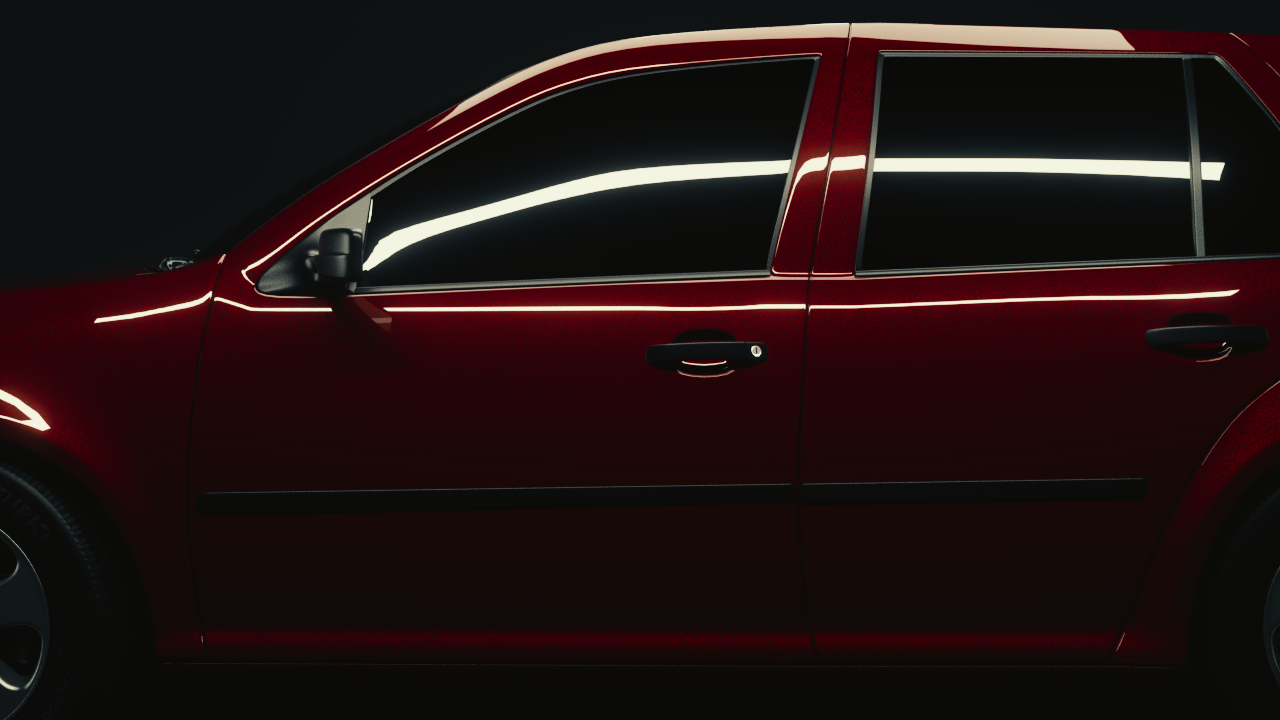
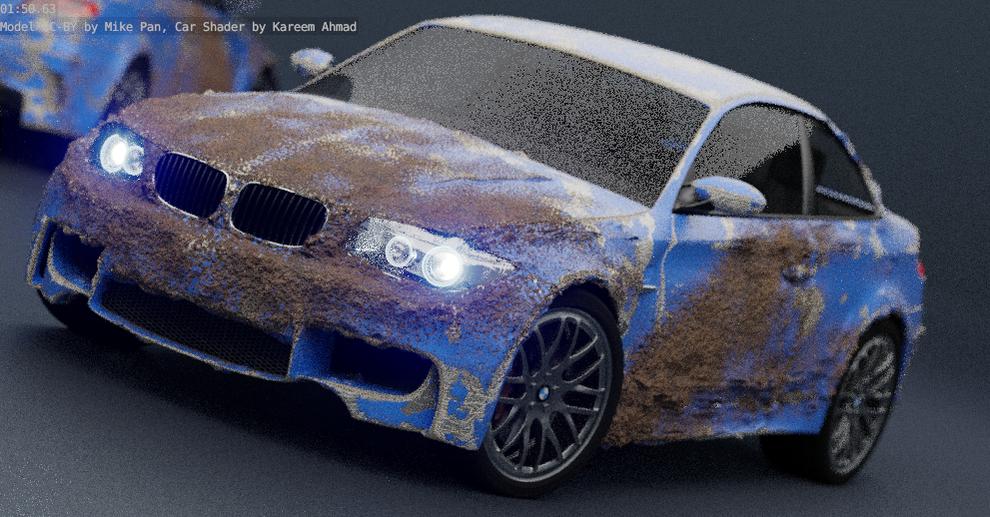
The shader looks good but the problem is its illogical. I mean how your bottom part of door can be clean and mirror and roof has got dirt there. You may like to work on that.
I like the middle image, as it reminds me of old cars rusting in a shed somewhere. They tend to rust around the sides but collect dust on the upward facing surfaces.
Good point. For the mask I used the dot product of a forward facing normal—the idea was the car running into dirt. I forgot about the door. Could probably be fixed by pointing the normal down and forward, or by hand painting a custom mask—this would probably be the better option.
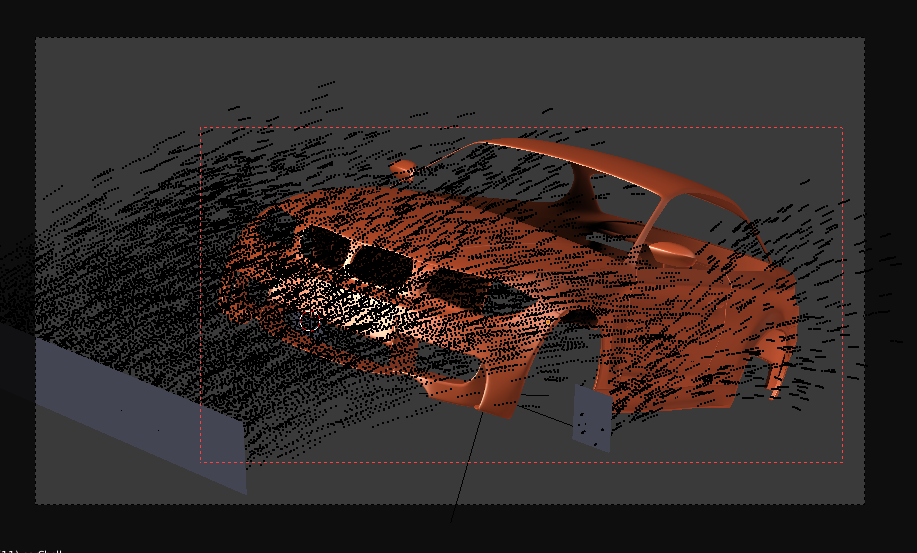
I tried driving the dirt-mask with the image output of a dynamic paint simulation. It worked–mostly. As you can see in the GIF, there are a few issues with the displacement displacing car-body before there is enough dirt to be visible. I’ll need to further reduce the sensitivity of the displacement to the mask.
Also, the positions of particle emitters and their timing wasn’t too good, but it’s not bad for a proof of concept.
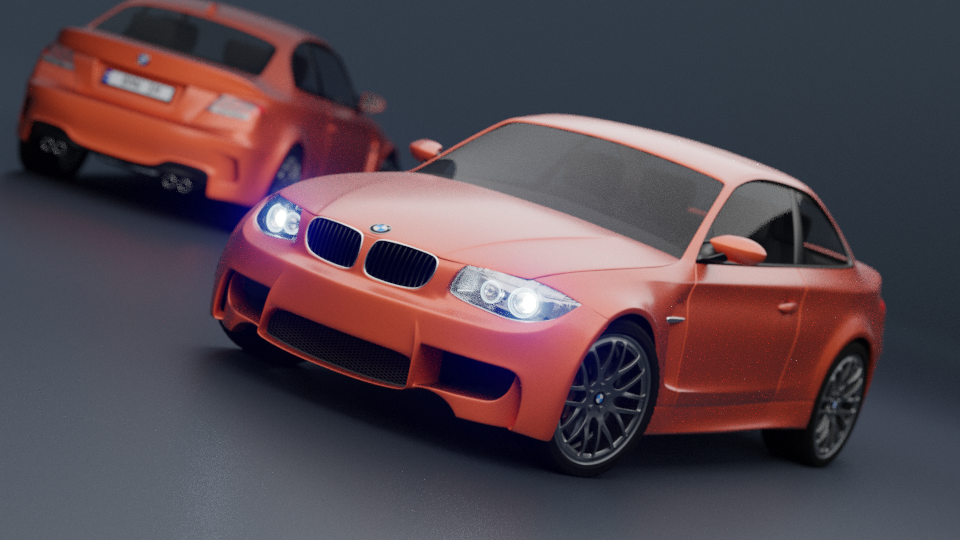
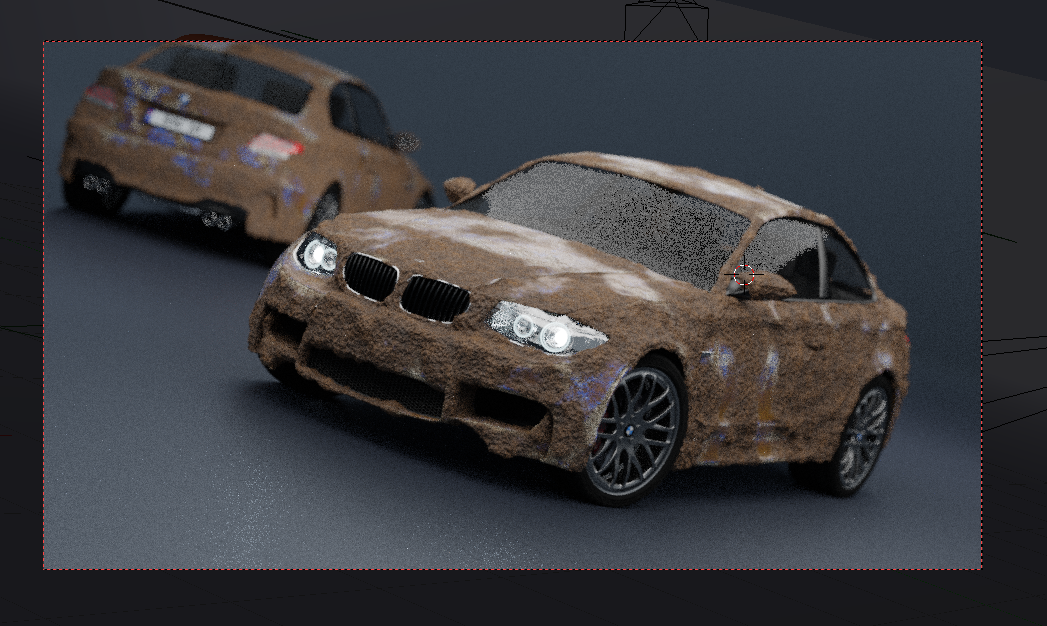
Well yes you made it all dirty. You can lower down the dirt and if body is this much in dirt then why glasses will be so clean and new. make them dirty too. Even if you are driving in muddy river you won’t get this much dirt on your car. and glasses will be affected too either its window or headlight.
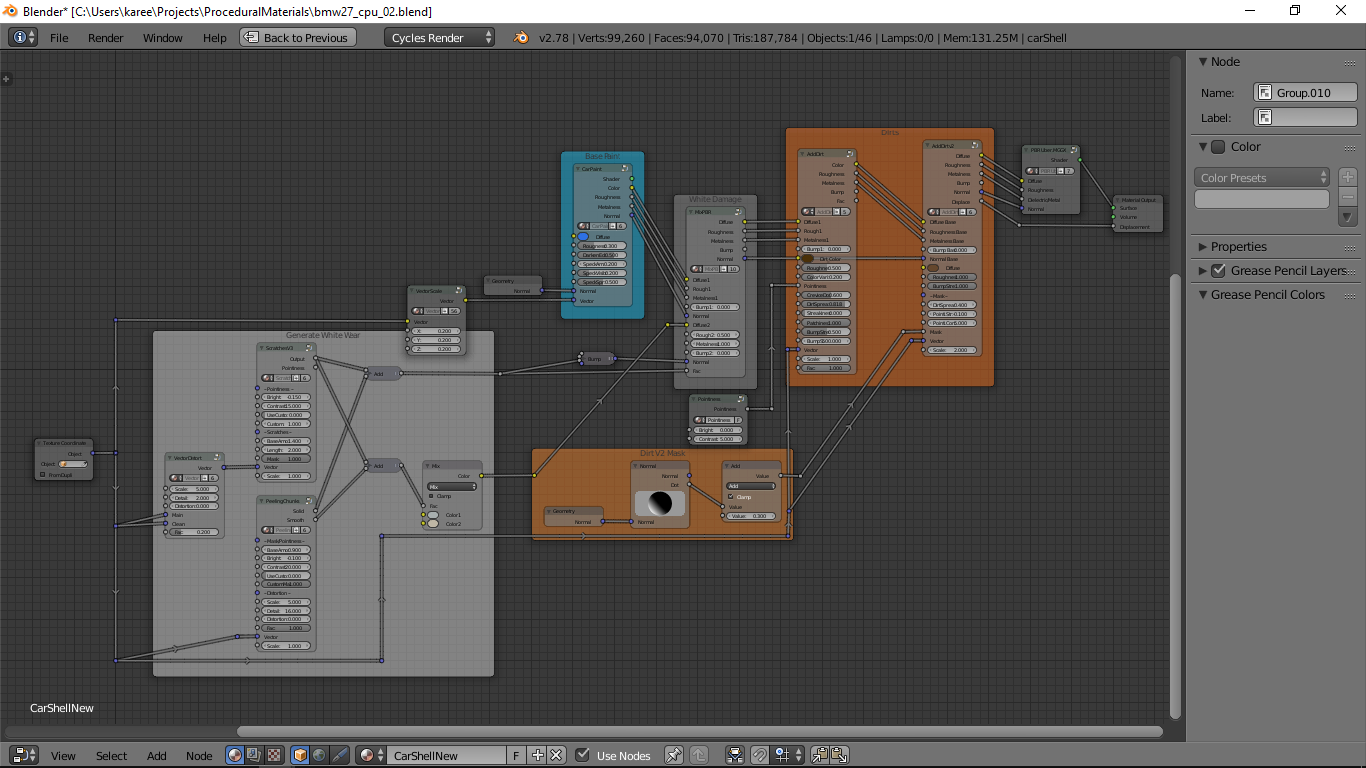
But i love your shader workflow. it is something that i will love to learn.
And i want to see your render settings if possible.
Cheers
400 samples must not take ample amount of time, though you can try lowering down your bounces. If the glass ain’t transparent then transparency with 4 bounces and others also with 4 max and min will be enough. If needed you can use clamp indirect though.
And about dirt part as i said in my comment earlier, you need to see where the dirt should be and how much.
Cheers !!!
It’s been quite a while since I’ve posted anything here, been busy moving.
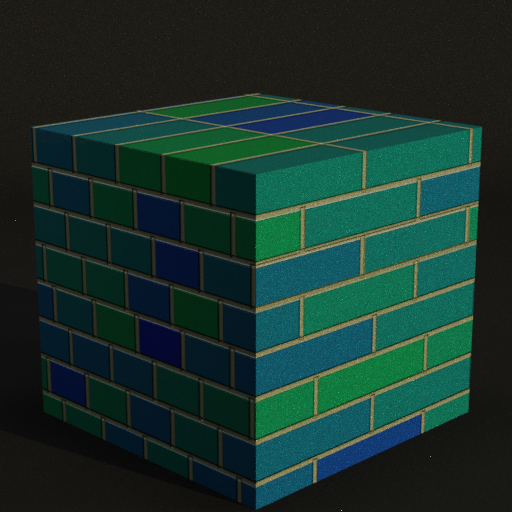
Anyhow, I’ve completely rebuilt my tiling algorithm, and with it a new generate random node (uses 3 seed inputs).
The tiler, by the way, is basically an improved brick texture (it works in 3 dimensions unlike the basic brick texture) and generates a random value for each brick as well as a random per-brick vector. Basically it allows you to use a procedural texture for the bricks and have them automatically randomized for each brick.
The vector for the noise texture used for the bump on these bricks is the BBV (Brick based vector) so if you look closely you can tell that the bricks’ bump maps are not contiguous from brick to brick.
This would be more obvious using microdisplacement and a stronger displacement.
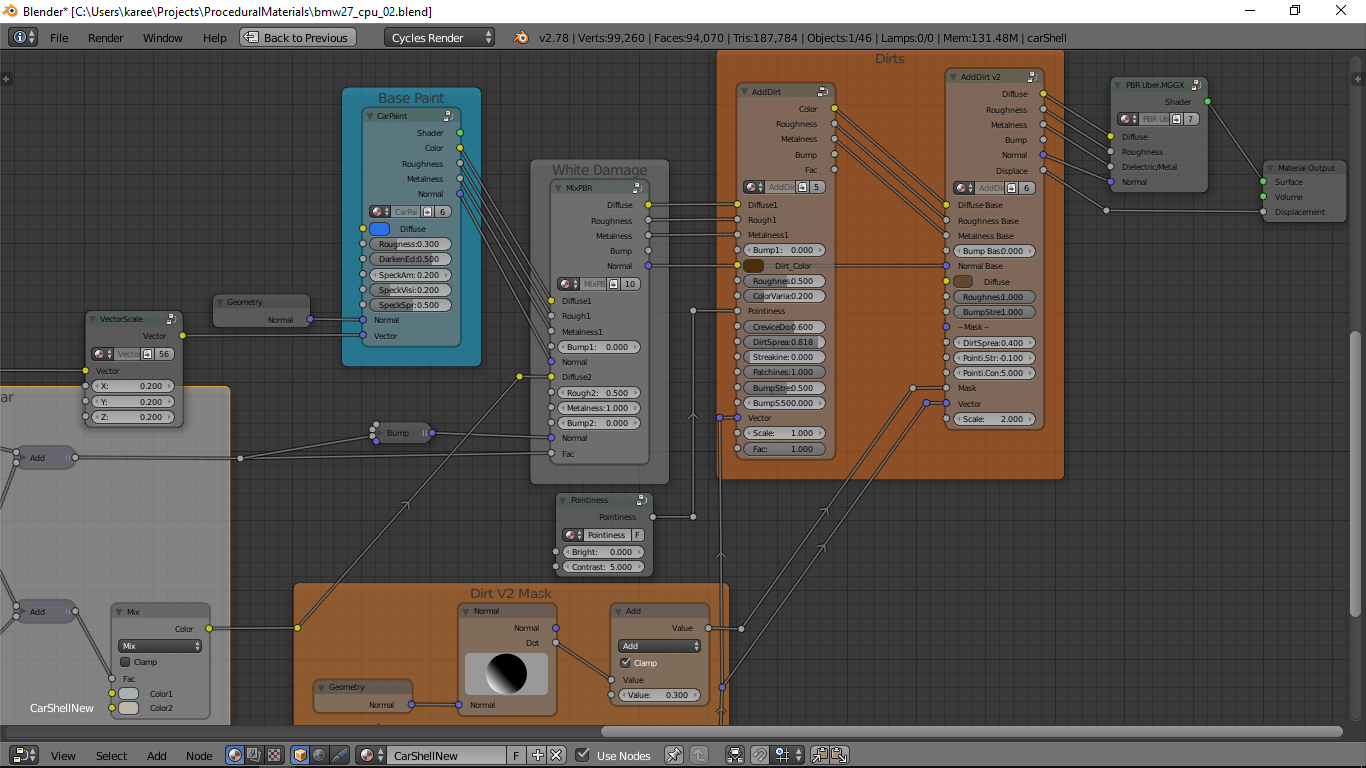
In other news, I’ve been working on more damage maps, mostly for metal but also for other things. Concrete damage is the first one I’m somewhat satisfied with:
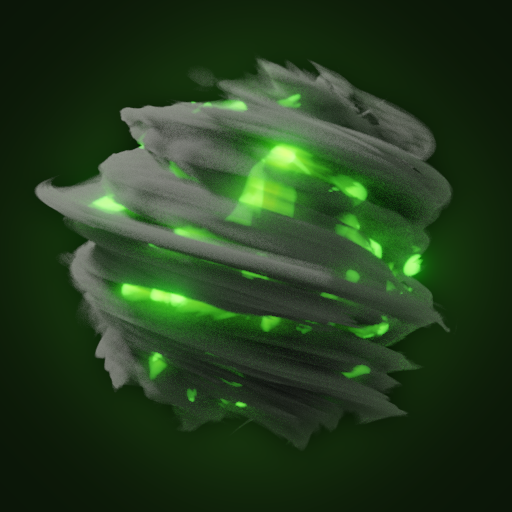
For the RGSimplicity challenge by Remington Graphics, I decided to play around with volumetric shaders and the vector modifiers I made through this project.
So its been quite a while, Graswald took up quite a lot of my time, and, while I’m not completely free yet, I’ve had some free time, so I decided to make a few new shaders.
I’ve been wanting to make this for quite a while, though I’m not quite sure what its called… a threadplate? It took a while to get it right but I’m pretty happy with the result.
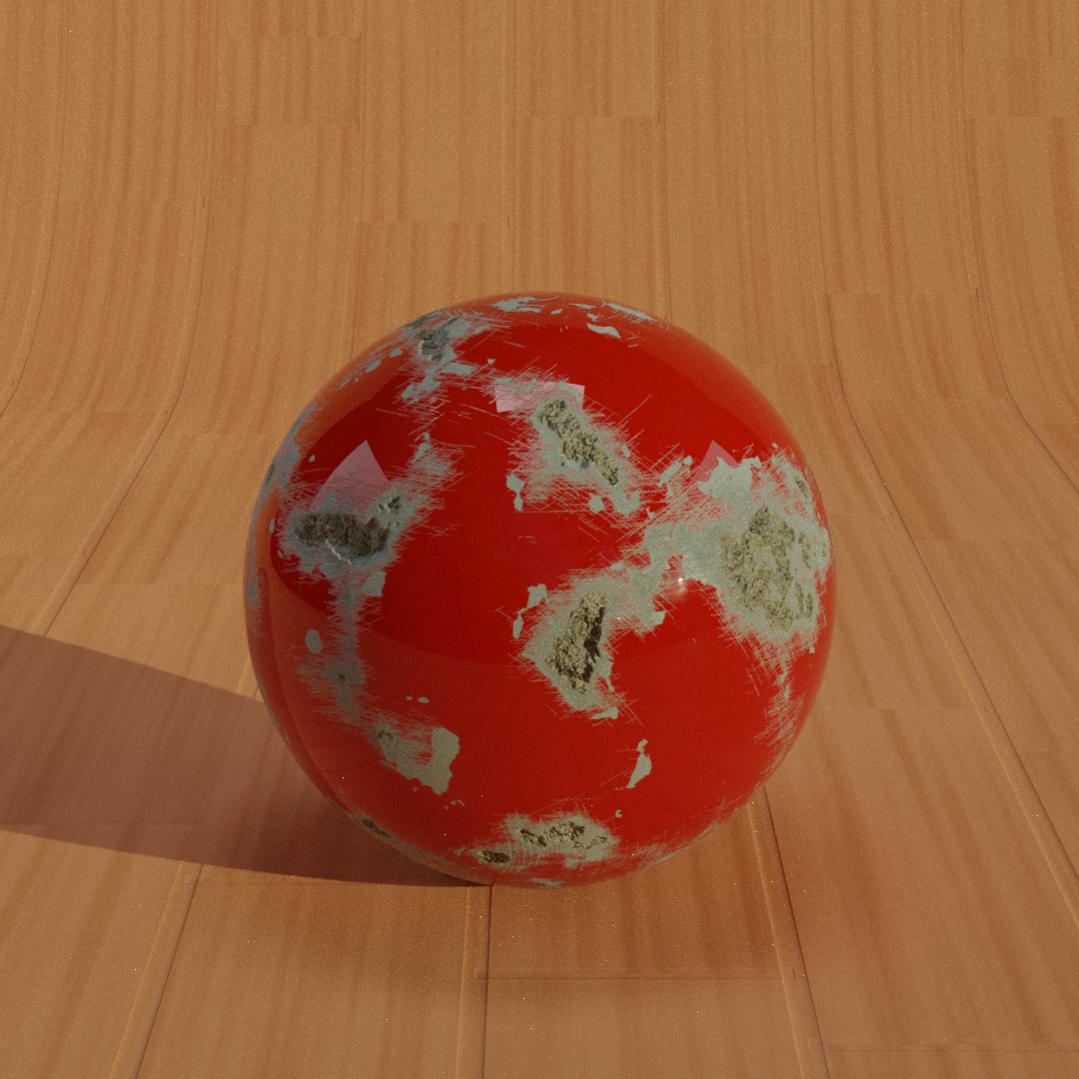
I also made a dedicated modifier for adding paint. I finally realized, you could do a lot of it. You can set how deep the paint seeps into the material below, its thickness, how high it starts eroding, and more. And I’m really happy with that result.
I was just reading the thread. Great work. About the wood shader: you could further improve it by letting the wood grain flow around the knots. The base grain should interact with them in some way.