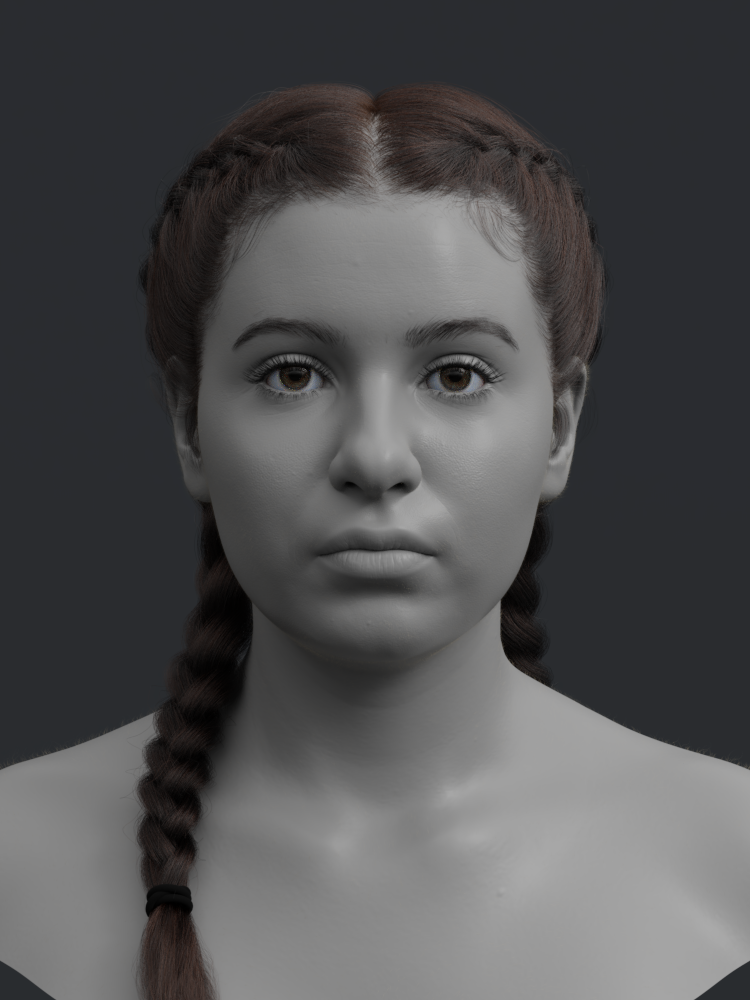
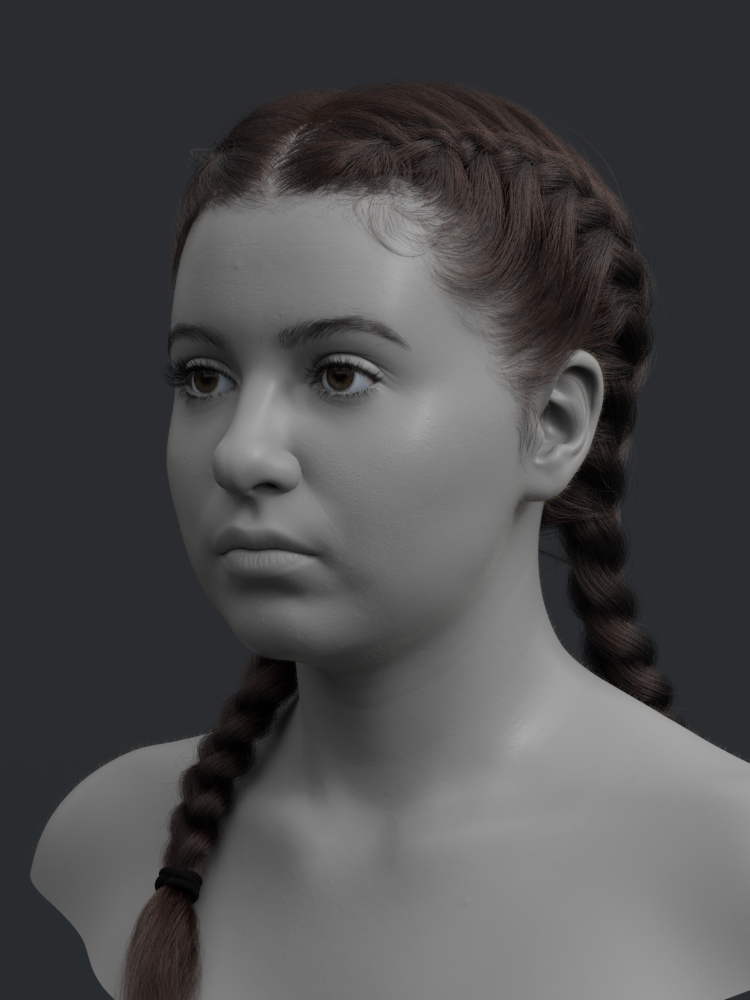
Alright, I had some time over the holidays to write up how I did this.
I started with Nazar Noschenko’s excellent braid tutorial: Puma (braid tutorial)
(Seriously, watch that first!)
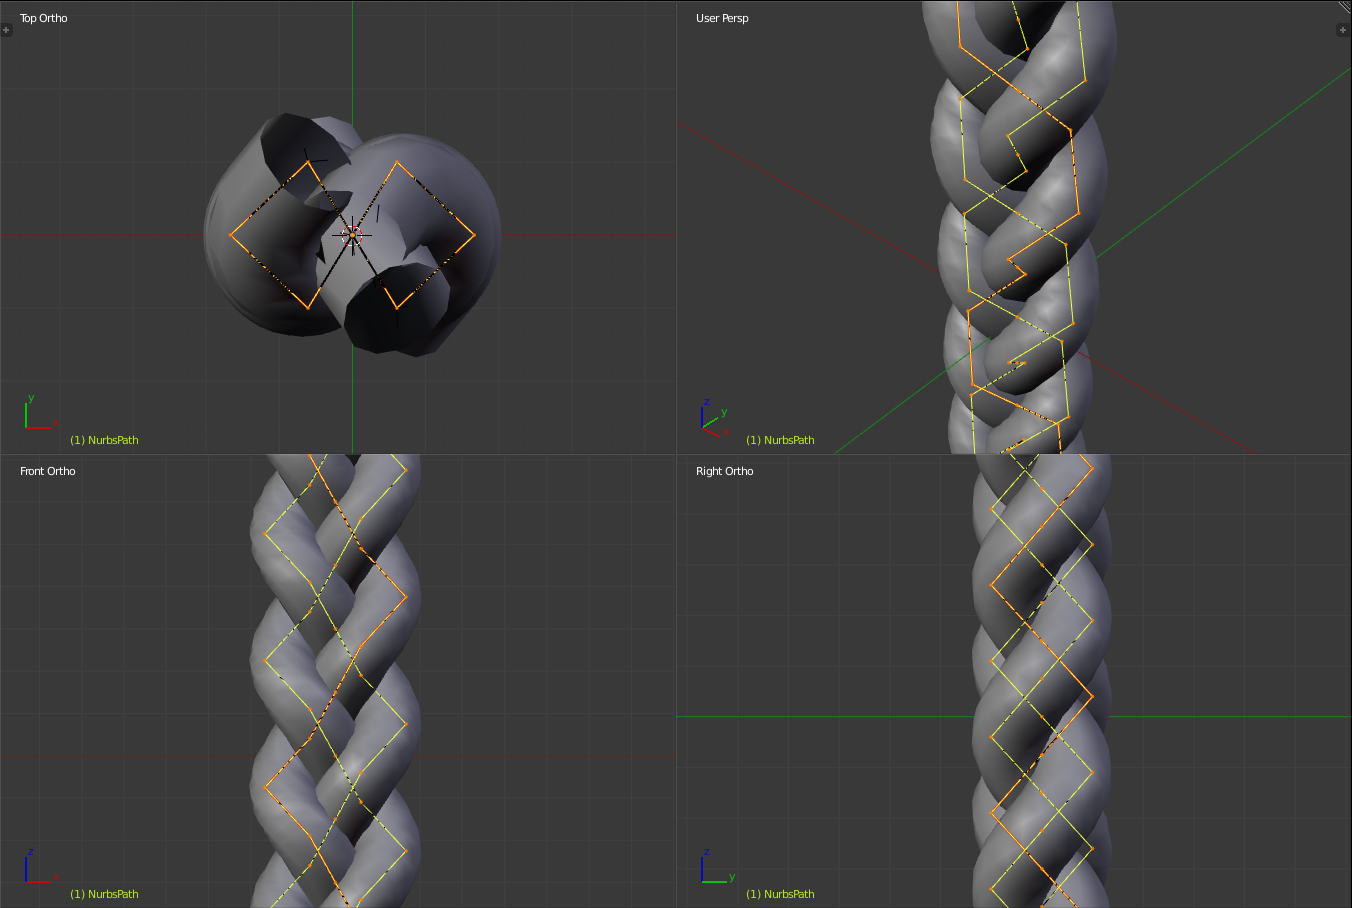
I made a change to his braid shape by subdividing the outer segments (where they cross the x-axis) and scaling the other control points inward along the x-axis, to give it more roundness. This is probably easiest to understand by looking at the top view:
I also let the braids end at the hair tie and used a separate emitter object for the loose hair at the ends.
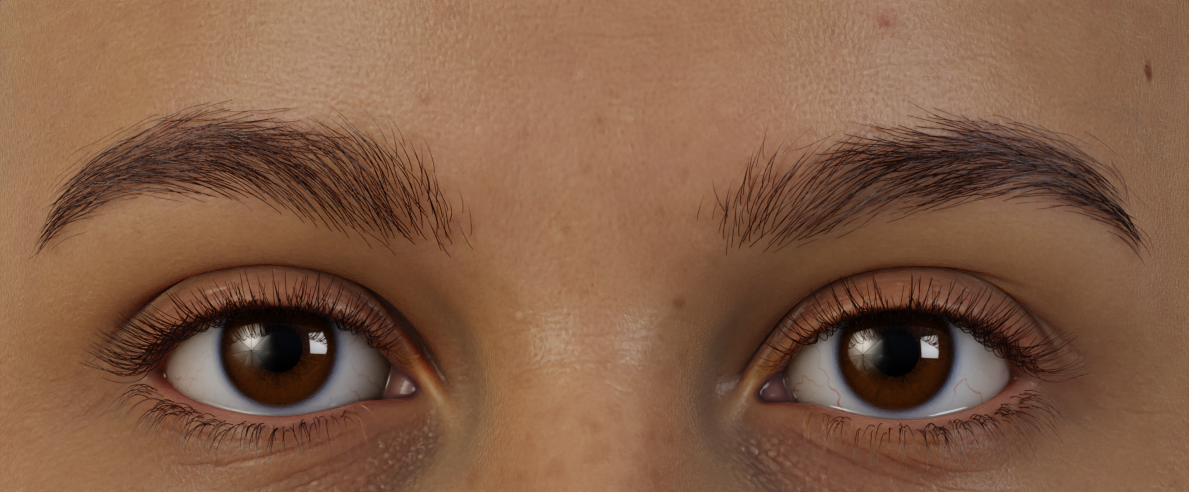
But when I tried a test render, the highlights on the braid didn’t look right. I realized the problem was the lack of twisting in the child hairs. Unfortunately, I couldn’t use a curve to define the twist, since the hair needs to twist back and forth and the twist curve ignores negative values.
The solution is to use the curve bevel and tilt to create multiple curves that twist around the original and follow the taper. I used this as the starting point for the tilt (top view again): 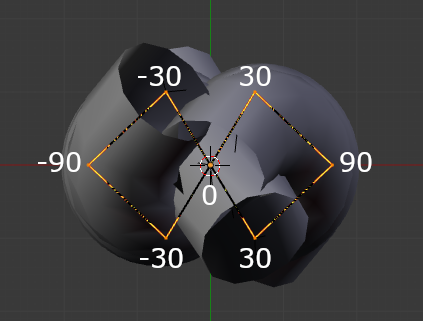
then I manually adjusted the tilt (with wire display turned on) until it looked right:
Here’s the workflow to make the new curves:
Duplicate the braid curve object in place, so you don’t lose the original.
Divide the bevel depth by 2 and set the bevel resolution to 1 (six curves is enough to make it look round).
In edit mode, select all the splines and set the spline type to poly.
In object mode, convert the curve to a mesh.
Back in edit mode, select all the closed edge loops (Ctrl+Alt+Shift+select a row of edge rings on each of the three braid parts, then Select->Select Loops->Edge Loops from the menu bar).
Delete Only Edges & Faces, so only the longitudinal edges remain.
Convert back into a curve object.
Set the spline type to NURBS.
In the Active Spline panel, check Endpoint U and change Order U to 5 (this has to be repeated for each of the 18 splines).
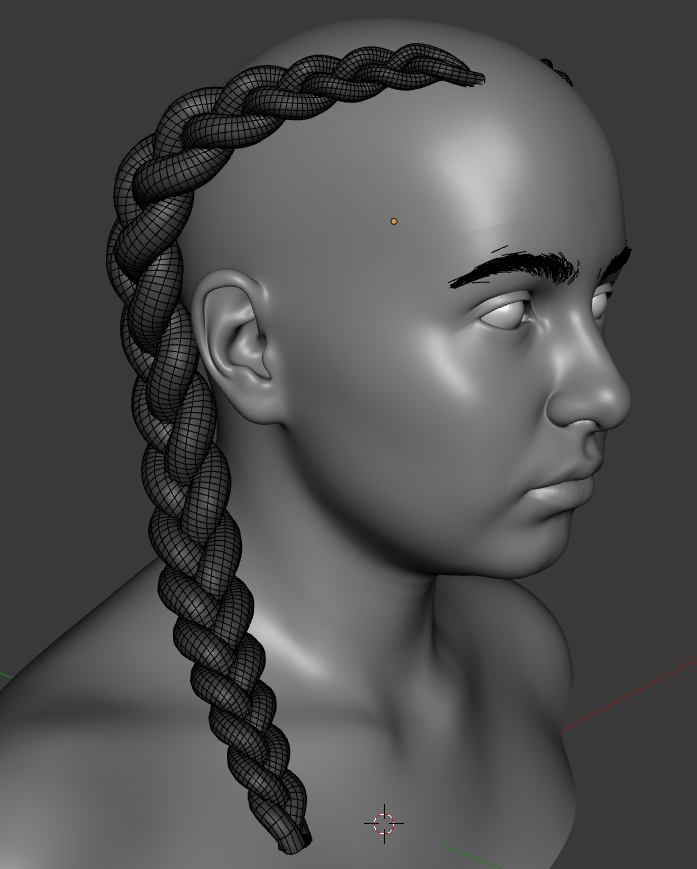
Then I set the U resolution to 2 and used HairNet to create the braid hair systems, as described in the tutorial above.
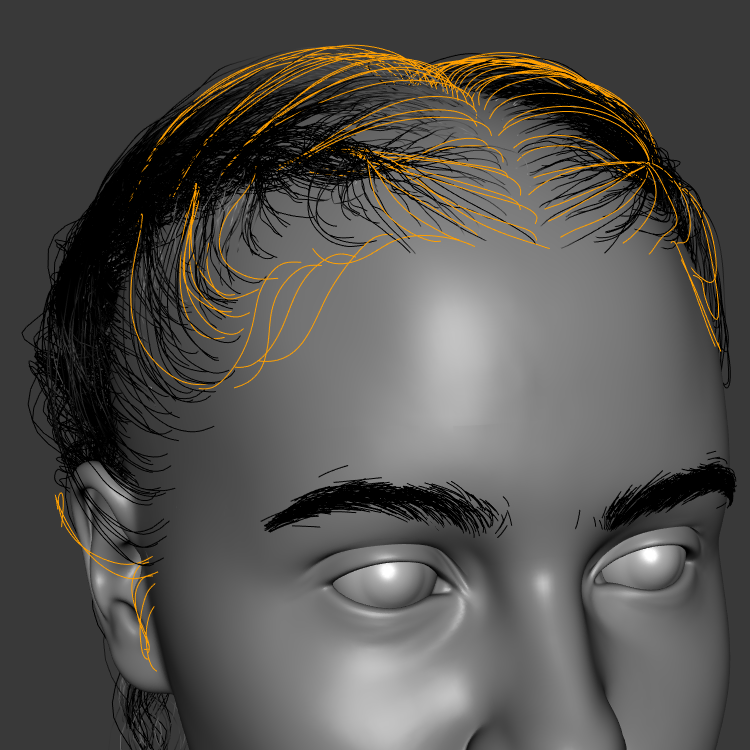
The main hair system uses interpolated children to fill out the scalp and feed into the braids:
Even with clumping and parting turned all the way up, I had to add more parent strands than I expected to keep the children from spreading too much at the ends. I also had a strange problem with child strands not clumping with the nearest parent, and had to add even more parent strands along the part to try to overcome it. It’s still not yet fixed on the back of the head.
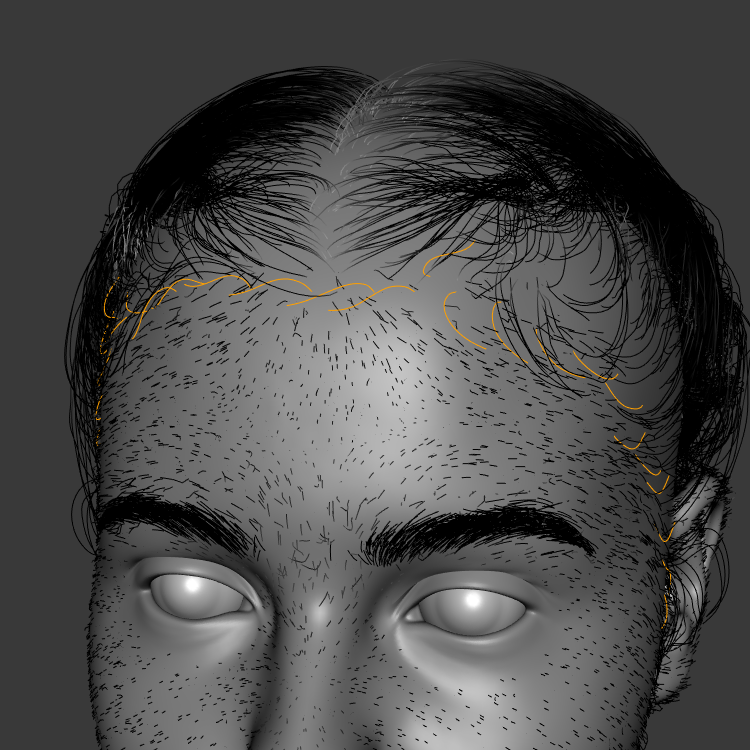
I used a system of simple children with clumping for the loose long hair on the hairline and to fill in the part:
Honestly, this step is where I got bored. If I come back to the hair, I’ll add more parent strands to this system, since it adds quite a bit of realism.
The flyaway hairs are a duplicate of the main hair and braid systems, with more randomness and far fewer children.
I added one last system of short interpolated hair along the hairline to make a sort of transition from peach fuzz to long hair:
I’ll have to redo the braids when I pose the head for the final image, but that’s not too much trouble for a single picture.